Microsoft has played a vital role in bringing the Live Voice Assistant Cortana to their Windows. In all Windows-based OS, the voice assistant is integrated by default. Microsoft introduced Cortana in 2014 as a personal and virtual female voice assistant. Before naming Cortona Microsoft used to call it her or she. In Windows 11 the Cortana is disabled by default. It does not mean that Cortona does not exist on Windows 11. It is there but it is not activated. To use it here you need to activate or install it on Windows 11.
There are a number of users who don’t know how to enable Cortana voice assistant in Windows 11, so for those users, we are here with a proper guide to install and start using the voice assistant. Here you will also get a guide to disable or competently remove Cortana from Windows 11.
Read Also: Remove Microsoft Defender from Windows 11
Contents
Cortana Features in Windows 11
Cortana features in all Windows OS have been changed from time to time. Microsoft has changed and even added a lot of new Cortana features in Windows 11.
- In Windows 11 you can connect Cortana with other Microsoft applications such as Outlook and Microsoft Office 365.
- Now it is integrated with the Google Calendar. It leads to ease and flexibility in scheduling.
- It reads the emails with a loud voice in case a person is busy with other work.
- It is integrated with Internet Explorer 11 mode in Microsoft Edge.
- It is used in tracking airlines flight when needed.
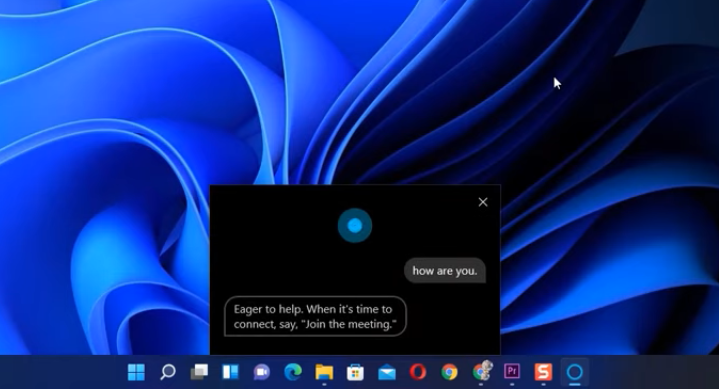
- A person can launch apps by voice command.
- Cortana is integrated with Windows 11 Microsoft Teams Chat. A user can create meetings, ask for information, send documents to colleagues or co-workers
So these were features of Cortana voice assistant on Windows 11. Now it’s high time to jump on the actual guide to enable Windows 11 Cortana.
Enable or Install Cortana Voice Assistant on Windows 11
Well, Cortana isn’t removed, it is just disabled by default on Windows 11. Go through the below steps to enable and start using Cortana on Windows 11.
- First of all, search and open the Cortana app from the Start Menu.
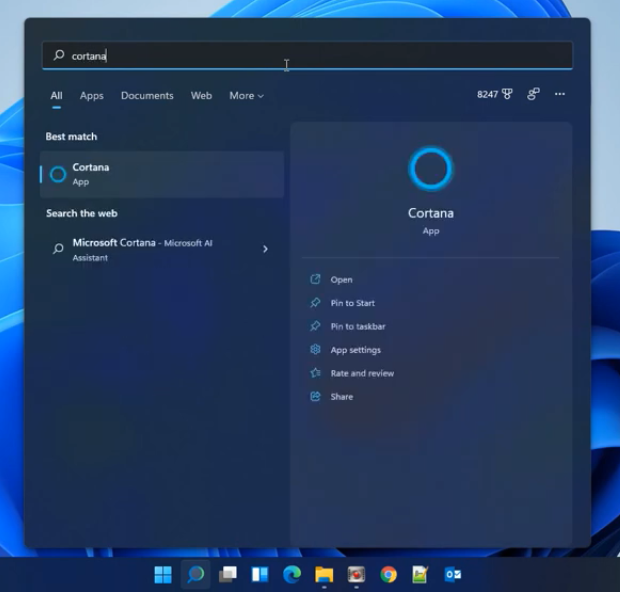
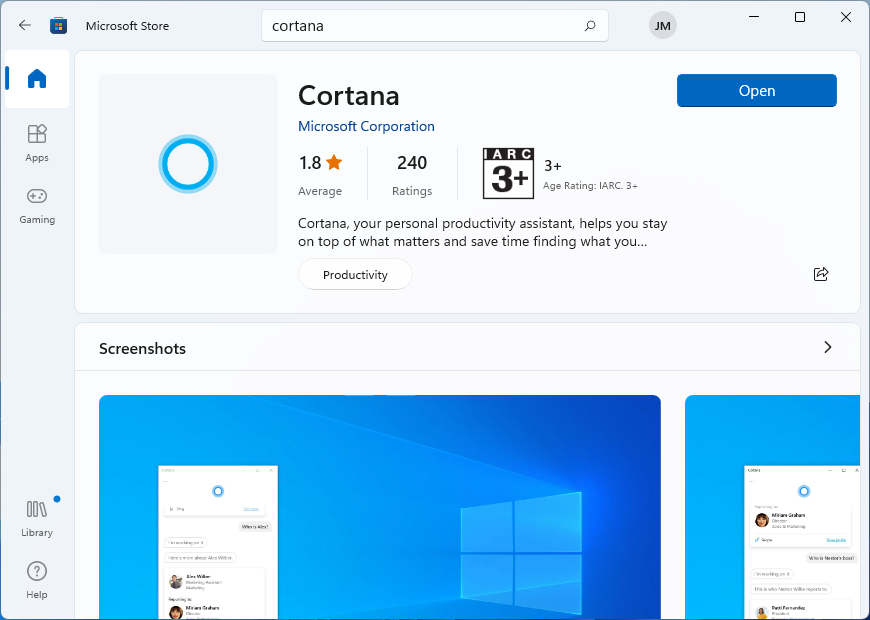
- If you can’t find it in the Start Menu then launch Microsoft Store, search for Cortana to Download and install it on your Windows 11. Then close the Microsoft Store and again launch it from the Start Menu.
- After this, Cortana will ask you to sign in. For the further process hit on Sign in and make sure you sign in it with your Microsoft Account.
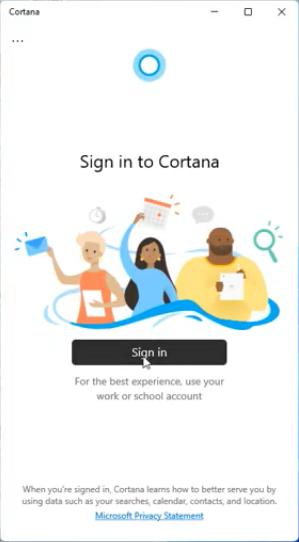
- To accept all its terms and conditions hit on Accept and Continue.
- After all, if you want to control Cortana using your voice, you have to enable voice activation here.
- To enable voice activation, tap on the three dots from the top left corner to open its Settings and then hit the Voice activation option from the list.
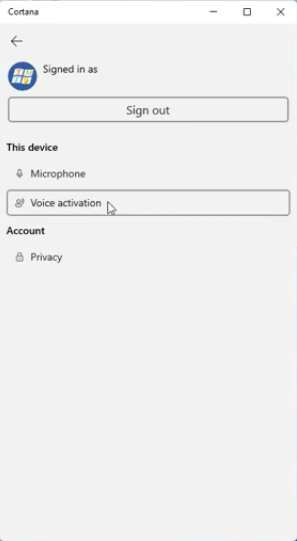
- Now Cortana will ask you to give voice permissions. So, hit on the Voice activation privacy settings link.

- After this, you will be navigated to the Settings app in the voice activation section. In it look for Cortana. Toggle on the option name as Let Cortana respond to the “Cortana” keyword.
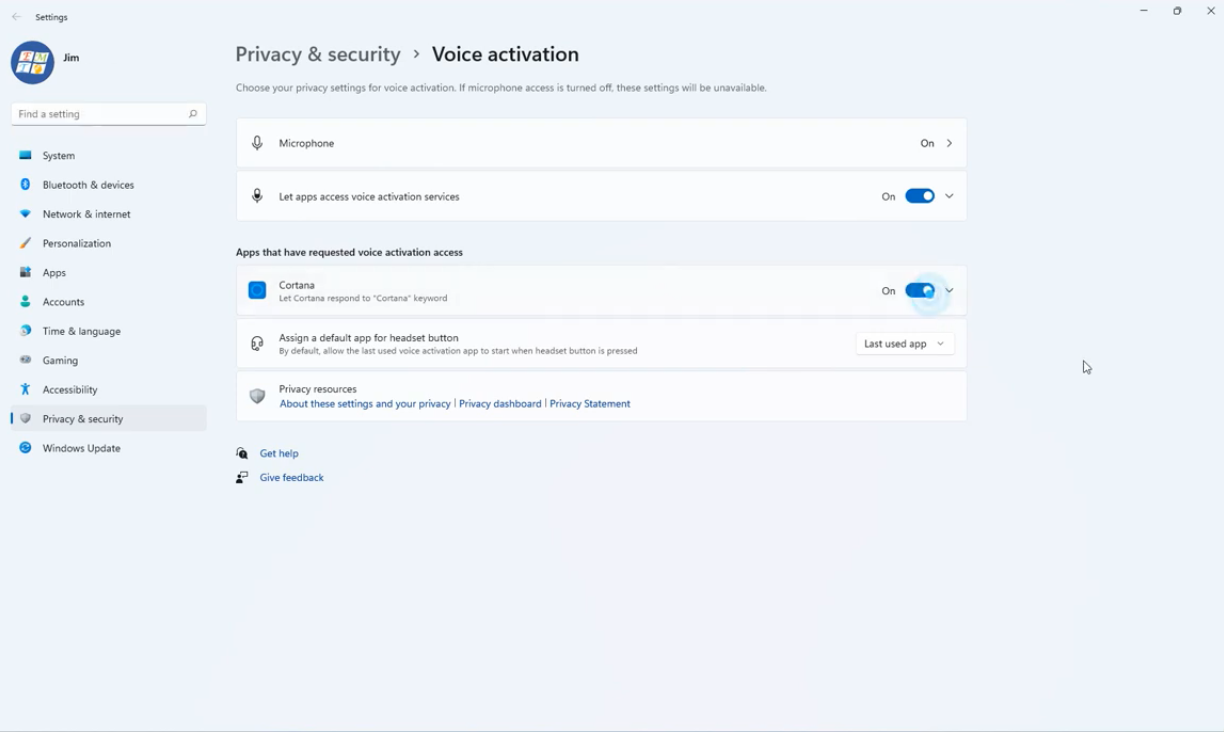
- Also, enable the Microphone permission to the Cortana Apps from the Privacy & security > Microphone settings.

Now you can control Cortana using your voice. So, this is how you can install or enable Cortana Voice Assistant on Windows 11.
Fix: Windows 11 Widgets has Stopped Working
How to uninstall or disable Cortana Voice Assistant on Windows 11?
As there are users who love to use a voice assistant on their PC, some users are also finding ways to fully disable and uninstall Cortana from Windows 11. It is because of its some minor drawbacks. It collects personal information such as your location, habits, search history, email, calendar entries, and many more. It stores all this information on a cloud server. It is said that it also slows down the system as it runs in the background. If your mind changes to permanently disable Cortana then apply the below steps in sequence.
- Launch Registry Editor. To open it hold the Windows key and R Key. In the Run Dialog box type Regedit and hit on OK button to launch the registry editor.
- Enter the following path into the Registry Editor.
Computer\HKEY_LOCAL_MACHINE\SOFTWARE\Policies\Microsoft\Windows
- Right-click to create New file and then hit on the Key option.
- Now name the key as Windows Search for the further process.

- Do right tap on the new folder named Windows Search and go on New and then hit on DWORD (32-bit) Value.
- Now name the file as AllowCortana.
- Double click on the created AllowCortana file to modify and check its Value data is set to zero (0) and not one (1).

- At last hit on the OK option to execute the changes you have made.
After all, make sure you restart your Windows 11 PC. Finally, Cortana is permanently disabled on your Windows 11. If you will try to open Cortana on Windows 11 you will get a message saying “Cortana is disabled, To use Cortana you need to get permission from your administrator”.
I hope that now you are clear on how to enable and disable Cortana Voice Assistant in Windows 11.