Microsoft Defender is also known as Windows Security on Windows 11. Windows Defender is an inbuilt antivirus to provide security from threats, viruses, malware, trojans, spyware, and ransomware. It’s one of the best antivirus solutions for Windows 11 but some may not like its interruptions in several instances hence want to disable Windows Defender services.
Windows Defender continuously keeps scanning for files throughout the PC and will acquire twenty-five percent of the resources. Sometimes may cause high CPU or Memory usage alerts in the task manager. At times, it is also responsible for automatically deleting the recently downloaded files due to real-time threat alerts. You might urgently need a file from the internet but Windows Defender won’t allow it through it’s totally safe. In such scenarios, it’s advised to disable Microsoft Defender and its firewall on Windows 11.
You can’t uninstall Windows Defender from Windows 11 but we have also covered an option to permanently terminate its services. Permanent deletion will simply disable Defender roots from Windows 11.
Contents
Turn off Windows Defender Real-time Protection in Windows 11
Real-time protection is Windows Defender’s exclusive feature to keep an eye on all the incoming and outgoing files. Suppose you just plugged in an external USB drive to your Windows 11 PC then Windows Defender Real-time protection will immediately come into action and start scanning for all the files on the USB drive. All the downloaded files, as well as extracted zip folders, are also under live protection.
Mostly, downloaded files through Chrome or Edge browsers are deleted due to Windows Defender security. It’s just a temporary and the best solution to turn off Windows Defender Real-time services to hold it for a while.
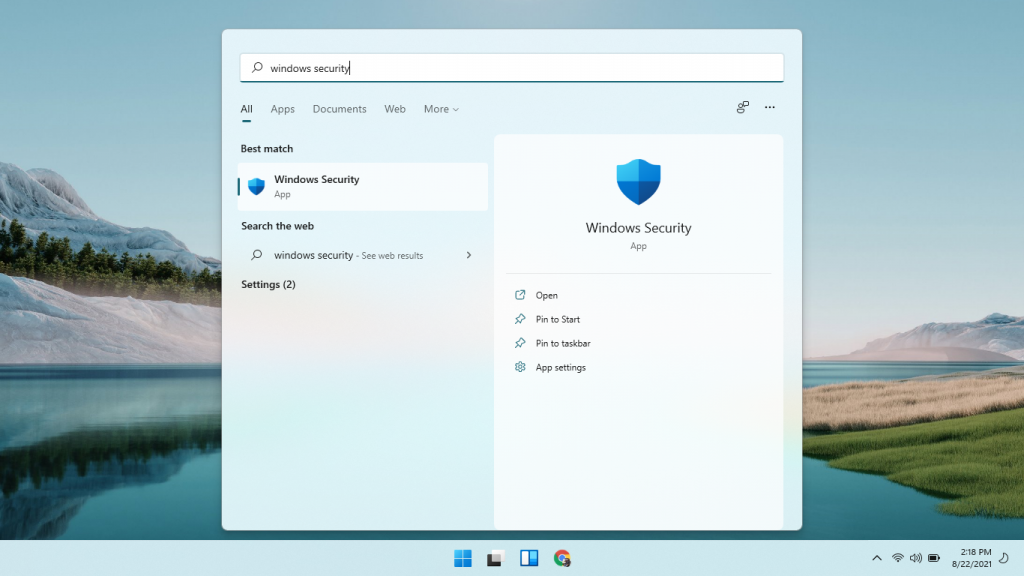
- Head to the Windows 11 Start Menu and search for Windows Security.
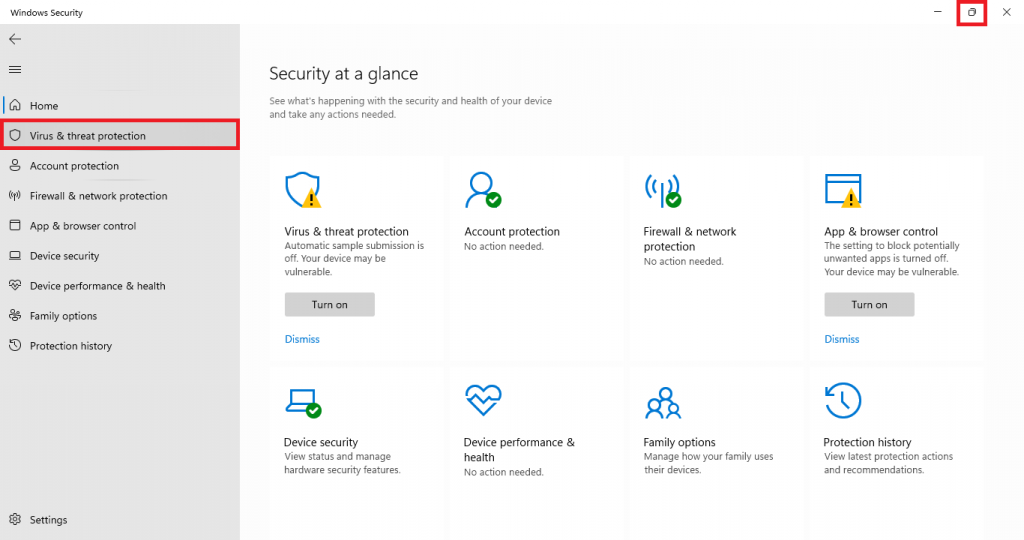
- Maximize the Windows and tap on the second Virus & threat protection option under the left side menu.
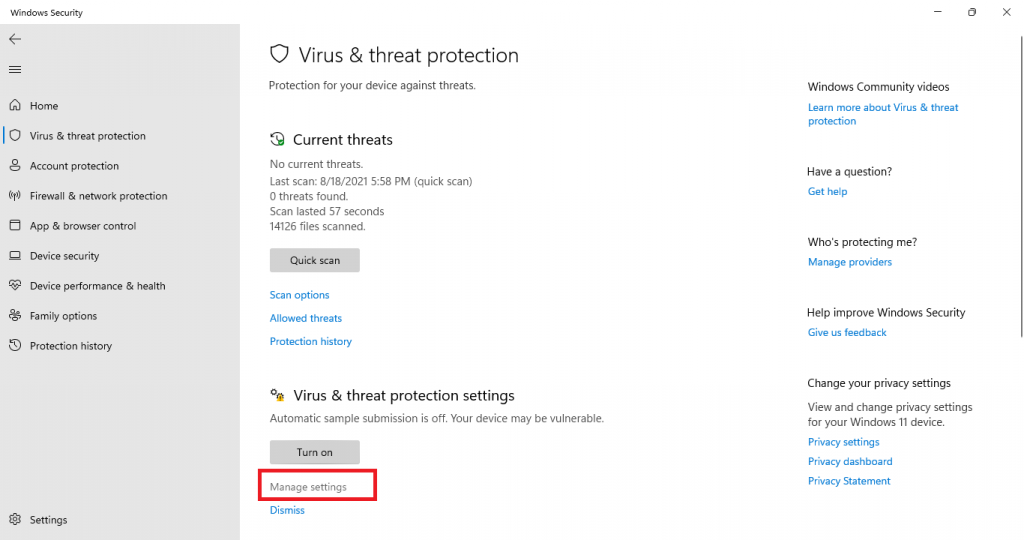
- Click the Manage settings link under the Virus & threat protection settings.
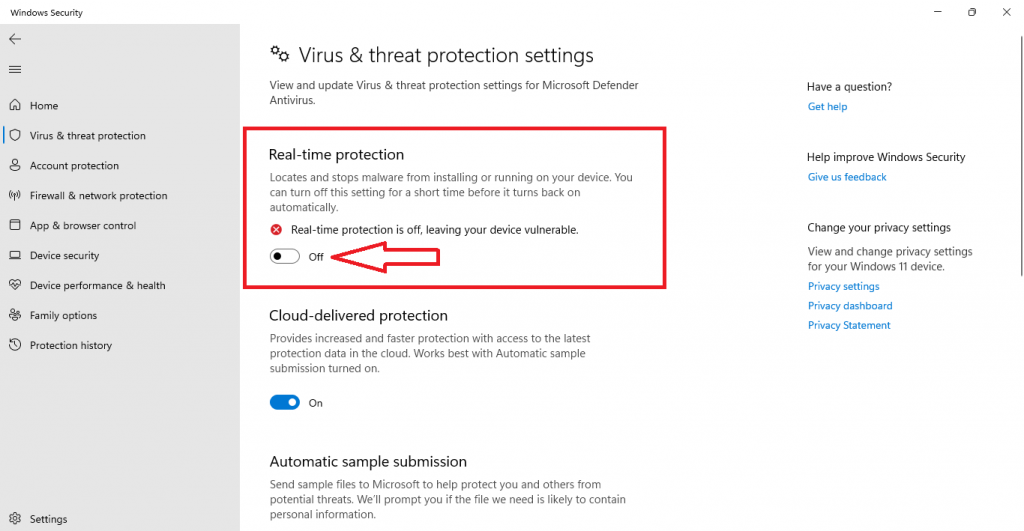
- Toggle off the very first Real-time protection option. Tap on the Yes prompt to make administrator changes.
Windows Defender Real-time protection will be turned on with the next startup to keep your Windows 11 PC secure from threats.
Disable Windows 11 Firewall
Windows Defender Firewall is the responsible wall between Windows 11 and the internet connection. Plenty of data transfer between computers during the live internet connection. Unauthorized apps or unethical websites may easily leak your private data to their servers and compromise your privacy. Windows 11 firewall comes here at the rescue by encrypting all the information.
Sometimes, Windows 11 Firewall might block legitimate websites and apps. Due to the strict firewall rules, you might not able to connect to the internet. We recommend disabling Windows 11 Firewall to fix such issues.
- Hold the Windows + I keys to launch the Settings.
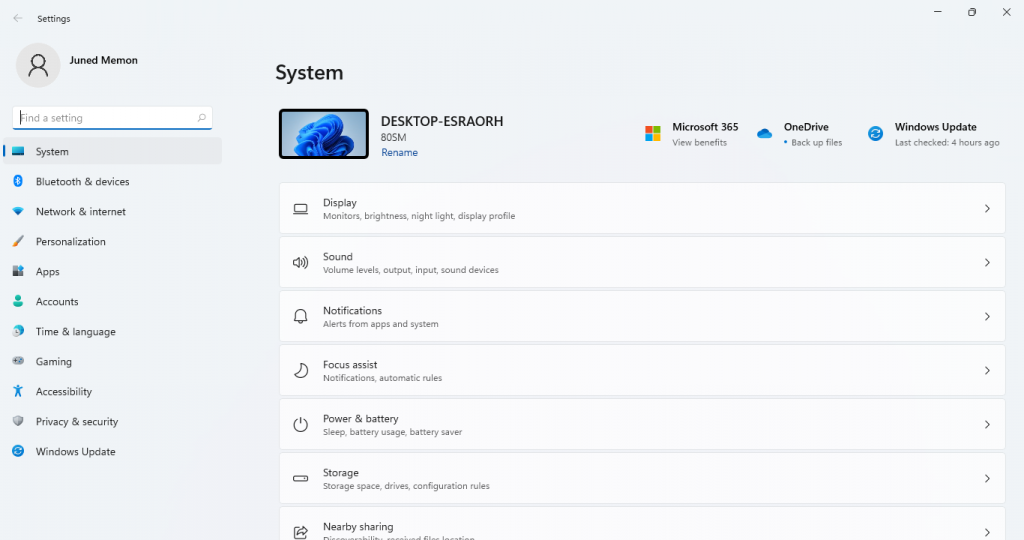
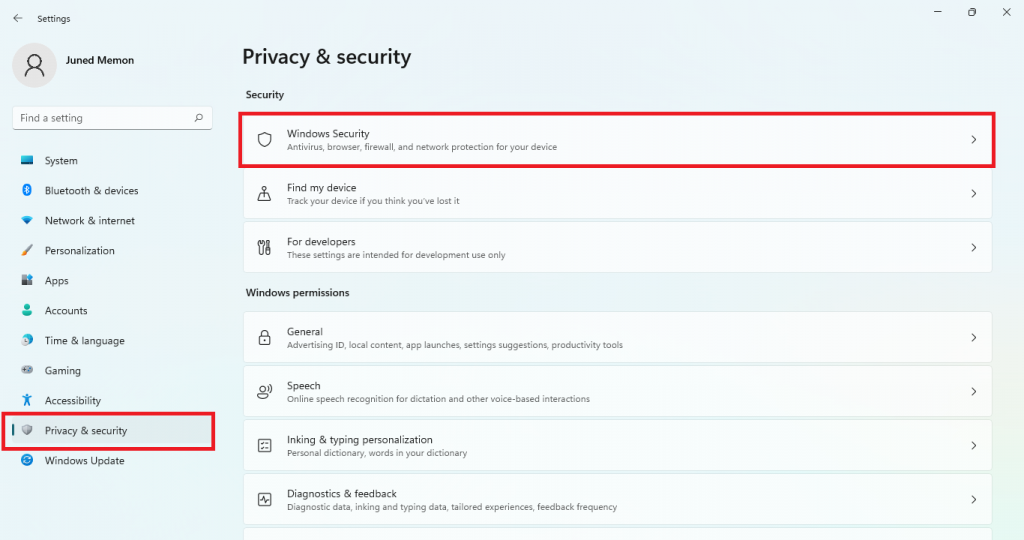
- Click on the Privacy & Security option and go to the Windows Security settings.
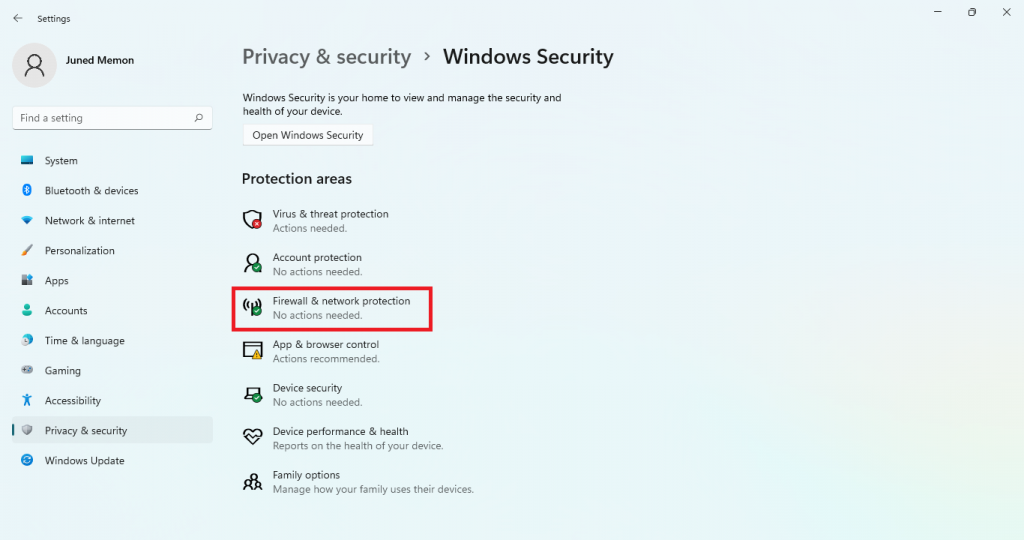
- Tap on the third Firewall & network protection option to launch the Firewall Settings.
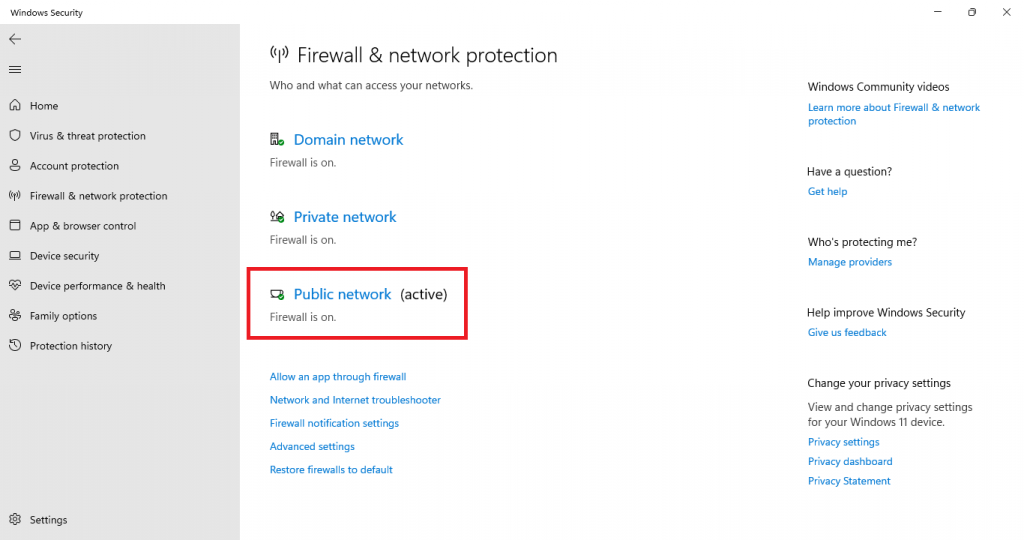
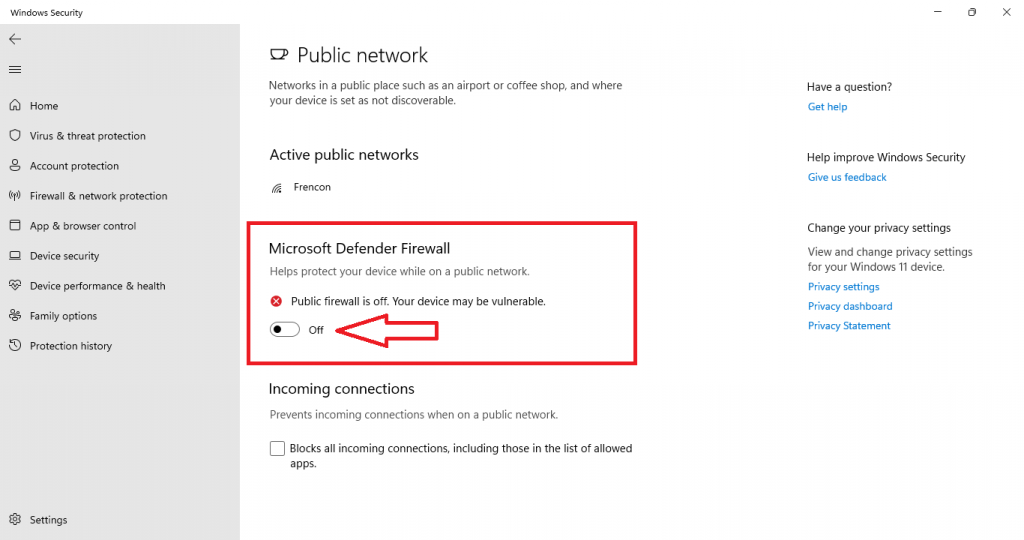
- The three Domain, Private, and Public firewall networks will be listed in Windows Defender. Select the active network, it’s the Public network in my case.
- Disable the Microsoft Defender Firewall option.
Permanently Uninstall Windows Defender from Group Policy Editor
Windows 11 Group Policy Editor manages all the system and external app services. Even Windows Update, Microsoft Edge, Widgets, and Windows Defender services can be changed from the Group Policy Editor. Microsoft introduced Group Policy Tool to manage administrator permissions of apps across a group of computers or an organization but it’s very well used for uninstalling Microsoft Edge and other Windows 11 systems apps.
Microsoft Defender can be easily turned off and permanently uninstalled just by changing a single file value. Further, Windows Defender won’t interrupt until you manually undo the changes.
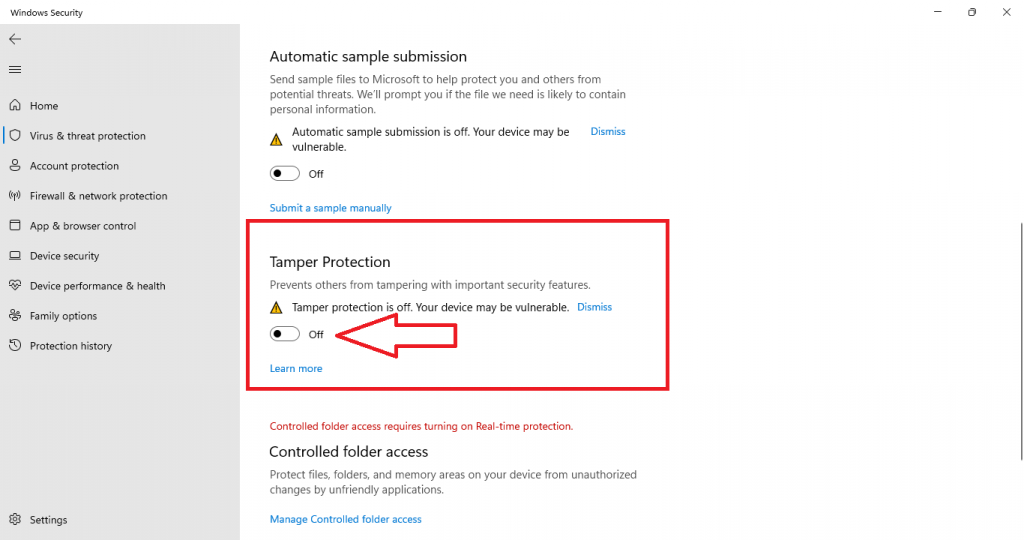
First, make sure to turn off the Tamper Protection to do not restore the Group Policy changes after the restart. Go to Windows Security > Virus & Threat Protection > Manage settings (Virus & threat protection settings) > Tamper Protection (Scroll down). Turn off the Tamper Protection option.
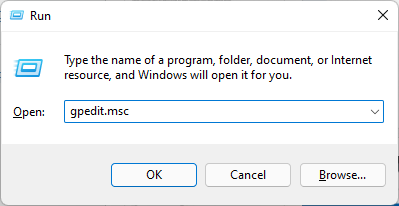
- Press Windows + R to launch RUN dialog and enter gpedit.msc to open Local Group Policy Editor.
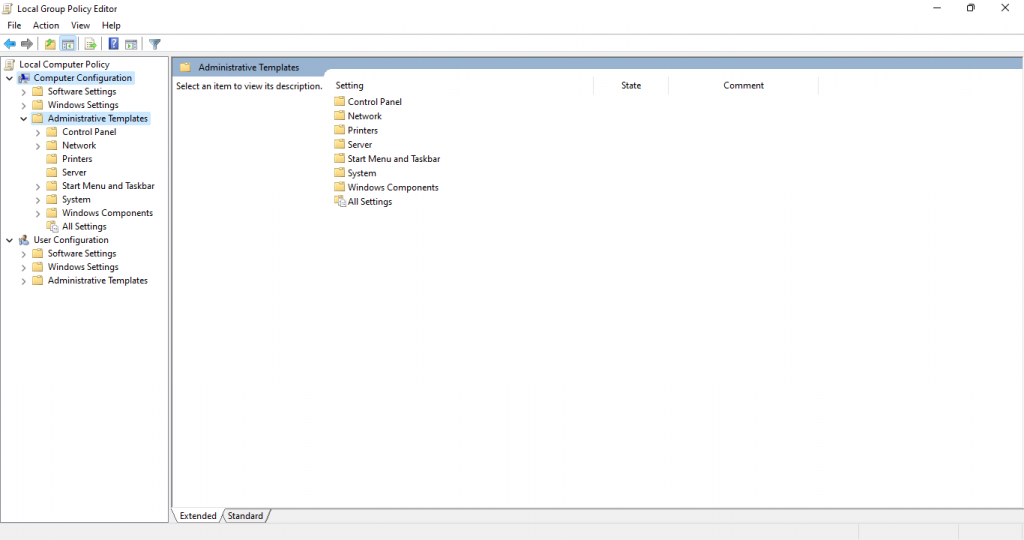
- Maximize the Window and expand the Administrative Templates under the Computer Configuration.
- Expand the Windows Components and scroll down to the Microsoft Defender Antivirus.
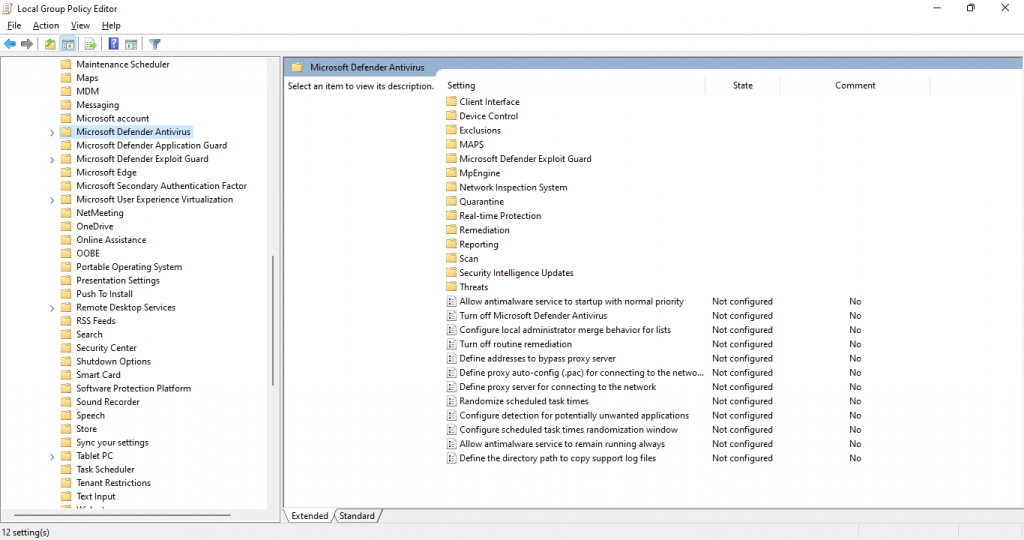
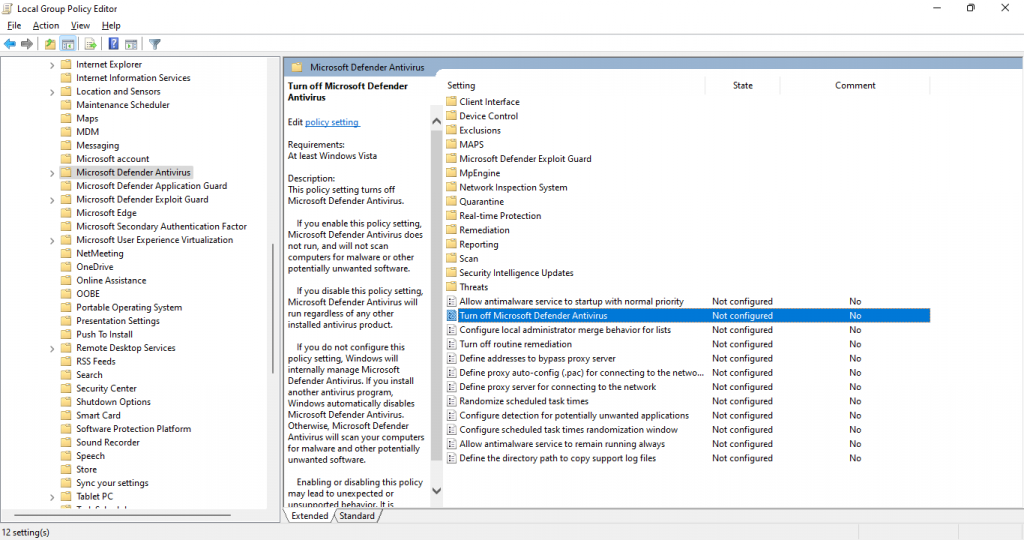
- Double click on the Turn off Microsoft Defender Antivirus file on the right panel.
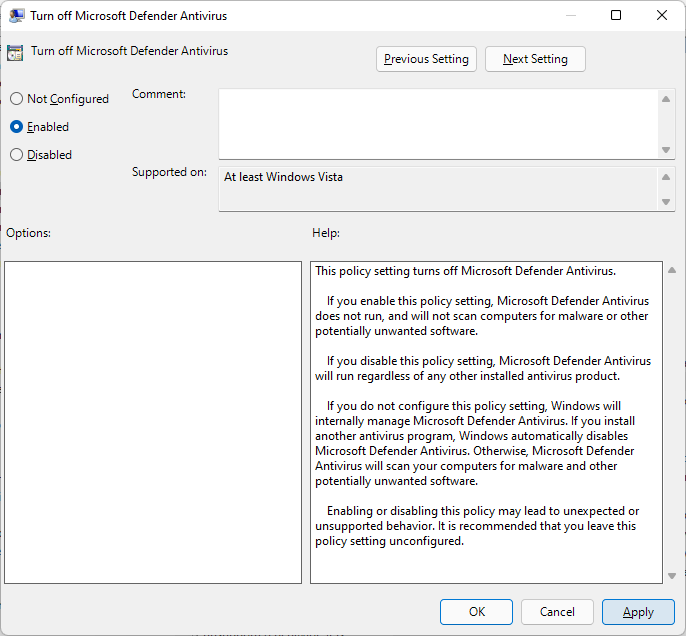
- Change from the Not Configured to the Enabled option and Apply.
Read Also: Fix Windows 11 Widgets
Windows Defender Alternative for Windows 11
Microsoft allows Windows Defender alternatives to overtake its job by pausing its updates. If you are a third-party antivirus user or want to try an alternative then it will definitely remove Windows Defender from Windows 11.
An antivirus needs resources to run its services and more than one antivirus will be a total disaster for the single operating system. Further, some root access can be allotted to a single entity. According to Microsoft, only one antivirus can sustain on a PC.
Well, just install any lightweight antivirus from Norton, McAfee, Avast, Malwarebytes, Kaspersky, or AVG to disable Windows Defender on Windows 11.