Well, if you have updated to Windows 11 then making use of its features is a challenging task. Do you want to Hibernate your Windows 11 PC or Laptop? It is not a new feature in Windows 11 it has been there from Windows 8. Just like the previous Windows versions, Hibernate mode isn’t enabled by default nor it’s added to the Start Menu.
In this article, you will see the best methods to enable or disable Hibernate Mode on Windows 11 and add it to the Start Menu. All you need to do is to follow all the steps of this article.
Read Also: Free Up Disk Space after Windows 11 Upgrade
Contents
What is Hibernate Mode on Windows 11?
In the first place, hibernate mode in Windows 11 pauses all your unsaved work without using any power, and resumes from where you left. The hibernate mode is beneficial for all types of users as it saves all your work when user shut down their computers.
Sleep Mode uses less power to let you resume from where you left, whereas hibernate mode won’t use any power and simply shut down the device. When you sign in to your Windows 11 for work then you can continue with your work from where you left. Sleep mode is helpful for the short pauses and hibernates mode will resume you even from months and years.
The Hibernate Mode will take a live snapshot of your ongoing work and save it on your storage drives (HDD or SSD) before shut down. Then PC will start quickly as the system does not have to restart all services, files, and settings. After all, I must say that the Hibernate Mode is a very useful feature. You should enable it on a trial basis.
Read Also: Enable Remote Desktop Windows 11
How to enable or disable Hibernate Mode on Windows 11?
There are two simple and easy methods to enable or disable Hibernate Mode on Windows 11. The first is by using the CMD and the second is by using the REGEDIT.
Using Command Prompt
The easiest and simple way to enable or disable Hibernate Mode on Windows 11 is by using Command Prompt. Here you have to play with commands to switch the hibernate mode. Let’s go through the steps for the same.
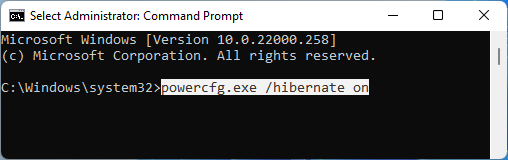
Tap on the Start Menu’s Search icon in the taskbar and type cmd. Then right-click on the first Command Prompt option to Run as administrator. Now, enter the following command to enable the hibernate on Windows 11.
powercfg.exe /hibernate on
You will not get any message saying it is enabled on your PC. If your mind changes to disable it then enter the following command.
powercfg.exe /hibernate off
This command will disable hibernate mode on Windows 11.
Using Registry Editor
Alternatively, Registry Editor also provides the option to change the system settings. Make sure, to be careful while making changes as even the minor mistakes may lead to major problems with your system. Follow the below steps to change hibernate settings on Windows 11.
- Open the RUN with its Windows + R shortcut and enter the regedit to open the Registry Editor.
- Tap on Yes to allow the user access control permission.
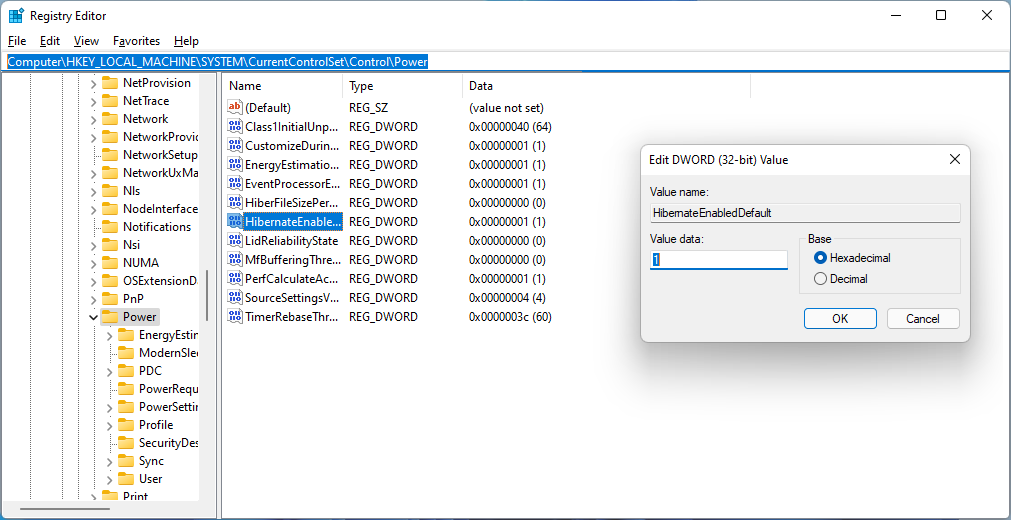
- Paste the following path into the address bar below the menu and press the enter key. Computer\HKEY_LOCAL_MACHINE\SYSTEM\CurrentControlSet\Control\Power
- Then double-tap on the HibernateEnabledDefaut file from the right pane.
- Now enter the following numbers into the Value Data box to change the settings.
Disable Hibernate: 0
Enable Hibernate: 1 - Then hit on OK button to apply the changes.
After all, do Restart your Windows 11 to save and apply all the changes. If you want to disable hibernate mode then enter 0 in place of 1. Make sure you don’t forget to restart your PC.
Read Also: Disable Microsoft Teams Chat from Windows 11
Add Hibernate to the Windows 11 Start Menu
Windows 11 Control Panel is the best hub for making the system changes to your PC, such as enabling or disabling hibernate mode.
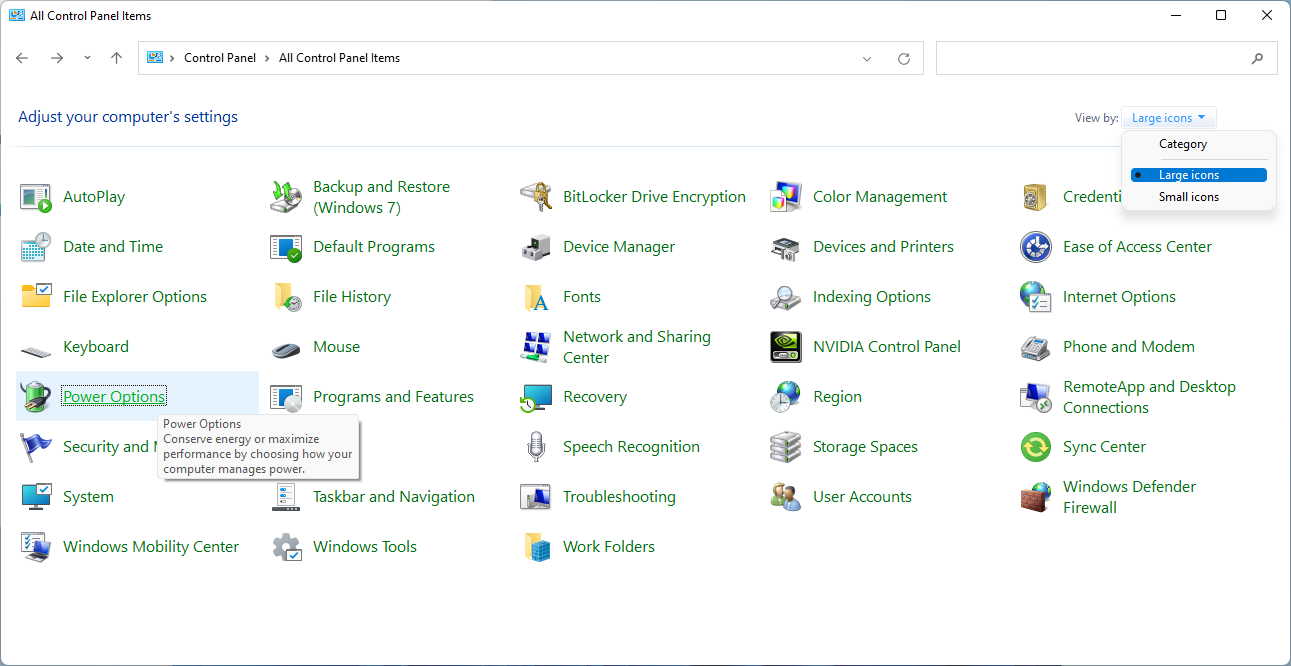
- From the taskbar tap on the Start button to search and launch the Control Panel.
- Make sure that Control Panel’s view by drop-down is either set to the small or large icons.
- Find and tap on the Power Options from the list.
- Tap on the “Choose what the power buttons does” from the left side options.
- Now you will have the System Settings window, from it tap on the link which says “Change settings that are currently unavailable“.
- Tick to enable or untick to disable the Hibernate option from the Shutdown settings.
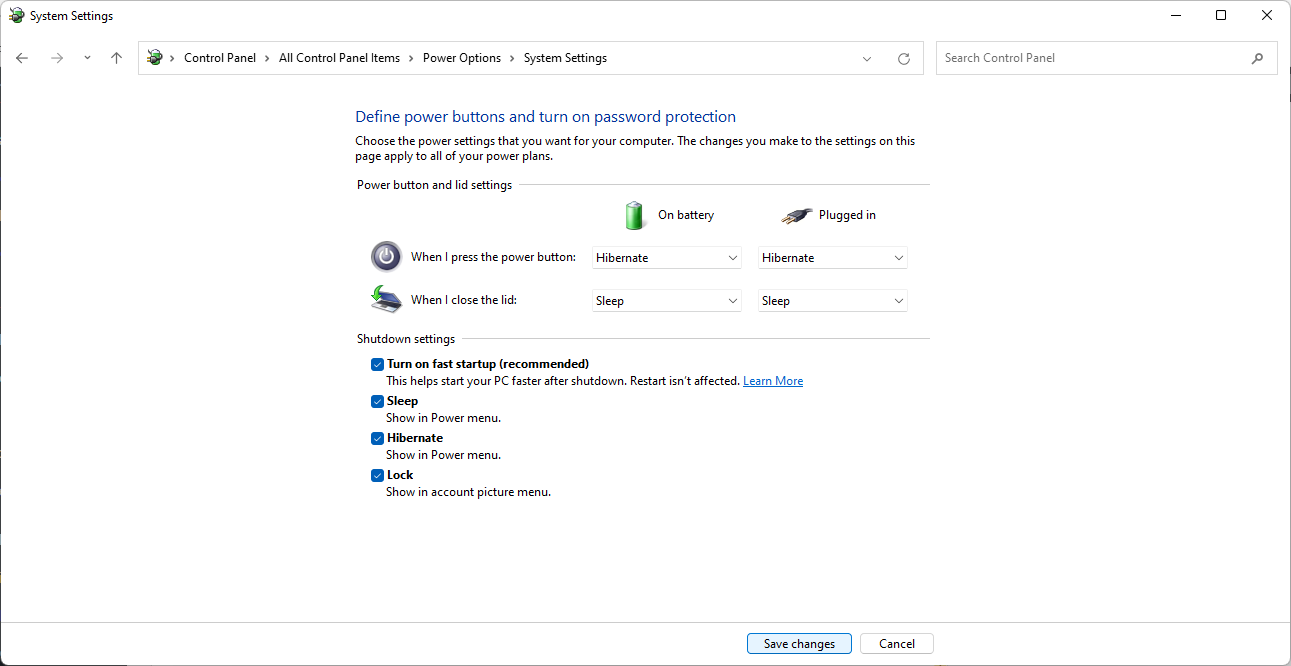
- Then hit on the Save changes button from the bottom.
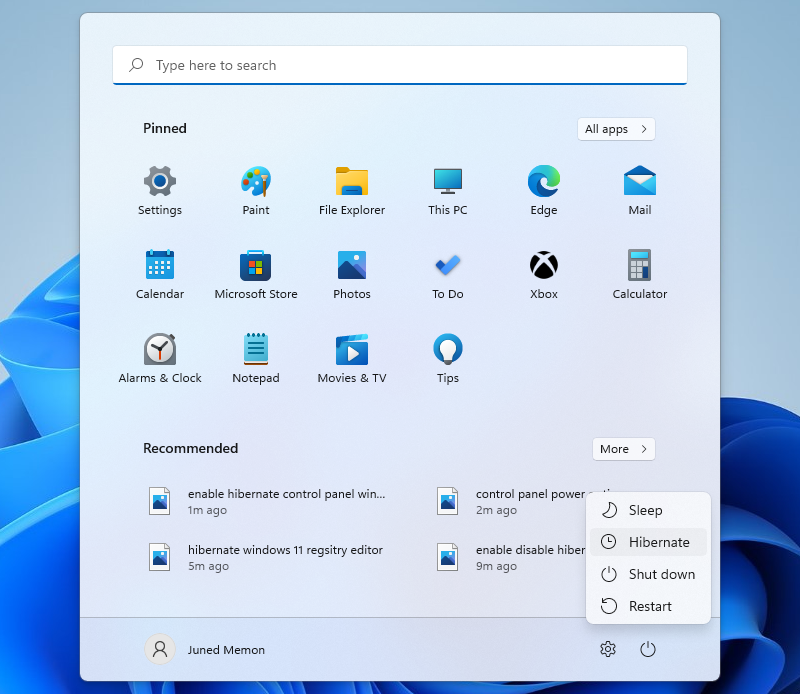
You have successfully added Hibernate option on Start Menu and Quick Access Menu. Look the first image of this post to see how hibernation looks on the Start Menu and Quick Access Menu (Windows + X).
I hope that using the above methods you have successfully enabled or disabled Hibernate mode from the Windows 11 Start Menu.