You might have arrived here either for disabling the automatic updates on Windows 11 or to stop the Windows 11 update on Windows 10. We have covered both cases in this article.
Microsoft is habitual of giving regular updates on Windows users. These updates contain bugs, features, and fixes too. The Windows Automatic Updates feature doesn’t bother users to check, download, and install the updates. The available updates will be download and installed automatically without even notifying the users. This feature is available in both Windows 10 and now in Windows 11. This feature has both sides positive and negative sides. If you want to keep your Windows 11 up to date then let it keep doing its job.
Windows 11 and Windows 10 users are facing multiple issues due to Automatic Updates.
- Low Disk Space Problems.
- Low internet speed issues for browsing or gaming. Windows updates even may finish the limited data pack.
- New distractive features such as Widgets, OneDrive, Microsoft Edge, Teams Chat, etc.
- May affect or lower the performance.
- Windows Update Stuck forever during the restart.
You must stop Windows 11 updates to stay away from the above issues. We are here with the three best methods to disable automatic updates to Windows 11.
Read also: How to Troubleshoot Windows 11 Update?
Contents
Turn off Windows 11 Update over Metered Connection
The metered connection is the best solution to stop Windows Update on both Windows 11 and Windows 10.
One of the best and easiest ways to stop Windows Automatic Update is enabling Metered Connection. Enabling Metered connection your internet will be limited for your personal usage. It will be a barrier to other Windows Services. In this method, you can stop automatic updates without permanently disabling any major features of Windows 11.
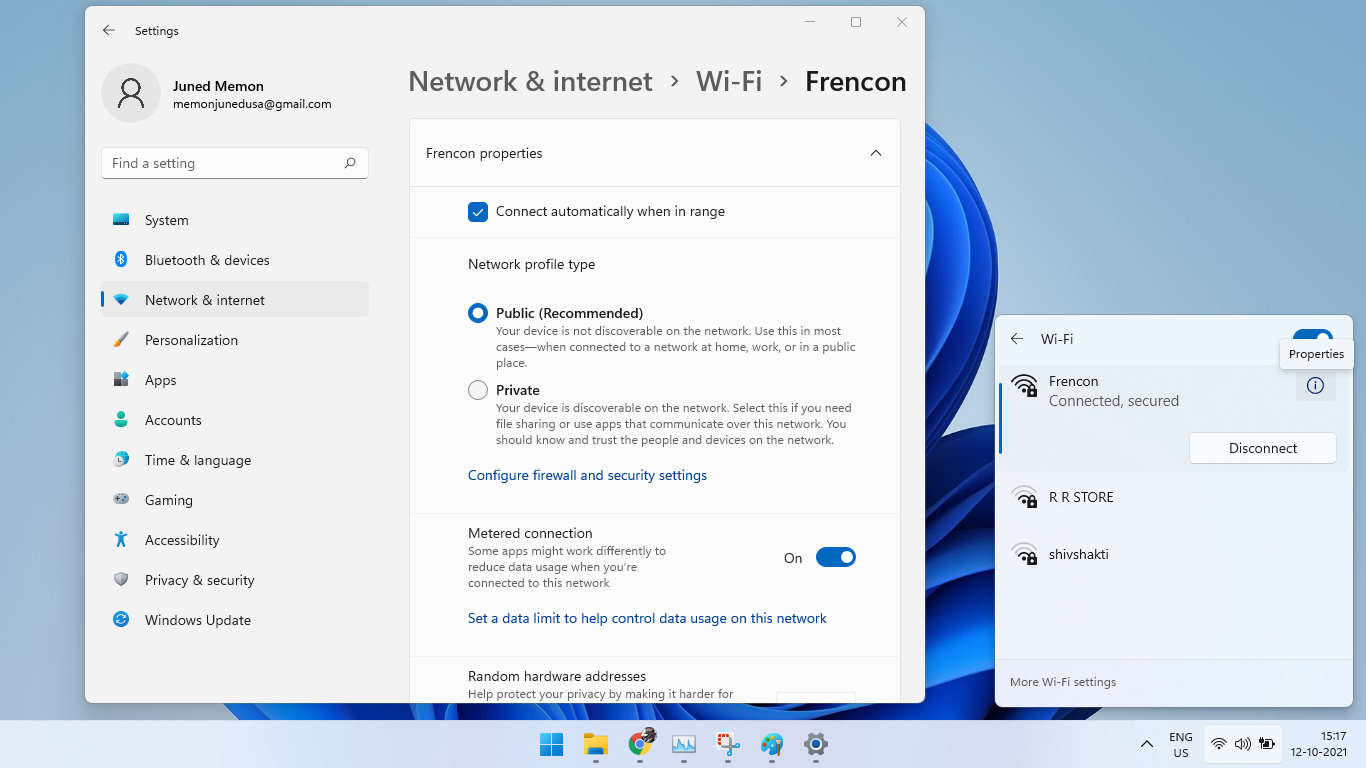
The Metered Connection option is under the network properties. If you are on Windows 11 then tap on the action center icons from the right side of the Taskbar. The WiFi, Speaker, and Battery icons made up one common trigger to the Windows 11 Action Center. Then go to the first WiFi Network and tap on the connected network ‘i’ under the circle to open its properties. Now, scroll down the network properties to find and toggle ON the Metered Connection option.
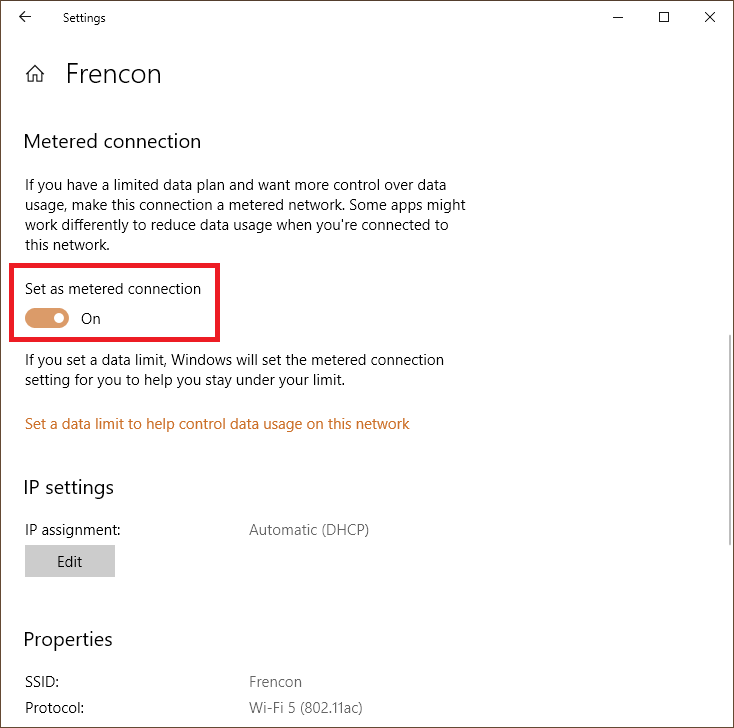
It’s quite same on the Windows 10, tap on WiFi or a Network icon from the Taskbar, open the connected network properties, and set it on the Metered Connection.
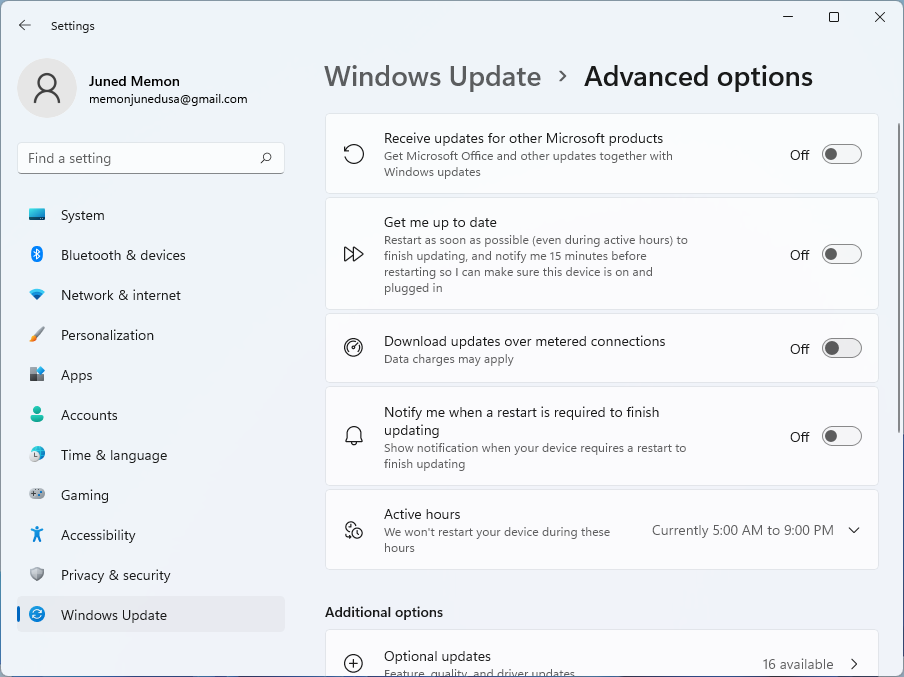
Also, make sure that the “Download updates over metered connections” is turned off from the Advanced options. To navigate to this option follow the path as Settings > Windows Update > Advanced options. That’s it, have successfully enabled Metered Connection to stop automatic updates on Windows 11 and Windows 10.
Metered Connection option can be individually enabled or disabled for the particular network. So if you connect with multiple networks such as Home, Office, Cafe, Mobile Hotspot, Ethernet, etc then make sure to set them all on the metered connection.
Microsoft Windows won’t download updates on Metered Connection, whether if it’s the next feature update to Windows 11 on Windows 10 or small cumulative updates on Windows 11 itself.
Read Also: Get Windows 11 Update Without Waiting
Pause Windows 11 Update
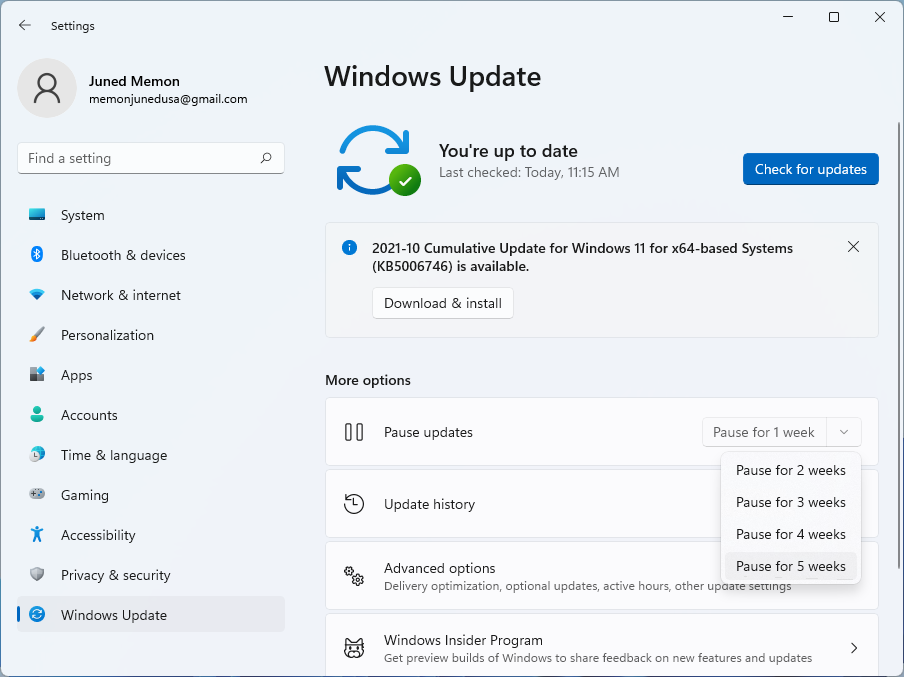
Microsoft Windows 11 and 10 offer the Pause updates option under the Windows Update settings. Making use of it you can stop Windows 11 update easily. You can pause Windows 11 and Windows 10 updates for 1-5 Weeks. If you are low on the data or the current updates are causing issues then you will get relief for more than a month until the next release. Go through the below steps to pause the Windows 11 update now.
- Launch the Start Menu and tap on the Settings icon from the Pinned apps.
- Go to the last Windows Update option from the left side menu.
- Ignore all the current updates and look for the Pause updates under the More options. Its drop-down offers the Pause updates for 1-5 weeks. It will also stop all the ongoing updates and resume them after the pause.
Read Also: How to get the latest Windows 11 2021 Update?
Disable Windows 11 Update Service
All the system processes run the Windows Services. Even Windows Update has got several Windows Update Services. Disabling them on Windows 11 and Windows 10 will stop the Windows Automatic Update feature from fetching and installing updates.
- Open RUN dialog (Windows + R), type services.msc, and hit on the OK button.
- Scroll down the services on the right pane until you find the Windows Update in the list.
- Double-tap on the Windows Update to launch its Properties.
- Now change its Startup type to Disabled and hit on the OK button to save the changes.
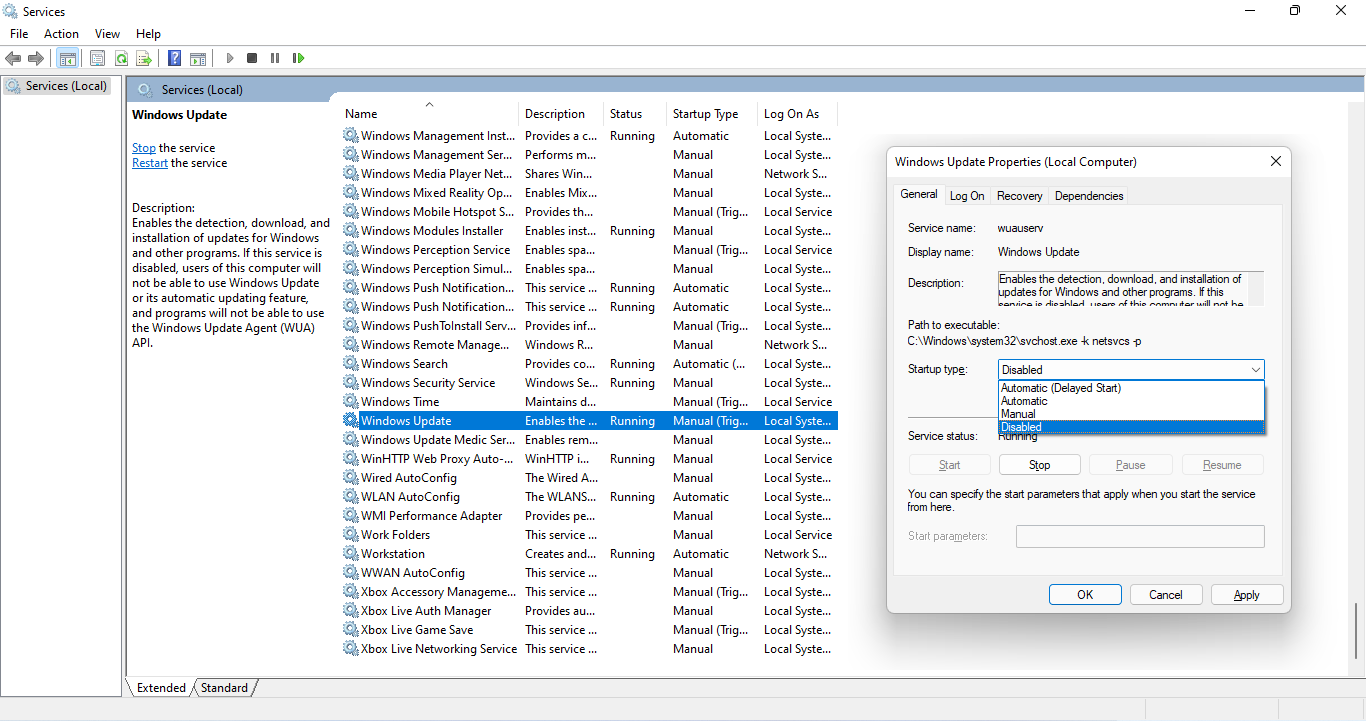
It will stop all the current and future updates to Windows 11. Just change the Startup type to Automatic or Manual when you change your mind.