Microsoft has officially released Windows 11 for its users. It’s super easy to upgrade from Windows 10 to Windows 11. Windows 11 has come up with good changes in user experience and performance improvements. The plus point is that it’s totally free upgrade for eligible Windows 10 users.
Many new Windows 11 users have reported that the system disk partition (C Drive) shows Low Disk Space even without many apps, games, or users files. It shows low disk space because Microsft holds a lot of temporary files such as Previous Windows Installation (Windows.old), Windows Update, and a lot of dump files.
These older files will definitely not give enough room to the existing applications and may also slow down, hang, or even crash Windows 11 PC. To make a distance with these issues you have to decide whether you want to keep these files or not.
If you have decided to stick with the new OS then you must remove all the garbage and unwanted file. We have got four methods to free up disk space on Windows 11.
Read Also: What is the installation size of Windows 11?
Contents
Remove Unwanted Files from Windows 11 Storage Settings
The Windows Settings is one of the best components for the users to customize the Operating System. It was first introduced in Windows 8 and now it is available in Windows 11. Microsoft has really improved Windows 11 Settings to a lot of useful tools for managing Storage, Networks, Updates, and almost everything on your PC. Soon Windows Settings will replace all the Control Panel options. Here are the steps to clean older files from Windows 11 Settings.
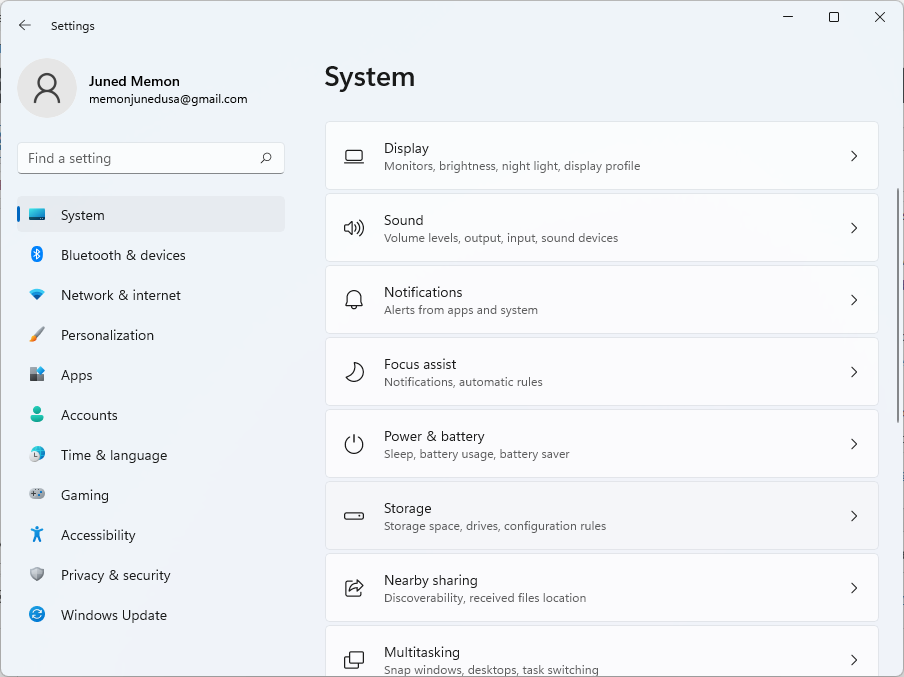
- Hold Windows + I keys to launch Settings and scroll down to the Storage option from the System Settings.
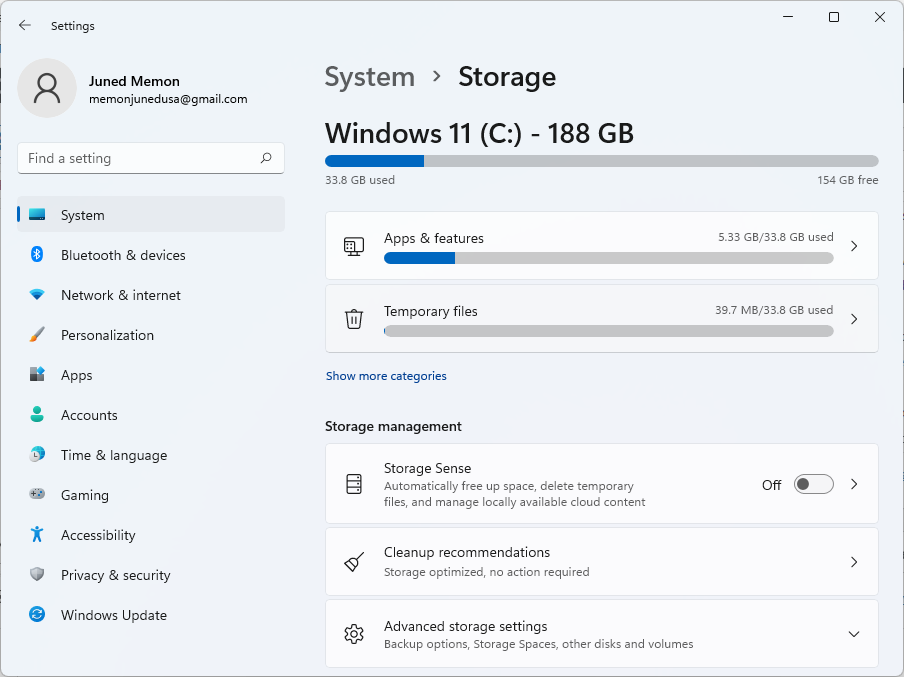
- Go to the Temporary files option and wait until it processes all the files. It will give you a list of files that you can remove from your Windows 11.
- First of all, find and select the huge Previous Windows Installation and Windows Update Cleanup files. Keep the default selection of Delivery Optimization Files, Temporary Internet Files, Thumbnails, System error memory dump files, Microsoft Defender Antivirus, Temporary Files, System error minidump files, DirectX Shader Cache, and Windows error reports and feedback diagnostics files. The remaining two Downloads and Recycle Bin options are you as they may contain important files.
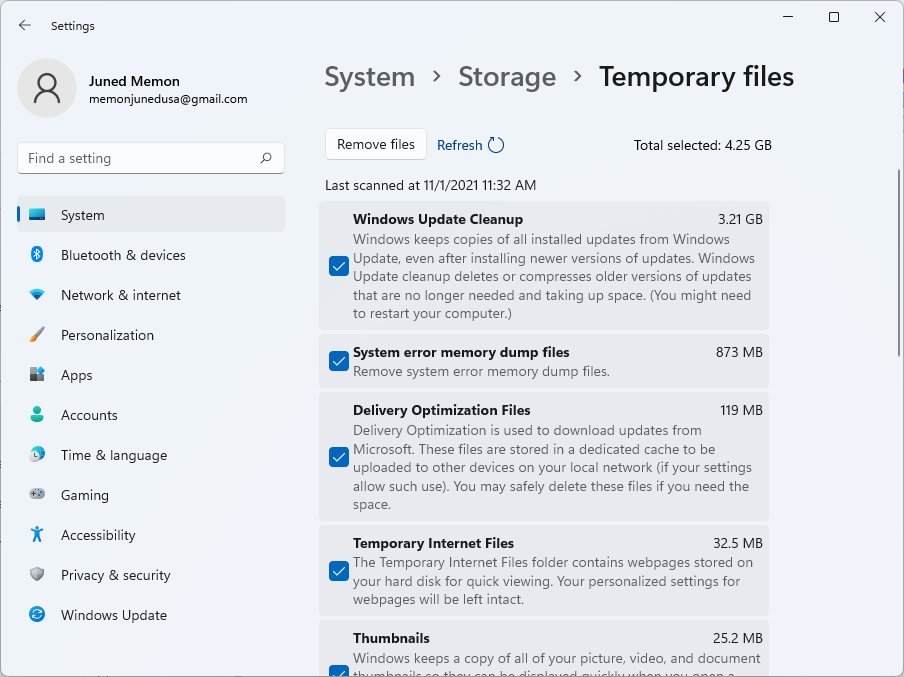
- Finally, hit on the Remove files button from the top.
Now you will have huge disk space on your Windows 11. If you want to have more space then you should uninstall apps and remove their data. For this, you have to go to Settings > System > Storage. Now look for unused apps to uninstall them.
Read Also: Go back to Windows 10
Disk Cleanup for Windows 11 (C:)
The Clean Manager is for cleaning the Disk Space from unwanted files on Windows 11. It is an inbuilt tool developed by Microsoft. Go through the below steps to use this Clean Manager on Windows 11.
- At first, launch the Run dialog box by holding the Windows key and R key. In it enter cleanmgr.
- Now you will have to select the drive of which you want to clear the space. Once you have selected the drive then hit on the OK button.
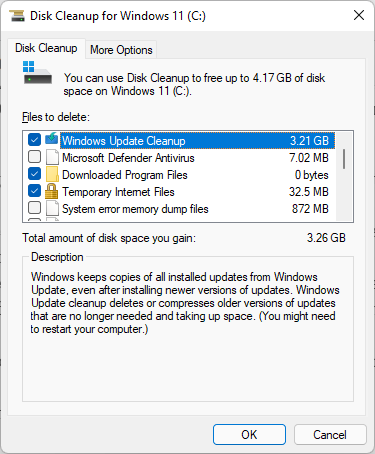
- The tool will start scanning the selected drive. Once the scanning is finished then do tap on the Clean up system files. If it asks you to select the drive then select it and hit on OK again.
- On the screen do tick on the box which says Previous Windows installation and Windows Update Clean-Up.
- At last hit on OK. Make sure that you have selected the above two options.
Now you will have a huge space disk on your Windows 11. Now you can’t roll back to Windows 10 as you have removed all related files. You can only do it by installing Windows 10 with help of a USB drive. You have to do it manually.
Read Also: Windows 11 Known Issues
Storage Sence feature in Windows 11
The Storage Sence is a built-in tool on Windows 11. It is for cleaning the temporary files. You can enable Storage Sence to automatically clean temporary files. If you don’t want to enable Storage Sence, you can use it manually when your low disk space occurs. In this guide, I will show you both ways manually and automatically.
- Do tap on the Start button and then scroll the screen to find Settings. Once you get it then tap on it.
- Tap on the System and then click on Storage from the left pane.
- It will be open on the right side of the same screen. Now do the toggle on of Storage sense.
- After this tap on the Configure Storage Sense. Do tick on the box which says “Keep Windows running smoothly by automatically cleaning up temporary system and app files“. It is under Cleanup of temporary files. Also, do the toggle on of “Automatic User content cleanup“. Apart from it, there are more settings to play with.
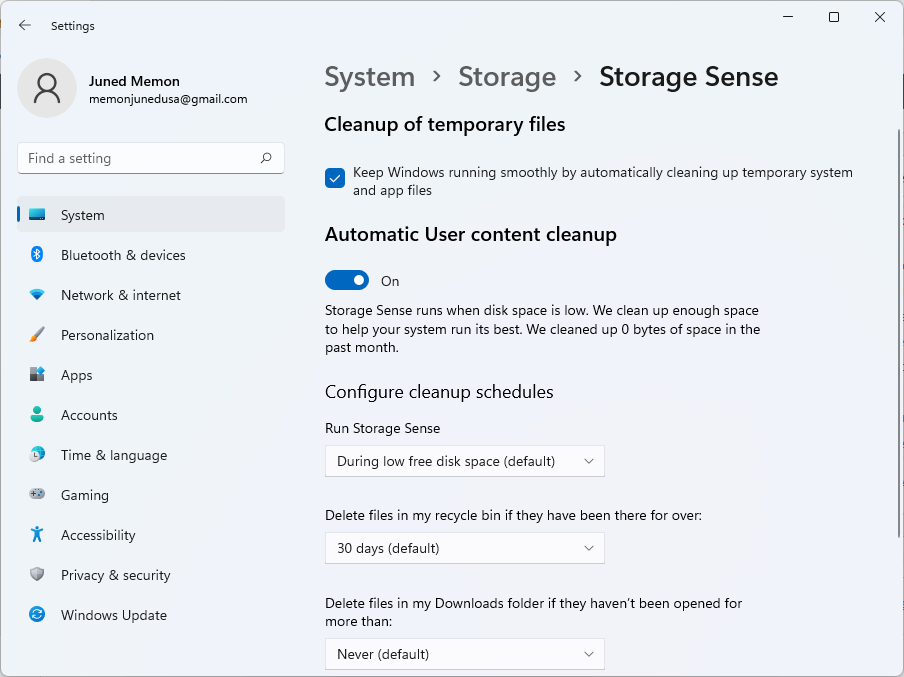
By applying all the above steps you have enabled Storage Sense on Windows 11. When a “Low disk space” error occurs Storage Sense will run automatically and will clean the space removing temporary files. If you want to run it manually then hit on Run Storage Sense now button.
Delete Temporary Files by Apps
You can also free up disk space by removing all temporary files left by applications. There are lot many applications on Windows 11 which create unwanted files. To remove them follow the steps below.
- Open the Run Dialog box by pressing the Windows key and R key.
- In type %temp% and hit on the Ok button.
- Press Ctrl + A to select all the files and Delete them.

You will not able to delete some files because they are related to active apps.
I hope that you have removed all old and unwanted files from your Windows 11. Now you can make use of free disk space as you want.