The Waasmedic Agent Exe and Mouso Core Worker Process are similar in terms of acquiring 100% disk usage in the background. Both run independently of each other in the task manager and have minor differences.
Well, the users reported that when they try to start their computer it lags. Even when they try to launch the browser it almost takes approximately minutes to launch. In this situation, all you need to do is to check the Task Manager. In Task Manager you will see all the services running on your Windows OS. You will see 100% disk usage in the task manager which causes lagging issues. The almost disk usage is taken by Waasmedic Agent Exe or Service Host Sysmain process.
Get answers to all your questions:
- What is Waasmedic Agent Exe?
- Should we disable it?
- How to fix 100% Disk Usage in Task Manager?
Contents
What is Waasmedic Agent Exe?
The Waasmedic Agent Exe is one of the most important components or services. It stands for Windows Update Medic Service. This service was launched first in Windows 10. Its duty is to keep Windows Update smooth and safe from interruption. In case if the Windows Update process is stuck due to malware or virus issues then this service will repair it. You might think that it is a third-party tool but let me clear you that it is an important component of Windows 10.
If we talk about disabling it then you can somehow but keeping it on Windows 10 is good for Windows Update. Just like the Desktop Windows Manager, it is difficult to remove it but you can disable it. Disabling Waasmedic Agent Exe should be your last option to fix 100% Disk Usage should be your first priority. If we talk about its causes then the causes differ from computer to computer as each computer configure differently.
Once you have read the above content then it’s high time to go with the below actual fixes. Make sure you apply fixes in sequence. If the first fix fixes the issue then there is no need to go on other fixes. Before advanced fixes do restart your Windows 10. Restarting fixes several issues on Windows 10. After this disable or uninstall the Antivirus software you have on your Windows 10. Now disconnect the removable drive such as USB Flash drives or HDDs. If this won’t fix then go to the below-advanced fixes.
Pause Windows Update
There are situations where Windows Update fails to install some important files and it gives the error codes or messages. It gives a re-download option. Due to these re-download and error codes or messages, the resources of Windows 10 are consumed high.
- At first launch Windows 10, Settings app holding Windows key and I key.
- From the open screen tap on the Update and Security option for the further process.
- Now from the left pane tap on the Windows Update option.
- This will be open on the right pane. Scroll the screen till you won’t get the “Pause updates for 7 days” option. Once you get it then tap on it.
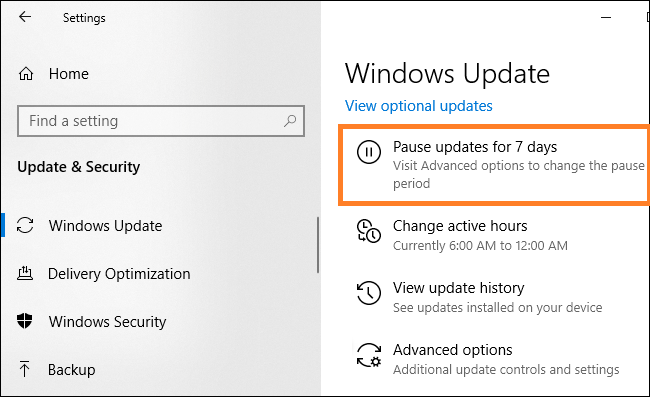
On your Windows 10, you will not have updates for 7 days. You will get updates after 7 days. To have updates tap on the Resume Updates option.
Use Disk Cleanup Tool
The insufficient space on Windows 10 will lead to Waasmedic Agent EXE high disk usage. This will slow down your Windows 10. To fix it you have to delete unnecessary files from Windows 10. This can be done using Disk Cleanup Tool. On all versions of windows, this feature is there.
- Launch a search bar on your Windows 10.
- Once you have it then type Disk Cleanup and then tap on the first result.
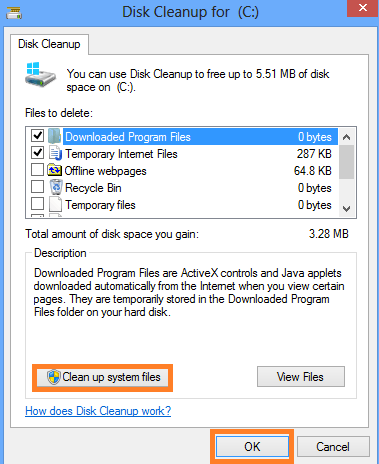
- Now you have to select the drive on which Windows 10 is installed.
- Hit on the OK button and tap on the Cleanup system files option.
- At last hit on OK button.
This will start cleaning your Windows 10. This will also delete broken registry entries. After the process check for the Waasmedic Agent Exe is consuming more resources or not. If no then good! if yes then continue reading this article.
Configure Windows
On your Windows 10, you will get high disk usage issues if you have viruses and malware. You can fix it by turning on DEP for that service. To do so follow the steps below.
- Do right tap on the Desktop and select the Properties option.
- Go on the Advanced tab and tap on the Settings option which is under the Performace section.
- Now go on the Data Execution Prevention tab and select “Turn on DEP for essential Windows programs and services only”.
- After this tap on Add option and then select the waasmedic.exe.
- At last tap on Open.
So, this is how you can turn on DEP for a particular service.
Disable Waasmedic Agent Exe
If all the above fixes won’t work in your case then it’s time to disable Waasmedic Agent Exe on your Windows 10. Manually disabling it is not possible. When you will try to disable it you will get an Access Denied error. The error means that it is not recommended to disable it. You can use a third-party tool to disable this exe process. Here are steps to use a third-party tool to disable it on Windows 10.
- Download Windows Update Blocker on your Windows 10. Make sure you download it from a trusted source.
- Once you have downloaded then open it and tap on Menu.
- Now select Windows Services and in its look for Windows Update Medic Service.
- After this copy the service name and launch the Windows Update Blocker directory.
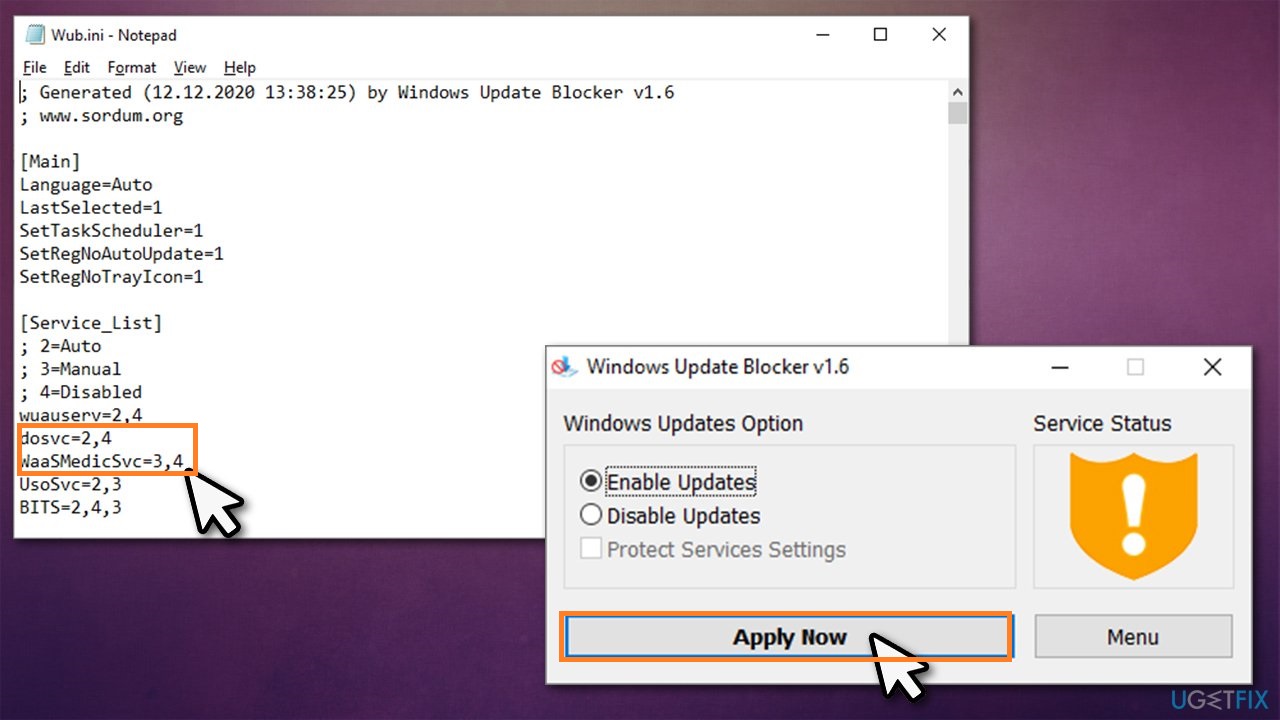
- In it launch ini file in a notepad. Now paste the service name under dosvc=2,4 and type =3,4 in front of the service name.
- Launch the Windows Update Blocker and tap on Apply button.
You have disabled Waasmedic Agent Exe on your Windows 10. In case if you want to enable service then launch Windows Update Blocker. In it tap on Enable Service and hit on Apply button.
Read Also: Disable Antimalware Service Executable Windows 10
I hope that after applying the above fixes you got rid of Waasmedic Agent Exe 100% disk usage in Task Manager on Windows 10.