As we know that Start Button in Windows 10 has one of the most useful functions amongst all Windows Apps. Because all the function mostly operates from the Start Menu. Start icon contains easy access to the third party and system apps. Start icon in your Windows 10 PC is seen on the bottom left Corner of your display Screen. If you click on the Start Button and if it does not work you will feel Frustrating at a time so to overcome from this problem you should read the whole blog and solutions given below will help you to resolve the problem and allow you to fix Start Menu in Windows 10.
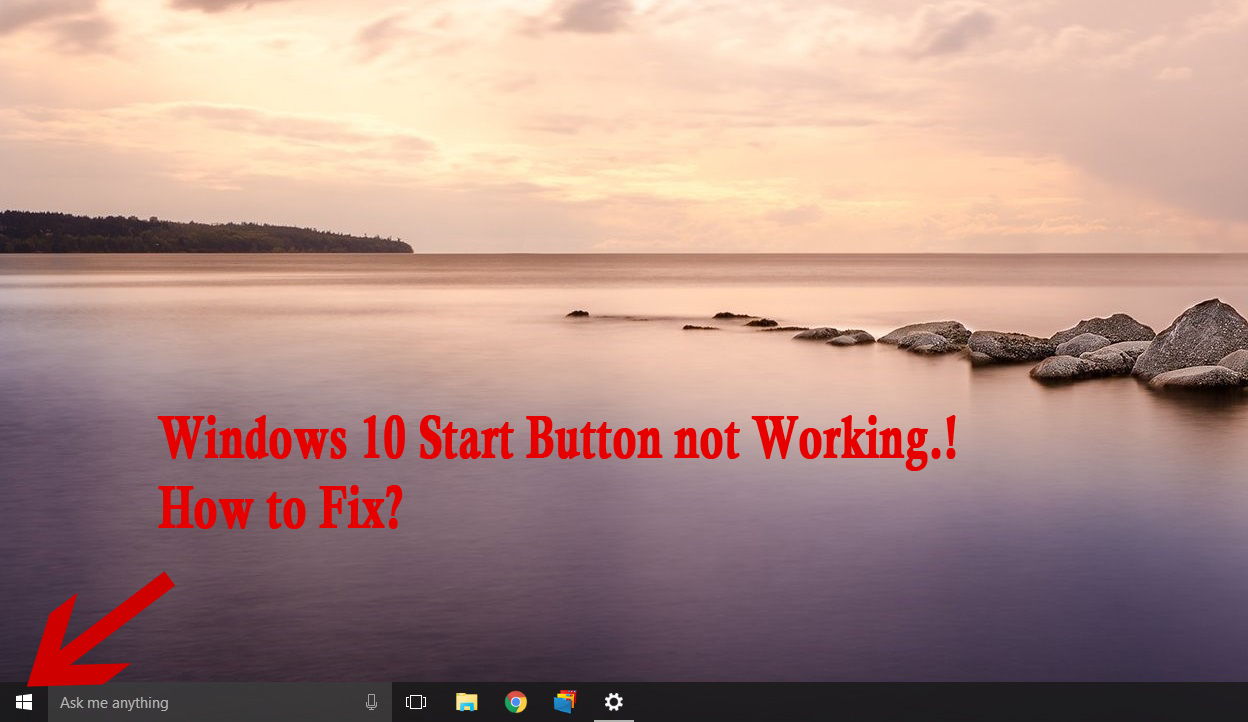
If Start Menu icon suddenly stops working it means you have added some new program to your system or you have done some recent upgrades. Many Windows 10 users have a question that How to solve a problem of Start Menu. There are many different solutions that will work but today I will give 5 Most Working Quick Fixes Which will get your system back to the normal.
Contents
Re Logging Into Your Account
This Solution is the best solution among all if the Problem occurs Occasionally, So make sure that first of all, you apply this Solution to Fix the Start Button. Below are the Steps to Follow:
Step 1: The first and foremost Step is that Press Ctrl + Alt + Delete keys simultaneously. and click on the “Sign out” Option.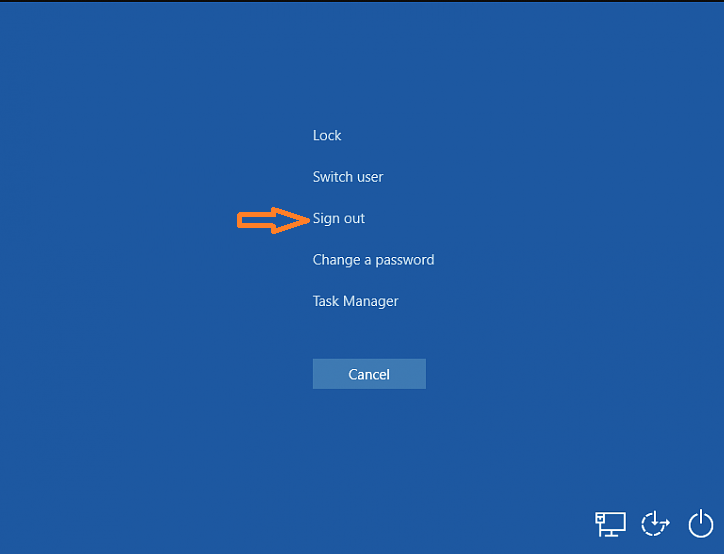
Step 2: After a system Reboot, go to the Login option and enter your password to login once again.
Step 3: Now finally test the Start Button, Its working or not, If not Just go on our next solution.
Uninstall Windows 10 Inbuilt Software
Windows 10 include varieties of Universal Apps, And there is no easy way to hide them from “All Apps” view in the start menu. You can uninstall them but Microsoft does not allow you to do so. Before going to the solution I must say that Universal Apps does not take much more space so you might ignore it if you are not using it. So you don’t need to Uninstall the built-in universal Apps. If you want to Uninstall you can. As we know that Cortana also raises workload on the Window, So you must uninstall Cortana too.
Steps to Uninstall Windows 10 Inbuilt Software
To Uninstall Windows 10 Inbuilt Apps You have to use “Command line”. It won’t be that time consuming process its easy and straightforward.
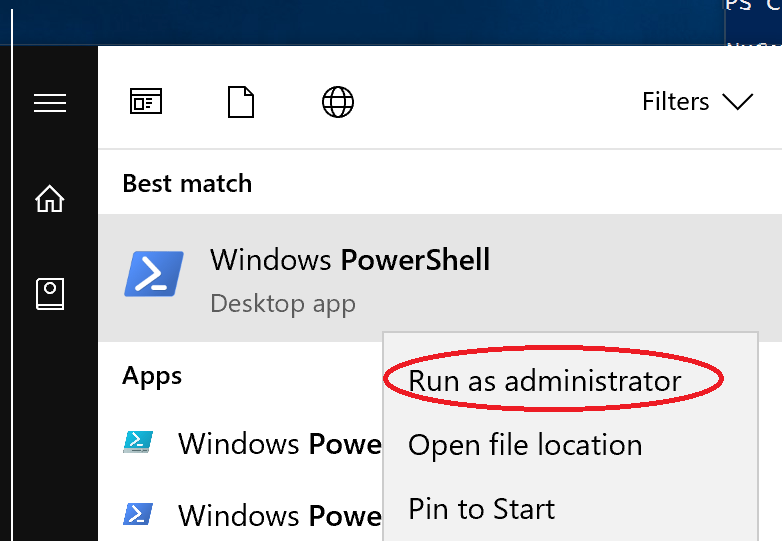
- Open the Start menu and type Powershell into the search box.
- Right click on it and select a Run as Administrator Option.
- Once the Powershell is open write the Command to remove the Apps.
- Some users will have Question that how to write Command line. So you can write a Command as follows:
Get-AppxPackage *app name* |Remove-AppxPackage
For Example, You want to remove 3dbuilder App you have to write a following Command and Press Enter;
Get-AppxPackage *3dbuilder* |Remove-AppxPackage - Here are some more examples that you can use these apps names and delete them: officehub, 3dbuilder, maps, messaging, bingweather, soundrecorder, photos, etc.
So it was an easy procedure to uninstall Windows 10 inbuilt apps.
Uninstall Cortana
Cortana is a virtual assistant created by a Microsoft for Window 10.
- Click on the Cortana icon near to the Start Button.
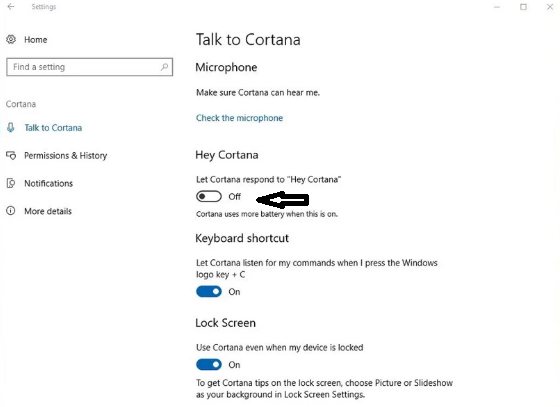
- Open Cortana’s setting with the gear icon.
- In the setting, turn all the toggle from On to Off.
- Now, scroll to the very top of the setting panel, and click on change what Cortana knows about me in the cloud.
- Microsoft will fetch a page from the internet called Personal Information.
- When it loads, Scroll to the very bottom, and hit clear.
So this was the Process to uninstall or disable Cornata on windows 10.
Deleting Unwanted Files
Storage problem also causes errors while using the Start Button of Windows 10. If we neglect this problem your PC will not work Smoothly and if the problem arises day by day it will affect the Start Menu. In our PC there are many temporary files which Creates the problem of Storage in our PC. So I will give the Solution on How to Delete or uninstall Unwanted file from your PC. Unwanted files mean Junk files, hard drives Unwanted files and many temporary files.
First, I will give you basic tips to delete Junk files. Just follow below easy steps.
There are 2 Ways to remove Junk files from your PC.
- Manual method
- Using cleaning tools
Manual method
The manual method is an easy method but somewhat time consuming no matter it will definitely work.
- Go to Disk cleanup by typing in the taskbar.
- Choose a Drive to delete junk files. Here the processing will be done and you will see the junk containing in your PC. Tap OK, similarly, you can go for other drives and follow the same procedure.
OK so, this how you can delete or remove the junk files from your PC by Manual method.
Using Cleaning Tools
As there is Cutthroat competition in the market so, there are many Clean up tools available in the online market. But the best one I found is CleanMyPC. I myself use this Software to clean and boost my PC speed Twice. One of the best features of this tool is that it automatically handles that which file is important and vice versa, so you don’t need to see it and you can easily clean it. And this process takes 2-3 minutes. To follow this process follow the below steps:
- Install the App, one installation finished launch CleanMyPC.
- Go to scan option, it will take a moment to scan junk files.
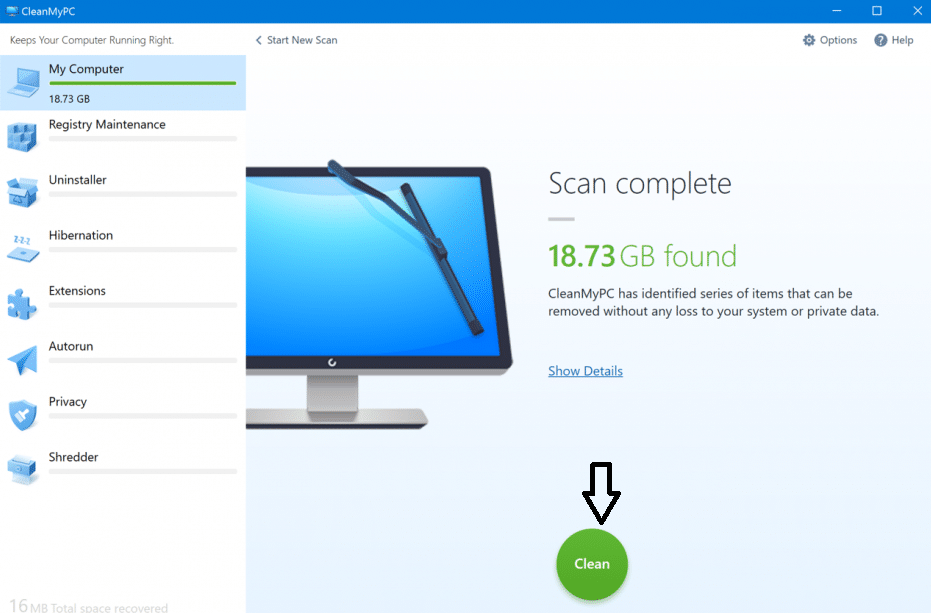
- Once completed click on the clean option.
So this was the important steps to delete the junk files by using a cleaning tool(CleanMyPC). By this tool, you can also delete the temporary files which consumed more space. Temporary files referred to those files that Apps store on your computer to hold information temporarily.
Windows Old Files
Windows old files folder is created when you upgrade from one version of windows to another. Windows old files contain all files and data from your previous window installation. So, windows old files just contain old windows system. Now question is that how to delete windows old files to free up space of your PC. Below is the tip and various steps to adopt the process. To delete the windows old files from your PC the best way is to use Windows Disk Cleanup Tool.
- Go on Search field and search for Disk cleanup tool and launch it.
- Click on “Cleanup system files” button.
- Wait a moment till window scan for files, then scroll it down to the list until you see “Previous window installation(s)”.
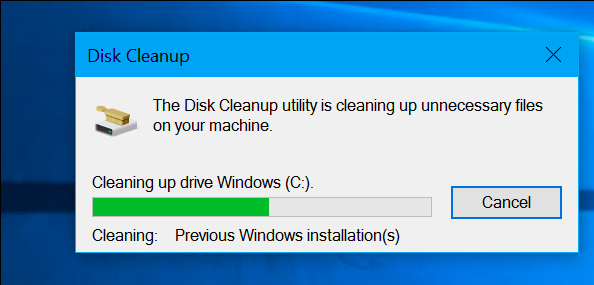
- Now click on the OK to start Cleanup.
So this is how you can easily delete the windows old files. Which will free up your space and your windows 10 start button will work smoothly without any problem.
Read Also:
- WiFi doesn’t have valid IP configuration
- How to fix Windows Update Cannot Currently Check for Updates?
Unwanted Software
You must have knowledge of unwanted software because it causes your PC. To prevent unwanted software, download software from only official Websites, or from the Microsoft store. Be aware of downloading software from third-party sites. Enable Windows Defender Antivirus in Windows 10. It provides real-time protection against threats and detects and remove unwanted software.
Many windows 10 users found that Dropbox somewhat conflicts with the start menu, it makes impossible to use all the feature in the start panel. If you have Dropbox in your PC try to uninstall it by following steps:
- On your keyboard, press the window logo key and R at the same time, type control in and press Enter.
- Go on view by Category, then tap on Uninstall a program.
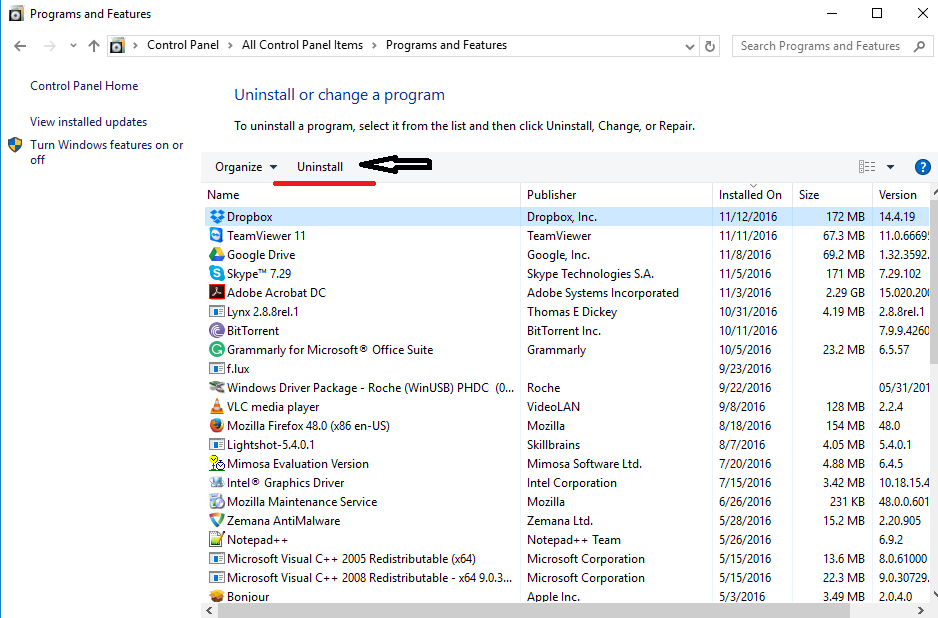
- Find Dropbox and Click on uninstall to remove from your computer.
I am sure that this bunch of solution will solve issues related to start button in Windows 10 and will fix the start menu not working.