Well, the newest Windows Laptop and PC come with SSD or HDD without any partition. It is the user’s responsibility to make disk partition on their Windows OS as per their need. As the latest OS of Microsoft is Windows 11, users are asking questions on multiple forums that “How to make Disk Partition in Windows 11?”. Here in this article, you will see a detailed guide on it. Make sure you read it till the end in order to create a partition on your operating system. Before going on to the actual guide let’s understand “Why you should create Disk Partition?”.
Read Also: What is Windows 11 Disk Partition Type GPT or MBR?
Contents
Reasons to Partition SSD or HDD on Windows 11
As I said before your new Windows gadget will come with a single partition. It mostly comes with a C Drive in which the whole system is stored. Having a single drive on Windows 11 is somewhat risky. It is assumed that if your drive is corrupted then you will lose your personal data as you have stored in it because you were not having another option. So, here you have to think that what about other data like photos, videos, files, and folders. To store all this personal data you need to create a disk partition on your Windows 11. Apart from this, there are multiple reasons for making disk partitions. Here below are some of the main reasons.
- For managing data properly. If you have three drives then you can store your system on one drive, the personal data on the second drive, and on the third drive, you can store games and all. Storing all data in one will lead to a slow down of your Windows 11 OS. Adding to it, it will create several problems with your Windows 11.
- For running multiple Windows on a single laptop or PC. If you want to run two Operating System like Windows 10 and Windows 11 then you will need two partitions because each OS need a separate drive.
- For keeping your data safe. You will not have fear of losing personal data.
So, these were the main reasons for adding partitions on Windows 11.
How many Disk Partitions you should have on Windows 11?
If you don’t have an idea of how many disk partitions you should create on Windows 11 then this guide is for you. Making Disk Partition on Windows 11 totally depends on the hard drive you have. It is recommended that at least you should have three partitions. The one for storing Systems, the second for storing personal data like photos, videos, and files, and the third for storing software and games.
In case, if you have 128GB or 256GB of a hard drive then you don’t have to create more disk partitions. It is because the drive in which your OS is stored must be 120GB to 150GB. If you have more than that like 500GB – 2TB of hard drive then you should have more disk partitions on your Windows 11.
Once you have an idea of how many separate drives you can make then go to the below guide to create disk partitions in Windows 11.
Read Also: Increase RAM Virtual Memory Size on Windows 11
How to make a Disk Partition in Windows 11?
Well, there are three ways to create it. The one is by using an inbuilt tool that is Disk Management. The second is by using Command Prompt. And the third is by using third-party software. The best and easy method is using Disk Management.
Before creating disk partitions in Windows 11 you have to shrink an existing partition. It means you have to create space on the existing partition in order to make new disk partitions.
Shrink Partition using Disk Management
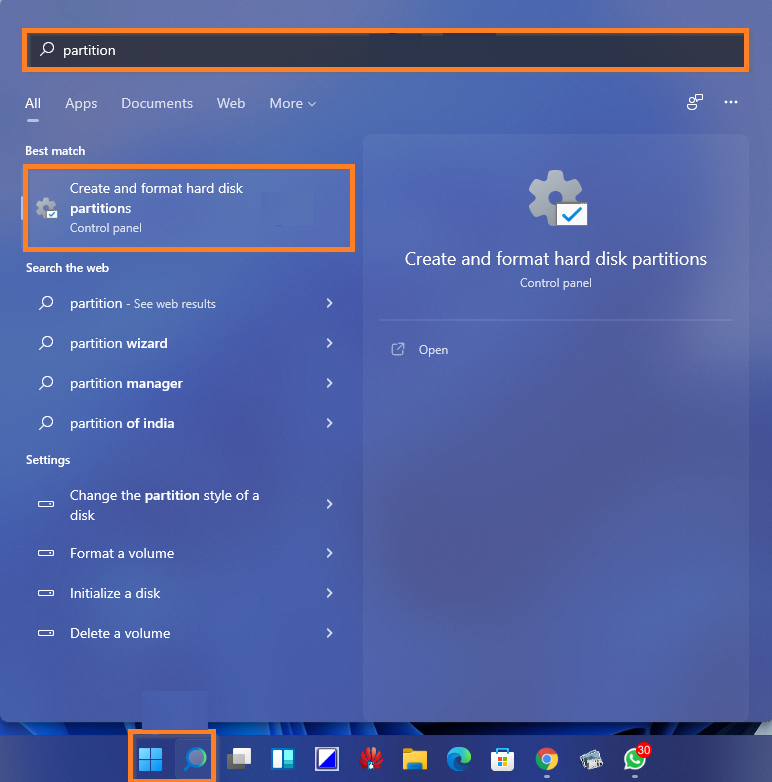
- At first, go to the Start menu and search for Partition. From the top result tap on Create and format hard disk partitions.
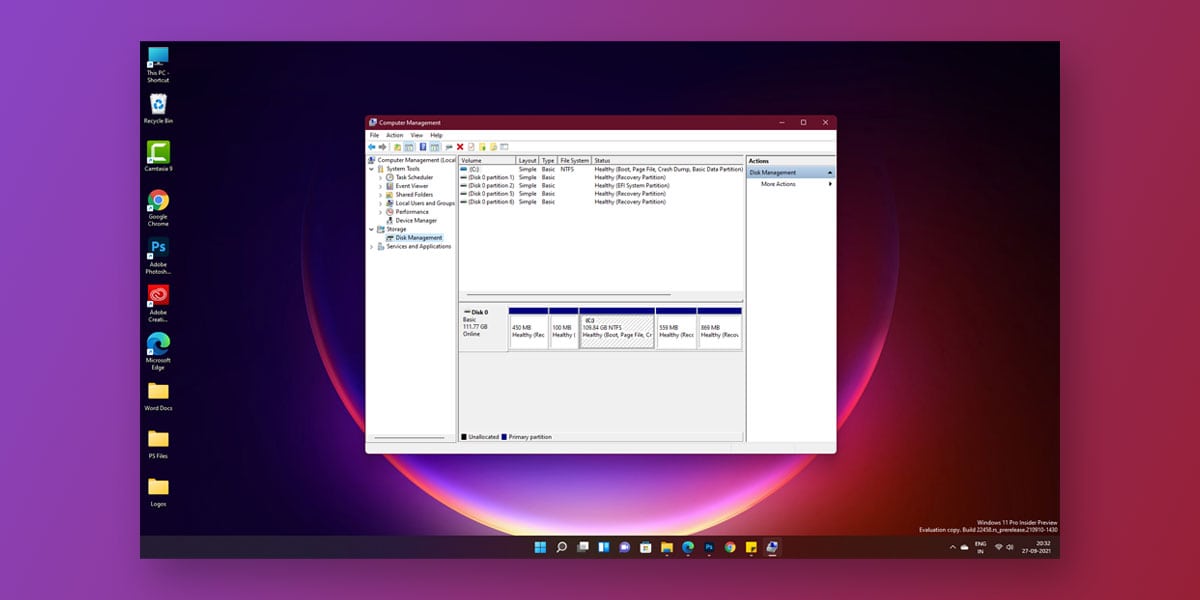
- By doing this you will have a Disk Management window.
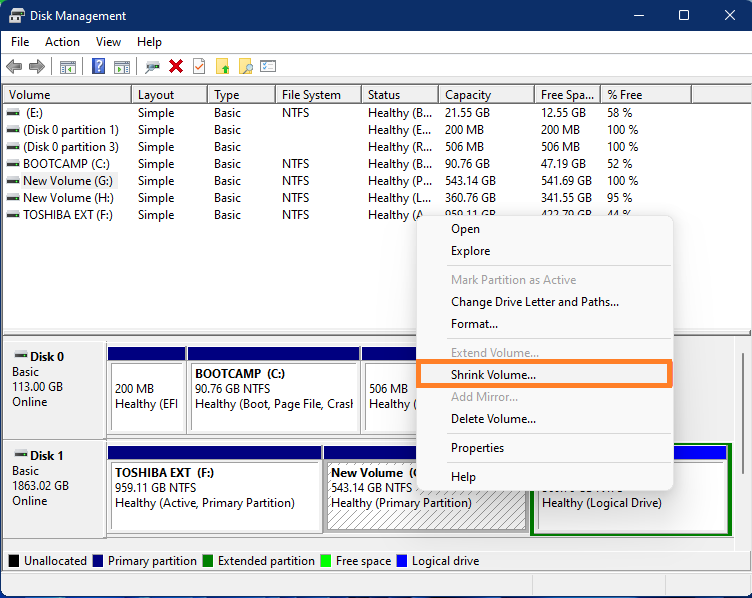
- Now do right tap on the Partition which you want to shrink. From the open menu tap on the Shrink Volume option for the further process.
- After this, go to the option which says “Enter the amount of space to shrink in MB”. Now type the size in MB and hit on Shrink button. The entered size will be space for your new partition.
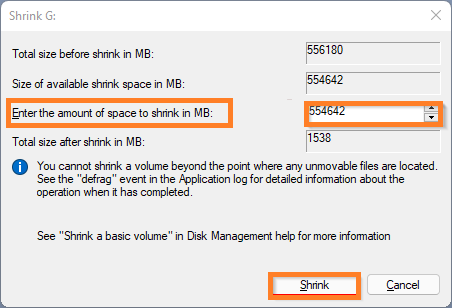
- By doing this, the selected volume size will fall. On the screen next to the selected drive you will have Unallocated space.
Finally, you are done with shrinking disk partition in Windows 11.
Create Disk Partition using Disk Management – HDD/SSD
If you have seen unallocated space and you want to make Disk Partition then make sure you follow the below exact steps.
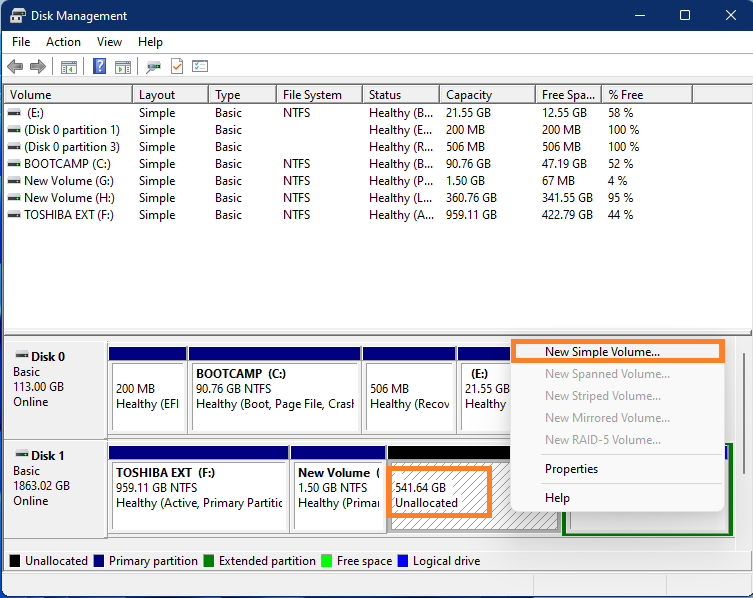
- Search for the Partition as you search in the above guide.
- Now you will have Disk Management Window. Do right tap on the Unallocated Space and then hit on the New Simple Volume option.
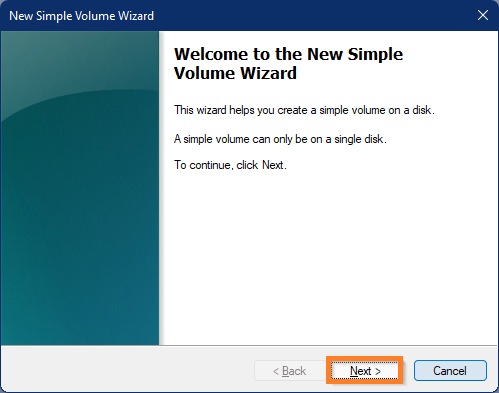
- After this, you will have a Welcome screen so to accept it tap on the Next option.
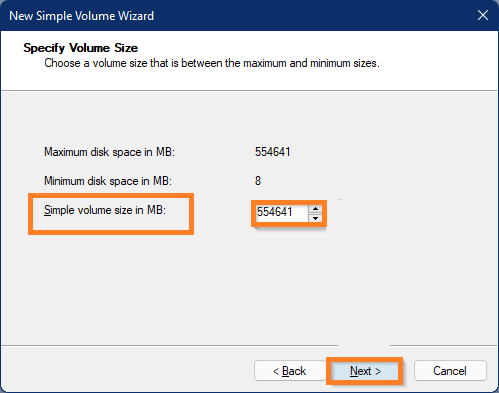
- Now you have to set the size of the partition in MB. To do so go to the Simple volume size in MB and enter the size of the partition. By default Windows 11 will give the whole space to the partition. Once you are done with this then hit on Next button.
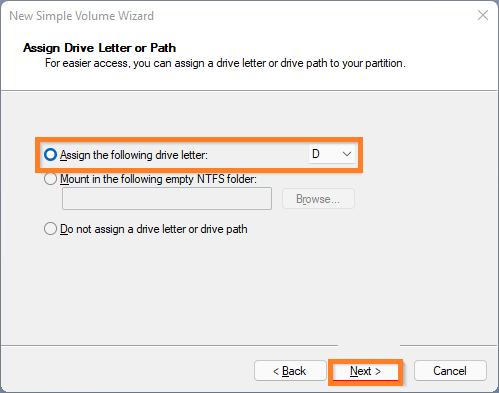
- Here Windows 11 will give you the letter for your partition. You can change it by clicking on the Assign the following drive letter drop-down menu.
- Now tap on the Next option twice.
- Finally hit on the Finish button.

At last, Windows will create a separate disk on your Windows 11. Now you can use the newly created drive from the File Explorer or This PC.
I hope that after reading this whole blog you are able to “Make Disk Partition in Windows 11” using Disk Management Tool.