On Windows 10 there are several problems like select proper boot device that prevent Windows 10 from booting. These problems occur when there is something wrong with important files that are needed for booting. All these problems can be fixed using a system scan but using the System Repair tool will work faster. In this guide, you will get to know what actually Windows 10 System Repair Tool is, and apart from it, you will get to know 5 easy and simple ways to run Windows Startup Repair Tool.
Contents
What is Startup Repair?
The System Repair is one of the best feature on Windows 10 to repair files which prevent Windows 10 to boot. It is a recovery tool for Windows 10. This tool is located in the System Recovery Options menu. It is made with the intention to fix system files. In all situations, you can run Startup Repair on Windows 10. The easiest way is when you can go on your Windows 10 desktop. You can also run Startup Repair from outside Windows 10. Apart from it, you can run Startup Repair using an installed disk.
RUN Windows 10 System Repair – 5 Methods
As I have told you that in this guide you will see 5 ways or we can say methods to run Windows 10 Startup Repair. Make sure you pick up the method as per your Windows 10 situation.
Using Windows 10 Settings
This method is for those users who can log in to their Windows 10. You have to use the Settings app to run Startup Repair on Windows 10. If you don’t know how to make use of the Settings app then follow the steps below.
- At first launch Settings app holding Windows key and I key.
- Once you have the settings screen then tap on the Update and Security option for the further process.
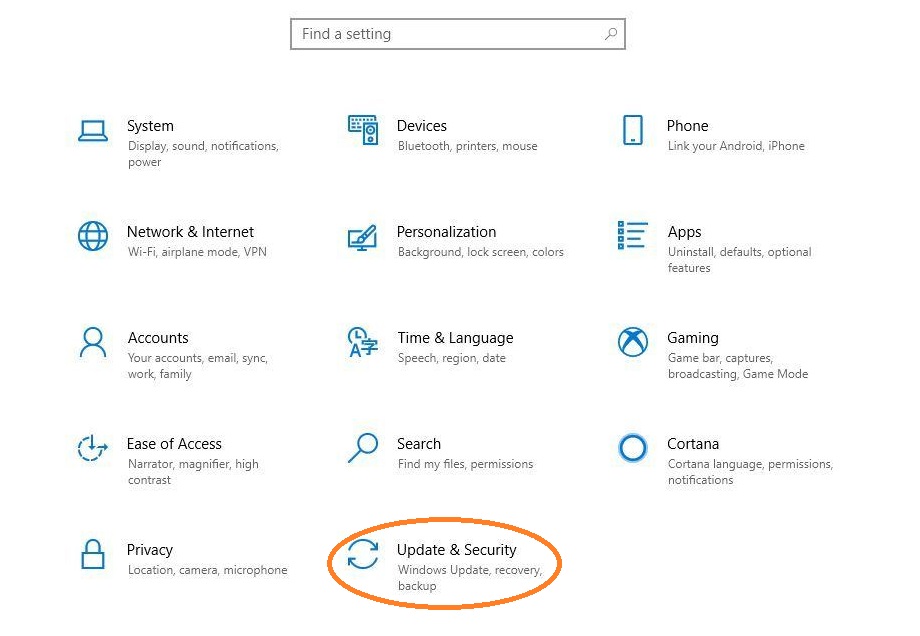
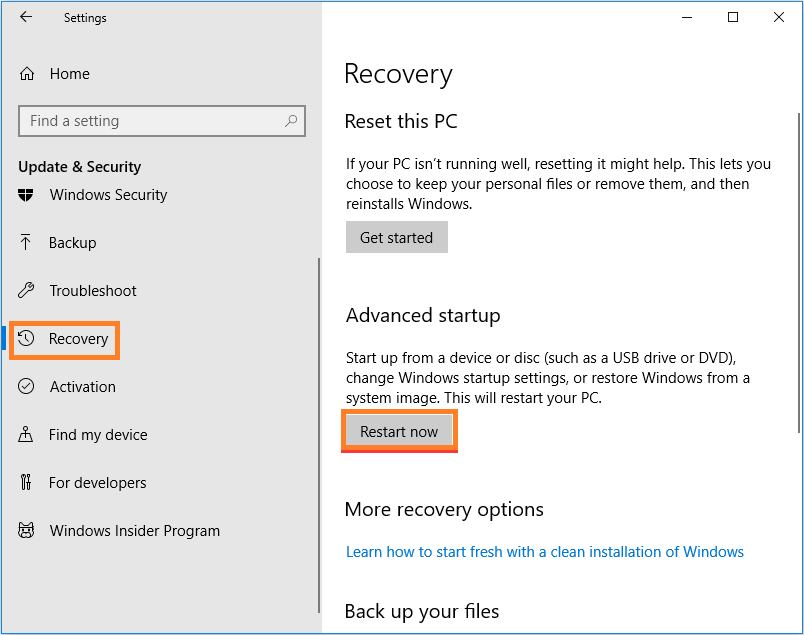
- From the left pane under the Update and Security section tap on the Recovery option.
- By doing this you will have a recovery screen on the right side. Now go under Advanced Startup and tap on Restart Now button.
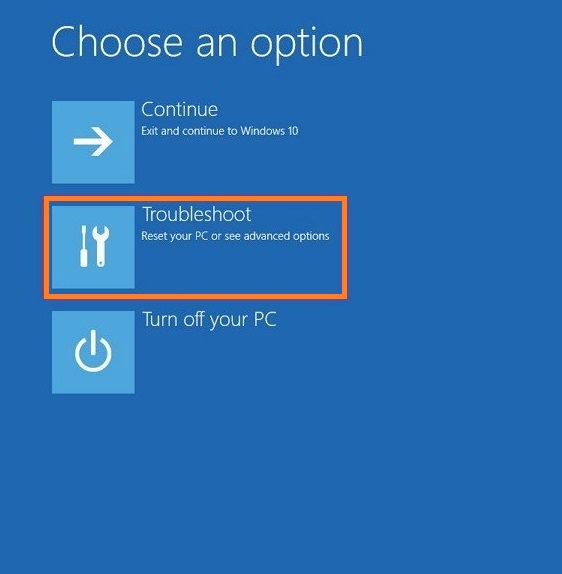
- After restart from the screen tap on the Troubleshoot and then on Advanced options.
- Now on the screen, you will have the Startup Repair option so hit on it.
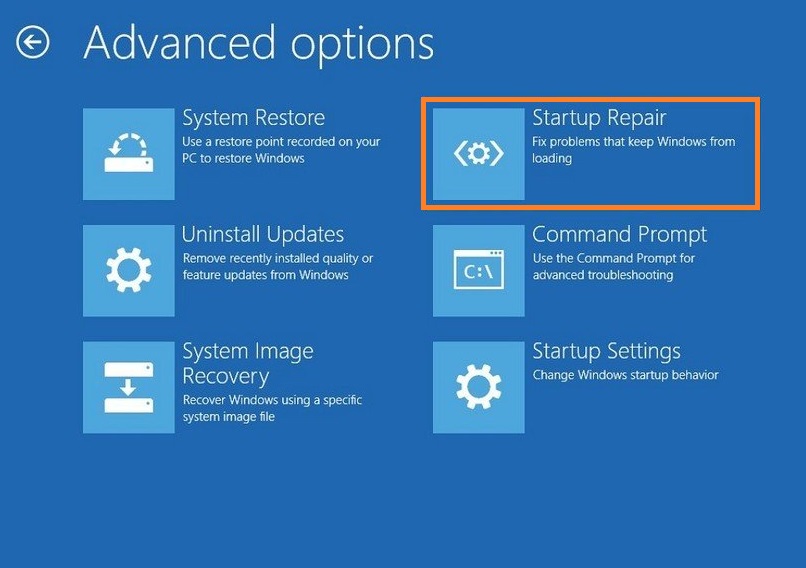
The scanning will start now. It will also fix Windows 10 stuck on getting Windows ready.
Using Power Options Menu
If you cannot access your account then you can run Startup repair using the power options menu from the lock screen. All you need to do is to follow the exact steps given below.
- On the lock screen tap on the Power icon.
- Hold the Shift key and then tap on the Restart option from the open menu.
- Once Windows 10 is restarted then from the prompted screen tap on the Troubleshoot option.
- After this tap on the Advanced options.
- Now you will have the Startup Repair option on the screen do tap on it to start scanning and repairing core files.
So, this is how you can make use of Startup Repair if you are not able to bypass the Preparing Automatic Repair on HP Laptop or other Windows 10 devices.
Using Keyboard Shortcut
This guide is for those users whose Windows 10 is not responding and the start button is not working. If you are one of them then you can also run the Startup Repair tool using the keyboard shortcut. Make sure you follow the steps below.
- At first, hold Ctrl + Alt + Delete key on your Windows 10 keyboard.
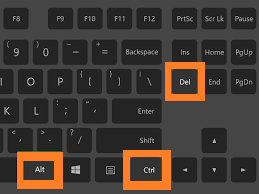
- From the prompted screen go on the Power icon which is at the bottom right corner.
- Now hold the Shift key and then from the open menu tap on the Restart option.
- After restart on-screen follow the path as Troubleshoot > Advanced options > Startup Repair.
This will solve the problem related to startup on Windows 10. If this didn’t work then go with the next method.
Make use of Bootable USB Drive
If there is a problem with Windows 10 then automatically you will have Startup Repair on Windows 10. If this won’t happen then you have to create Bootable USB Drive by using a second Windows 10 device. Here are detailed steps to use Bootable USB Drive on Windows 10.
- First of all, press the Power button to shut down Windows 10.
- Now it’s time to insert the Bootable Windows 10 USB Drive into the Windows 10 USB Port.
- Once you are done with this then to start your device hold the Power button.
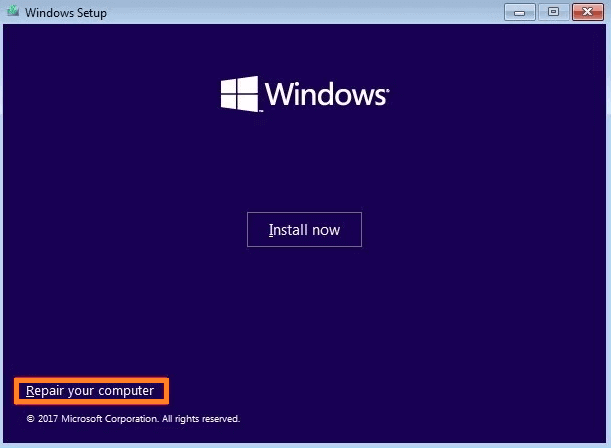
- From the prompted screen tap on the Next button for the further process.
- After this tap on the Repair your computer option from the left bottom corner.
- Now you will be on the Advanced startup screen.
- Hit on the Startup Repair option.
So, this is how you can make use of Bootable USB Drive on Windows 10.
Make use of Recovery Mode
In case if you are not able to create a Bootable Windows 10 USB Drive then also you can run a startup repair using Recovery Mode. This guide is for those users who fail to create a Bootable Windows 10 USB Drive.
- Hold the Power button to start Windows 10.
- As the device is unable to load Windows 10 OS it will start POST (Power On Self Test).
- After the test is completed hold the Power button to shut down your Windows 10 device.
- Make sure you repeat the above steps twice.
- After a final restart, your Windows 10 will enter into Recovery Mode.
- Now it’s time to choose the User Account and then enter the password.
- For further steps tap on the Continue button.
- After this tap on the Advanced options.
- Now you will have a list of options on the Advanced options screen. From it tap on the Startup Repair option.
Likewise, you can make use of the recovery mode to fix boot problems on Windows 10.
The blog consists of 5 methods to run Startup Repair on Windows 10. I hope that you are able to understand all the above methods.