Contents
What is MoUSO Core Worker Process?
MoUSO Core Worker Process triggers along with the Windows Updates. Whenever Windows 10 automatically checks for updates then MoUSOCoreWorker.exe fires in the background. Windows 10 generally checks every now and then for recent updates and hence it often keeps running along with other processes.
Windows 10 usually releases security updates every week and feature updates once or twice a month. So, you will see extra processes in the Task Manager to check, download, deliver, receive and install updates on your device. The USO Core Worker Process as a variation will sometimes handle its operations.
MoUSO Core Worker Process in the Sleep Mode
Its background thread to continuously check for the Windows Updates. It even runs and wakes up your laptop or computer from sleep mode. Your Laptop or Computer screen will automatically turn on with the CPU and its working fan, you may notice the blinking led lights. Will consume a bit of resource and then will again put your PC to sleep mode. This cycle may keep repeating until you notice and shut down your PC.
Just like the Waasmedic Agent Exe 100 disk usage, MoUSO Core Worker Process also causes High Memory Usage along with occupying CPU, Disk, and Network in the task manager. As it’s related to updates hence might extensively use your network bandwidth.
You can find its service logs in the command prompt with the administrator’s permissions. Launch the Command Prompt as an admin and click on Yes in the User Account Control prompt. The cmd window will appear with the C:\Windows\system32> location. Now type powercfg /requests and hit Enter to see the list of running threads. The MoUsoCoreWorker.exe will mostly appear in the list if it’s running at snooze and making problems on your PC.

Battery Drainage By MoUsoCoreWorker.exe
Do you notice the battery drain after waking the Laptop from the Sleep Mode? Then Update Sessions might be the real culprits for continuously hooking up with your PC. It will also stop your PC to go into sleep mode keep eating all the available resources in the normal mode.
If your laptop is in sleep mode then on average USO Worker processes might disturb it 50 to 60 times within a night. It is adversely going to affect the battery and power consumption of your device. The battery will keep draining in the sleep and you won’t get enough power when required. You might notice the null battery when booting up from the sleep mode.
USO Core Worker Process keeps running with Updates
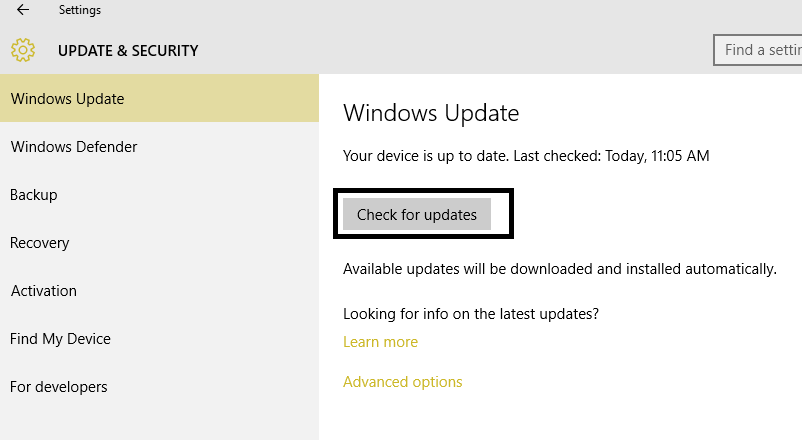
It appears once in a while in the Task Manager and often less noticeable but we will show you its true nature. You must be familiar with updating your Windows 10 from the Settings. Microsoft has made it easy and simple to let users Check for updates, just by clicking on a button on the Updates & security page in the Settings. As soon as you will hit on Check for updates, the Core Worker Process will popup in the Task Manager.
You must not end the process without proper acknowledgment, because it might create other severe trouble for future updates. We will showcase the proper execution to fix or boycott this process, so keep reading.
Disable MoUSO Core Worker Process
Now, we know about the actual working also read the multiple side effects of MoUSO running in the background. The question that arises is should we disable it? If yes it won’t affect the core from the Windows. If no then what’s the other way around?
The MoUSOCoreWorker.exe process handles the updates in the background and disabling them will keep you away from the updates and high memory usage by antimalware service executable. We have also covered the other ways around fixing its working to keep your Windows up to date without harming its sleep cycle or continuous disruptions.
First, let’s look at the methods to disable it from ruining your experience, and later we will cover the steps to fix it.
Disable Wake Timers from Sleep
Windows wakes up by default for the important processes and MoUSO is one of the important processes as per the norms. If it is making problems with your Laptop or PC in sleep and raising high memory usage then it’s the perfect fix to apply.
- Launch the Control Panel and go straight to the Power Options.

- Tap on the Change when the computer sleeps in the left side menu.

- Click on the Change advanced power settings.

- Scroll down to the Sleep option, and further expand the Allow wake timers. Choose the Disable options for both On battery and plugged situations.

This will permanently stop your PC from automatically waking up from sleep.
Pause Updates till 35 Days
Windows have included an option to halt updates till the next 35 days. It will also boycott all the running update processes. So let’s get to the first step if updates are messing up with your PC.
- Tap on the Windows button and type Check for updates and go to the first result.
- Press the Advanced options on the Windows Update screen.
- Scroll down to the Pause updates and drop down to the last date.
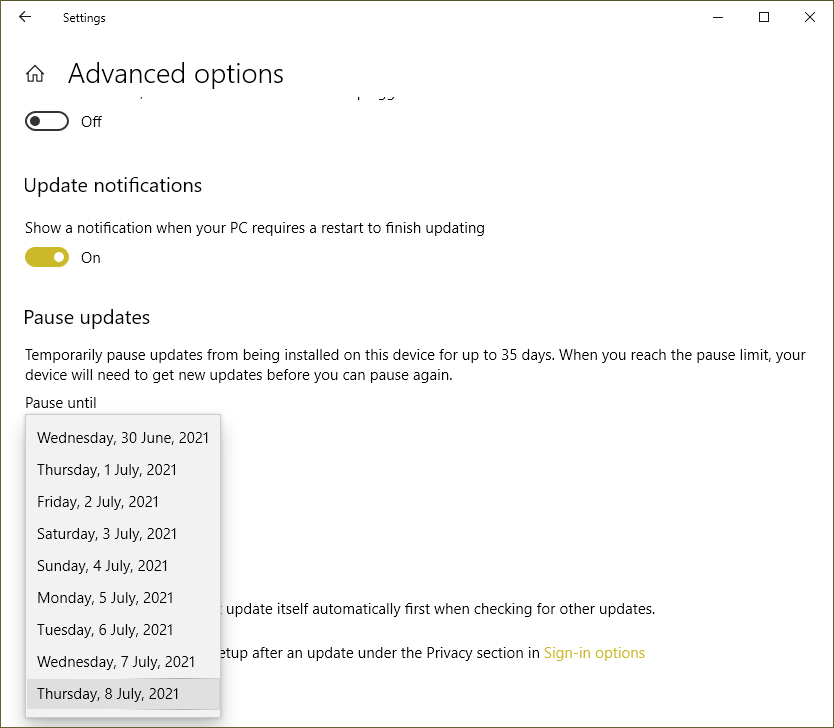
That’s it, just restart your PC and updates might stop creating problems for the period of 35 days. The latest updates will be installed after 35 days and again you can pause them for the next 35 days.
How to stop Windows 10 Update Permanently? – {3 Quick Tricks}
Metered Connection
Windows restricts checking the updates on the metered connection. Metered connections are cellular or limited WiFi with the scarcity of data. Follow the steps to manually assign your WiFi as metered connection to stop downloading automatic updates.
- Click on the WiFi network icon in the corner of the taskbar.
- Connected WiFi must be selected by default, tap on its properties.
- Scroll down until you see the Set as metered connection toggle and turn it ON.

Fix the MoUSO Core Worker Process
It’s an important process to take care of your systems’ security updates which will prevent your PC from the latest viruses, malware, and hacker attacks. So we have also researched for fixing the MoUSOCoreWorker.exe than disabling it from working.
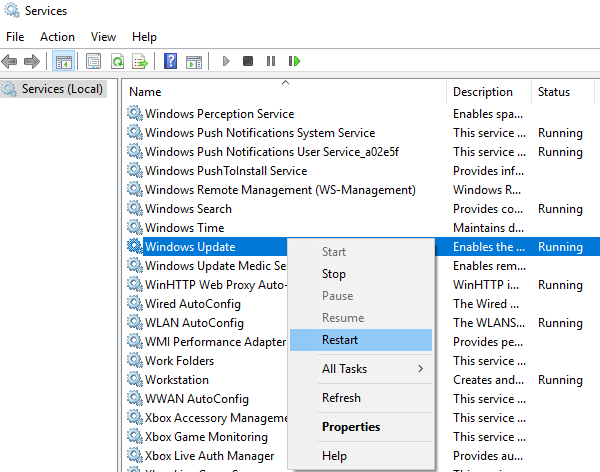
Restart Windows Update Service
Sometimes corrupted update services also keep running the same updates again and again. Just giving them a quick restart may prove useful to fix such problems.
- Launch RUN dialog and type services.msc and hit enter.
- Select the first Name then press W to skip to the services starting with W.
- Then scroll down until you find the Windows Update service in the list.
- Right-click on the Windows Update service and Restart.
- Also, Reboot your PC to apply to proper changes.
It might not be running currently, you to have to Start it first to Restart again.
Install All the Updates at Once
Go to the Windows Update & security and Check for the latest updates. Install all the available updates even the optional ones. It will take few minutes to an hour based on the available size but also fixes the bugs and errors from the Windows side.
If you are facing any error while installing the latest updates then update your Windows using the Windows Assistant. Download Windows 10 Update Assistant from the Microsoft Official Site.
Uninstall Recently Installed Updates
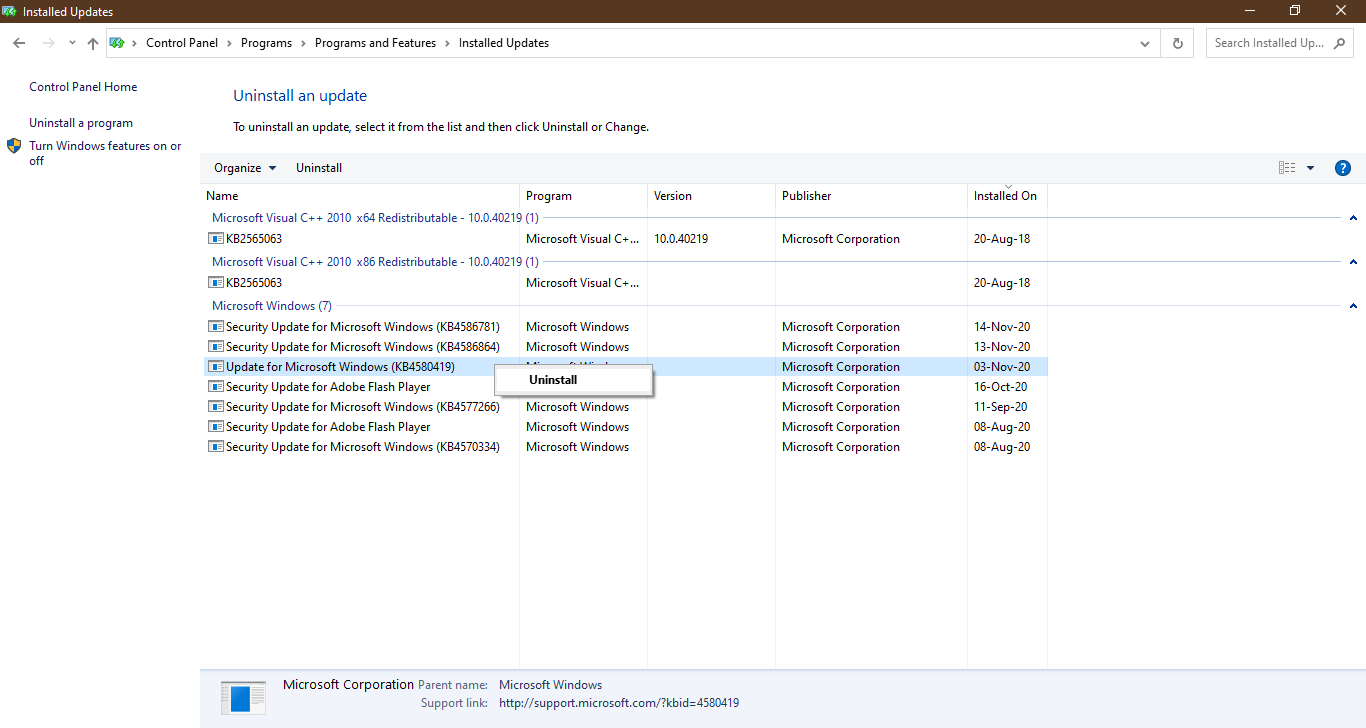
You might be facing a weird MoUSO Core Worker Process issue after recently updating Windows 10. Just roll back to the previous updates to fix the issue. Head to the Windows Update settings page. Tap on the View update history and select the very first option to Uninstall updates. It will launch a bunch of recently installed updates. Just uninstall the recently installed updates one by one from the list.