Virtual Machine is a tool to run an Operating System on top of the installed system, without making changes to the system files. It’s like a special virtual environment for trying out other OS. If you do not want to miss out on removed features from Windows 11 and still want to give a try to Windows 11 then VirtualBox and Hyper-V both are the best Virtual Machine to try out Windows 11.
Well, minimum requirements by Windows 11 are already more for a mediocre PC. If your laptop or a computer only meets minimum requirements than twice the resources required by a VirtualBox or Hyper-V then you have also got another option to dual boot both the Windows.
Contents
Windows 11 System Requirements on Virtual Machine
VirtualBox and Hyper-V will run Windows 11 on top of Windows 10 hence they will have extra resources to support its requirements. Windows 10 will keep running in the background hence it will also occupy certain resources. Overall availability must be twice to run an operating system on Virtual Machines.
- At least quad-core CPU with more than 2GHz of Clock Speed
- Total 8 GB of RAM
- More than 64 GB of free Storage
- Windows 10 with 64-bit Architecture
- A dedicated Graphics Card with DirectX 12 and WDDM 2.0 Drivers
- UEFI BIOS Mode with Secure Boot and TPM 2.0 chip
Once you have verified all the checkpoints and you are sure about your PC capabilities then let’s move to the actual part of installing Windows 11 on VirtualBox and Hyper-V.
Windows 11 on VirtualBox
VirtualBox is a free open source virtualization software under General Public License. It creates a special environment by acquiring 4 GB of RAM and 64 GB of storage to run Windows 11 on top of Windows 10. This special environment is termed a Virtual Machine. There exist a special relationship between Windows 10 as host and Windows 11 as Virtual Machine’s guest.
VirtualBox support all the major available OS including Windows (XP, 7, 8, 10), Linux, Ubuntu, DOS, OpenSolaris, and OpenBSD. We will see how to configure Windows 11 on the same VirtualBox with few tweaks.
- Visit the VirtualBox site and download it for the Windows hosts.
- Install it with the default options or change its default storage location.
- Finish the installation without launching it.
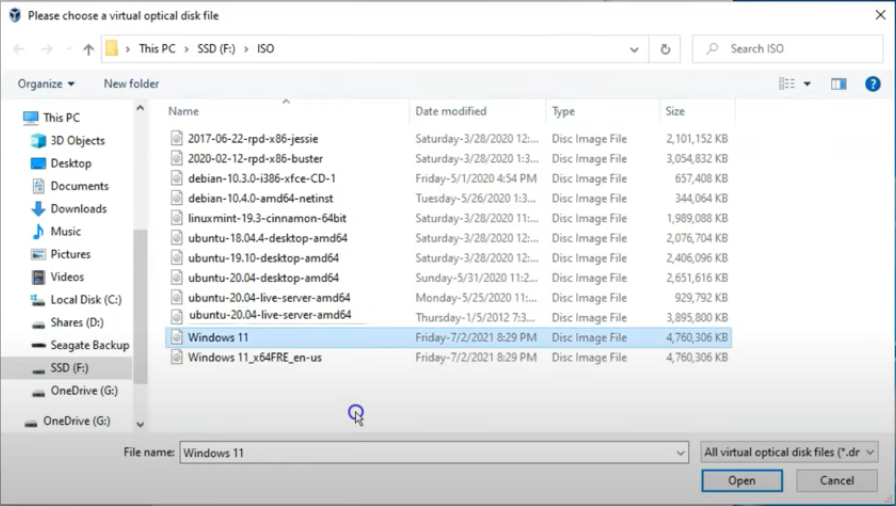
- Download the latest Windows 11 ISO file.
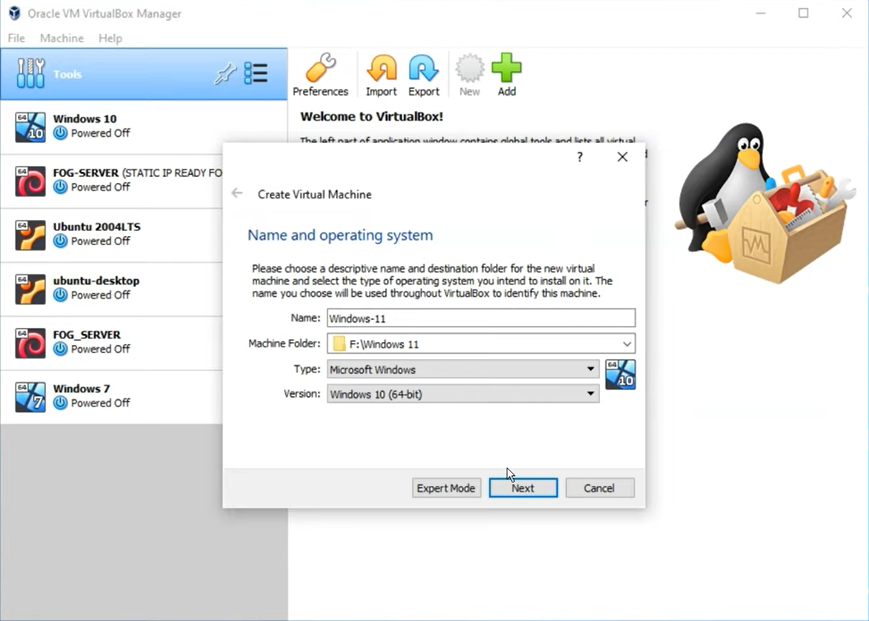
- Launch VirtualBox and tap on the New icon to Create Virtual Machine.
- Type Windows-11 in a name, keep the default or choose a separate folder for Windows 11, keep the default type as Microsoft Windows, and choose Version as Windows 10 (64-bit).
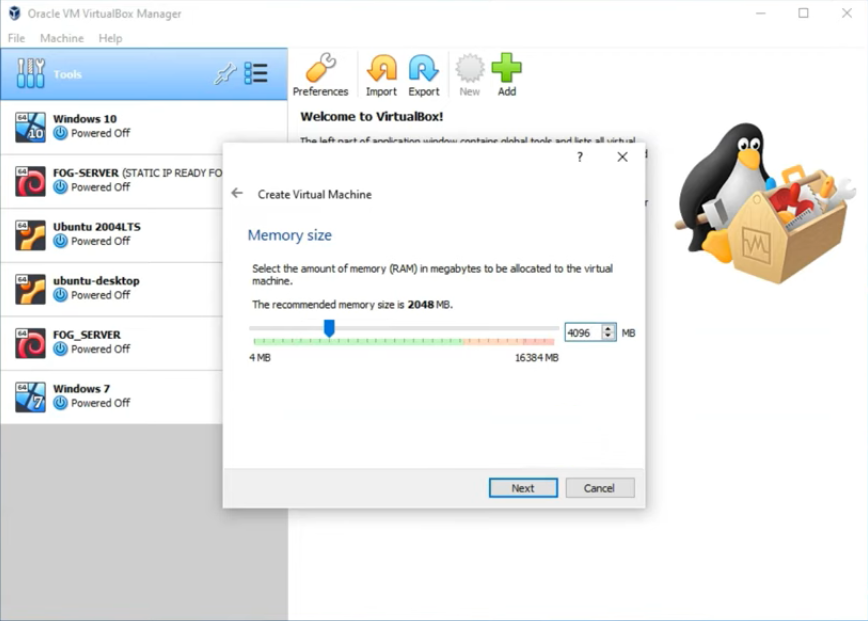
- Keep Memory Size (RAM) of 4096 MB (4 GB) or higher.
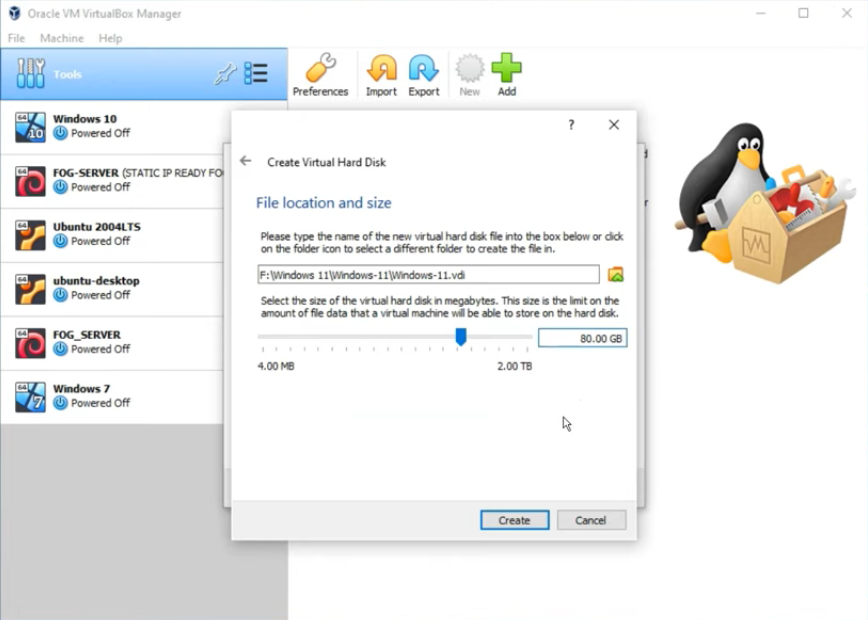
- Keep default options for Hard Disk, Hard disk file type, and Storage on physical hard disk.
- Change the File location and size from 50 GB to 80 GB or higher.
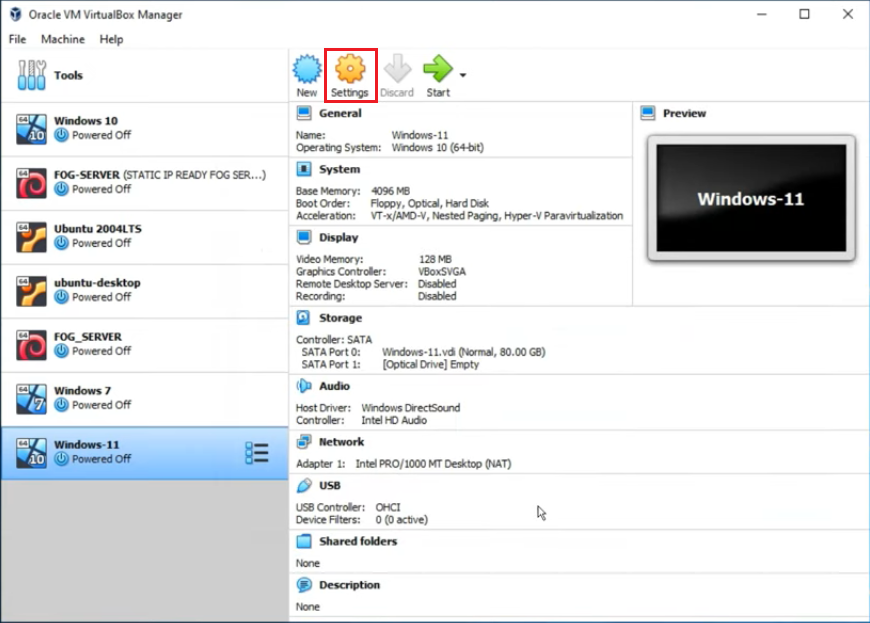
- It will create a Windows-11 Virtual Machine on the left side. Select and open its Settings.
- Go to Storage, tap on Empty disk, expand Optical Drive options, and Choose a disk file.
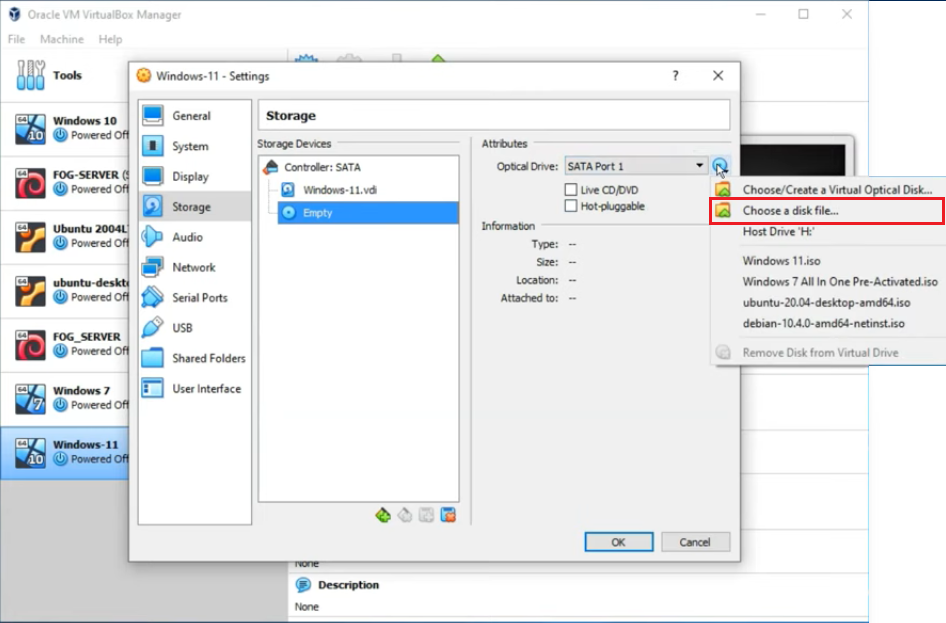
- Select the downloaded or created Windows 11 ISO file and Save settings by clicking on the Ok button.
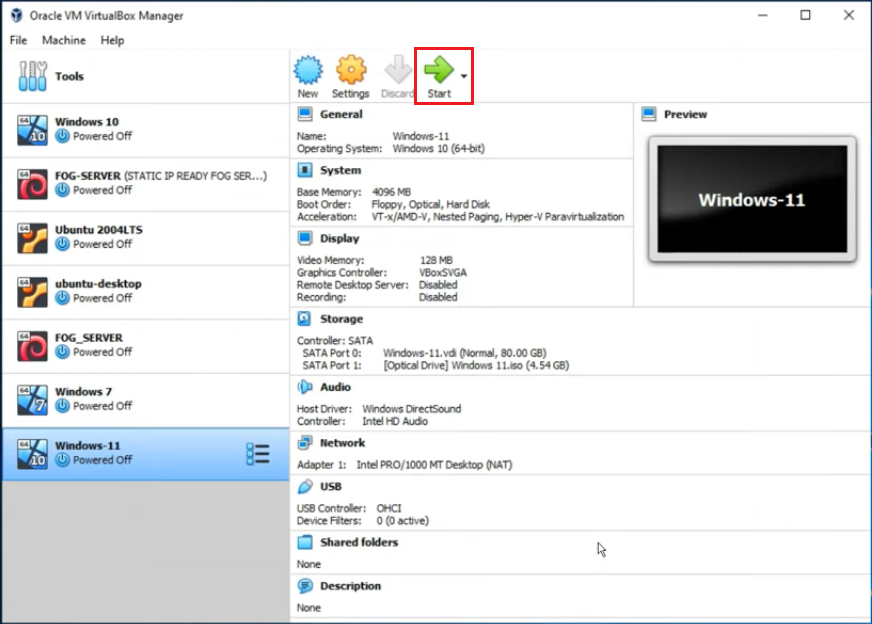
- Start Windows-11 Virtual Machine on VirtualBox.
- Again select Windows 11 ISO file for the start-up disk to Start the Virtual Machine.
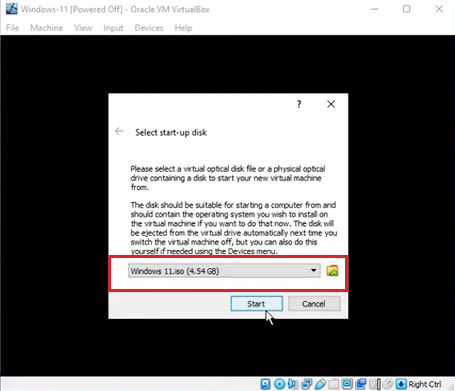
- It will start the Windows 11 on the VirtualBox, select the Windows 11 Pro, and follow on-screen instructions.
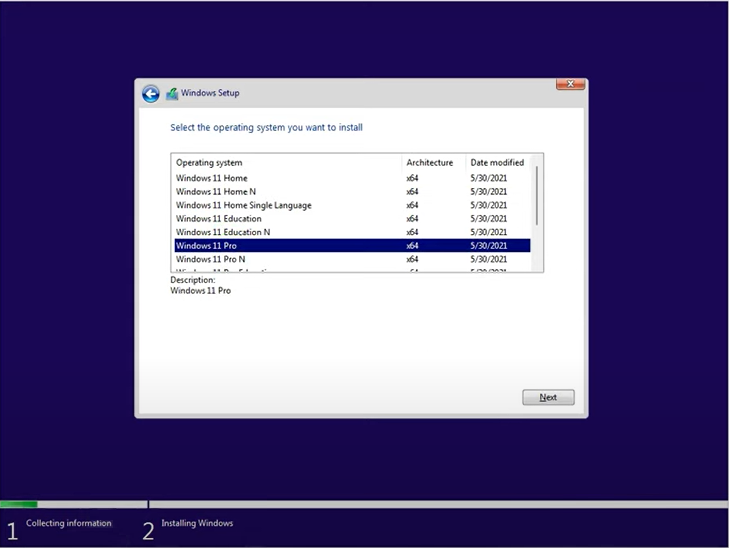
Make sure to select I do not have a Product key, and do no sign in to your Microsoft Account and use the last Sign-in options. There is a vast difference between Windows 11 Home vs Pro so choose wisely.
Windows 11 on Hyper-V
Hyper-V is a Virtual Machine tool by Microsoft available on 64-bit editions of Windows 10 Pro, Enterprise, and Education, not available for Windows 10 Home. Just like the VirtualBox, your PC will also need additional resources to run Windows 11 on Hyper-V.
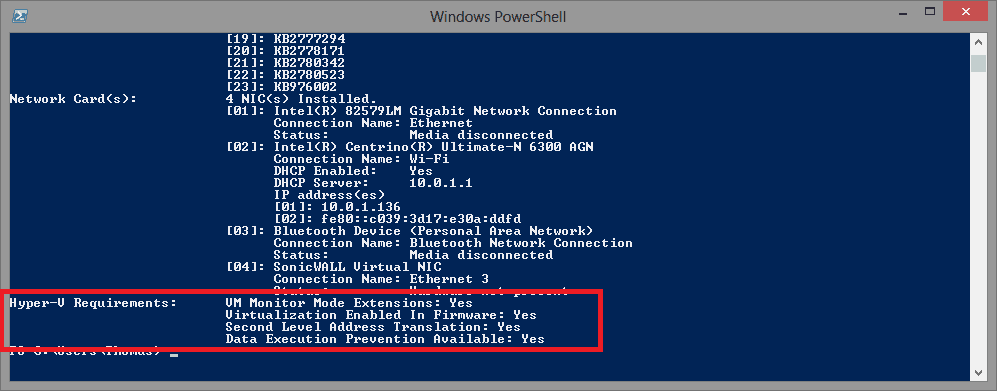
Make sure Hyper-V requirements are enabled on your computer. If you are not sure about it, then launch Windows PowerShell with admin permissions and run systeminfo.exe command. It will show all the Hyper-V Requirements at the end of the list.
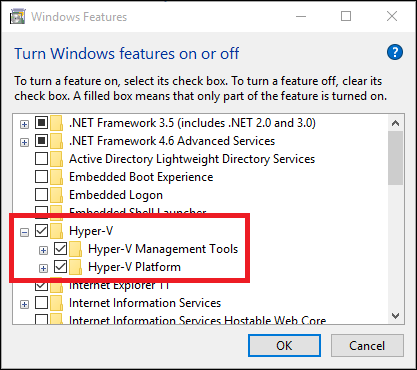
Go to Control Panel, then to Programs, and tap on Turn Windows features on or off. Enable Hyper-V, its Management Tools, and Platform.
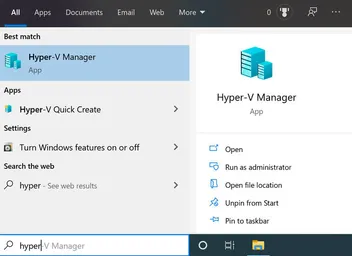
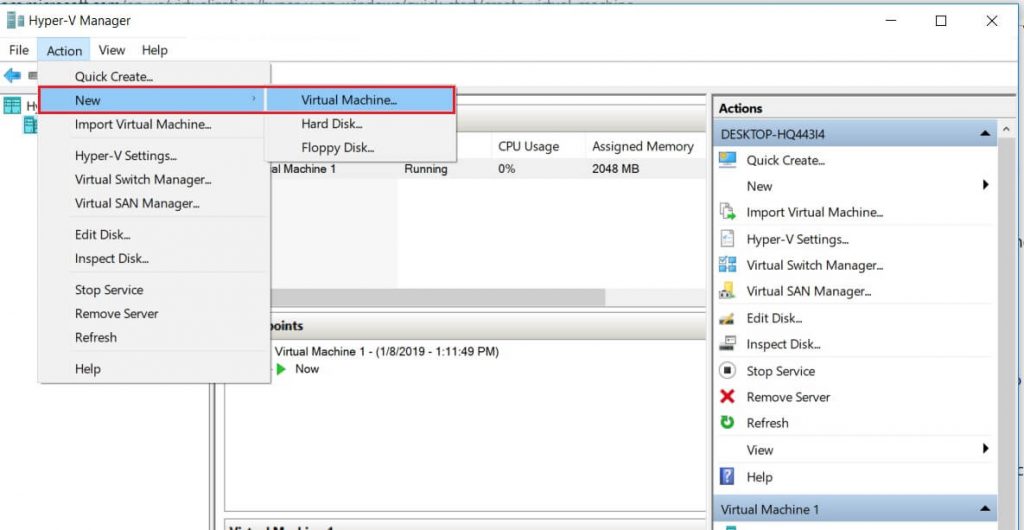
Launch Hyper-V by searching it in the Start Menu and select your PC name.
Create New Virtual Machine and name it Windows 11.
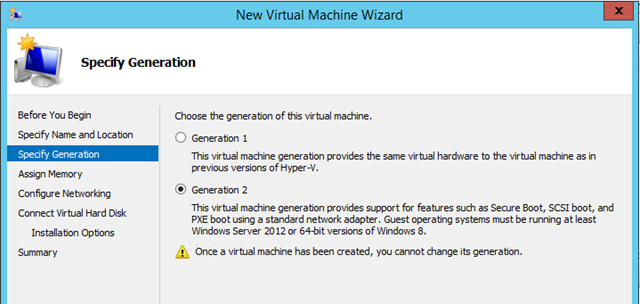
Select Generation 2 for a Virtual Machine and go to the next step.
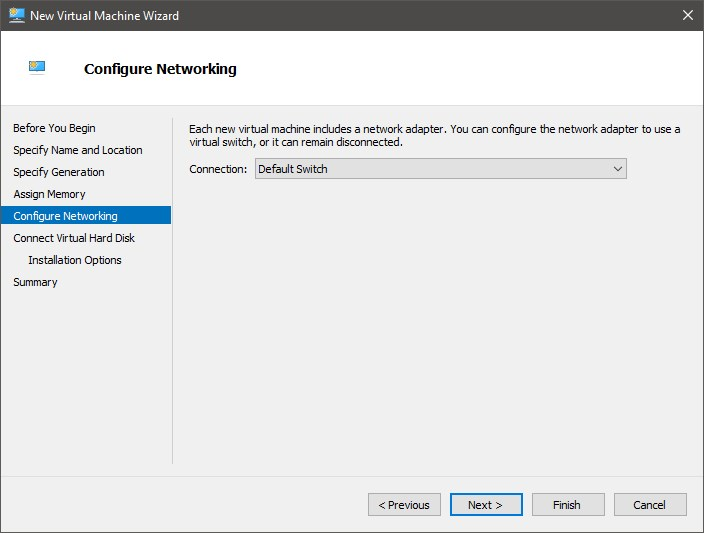
Allocate at least 4096 MB (4 GB) of RAM. Select Default Switch as the Connection type.
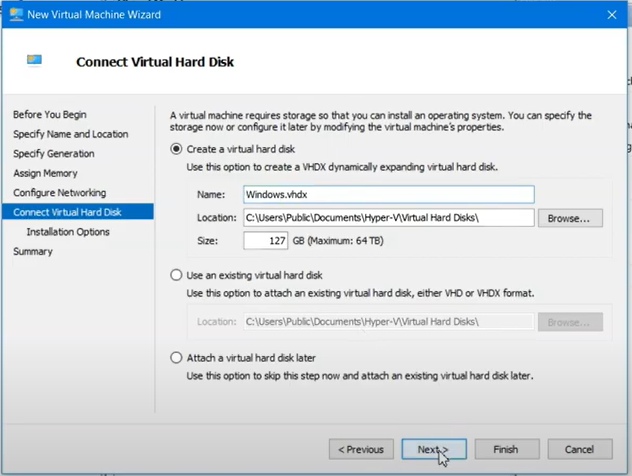
Change Virtual Hard disk Size of greater than 64 GB and proceed to the next step.
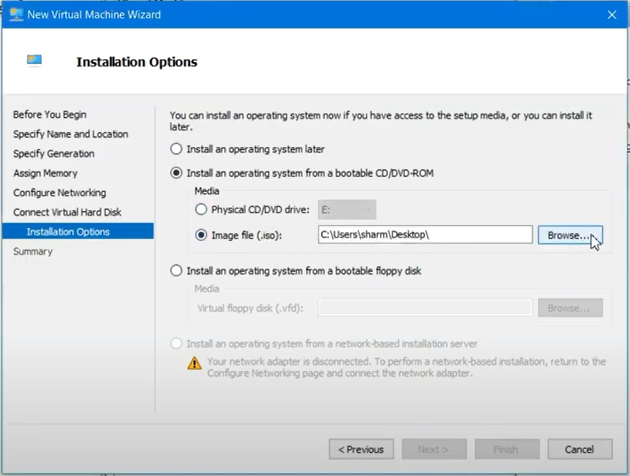
Select the second option to Install an operating system from a bootable image file, and browse the downloaded or generated Windows 11 ISO file and Finish the process.
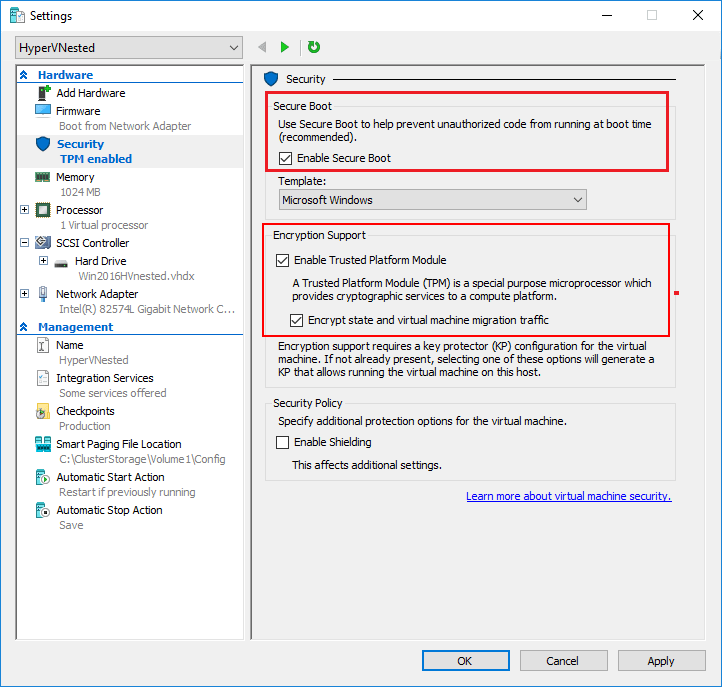
Open Settings of Windows 11 Virtual Machine and tap on its Security options from the left side menu. Tick the checkboxes of Enable Secure Boot, Enable Trusted Platform Module (TPM) and Encrypt State.
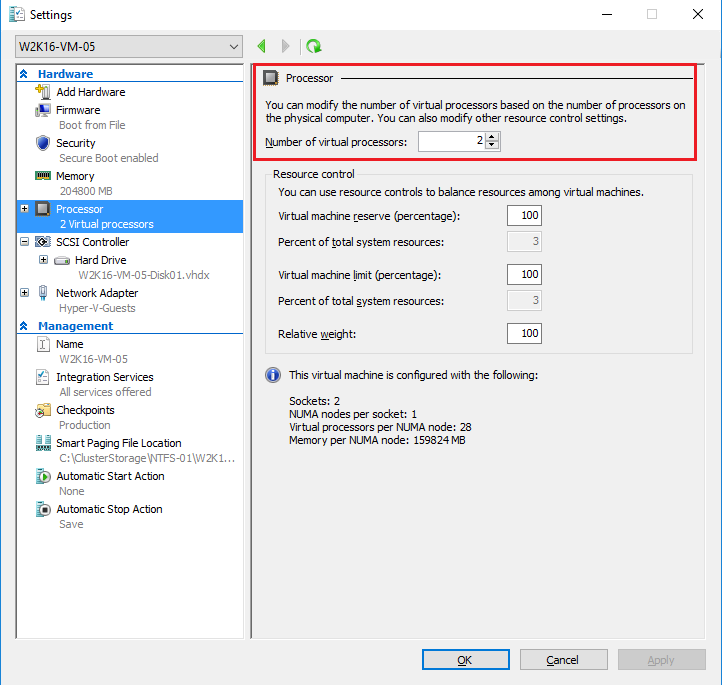
Then tap on Processor settings from the left side menu and assign 2 Core of Virtual Processors and close the Windows by tapping on OK.
Double click on the Windows 11 Hyper-V Virtual Machine to begin the installation. Follow on-screen instructions to finish the installation.