VMware Workstation and Fusion are Virtualisation software to run older or new operating systems like Windows, Mac, or Linux on top of Windows 10 and Mac (M1 or Intel). With the launch of the new Windows 11, users are really excited about settings up Windows 11 Virtual Machine on VMware.
It’s super easy to set up and run any operating system with VMware Player but has got a few twists for Windows 11 due to TPM 2.0 and Secure Boot requirements. First, we will bypass all the requirements then install Windows 11 on VMware Workstation or Fusion without errors.
Read Also, How to apply: Windows 11 Registry Bypass
Contents
VMware Requirements
Your PC must meet the VMware requirements to run Windows 11 on a virtual machine. Remember, Virtualisation is a heavy process and hence your PC must be powerful enough to run Windows 11 on top of Windows 10 or Mac (Intel and M1).
- At least, 64 GB of free storage in a drive to run Windows 11. VMware Player itself will acquire a few GB of installation space.
- More than 4 GB of virtual memory, that’s your PC must be equipped with 8 GB of RAM for supporting the host OS along with virtual OS.
- A newer and faster 64-bit processor with four cores and 1.3 GHz of clock speed.
If your PC has a TPM 2.0 chip and UEFI with Secure Boot enabled then it will be an extra cherry on the top, if not then let’s bypass them. An additional 8 GB USB is required to flash it with Windows 11 ISO image.
Read Also, How to run: Windows 11 Emulator on MAC
Download Windows 11 ISO and Bypass its Requirements
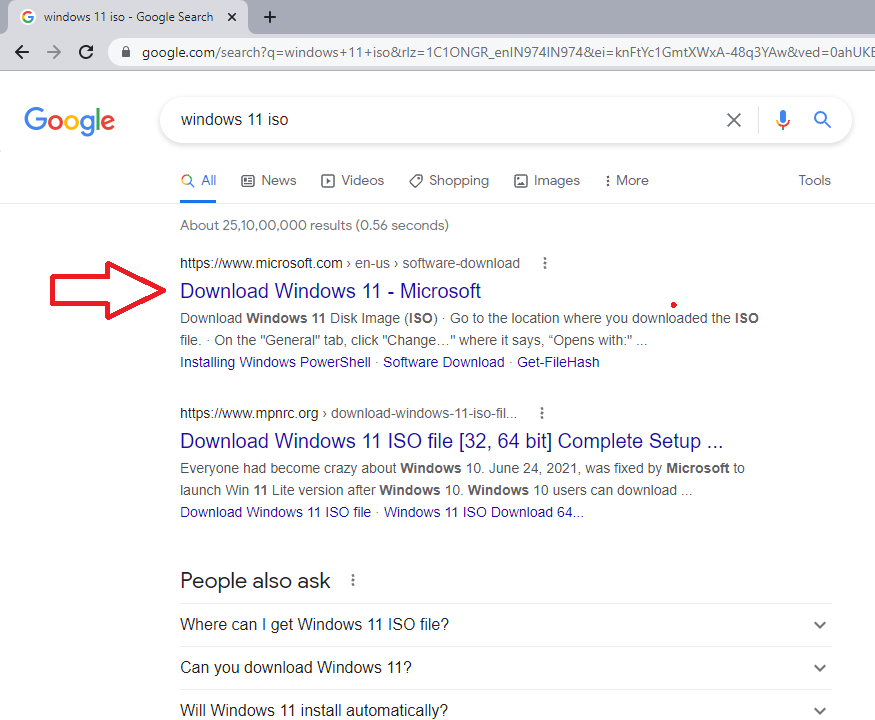
First of all, go to Google, search for Windows 11 ISO, and click on the first result by Microsoft.
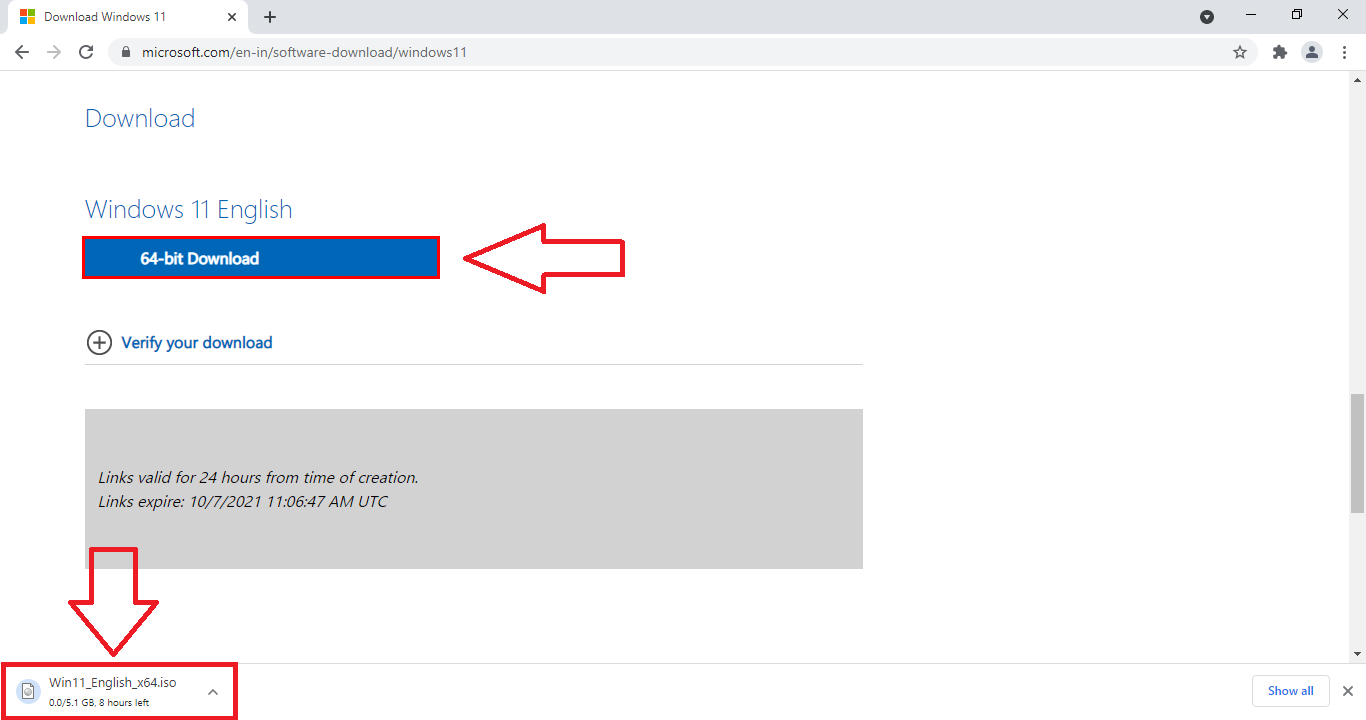
Scroll down to the Windows 11 Disk Image (ISO) section, select Windows 11 in the drop-down, choose the English language in the next drop-down, tap on the 64-bit Download button, and wait until it’s finished the download.
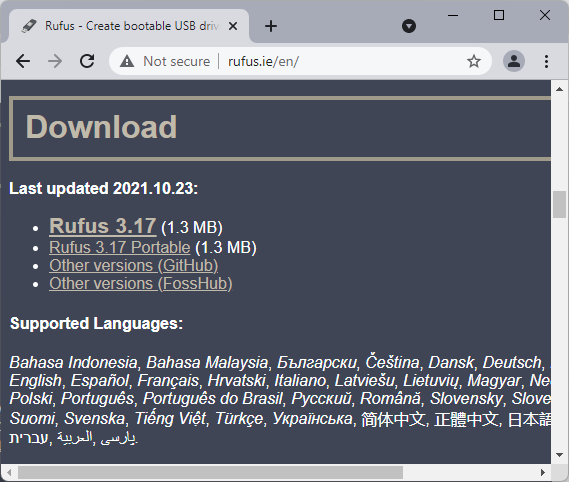
Then go to http://rufus.ie/ website and download the latest 3.17 or higher version.
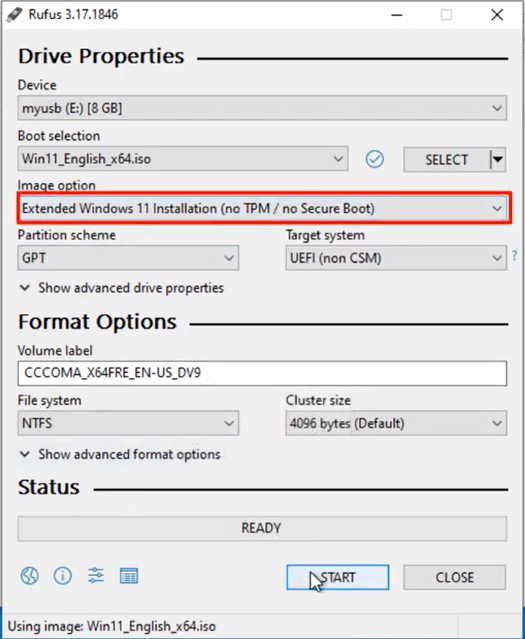
Insert the USB drive into your PC, launch the RUFUS, let it pick an inserted USB drive, select the downloaded Windows 11 ISO, change the Image option to Extended Windows 11 Installation (no TPM/ no Secure Boot), keep the Partition scheme as GPT, and click on the START button to format and create bootable USB.
It will take a few minutes to create a bootable USB on Rufus. If you are on MAC then ask your friend to create Windows 11 USB with these options.
Install Windows 11 on VMware Workstation
Now we are ready to install Windows 11 on VMware Workstation once you have its bootable USB.
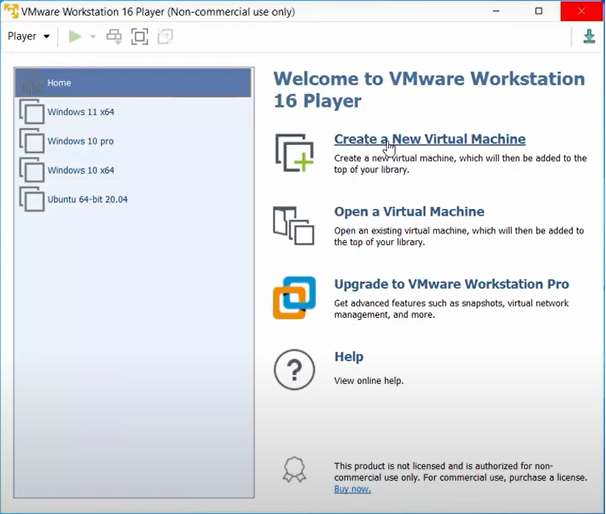
Launch the VMware Workstation tap on Create a new Virtual Machine from the right panel.
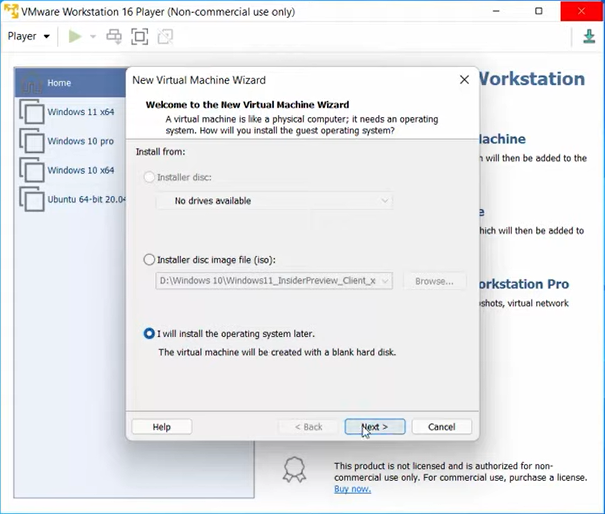
Keep the default option of I will install the operating system later and tap on the Next button.
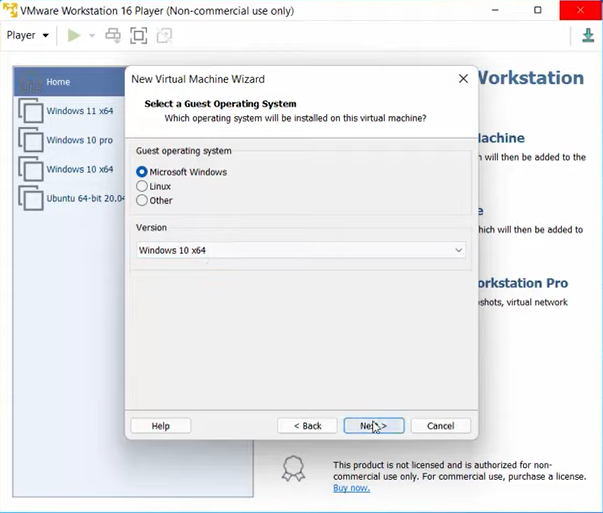
Choose Microsoft Windows as the guest operating system and Windows 10 x64 as its version.
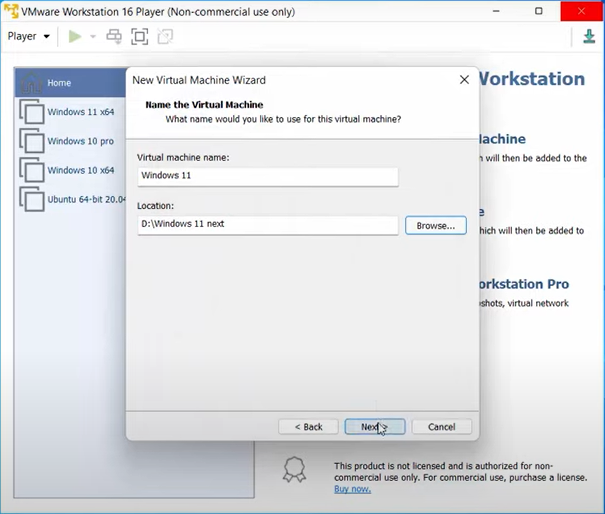
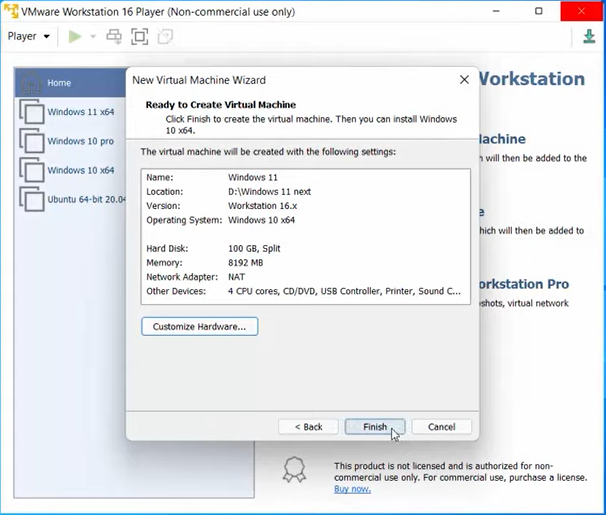
Rename the virtual machine as Windows 11 and change its location to your desired choice. Make sure that the location drive has more than 64 GB of free storage.
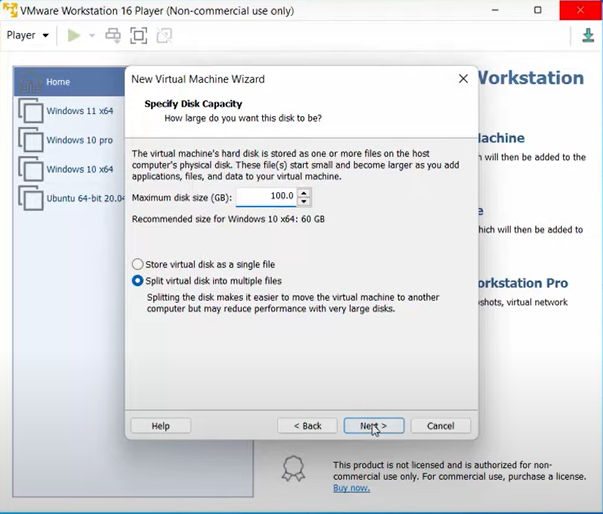
Give the maximum disk size more than 64 GB, it’s kept to 100 GB in the screenshot.
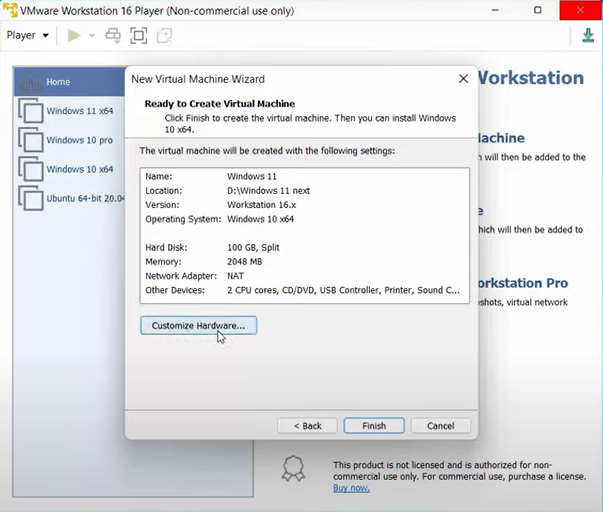
Click on the Customize Hardware button in the step before finishing the setup.
Allow more than 4 GB (4096 MB) Memory to run the Virtual Machine.
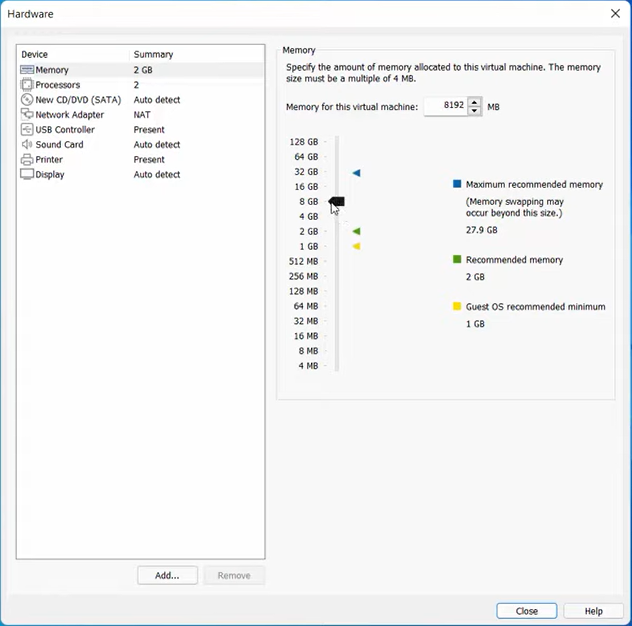
Give access to 2 or more cores in the Processors tab.
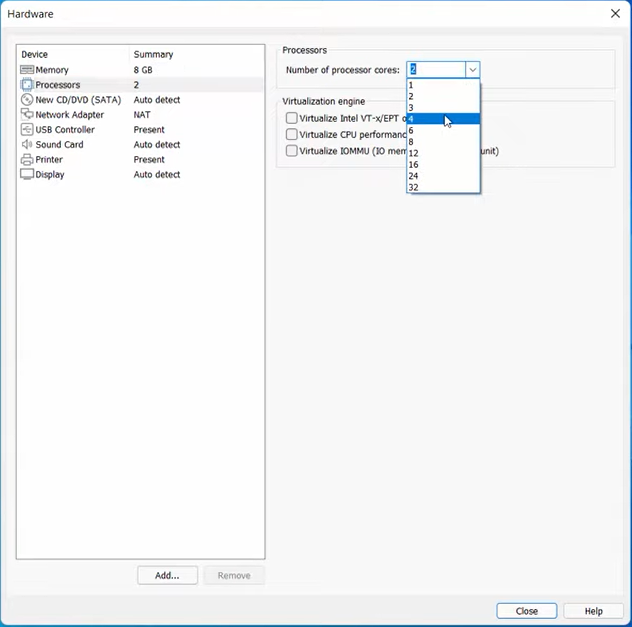
Keep the default values for the rest of the settings and close the Hardware window and Finish the New Virtual Machine Wizard setup.
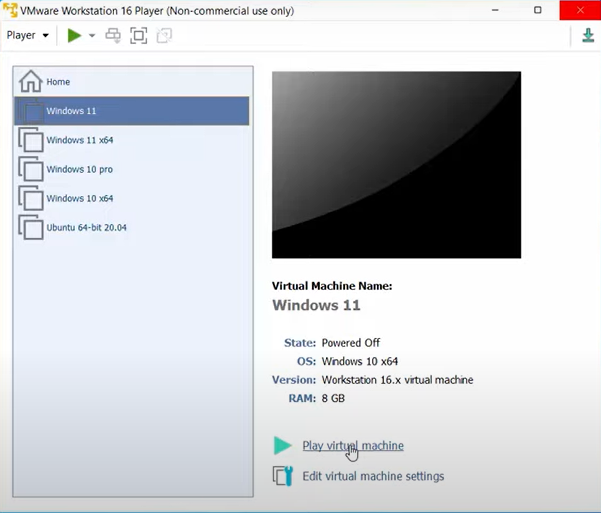
Choose your created Windows 11 Virtual Machine on the VMware and tap on the green play button.
Keep pressing the F2 key to launch the boot menu into Virtual Machine. If it doesn’t launch the boot menu then restart the virtual machine and do it again.
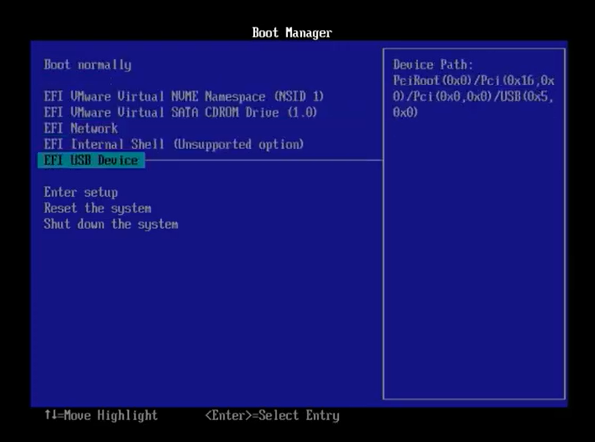
Select the Windows 11 bootable USB from the boot manager to start the Windows 11 Installation.
Windows 11 Installation on VMWare Workstation or Fusion
Windows 11 installation will be the same on the VMware Workstation or Fusion, hence we have covered it under the same topic.
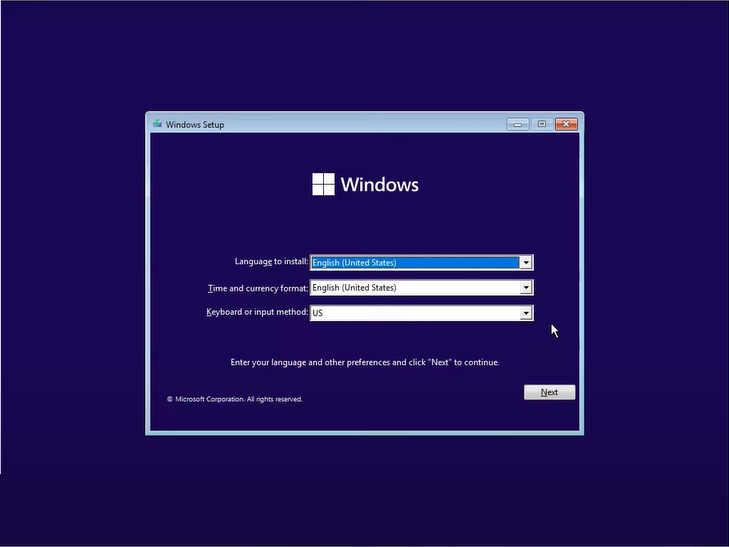
Select your desired language, time and currency format, and Keyboard input method.
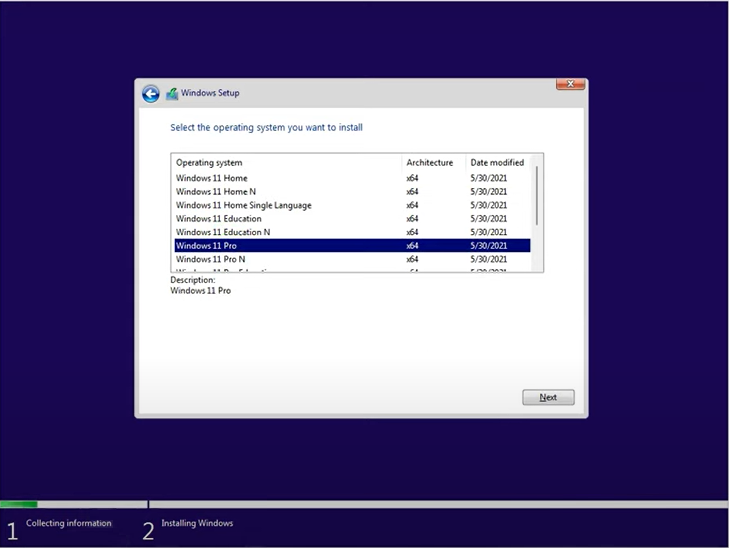
Click on the I don’t have a product key link from the bottom.

I will recommend Windows 11 Pro from all the available editions.
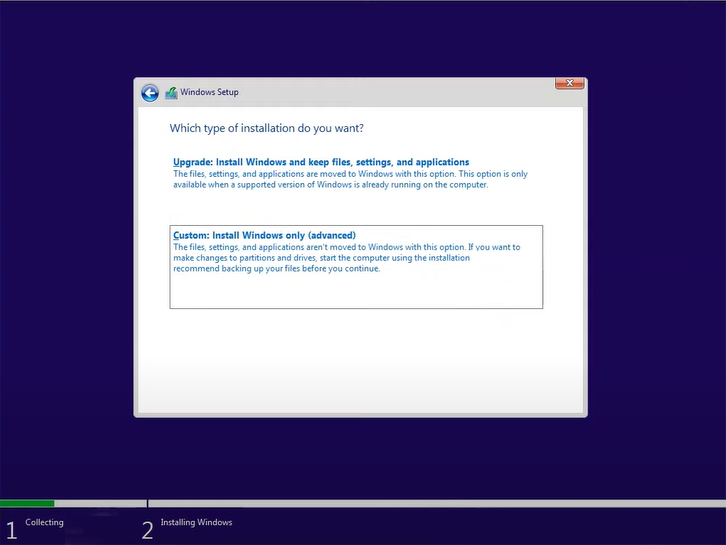
Accept the license agreement, Custom Install, and continue with the only available drive.
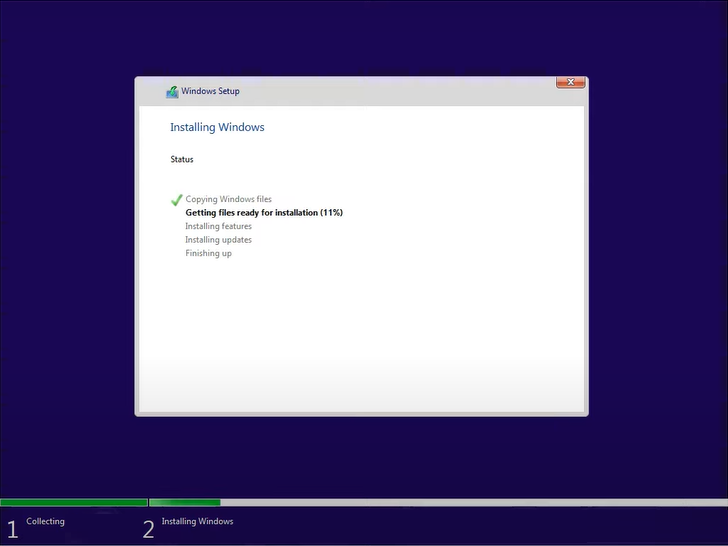
Now the setup will restart a few times during the installation.
Windows 11 setup will also offer to customize a few more options such as choosing your country, keyboard layout, naming your device, settings for work or personal use, adding Microsoft account, creating password or pin for your device, and finally will take a few more minutes giving you an actual Windows 11.

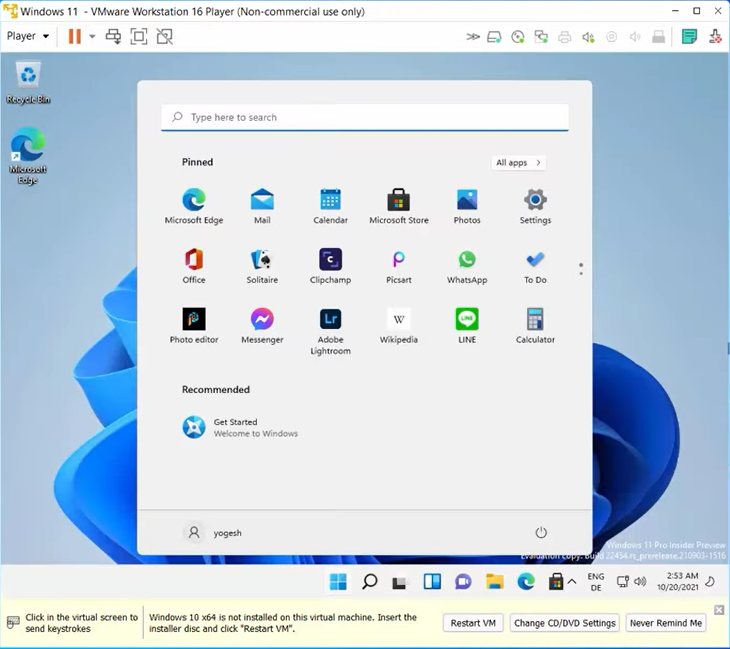
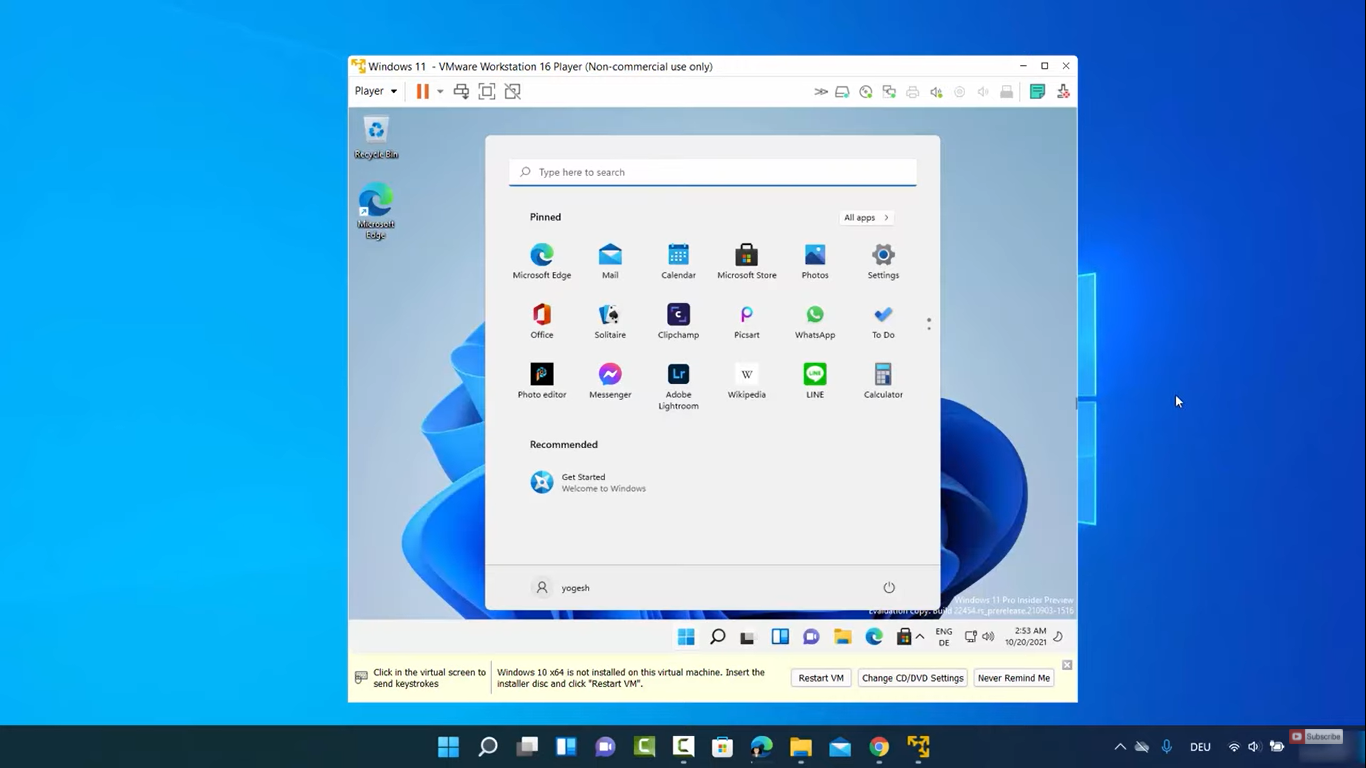
You will see a Windows 11 Start Menu once VMware Workstation or Fusion has finished the installation.
Also, do not forget to install VMware Tools to access Windows 11 in the full-screen display with all the features.
Install VMware Tools for Windows 11
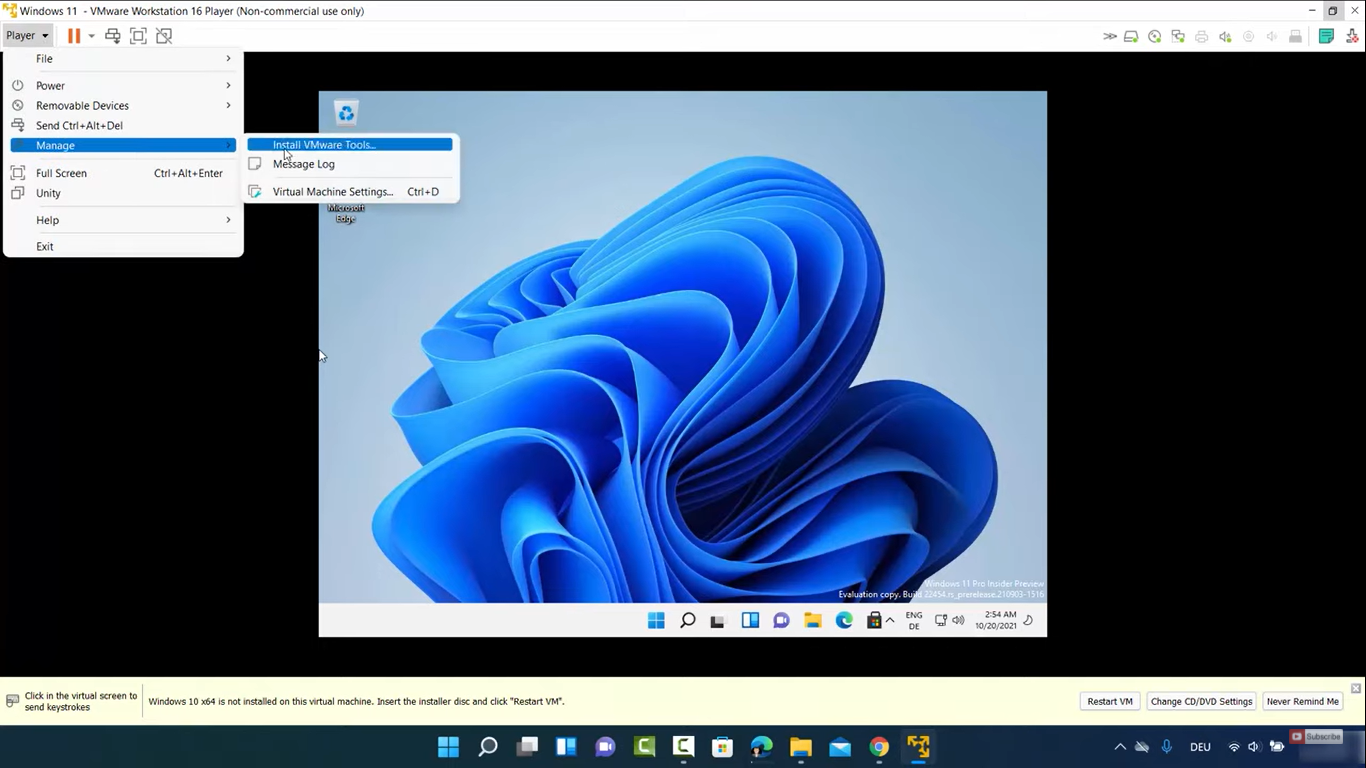
Let’s install the VMware tools for accessing Windows 11 on the full screen. Tap on the Player drop-down from the VMware window, go to Manage, and Install VMware Tools.
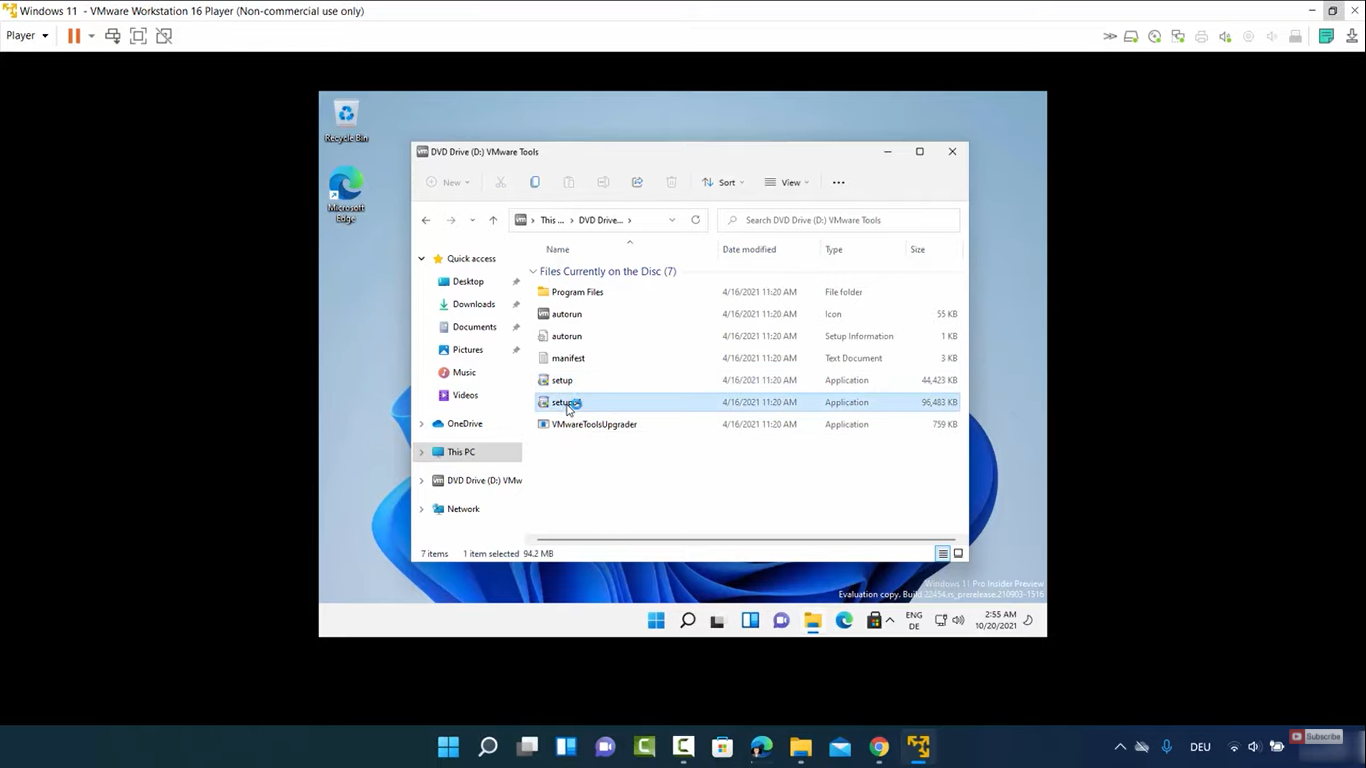
Then go to File Explorer in Windows 11, tap on the DVD Drive (D:) VMware Tools, run the setup64 file and allow Yes to the user access control.
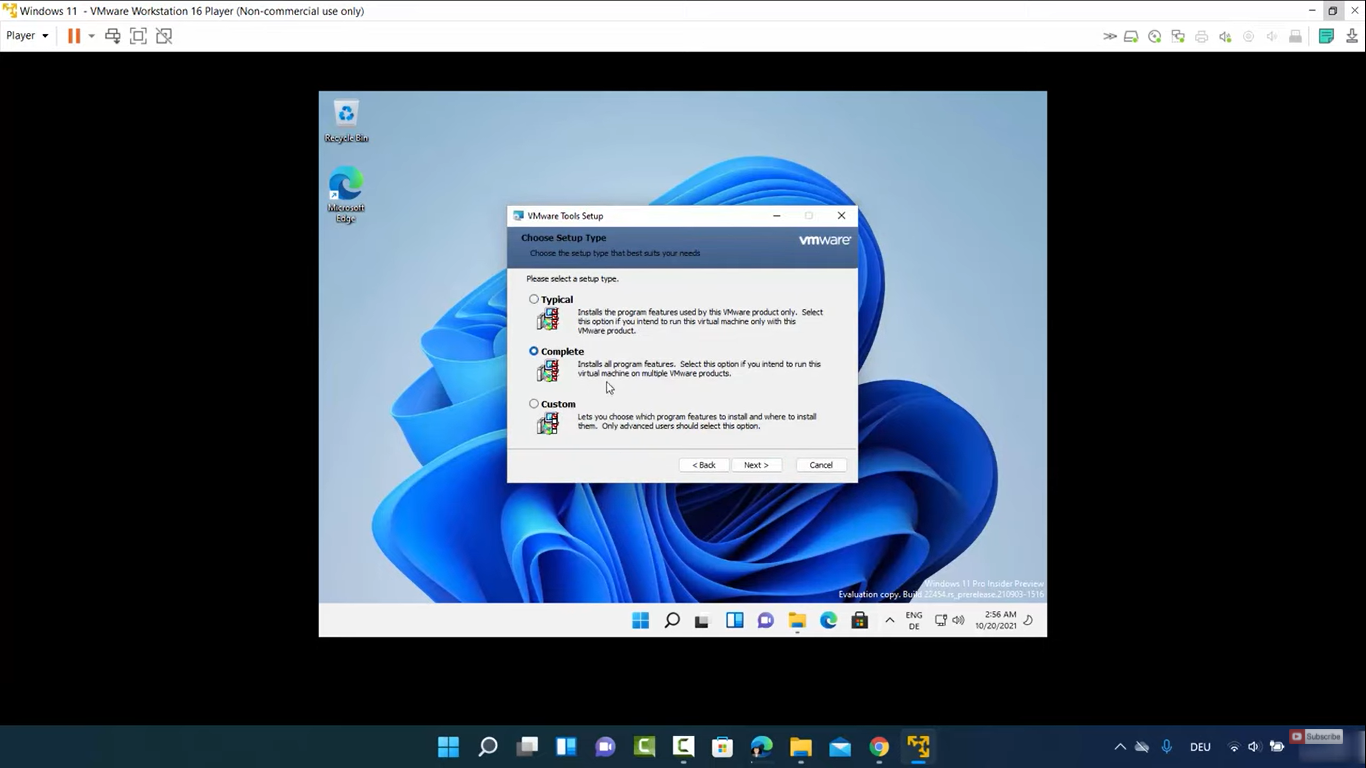
Go to the Next Step of the VMware Tools Window to Install the Complete setup.
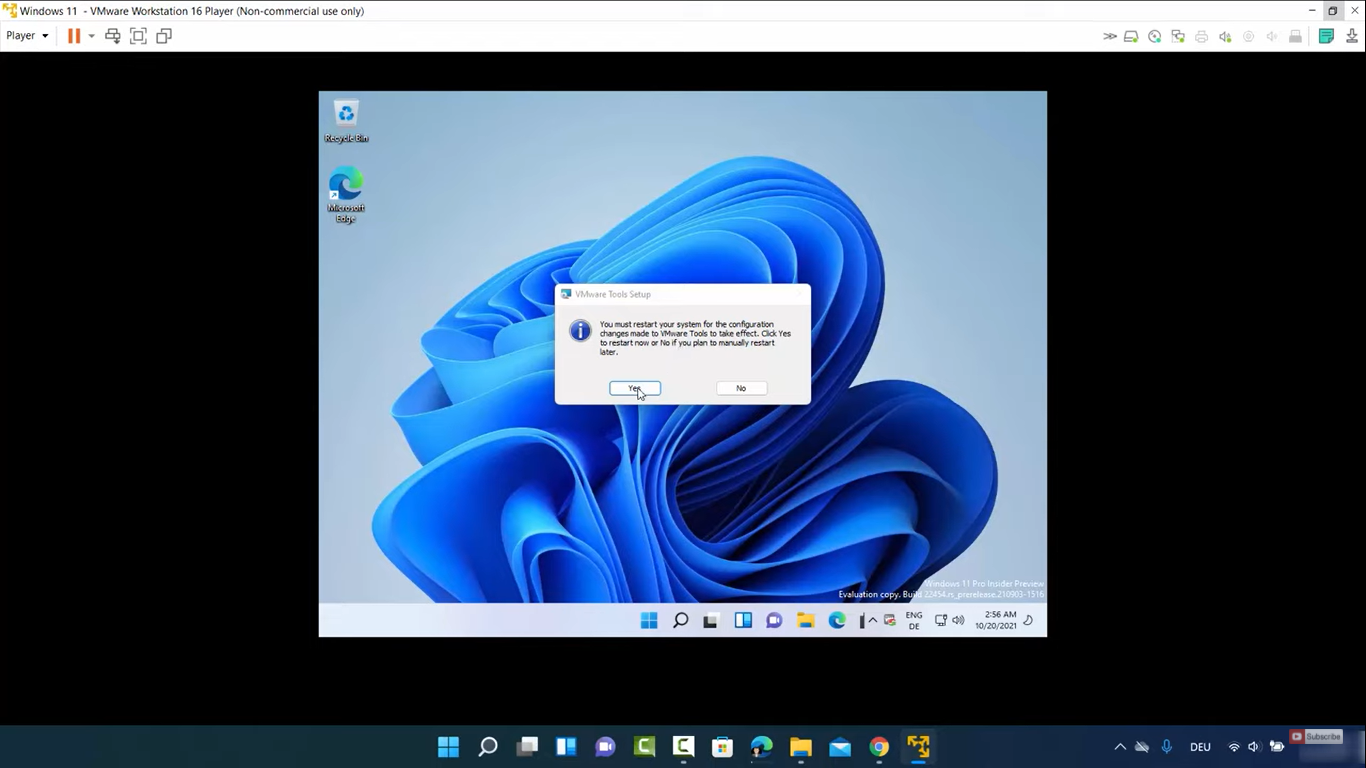
Tap on the Yes prompt to restart and apply all the changes.
Maximize the VMware to enjoy Windows 11 in a full-screen window with all the features.
Install Windows 11 on VMware Fusion
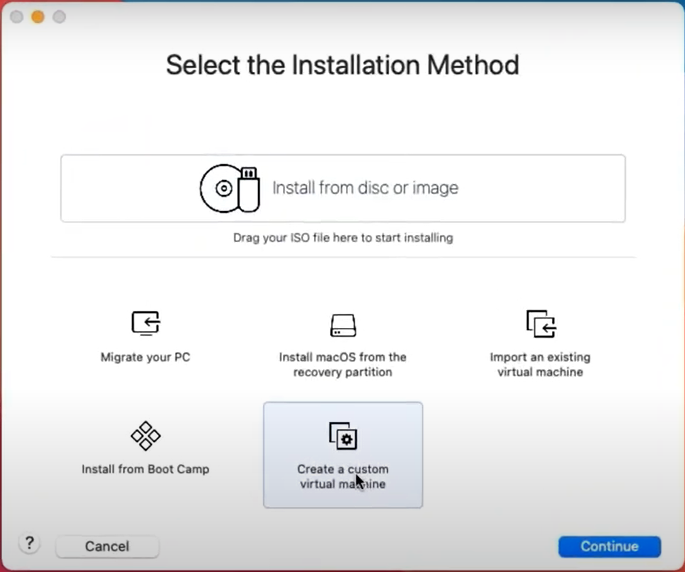
VMware Fusion and Workstation have got similar steps to install Windows 11 from a bootable USB. VMware Fusion will be able to run Windows 11 on both the Intel and Mac M1 devices. Download and Install VMware Fusion from their official website and launch it on your Macbook.
Create a custom virtual machine.
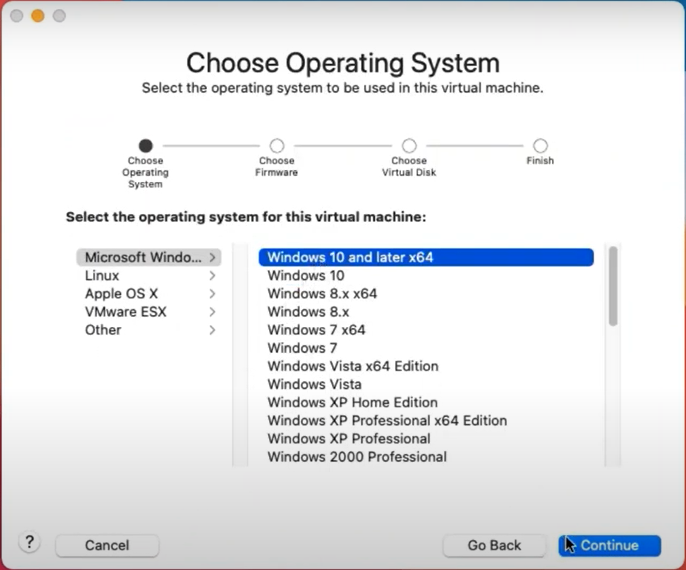
Choose Windows 10 and later x64 and continue to the next screen.
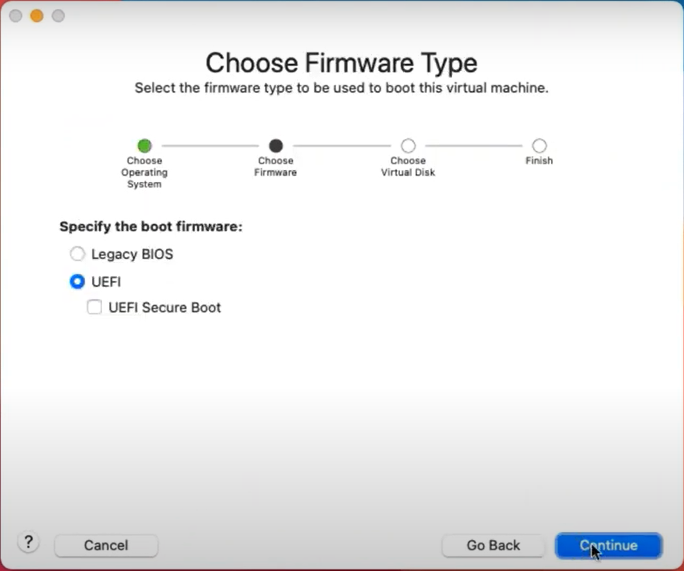
Keep the default UEFI boot firmware and Create a new virtual disk option.
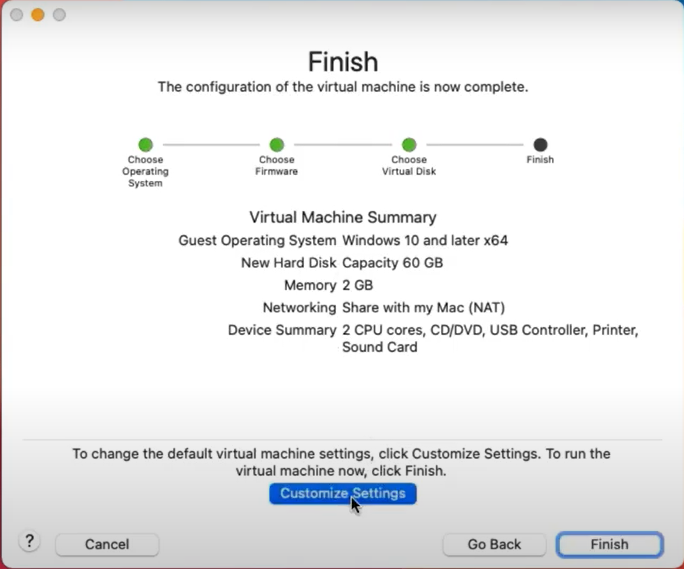
Now, let’s Customize Settings before the finish.
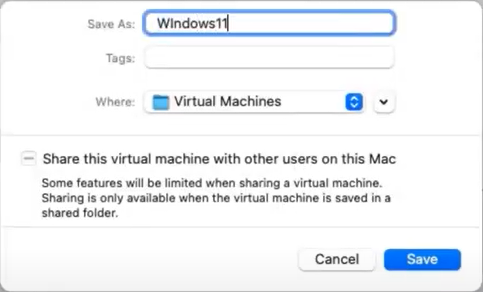
Save as Windows 11 Virtual Machines.
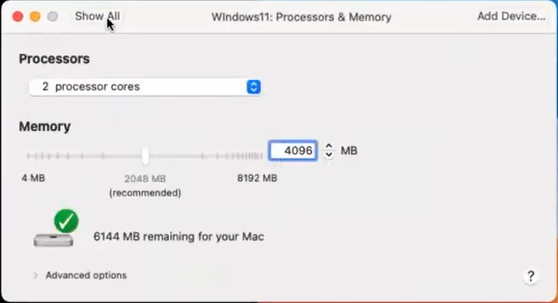
Give access to 2 processor cores, 4096 MB of Memory from Processors and Memory System Settings and go back to Show All settings from the top bar.
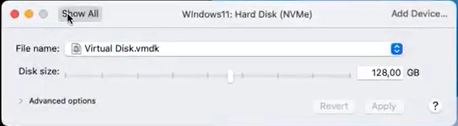
Tap on the Hard Disk option from the Removable Devices to increase the disk size to more than 64 GB and Apply. Then close the settings and make sure that the bootable USB drive is already inserted into your MAC.
Run the Windows 11 Virtual Machine in the VMware Fusion and press the F2 key to get to the boot menu options. Restart and try again until you get to the boot menu options.
Select the bootable USB from the boot menu options to start the Windows 11 Installation.
Alternatively, Parallels desktop also supports Windows 11. Follow all the steps from the VMware Windows 11 Installation. Also, do not forget to install VMware tools after the installation to access all the Windows 11 features on your Intel or Mac M1.