In the Covid Pandemic, technology has played a crucial role to face the modes of life. Everywhere is aware of Coronavirus precautions of safe distance. Even forceful lockdown was also imposed to slow down the spread. The school, colleges, institutes, business organization and etc are has been closed and uses the Zoom video conferencing app to contact or to do a meeting with students and employees. There are many video conferencing apps but Zoom is the best out of them.
Users who have used this conferencing app has reported that Zoom causes high CPU usage on Windows, Mac, and Chromebook. Have you ever thought that why Zoom is famous in spite of having close competitors? Zoom meetings give high video quality conferences to multiple users.
Zoom app causes high CPU usage due to multiple processes in the background during meetings. Many users have reported a “Your CPU usage is affecting meeting quality” warning message between meetings. It means high CPU usage problems exist.
Contents
How to see CPU usage on Windows, Mac, and Chromebook?
Well, you can see the percentage of CPU usage by Zoom on Windows, Mac, and Chromebook. On task manager, you will have information about processes and applications that are running on your system. It shows the CPU usage, Memory usage, Disk usage, Network, Power usage, etc. If you want to open task manager on Windows then hold the ctrl key, alt key, and delete key. It will track the usage differently if you are attending meetings on Chrome or using Zoom on Windows 10 S mode.
If you want to launch task manager on Mac then press the cmd key, alt key, and ESC key. You will have a screen name as Activity monitor which is the same as the task manager. So, in it, you will have all the information about running applications and processes.

If you are a Chromebook user and you want to open task manager then hold the Shift key and ESC key. Now go on the Zoom application and see CPU usage of it. If it seems high then go through this blog to fix it.
Tips to fix high CPU usage on Zoom
Try out these tips to reduce the high CPU usage by Zoom on Windows, Mac, and Chromebook. These tips might or might not work but can be applied on all the devices including Chrome browser and extension.
- First of all, make sure that during the Zoom meeting other apps are closed.
- Also, make sure that other apps are not downloading and uploading the files or images.
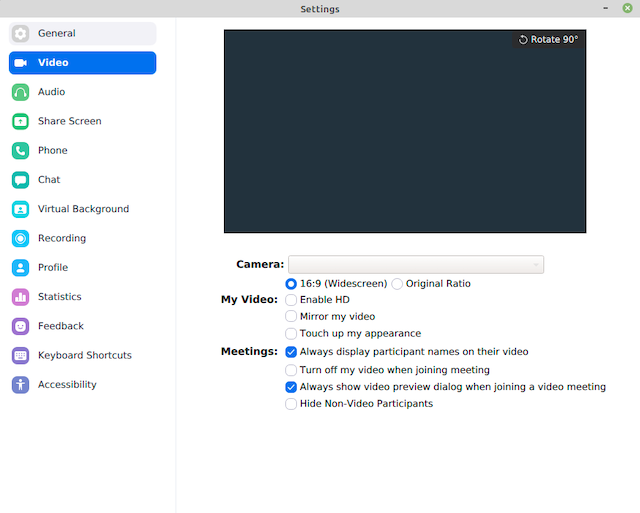
- Change Video Settings: Launch the Zoom Settings and tap on the Video option. At first, enable Original ratio and then disable settings name as HD, Mirror my video, and Touch up my appearance.
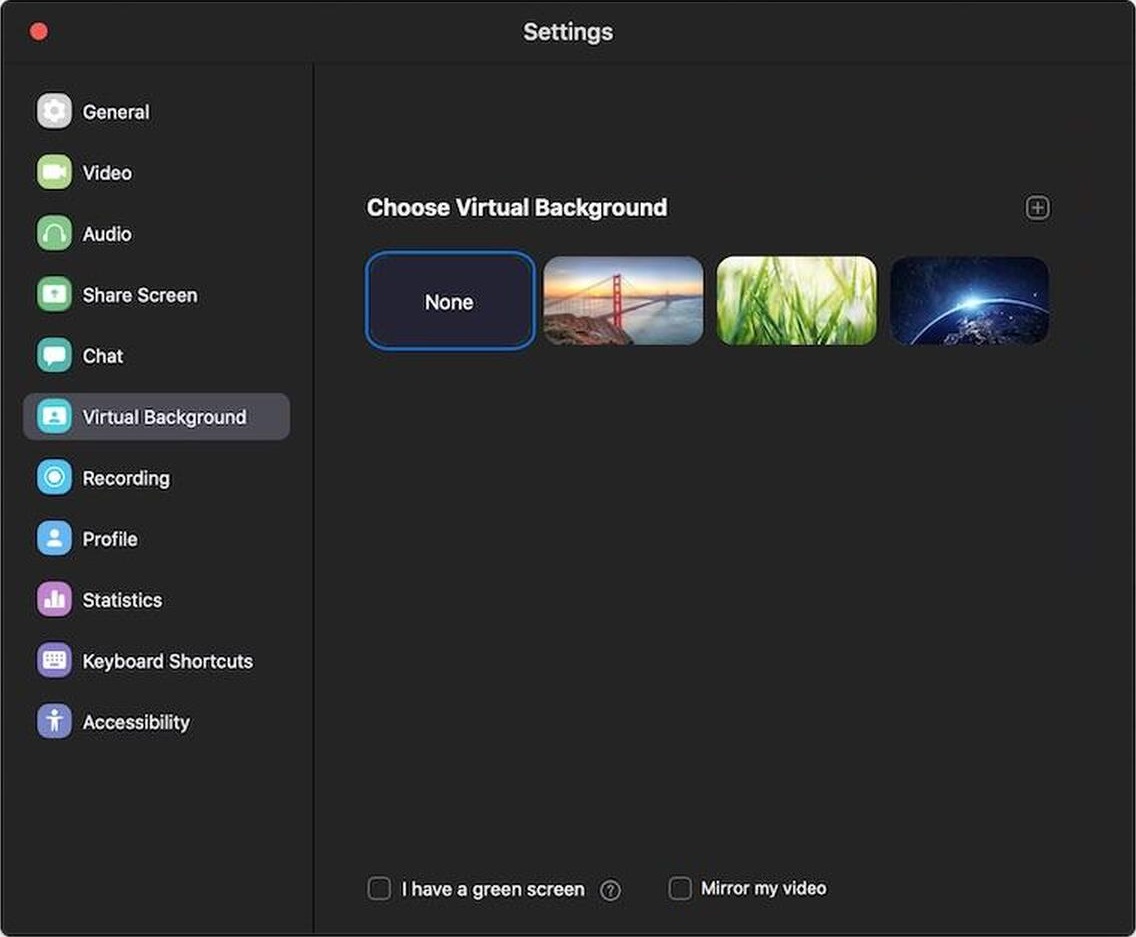
- Disable Virtual Backgrounds: Keeping the enable virtual background feature during a meeting is somewhat interesting and attractive too but when it comes to CPU usage then it plays a big role. To disable it go to Zoom settings and tap on the Background and Filters. After this choose None under the Virtual Backgrounds section.
- Make sure you use Speaker view instead of Gallary view while you are on the call.
- If you are a Zoom user then you already know what is screen sharing. If you want to reduce CPU usage then launch Zoom settings and tap on the Share Screen. At the bottom, you will have the Advanced option so tap on it. Now enable the option saying Limit your screen share to 10 frames-per-second. After this tap on the 10 and from the drop-down menu tap on the 4.
Once you finish with this then apply the advanced solution to fix the CPU usage problem by Zoom.
Read Also: Fix High Network Usage by Service Host Processes
Advanced fix: Reinstall Zoom App on Windows, MAC, and Chromebook
Many users have reported that reinstalling the Zoom app fixes the high CPU usage on Windows, Mac, and Chromebook. Reinstallation will automatically update your Zoom app. The latest and the fresh version will have fewer bugs and issues than the older versions. The reinstalling process for Zoom is somewhat different in Windows, Mac, and Chromebook so I have given separate steps for all 3 operating systems.
For Windows user
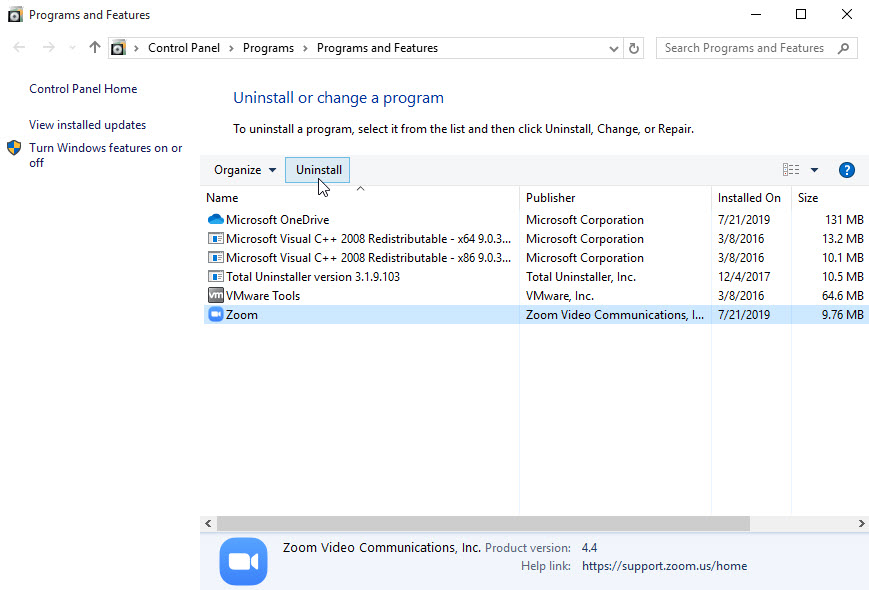
- Launch Control panel with the help of search bar.
- Once you have it then tap on the Programs and Features option.
- From the list tap on the Zoom and hit on the Uninstall button.
- After this go on the Zoom official website to download it.
- Scroll the download page till the bottom and tap on the Download.
- Now you will have the Download Center page so go on the Zoom Client for Meetings section and tap on the Download button.
- Once it is downloaded then tap on the .exe files to start the installation process.
After installation, you can enjoy the Zoom app on your Windows.
For Mac Users
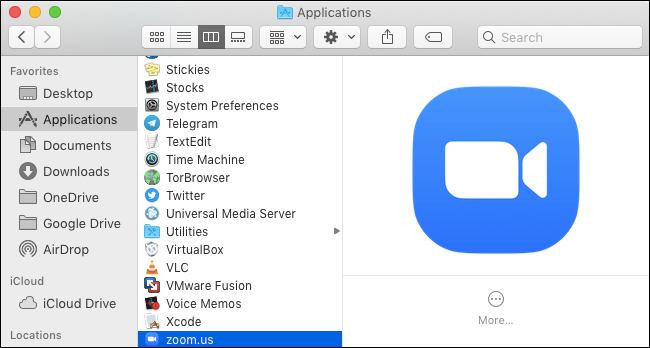
- At first, launch the Zoom desktop application and choose zoom.us from the top menu.
- From the open menu tap on the Uninstall Zoom.
- Now you will have a confirmation message to confirm it tap on the OK button.
- To download it back go on the Zoom official website and follow the steps which are for windows.
After all, you can have fun with the Zoom app on Mac operating system.
For Chromebook Users
- Tap on the Launcher which is on the bottom left corner of the screen.
- Now tap on the upper arrow to have all the apps.
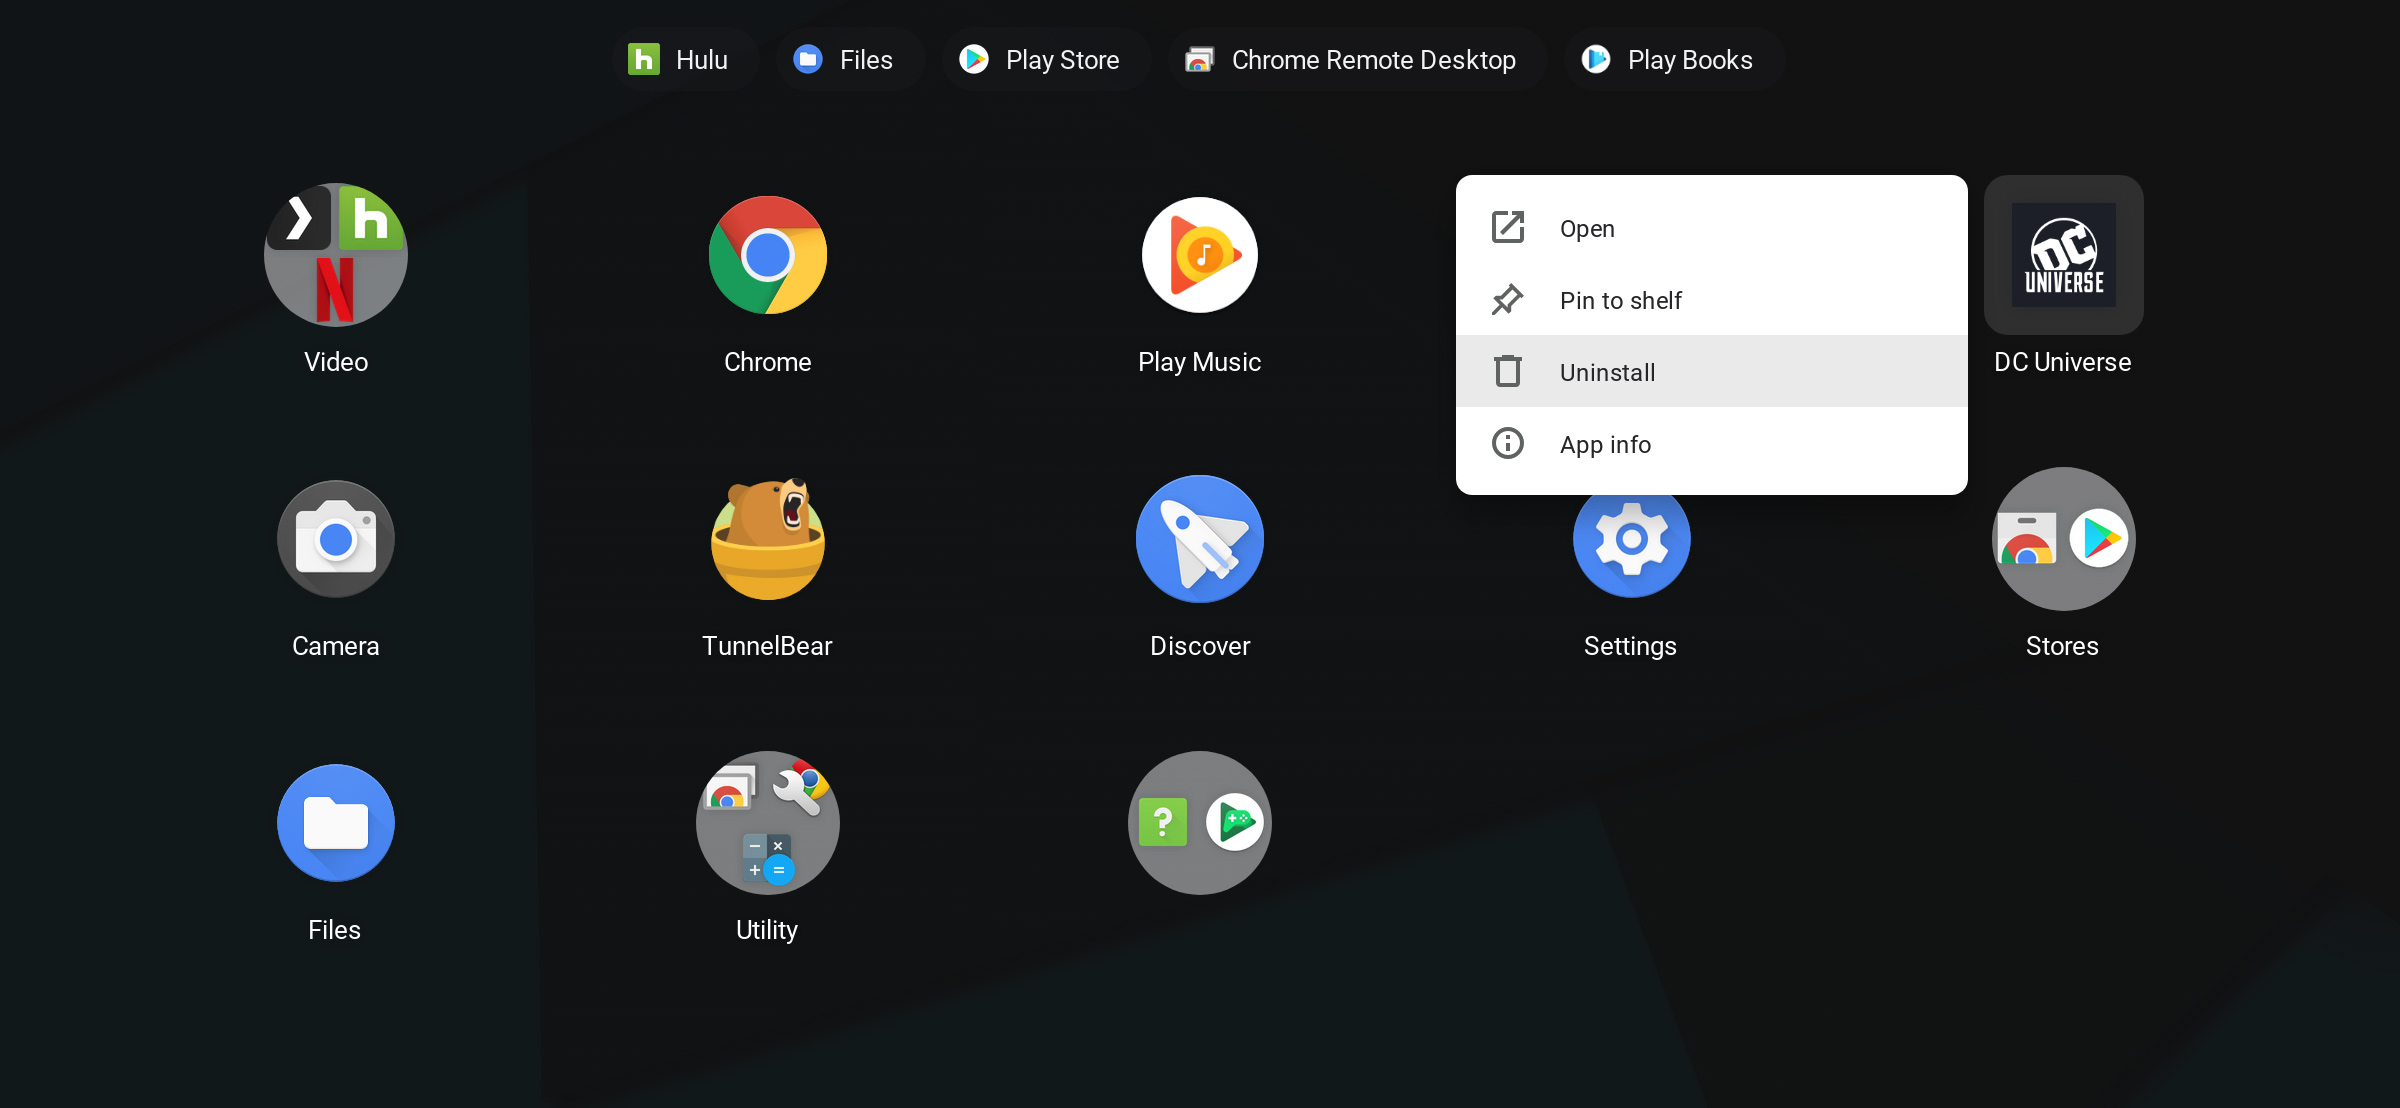
- Scroll the till you won’t get the Zoom app. Once you get it then do right tap on it and hit on the Uninstall option.
- At last, once again tap on the Uninstall button.
- After uninstallation to download it back launch Chrome on the Chromebook.
- In Chrome search for Chrome Web Store.
- Once you have it then in Web Store search for Zoom app.
- After this tap on the Add to Chrome button. Before this make sure that this Zoom app is from zoom.us.
- By doing this you will have permission to request a message with the option name as Add app so tap on it.
- If Zoom is successfully installed then you will have a notification saying Zoom was successfully added to your Chromebook.
Now if you want to use the Zoom app then go on the App launcher and make use of it.
Read Also: Change name in Zoom Meetings
I hope by reading the above tips and advanced fix you have reduce or fix high CPU usage by Zoom on Windows, Mac, and Chromebook. If tips won’t work then only do reinstall of Zoom app.