Well, here I want to ask you a question that “Do you enjoy watching movies, web series, and videos on a laptop screen or on a big screen such as TV and Monitor?”. Your answer will be “Of course big screen”. It is because you can enjoy it from a sofa. Apart from it, there are many advantages of smart TV such as large dimension, high resolution, and color.
There are a number of tools by which a Windows user can cast their Windows 11 or 10 on TV but here I want to discuss one of the best-inbuilt tools named Miracast. To know more about Miracast for Windows 11 or 10 continue reading this post till the end.
Read Also: Record Window 11 Screen
Contents
What is Miracast?
Miracast is an inbuilt tool on Windows 8, 10, and 11. It is for managing the wireless connection between Windows devices and big screens such as smart TV, Monitors, and Projectors. It has replaced the cable and different peripherals connecting to a device. Now the cable is replaced by HDMI over Wi-Fi. This has made possible wireless networks between two different devices.
Miracast was introduced by WiFI Alliance to give the high video quality and sound quality that is up to 1080p HD and 5.1 surround sound respectively. This much video quality and sound quality is all most enough for an average user. Apart from this, there are multiple advantages of Miracast such as quick content projection, support on the existing network and wireless hardware, and automatic detection.
In this blog, you will see a detailed guide on “How to check if your Windows 11/10 and TV support Miracast? How to set up and use Miracast on Windows 11 or 10? and How to wirelessly project Windows 11 or 10 to an HDTV?”.
Fix Screen Cast Error: Source not supported
Check if your Windows 11/10 and TV support Miracast
Before going on a guide to using Miracast at first you should check whether both devices support Miracast or not. Here below are the steps for both devices.
For Windows 11 or 10
- Launch Windows Settings on your PC or laptop.
- Tap on the Display option for the further process.
- Go to the Multiple display section and check “Connect to a wireless display” option is available.

If it is available it means that your Windows device supports Miracast.
Read Also: Get Chromecast App
For Smart TV
- You can find a screen-sharing option in TV Settings. It may be labeled with different names such as Screen Casting, Wireless Display, Miracast, Screen Mirroring, and Wi-Fi Casting. The name depends on the model and company of the TV.
- If the above step won’t work then hold press the Menu button and select Apps. In the apps screen look for apps related to screening sharing options. You can do it using the Remote of your TV.
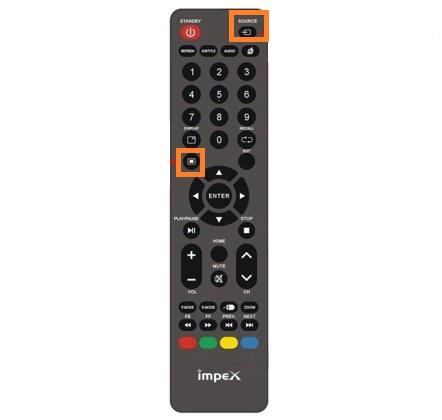
- There is a TV on which there is a separate button on its remote for screen sharing. In this case, press the Source or Input button and then select Screen Casting, Miracast, or Screen Mirroring.
At last, if you don’t get the above options then it is clear that your TV won’t support Miracast.
Set up and use Miracast on Windows 11 or 10
Before setup and using Miracast, you should first have the latest Miracast drivers. As you are using the Miracast inbuilt tool there is an app on Microsoft Store named Microsoft Wireless Display Adapter. Make sure you install it from Microsoft Store in order to have the latest wireless drivers automatically. Once you have supported devices and updated Miracast drivers then you are all set to set up and use Miracast on Windows 11 or 10. If you don’t how to set up and use then follow the below steps properly.
- On your TV turn on Miracast if it is supported. If it is not supported then in the HDMI port of your TV connect an external adapter. Make sure you turn it on.
- After on your Windows device follow the path as Start > Settings > Devices or Bluetooth or devices.
- On the screen, you will have Add a device option so tap on it.
- Now tap on the Wireless display or dock option from the prompted screen. Do select the wireless display from the list.
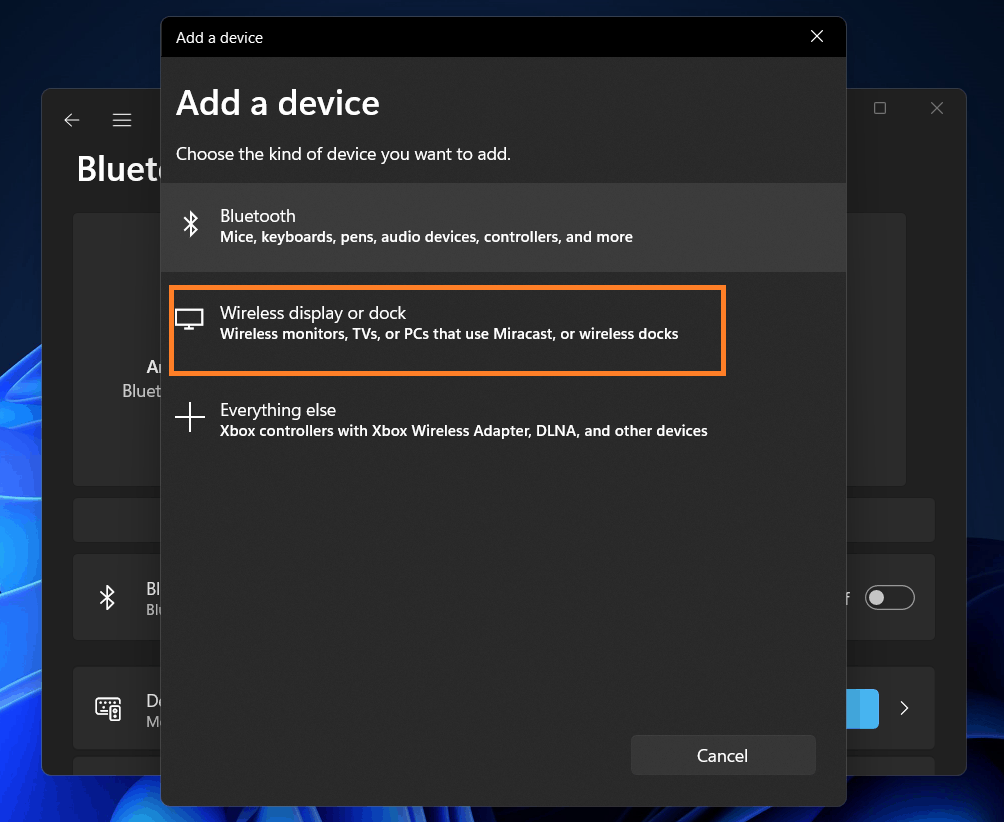
Your PC is now connected to the Wireless Display.
Read Also: Mirror VLC to Chromecast
Project Windows 11 or 10 to TV Screen
In this guide, you will see how to cast Windows 11 or 10 screens to an HDTV. In order to mirror your Windows screen apply the below steps.
- Now you have to set up an orientation. You have to do it using Projection Settings. To have it hold Windows key and P key.
- On the projection screen, you will have four options such as PC screen only, Duplicate, Extend, and Second screen only but you have to tap on “Connect to a wireless display”.
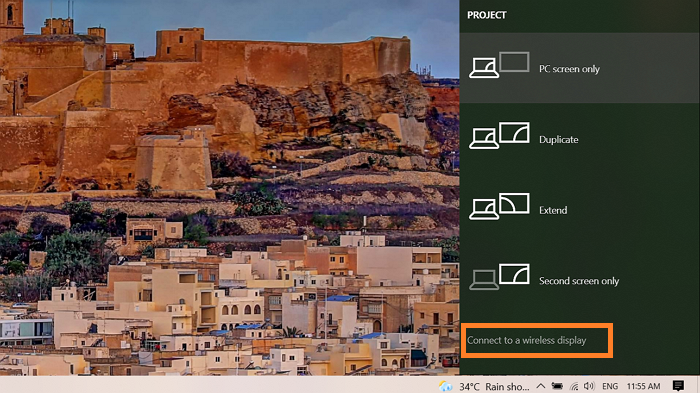
- Now it will look for devices using a wifi connection. It will also list old connected devices.
- From the list select the device you want to cast on TV.
Finally, now you can stream movies, videos, Netflix, and lot many other things from your Windows 11 or 10 to the big screen.
I hope that after reading this blog you have successfully cast your Windows 11 or 10 on Television using the Miracast inbuilt tool.