On Windows 10, keeping a record having a Screenshot is easy and simple. A user can use simple keyboard shortcuts to take screenshots on Windows 10. The problem occurs when a user wants to record a video of his/her activities on Windows 10. Recording video of activities such as gaming, browsers, web apps, and programs is somewhat difficult for normal users. If you are one of them then believe me this blog will be really beneficial for you. As it relates to your problem the content of this blog is only made keeping you in mind.
In this blog, you will see one inbuilt tool and one third-party tool to screen record with audio on Windows 10. Number of Windows 10 users are not aware of having an inbuilt tool name as a Game bar on Windows 10. The Game bar screen recording tool comes under the Xbox app. On Windows 10 the Xbox app is installed by default. Recently Xbox Game bar got an update that includes useful features. In this blog, you will see steps to use the Xbox Game bar and OBS Studio.
Before going on the actual content of this blog let me clear to you that we have selected Xbox Game bar and OBS Studio keeping in mind sound quality, video quality, screen capture abilities, sharing option, and user friendly.
Contents
Xbox Game Bar
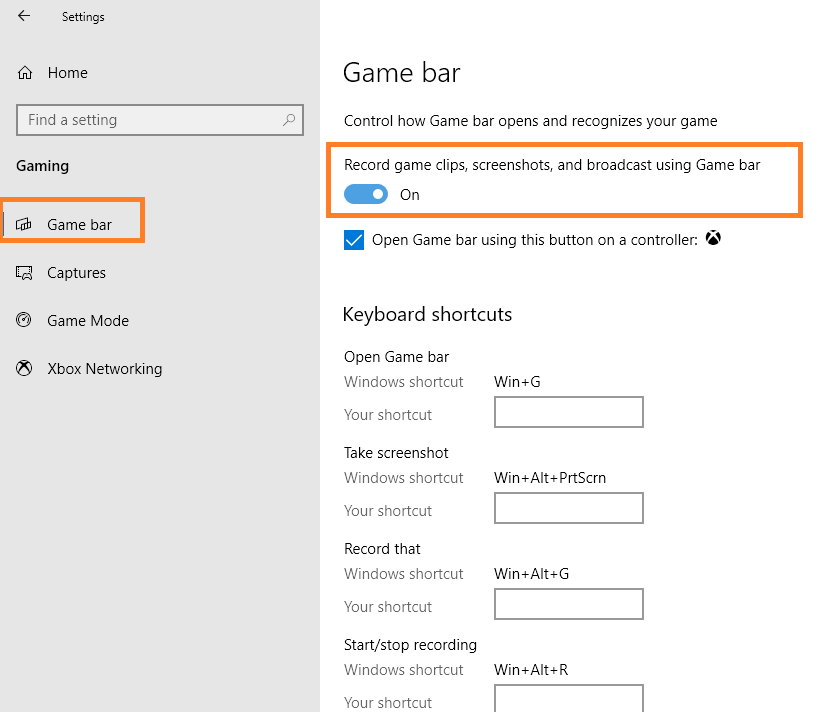
The Xbox Game bar is meant to record games on PC. You can also use it to record browsers screen, Windows applications, and other programs. If you use it to record the screen then the video recording will be saved as an MP4 video file. Before recording the screen video make sure you enable the Game bar on Windows 10. To enable launch Settings app and tap on the Gaming option. After this from the left pane tap on the Game bar option. It will be open on the right side of the same screen. Now do the toggle on of option saying “Record game clips, screenshots, and broadcast using Game bar”. You have enabled the Game bar on Windows 10.
- Launch the app you want to record. It may be a web browser, programs, folder, or anything.
- Now it’s time to open the Game bar by holding the Windows key and G key. If the Game bar won’t open using this keyboard shortcut then it means that the Game bar is disabled. Make sure you enabled it.
- To record the screen go to the left corner and tap on the White circle from the Capture window. If you won’t find this setting then tap on the webcam icon from the top screen.
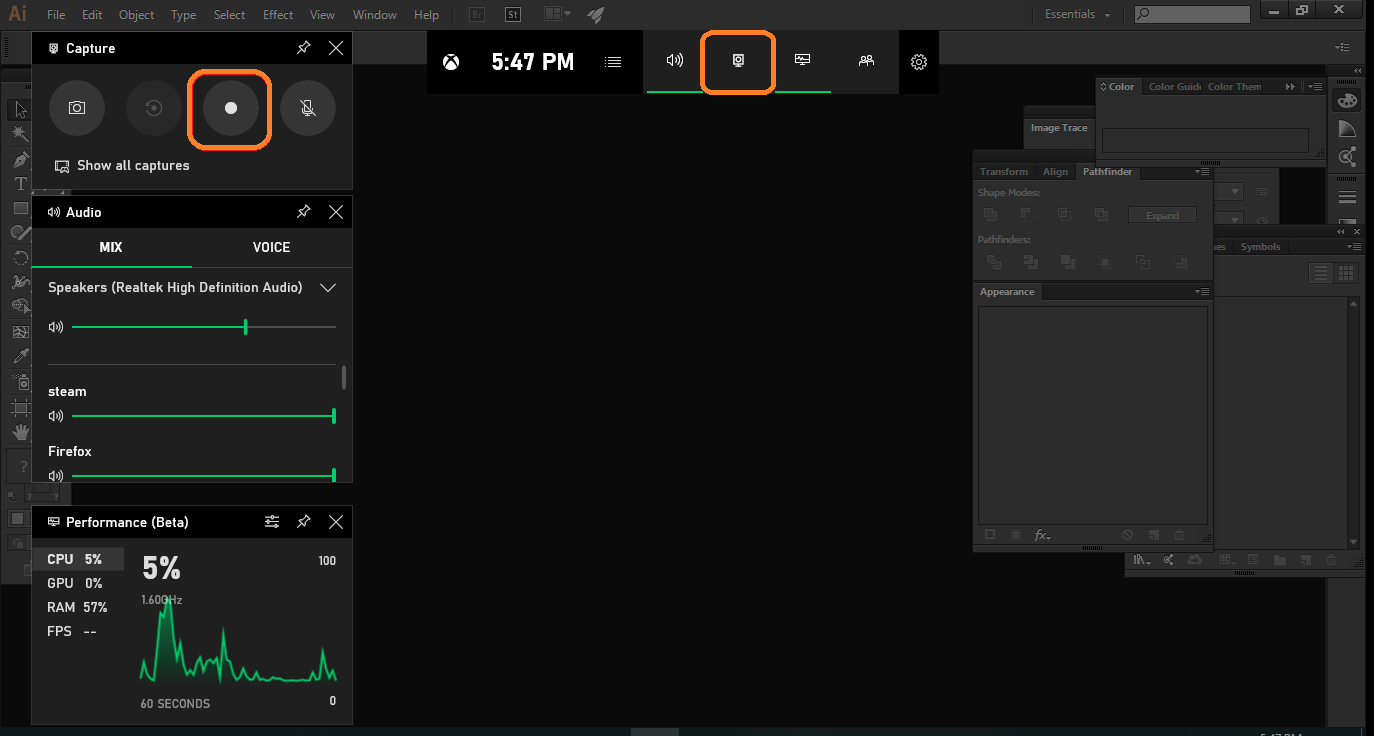
- You can see timing on the right sidebar. It will show you how long your screen recording video is. If you want to start direct recording without applying the above steps then hold the Windows key, Alt key, and R key.
- To record your own voice tap on the microphone icon from the right top corner.
- If you want to stop recording then tap on the Stop icon from the time recording bar.
Now you can see this video recording on your Windows 10 Video folder under Captures. You can also see all capture videos on the Game bar by clicking on the Show all captures. If you find this process somewhat hard or tricky then you can make use of the third-party tool (OBS Studio) to record the screen with audio.
OBS Studio
Well, we are suggesting this third-party tool it does not mean that the Xbox Game bar is not good for recording screen videos. If you use OBS Studio for recording you will have more control as compared to the Xbox Game bar. This tool is made to stream video games but you can also record normal screens such as programs, apps, and folders. Go through the steps below to use it for recording videos.
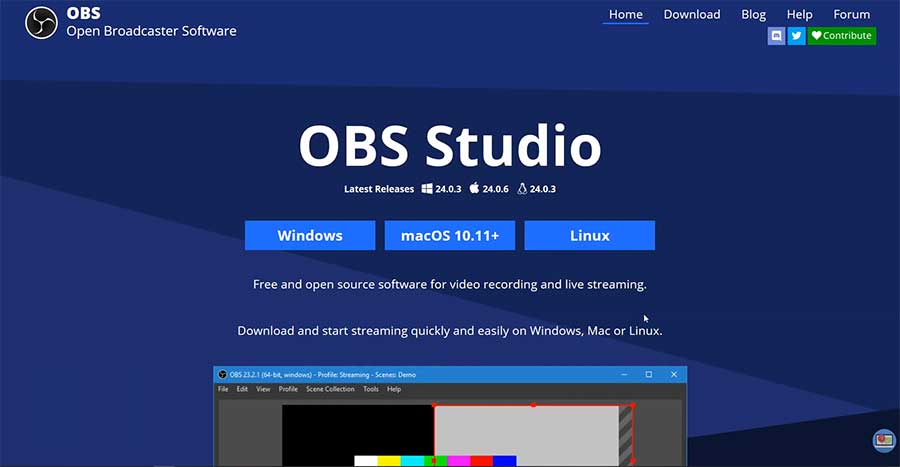
- At first download and install OBS Studio on your Windows 10. Make sure you download it from a trusted source.
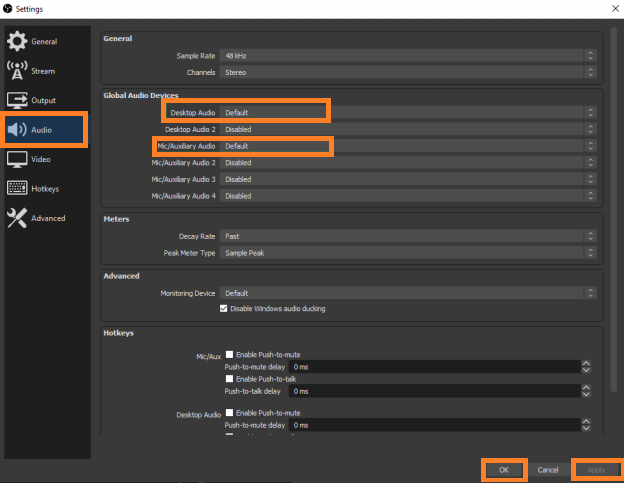
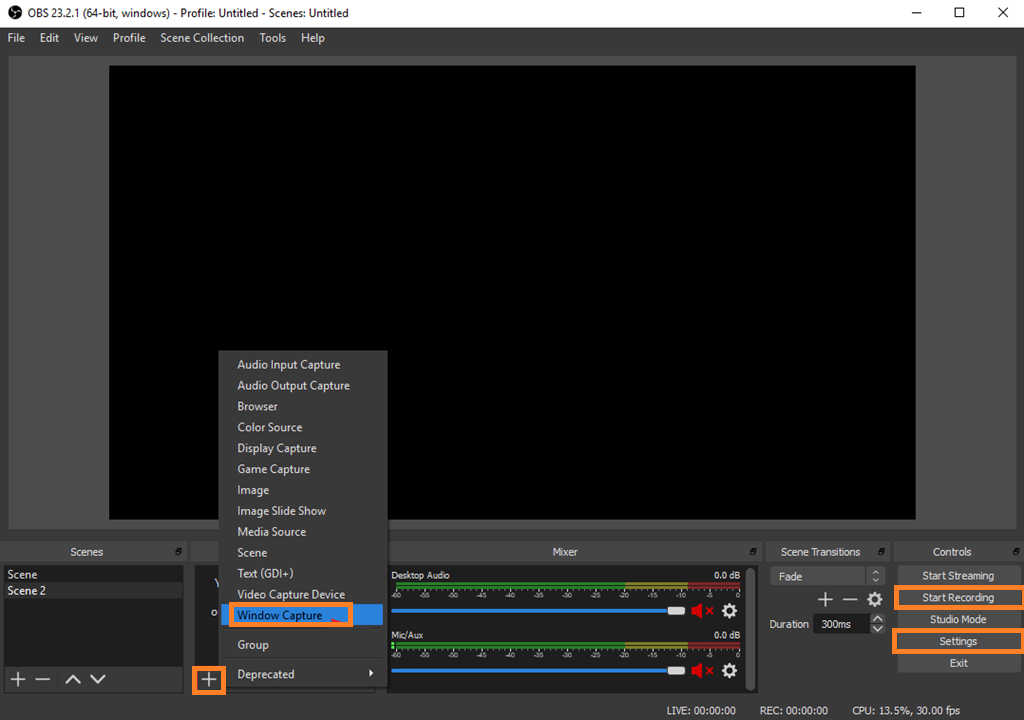
- The first and foremost step is to choose audio and microphone. For it tap on the Settings option from the bottom right corner. Now from the left pane tap on the Audio. By doing this it will be open on the same screen right side. Now select an audio device using the Desktop Audio Device drop-down menu. To select a microphone use Mic/Auxiliary Audio Device drop-down menu. After all, hit on Apply and then on the OK button.
- In this step, you have to add a source. It means that OBS Studio asking for what to record. For this go on the Sources box. If you are unsure about what to record then tap on the + icon and select Display Capture. Hit on the OK button. This will cover the whole display. If you are sure to record a particular program tap on the + icon and select Window Capture. Now you have to select the particular program you want to record from the list.
- Once you have chosen audio, microphone, and source then it’s time to start recording. From the right bottom corner tap on the Start Recording option. If you want to stop recording then use the same (Start Recording) option.
To have saved video follows the path as C:\Users\your_username\videos. You can also see the exact location using the OBS Studio tool. For it tap on the Settings option from the right bottom corner. Now tap on the Output and then on the Recording tab. On the Recording tab, you can see the Recording path.
So, this is how you can make use of an inbuilt tool (Xbox Game bar) and a third-party tool (OBS Studio) to screen record with audio on Windows 10. I hope that the above given two tools prove really beneficial for you. Apart from it, there lot many third-party tools such as ScreenRec, ShareX, Microsoft Expression Encoder 4, etc. You can go for it if you have deep knowledge about a particular tool.