The Screen Recording is way better than taking screenshots on Windows 11 PC. It is because through screen recording a person can understand fast and easily whereas through screenshots understanding becomes complicated. The screen recording has a plethora of benefits such as teaching, streaming, YouTubing, sharing screens with colleagues, etc. Like Windows 10 in Windows 11 also you can record the screen. On Windows OS there is an inbuilt and third-party software which are helpful in recording screen.
Here in this guide, we are with the best 5 tools including inbuilt and third party to record the screen on Windows 11. Some of the tools are free and some of them are paid. It depends on you which tool you pick up for the recording screen in Windows 11. If you are a Windows 10 user then also this guide will prove helpful for you because there are not many changes in the recording screen.
Contents
How to Record Screen on Windows 11?
Well, there are multiple tools for recording screens on Windows 11. Here in this guide, we have listed some of the best and easy-to-use tools for recording screens.
Xbox Game Bar – Inbuilt Tool
Just like the Windows 11 Snipping Tool for taking Screenshots, Xbox Game Bar is an inbuilt tool for recording screens. It is largely used for recording gaming screen as its name suggest. There are many features of Xbar Game Bar but recording all screens whether it is a gaming screen or other is one of the best features. As it has benefits at the same it has a drawback too. If you are using Xbar Game Bar as a recording tool then you will be able to record only one screen. It will not record Windows Desktop or File Explorer. In case, if you want to record multiple screens then make use of the third-party software which is listed in this article. Now apply the below steps to record the screen using Xbox Game Bar.
- Launch the screen or app you want to record.
- Press Windows + G to launch the Xbox Game Bar and tap on the recording button to start the screen recording. It will also launch the small window with a screen capture timeline and pause button.
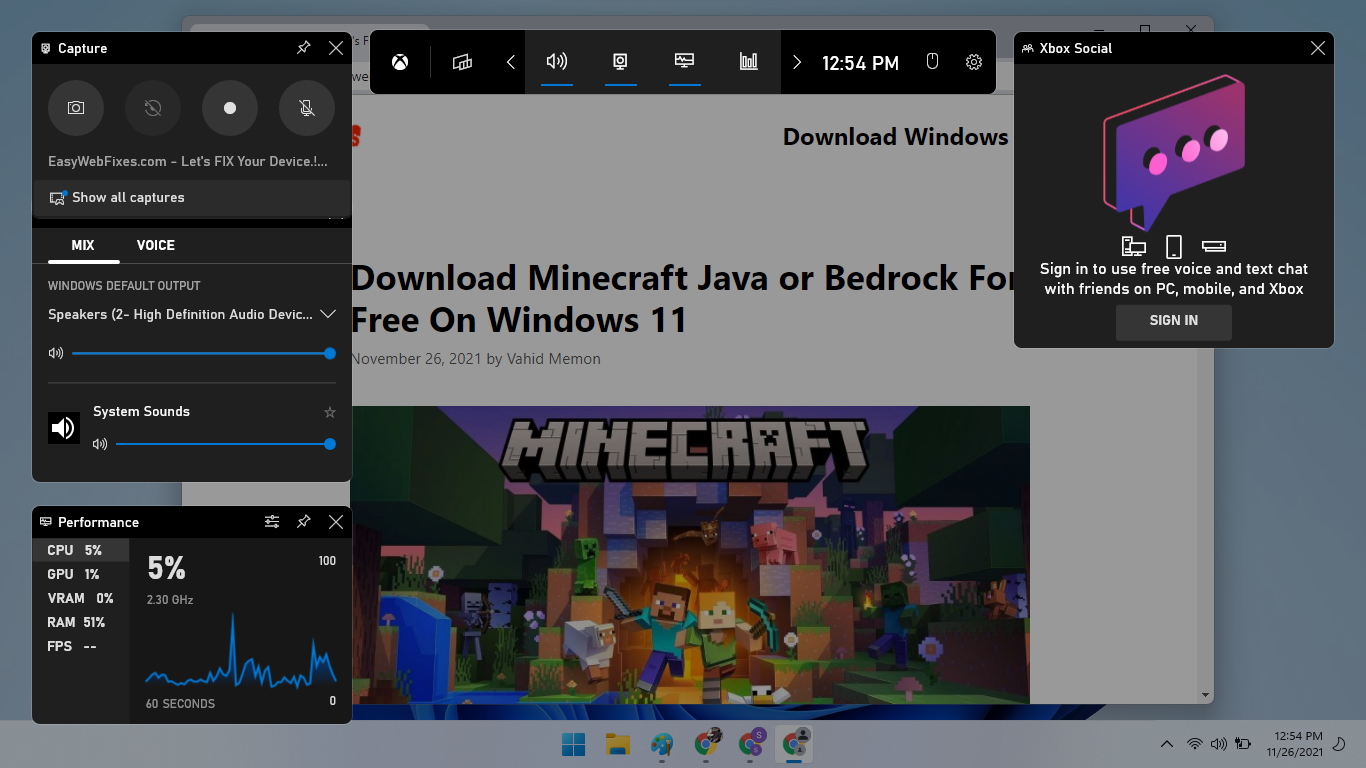
- Tap on the stop button to stop the recording.
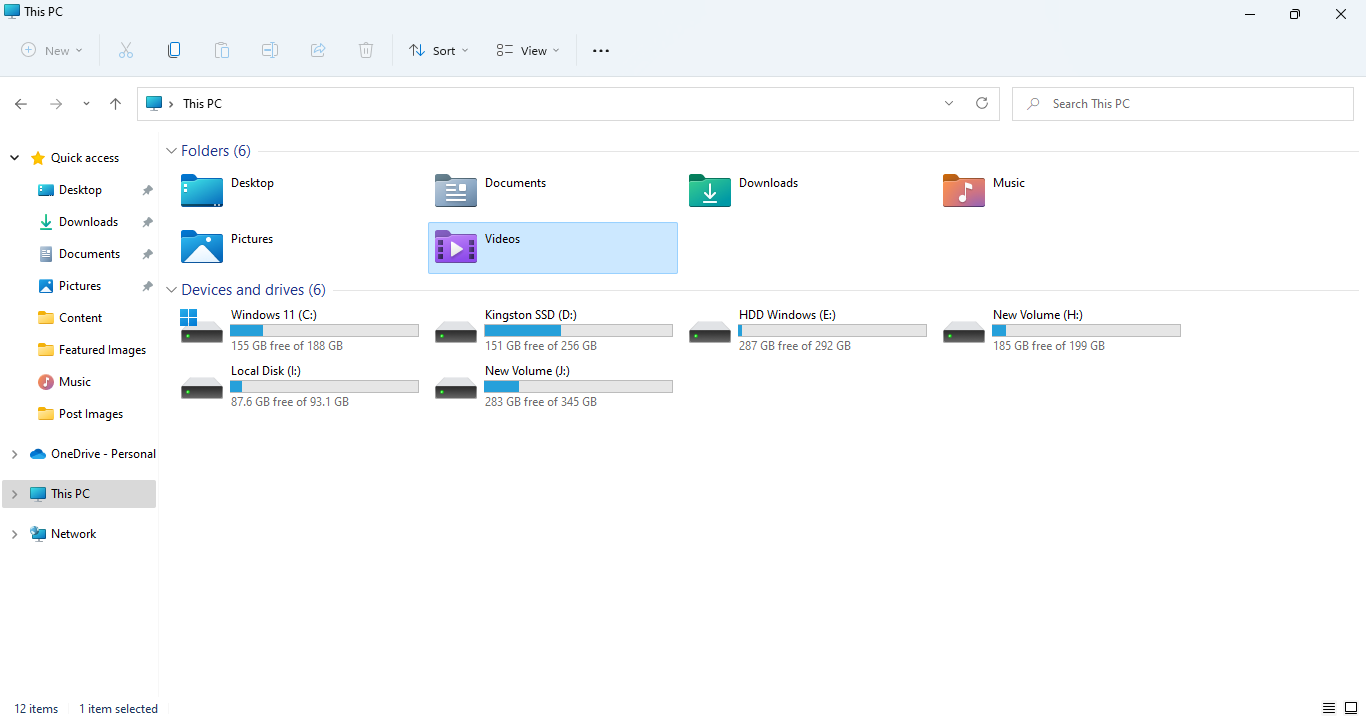
- The screen recording can be found under the Videos > Captures folder. First of all launch the File Explorer, go to This PC, tap on the Videos folder, and open the Captures folder to find your recording.
Alternatively, use Windows + Alt + R keys to initiate the recording. After doing this you will have recording time length on the corner of the screen. It will show you the length of the recording. You can also use your microphone to record audio. After all to stop recording hold Windows + Alt + R key again. You can also hit on Stop button to stop recording. After that, you will have a message saying “Game clip recorded”. When you will tap on it you will be navigated to the Gamebar section to preview the recorded video.
So, this is how you can make use of the inbuilt tool Xbox Game Bar to record mono screens on Windows 11.
OBS Studio – Third-Party Tool
OBS Studio is one of the popular third-party software when it comes to recording. The great thing about it is that it is free to use. The OBS Studio has the capacity to record multiple screens at the same time. So, if you want to record multiple screens then make use of OBS Studio applying the below steps in sequence.
- At first Download and Install OBS Studio on your Windows 11.
- Once you have downloaded then launch it. You will have options on the screen. As you have downloaded OBS Studio for recording so choose option name as Optimize just for recording, I will not be streaming.
- After this hit on the Next button. Now tap on Add icon to add a new source and then select Display Capture from the open menu.
- Do tap on the OK button from the pop-up, You can also change the name of the source from Display Capture to any other name.
- Now here you have to choose the display and then hit on the Ok button. After this to start recording hit on the Start Recording option from the list.
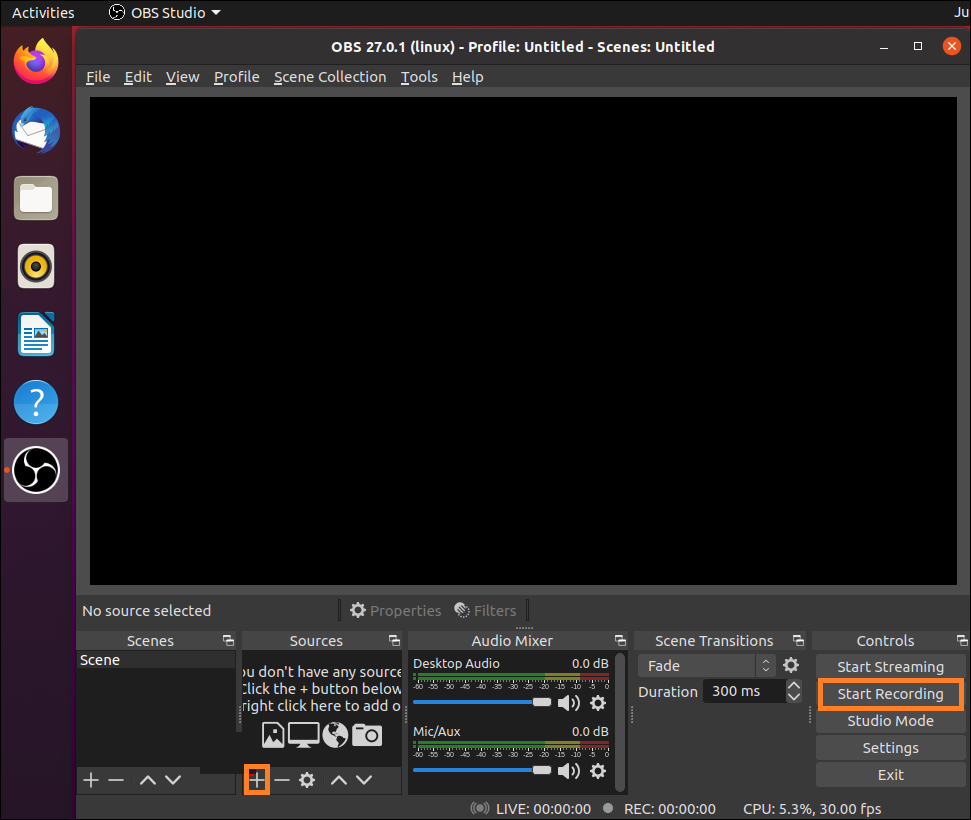
- If you want to stop recording then hit on the Stop Recording option.
To see video recording navigate to the video folder and look for the video in it. Play recording with Windows 11 new Media Player App.
TweakShot – Third-Party Tool
The TweakShot has amazed its users with its features. It is third-party software for taking high-quality screenshots and recording videos. Using this tool a user can record all types of screens such as single windows, scrolling screens, full screen, and specific regions. It also has a photo editing feature that helps users to make screenshots more attractive. It is developed for making tutorials, demos related to education. But here you can also record gaming screens and youtube videos if you want to.
- Download and Install TweakShot on Windows 11.
- Launch the tool after downloading and installing.
- Do tap on the big eye icon and then click on the Capture video option.
- Now choose the type of recording and then hit on the Record button.
- Once the recording is done then to stop it tap on the bar and then hit the Stop button. By doing this the recording will be saved.
In case, if you don’t want to use it then go on the below other third-party software.
EaseUs RecExperts – Third-Party Tool
The EaseUS RecExperts consists of an advanced editing tool and webcam feature. If you want to edit your recorded video or you want to webcam then EaseUS RecExperts will be handy for you. Using this software a user can record system sound. If a user wants to record gameplay of their own or online meeting then the webcam feature plays an important role. Go through the below steps to know how to use EaseUS RecExperts for recording video on Windows 11.
- Download and Install EaseUs RecExperts on Windows 11 PC.
- Launch it and then you will have four options named Fullscreen, Region, Audio, and Webcam. if you want to record full screen then tap on the Full-Screen option. If you want to record a particular region then tap on Region and select the region using cursor. If you want to take audio then tap on Audio. If you want to record live gameplay or online meeting then add it and hit on Webcam option from the panel.
- To start recording hit on Rec button.
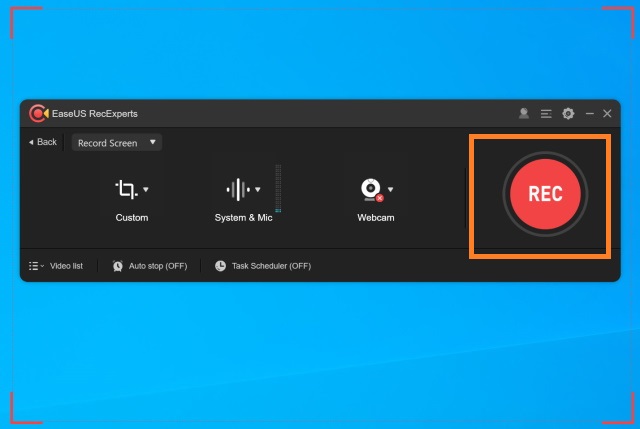
- To stop recording hit on Stop button.
Now you will have recorded video on the screen. You can edit it as you want. There will be many options such as trim, extract audio, rename file, etc for editing.
Loom – Third-Party Tool
Loom is free as well as paid third-party software for recording video calls, gameplay and all. It has the ability to record voice, face, and screen. You can make a shareable video using this application at the same time. The video can be shared easily on all social media. There are millions of people using Loom worldwide for better communication. The Loom is especially used by IT Engineers, professionals, marketers, sales, and designers.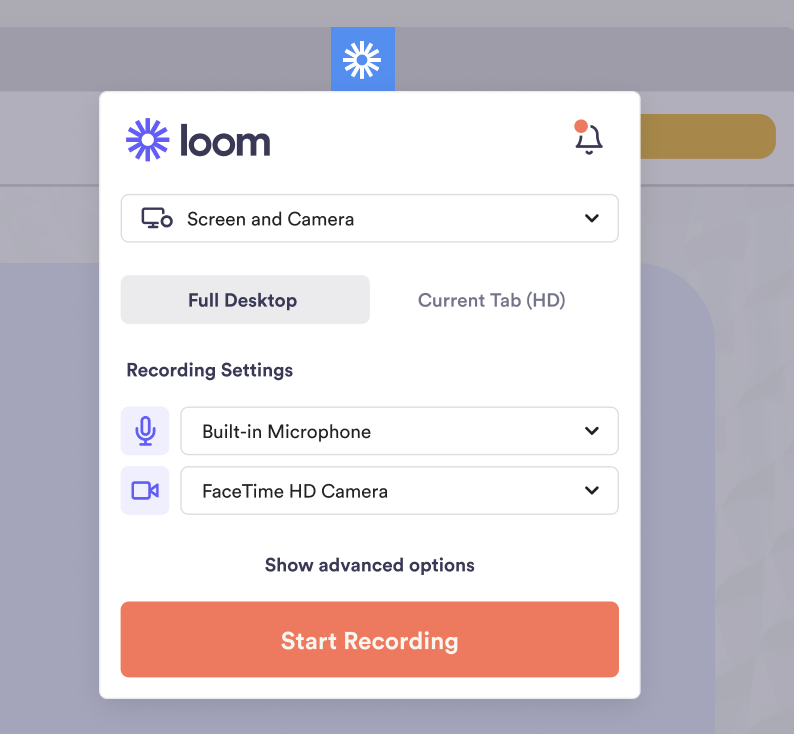
A user can record video using Loom of resolution 1080p. It allows for live notations. At the same time a user can record both webcam and screen or the user can record them both separately. There is only one drawback to the Loom application that it does not provide an inbuilt video editor. If you want to download it then go to its official site.
I hope that using any one of the above tools you have successfully recorded the screen on Windows 11.