As we know that Windows 10 is the latest operating system of Microsoft. As it is the latest OS so it also contains some common errors of Windows 10. In this blog, we will discuss one of the common errors of Windows 10 OS that is can’t connect to this network. This error is the same as mobile network not available on iPhone and Android. We know that today’s world runs due to the internet because all the activities we do and in fact, nowadays businesses also run on the internet. So, the internet plays an important role in human life. No activities are done without the help of the internet whether it is business or activities of your routine life activities.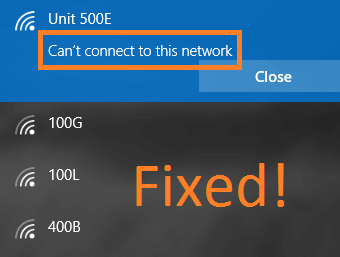
The error message can’t connect to this network is frustrating because assume that if you are doing a job in the company and you have some work related to the job but the work will be done with the help of the internet. And the situation is that you connect the wifi of the office or your phone hotspot and you get the error message can’t connect to this network. So, you will feel frustrated. The good news is that you can fix this error by applying the detailed solutions fixes.
Contents
Reinstall Network Adapter
The error message can’t connect to this network occurs mostly if you have some problem in the Network Adapter. Because Network Adapter is one of the components of the internal hardware of your computer which is mainly used to communicate on the network with another computer. So, if you have a problem in the Network Adapter then you may get the error message. The ultimate solution to this problem is to uninstall the network adapter and again reinstall it on the system.
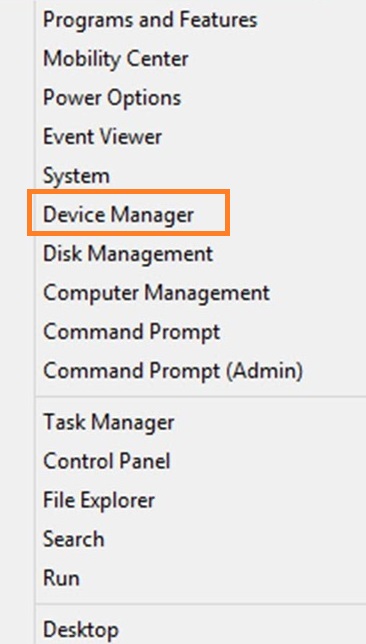
- First of all press Windows key + X key to launch the menu list.
- Once you have the menu list then tap on the Device Manager.
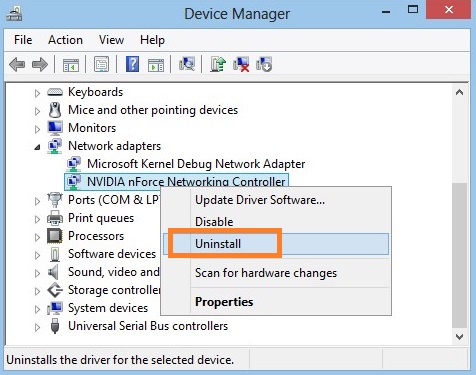
- Now go to the network adapter and do right tap on it.
- By doing the right tap you will have options so tap on the Uninstall option.
- Now tap on the OK button.
- Once the driver is uninstalled then do restart your Windows 10. By doing restart you will have instructions on the screen to reinstall the driver automatically.
- So, tap on the OK button to have the driver automatically.
So, this is how you can re-install the network adapter on Windows 10.
Update Network Adapter Drivers (Manually)
The Windows 10 can’t connect to this network error message only doesn’t occur due to problems in the WiFi hotspot but it might appear in case of old or corrupted drivers are installed on your system. As we know that drivers improve the performance of the system but if that driver is compatible with the system then only. So, the solution to the network problems like err_network_changed Chrome and not registered on network on Samsung and other brand laptops is to update the right driver for your system as soon as possible. Below are essential steps to update drivers manually on the Windows 10.
- Hold Windows key + R key to run the dialog box, type devmgmt.msc and then hit on the OK button.

- By doing this you will be navigated to the Device Manager.
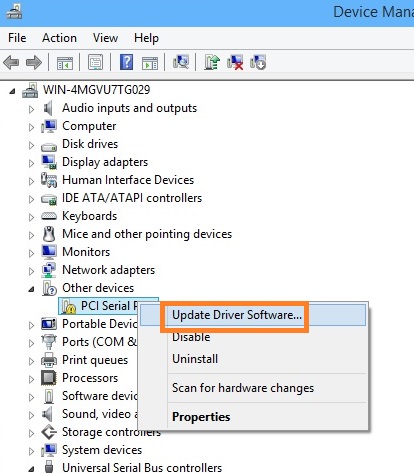
- In the device manager, find network adapter and to right tap on it.
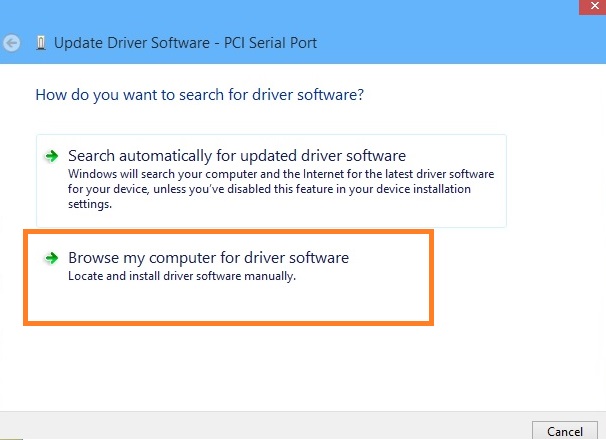
- Once you do it then you will have options so tap on the Update Driver Software option for the further process.
- Now you will have two options so tap on the second option which says Browse my computer for driver software.
- You will have a new screen showing option name as Let me pick from a list of device drivers on my computer so tap on it and hit on the Next button.
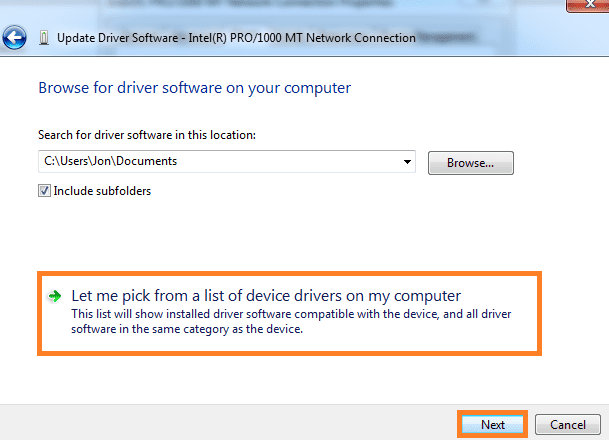
- In this, you have to cross-check that Show compatible hardware box is not ticked.
- At last, find the compatible driver you want to install and install it on your system in one click.
- Once installed all drivers on your system then do restart your Windows 10.
By applying the above steps you can easily update network adapter drivers manually on your Windows 10. All you have to do is apply all steps in sequence.
Forget and Reconnect WiFi
Well, we know that again and again if you get Windows 10 can’t connect to this network error message then you will feel frustrated and your mind will distract from the work. If this error message arises due to protocol error then there is one simple and easy solution that is you just have to forget the wifi network and reconnect it again. Before removing the saved WiFi hotspot password from your system make sure you know the connected WiFi password.
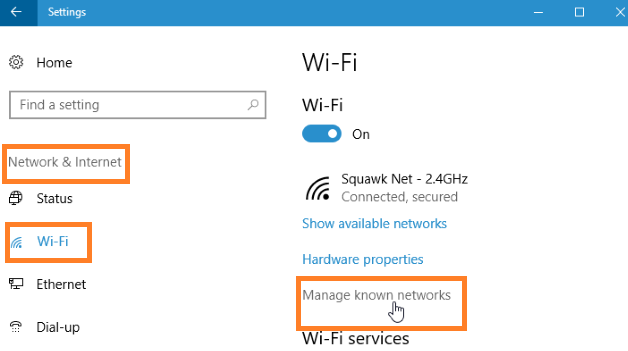
- Launch the Settings app and tap on the Network and Internet option.
- Now go on the Wifi section and tap on the Manage known networks option.
- Tap on the wifi network and click on the Forget button.
- After all, go on the same wifi network and connect it back.
So, these were the simple and easy steps to solve the problem of a protocol error. This will automatically solve the Windows 10 can’t connect to this network error message.
Use the Same Security type for the Router and Computer
There are different security types like WPA2-PSK (AES) or WPA-PSK (AES) which are essential to protect the data. It is used to run the network but the condition is that both the router and computer security type should be the same. If there is no same security type then you will definitely face the Windows 10 can’t connect to this network error message. Follow the below steps to apply this fix properly.
- First of all launch Network and Sharing Center for the further process and click on the Manage wireless networks.
- Now go on your wifi network and do right tap on it and tap on the Properties option.
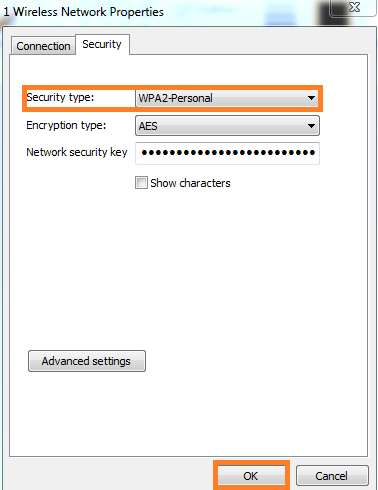
- In the properties screen, you will have different tabs so go on the Security tab.
- In the Security tab go on the Security type section.
- Under the Security type section choose the security type which is used in your router.
- After all, hit on the OK button to save the changes.
Likewise, you can make the same security type in both the router and the computer. This will solve the problem of the network on your Windows 10.
I hope that the above all fixes with its detailed solutions will surely help you out in fixing Windows 10 can’t connect to this network error message. By chance, if you don’t get a positive result from the above solutions then install the new Network Adapter because if there is a problem in network adapter then above all fixes will not work. All you have to do is install the new Network Adapter.