Well, as Windows 11 is rolling out users are frequently asking of “How to backup and restore files in Windows 11?”. Taking those users into consideration we are here with the 3 best ways to backup and restore important files in Windows 11.

Nowadays, people keep all information and data on laptops and PC. Having more data like files and folder means at the same time having fear of losing it. To ruin this fear you just have to backup your essential files and folder in Windows 11. A user can store backup data on a USB drive, online storage, external hard drive, and CD/DVD. Here below are some main reasons why should you backup files in Windows 11?
- It makes space on your Windows 11.
- It avoids loss of data if any problem such as system crashes, virus or malware issue, etc occurs.
- It keeps safe essential documents from deleting by mistake.
- You can access any file or data anywhere at any time.
So, these were the importance of backup in Windows 11. If you are ready to back up and restore files in Windows 11 then make your choice from the below three methods.
Contents
Backup and Restore Files to OneDrive Online
On Windows 11 there are multiple ways to backup files but one of the simple and easiest ways is OneDrive. It is an online platform where you will get free 5GB of space when you sign in. In order to have more space in it, you have to upgrade premium plan. It is also known as a cloud-based storage platform. On it, you can backup files and photos and you can access backup anytime from any device. Before going on the actual steps to backup files to OnceDrive make sure you have Microsoft Account. It is needed to set up OneDrive on your Windows 11. Once you have set up it then follows the below steps properly.
- At first launch Windows 11 Settings screen, holding Windows key and I key.
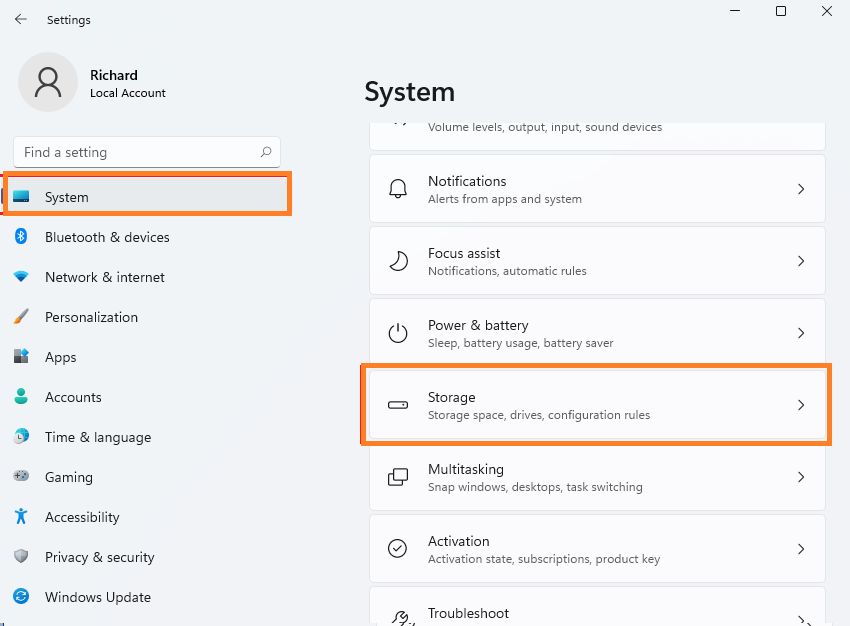
- On the left pane go on the System tab.
- After this from the right side tap on the Storage option.
- Now you will have a System storage settings page. On it look for Advanced storage settings. Once you have it then tap on it to have more options.
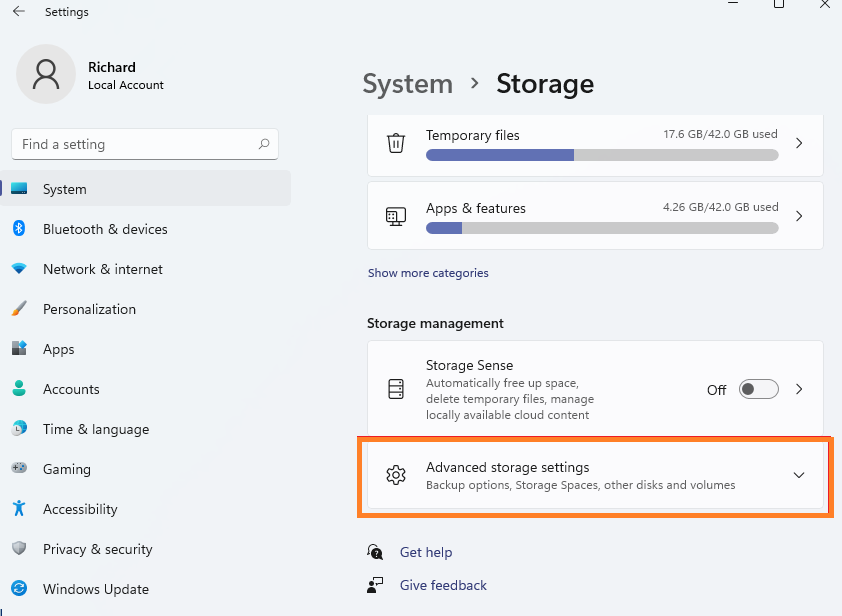
- From the drop-down menu tap on Backup options.

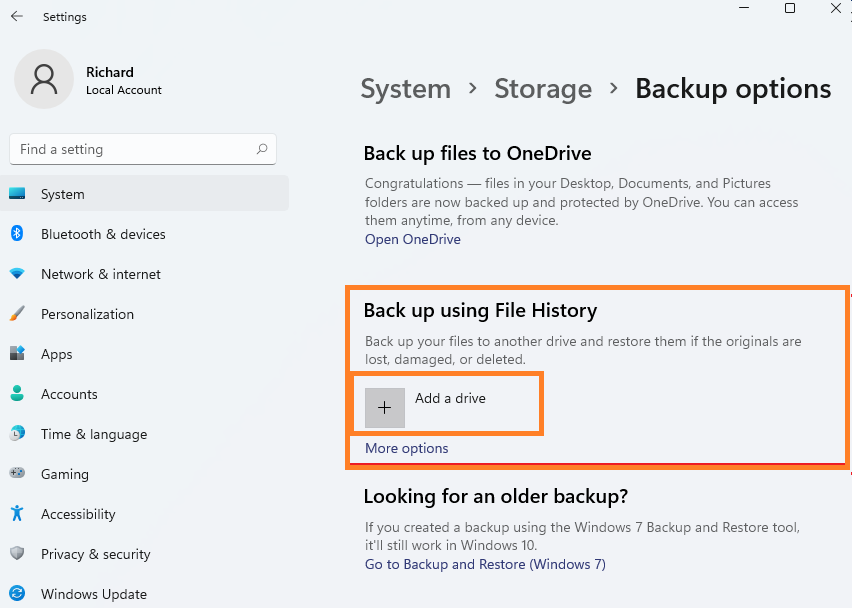
- On the prompted screen go on the “Back up files to OneDrive” option and tap on the link which says “Sign in to OneDrive”.
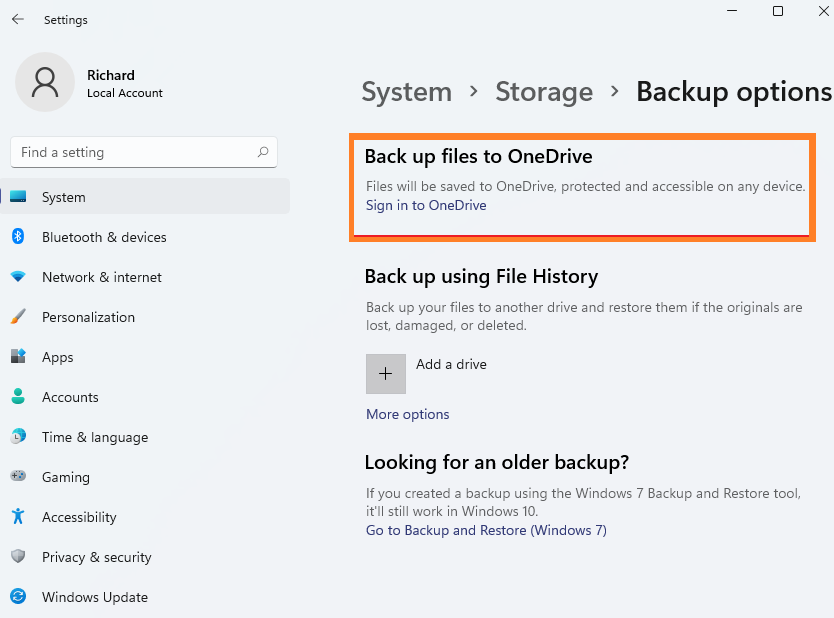
- Now the screen will ask you to enter your OneDrive account email address and password for signing in.
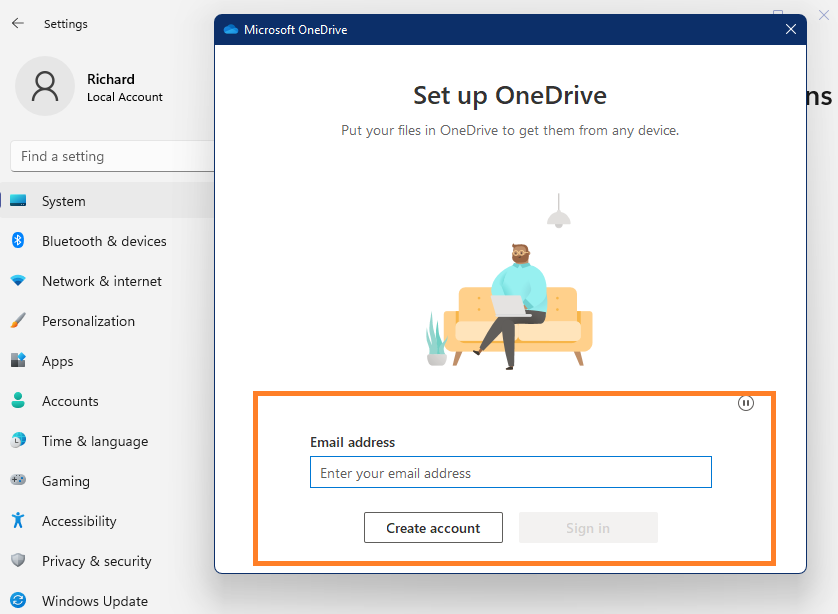
- After this follow the on-screen instructions to complete the backup.
Finally, on-screen you will have a message saying “Your OneDrive is ready for you”. It means that now you can access this backup anytime from anywhere.
Backup and Restore Files with File History
The File History is a built-in tool to backup files including documents, downloads, videos, pictures, contacts, music, desktop, etc in Windows 10 and Windows 11. In Windows 11 it has come up with huge changes. You will not find it in Windows 11 Settings and the steps for backup and restore is different from Windows 10. If you want to use this built-in tool then follow the steps below.
- Go to the Start menu and search for File History. From the result tap on the top result to launch it.
- Now tap on the Add a drive button for the further process.
- After this, you have to select an external drive. Make sure you select the drive which you have connected with your Windows 11.
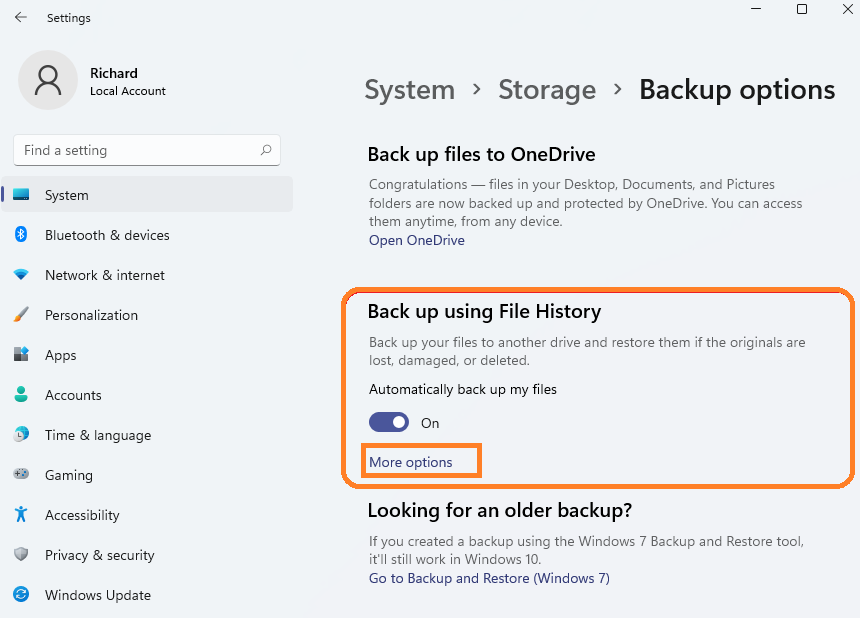
- Once you have selected drive then it means all is set. Now Windows will back up files and all in the user folder every hour.
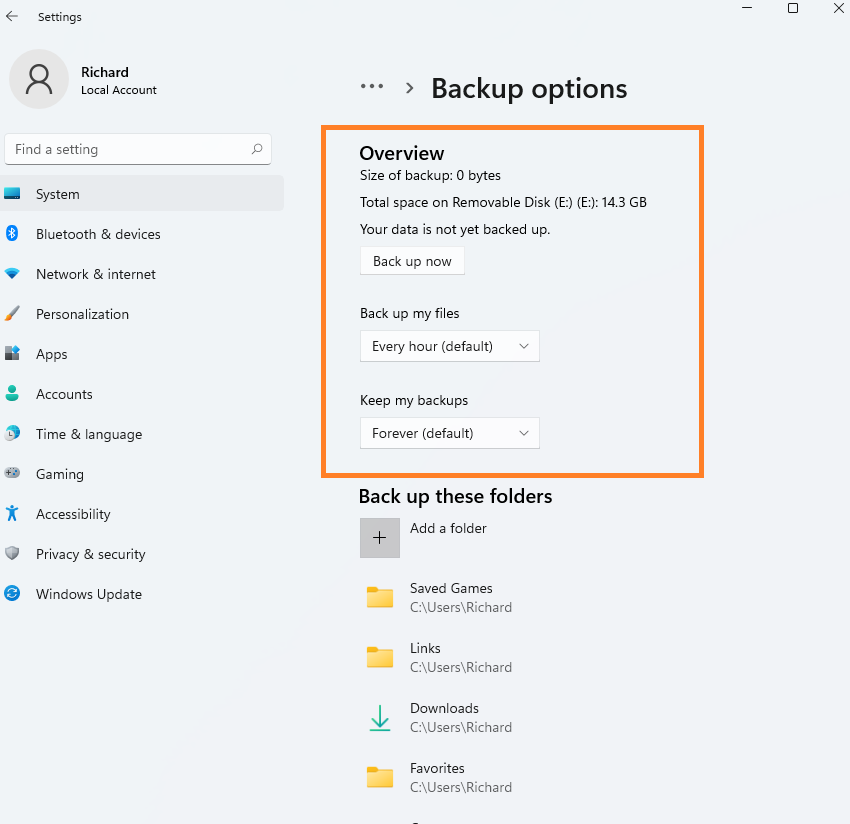
- If you want to change the timing and which files backup then tap on More options.
- Make changes as you want and then save it.
You have done a backup of files using the File History inbuilt tool in Windows 11. In case if you want to restore it back then apply the below steps.
- At first, connect the external storage device. It must be containing a backup of your Windows 11 files.
- Go to search filed and search for Control Panel. Do tap on the top result to launch it.
- In it search for File History and then select “Save backup copies of your files with File History”.
At last, follow the on-screen instructions to complete the process of restoration.
Backup and Restore Files with Backup and Restore feature
The Backup and Restore (Windows 11) is also an inbuilt tool in Windows 11. It will backup files and images. Using it you can create a system image on Windows 11. This tool support automatic backup also. To use this tool for backup follow the below steps.
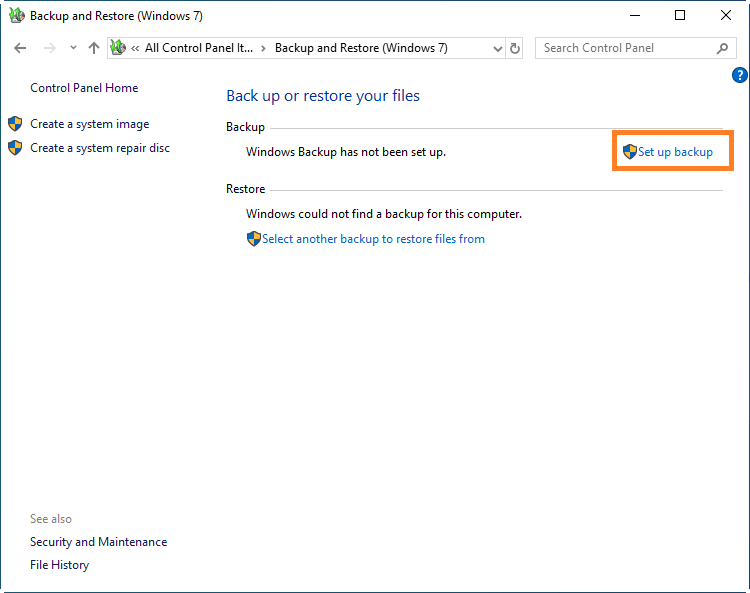
- At first, follow the path as Control Panel > Update & Security > Backup & Restore (Windows 7).
- On the screen go to the Backup section and tap on Set up backup button.
- If the screen asks for the admin password then enter it.
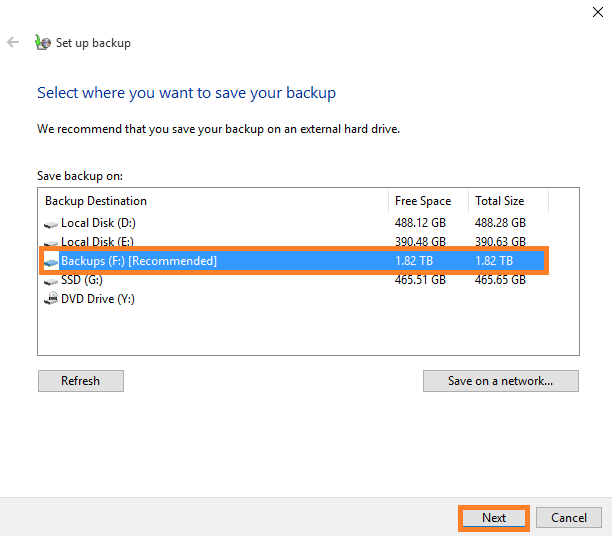
- Now select the backup drive and then tap on the Next button.
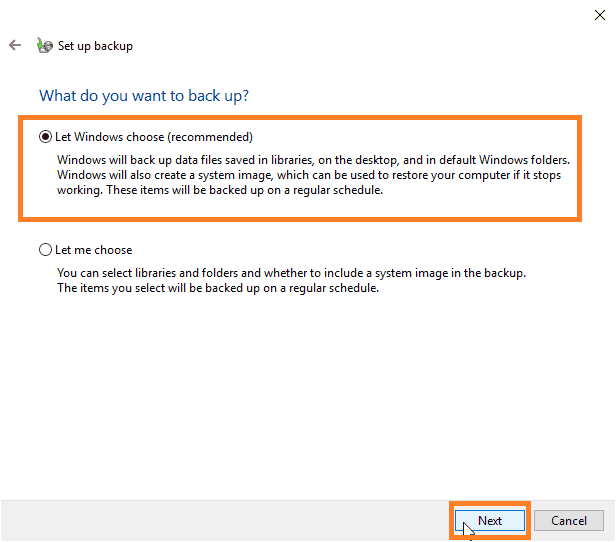
- After this, select the Let Windows choose (recommended) option and click on the Next button. It will backup data files saved in libraries, on the desktop, and in default Windows folders.
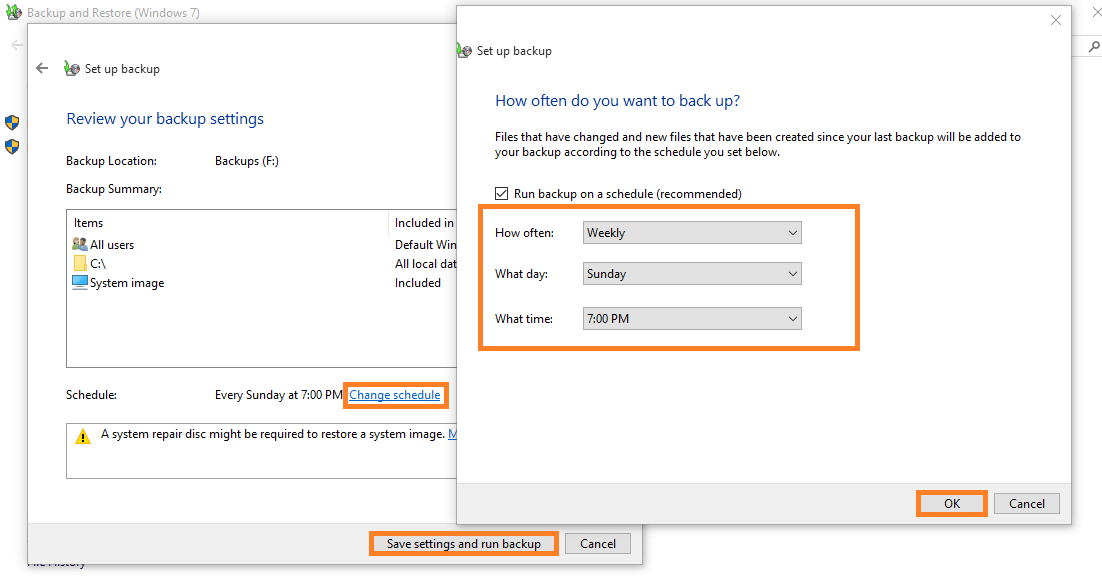
- From the prompted screen tap on the Change schedule link. Here you have to decide how often, on which day, and at what you want a backup. Once you all set it then tap on OK and then hit on Save settings and run backup button.
Once you are done with this then after some time you need to restore it then make sure you follow the steps below to do so.
- Follow the path as Settings > Update & Security > Backup > Backup and Restore (Windows 7).
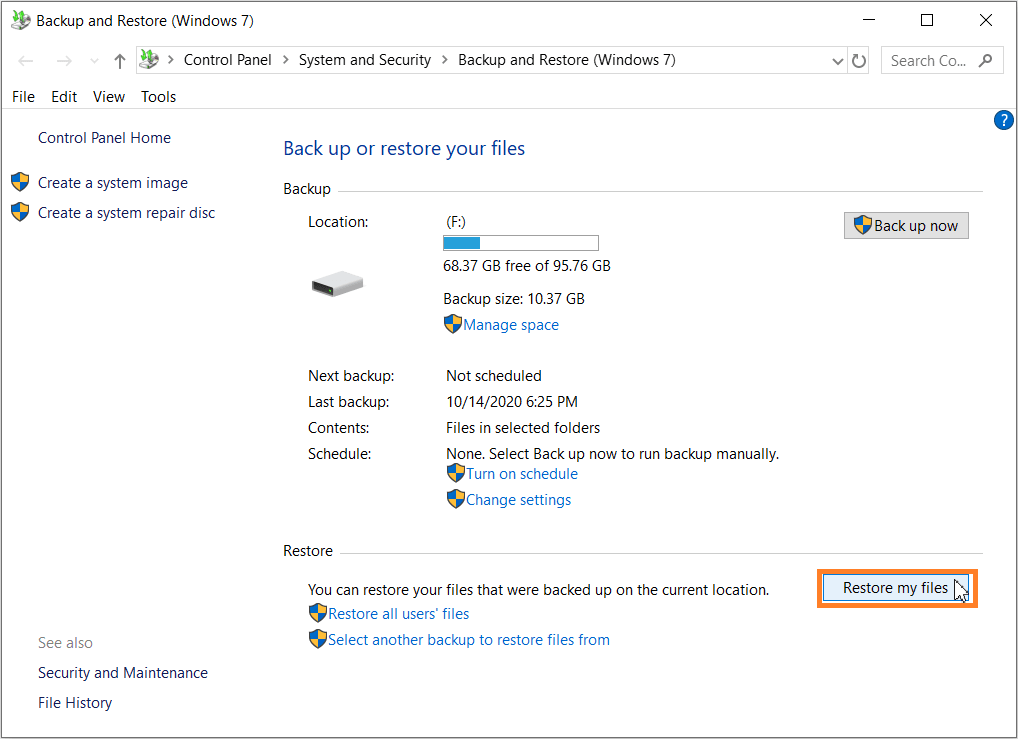
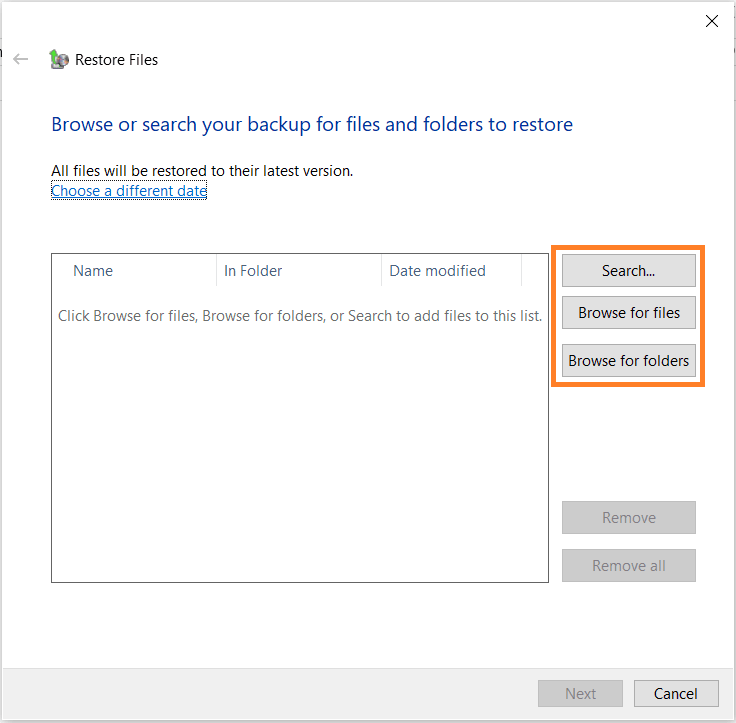
- Go to the Restore section and tap on the Restore my files button.
- Now tap on Browse for folders if you want to restore the folder. If you want to restore files then tap on Browse for files. After this, select a folder or files then hit on Next button.
By doing this the process of restoring will start.
I hope that after reading this blog you are able to Backup and Restore Files in Windows 11.