As we all know that Privacy is in all fields whether it is relationship or business. All do privacy in the form of physical keys, password, pattern, fingerprint, and all. And it should be there because it defines your attitude and status. Windows 10 users are concerned about their privacy for many reasons like, they have cream info about their business, they have secrets about their life, some people also do privacy because they are afraid of deleting file or folder by mistake by other people. It is not all about reasons, reason will be anything but the main motive of this article is to provide easy and secure tricks to hide files, folders, and drives on Windows 10.
In this blog, I will give the best three methods to protect files, folders, and drives on Windows 10. It is on you which method you apply. So, follow the below blog to go in deep in to “how to disappear files, folders, and drives in Windows 10?”.
Contents
Hide Files and Folders Using Command Prompt
Yes, if you are the Windows user then you know that what is Command Prompt? Command Prompt is an application or we can say tool on all Windows. By using it we can fix many issues with the help of the command line. This method is based on the command line so you make sure that you write the correct command.
Now let’s see an example of hiding “new image.jpeg” from E:\Images\2020 path on Windows 10.
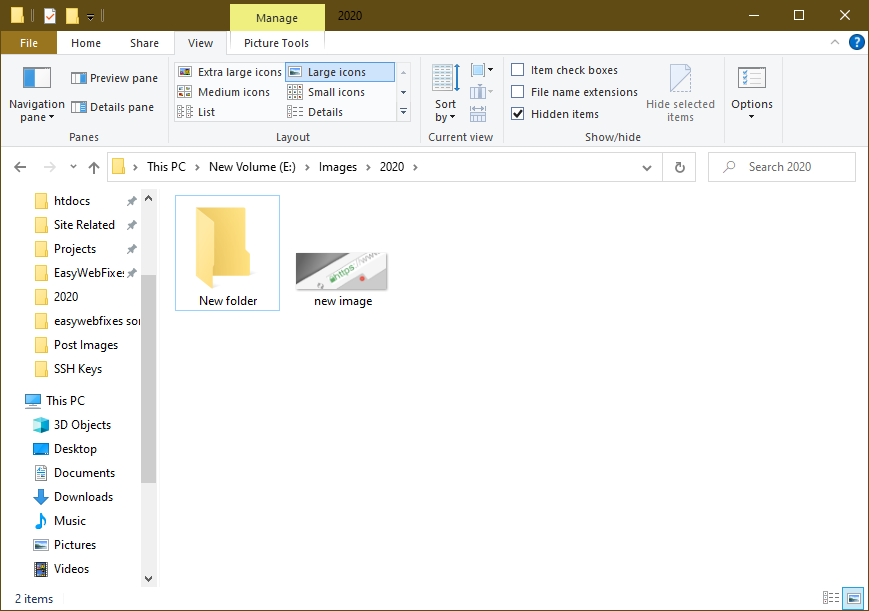
Press the Windows Start Button and search for cmd. Right-click on the very first command prompt app option and Run as administrator.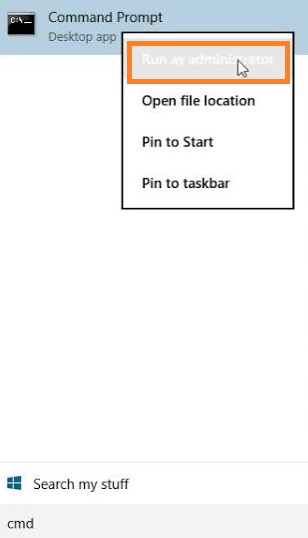
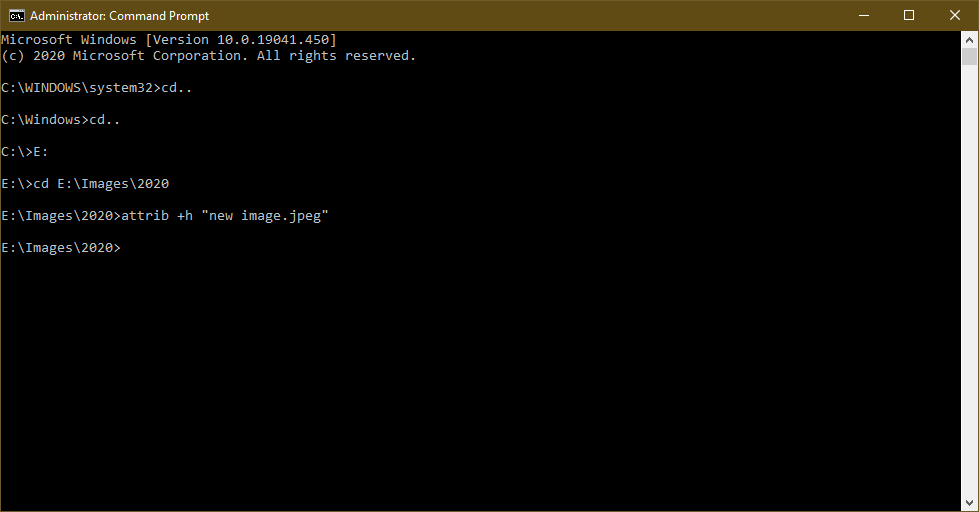
You will have Command Prompt on the screen, in it enter the cd (change directory) command to navigate to the file or folder.
- Use this command two times to go to the previous directory and the root of C drive: cd..
- Use this command to change the drive to the E drive: E:
- Use this command to navigate to the file directory: cd E:\Images\2020
This command will lead you to file or folder which you want to hide but make sure after cd you write the path of your file or folder, you can even copy and paste the path. If your file is located in the other drive then open cmd as an admin and drive letter like E: and hit Enter and later use the cd command.
Now type an attrib +h command (hide command) with the file or folder name.
- attrib +h “new image.jpeg”
Now go and check your Windows Explorer, you won’t find “new image.jpeg” file.
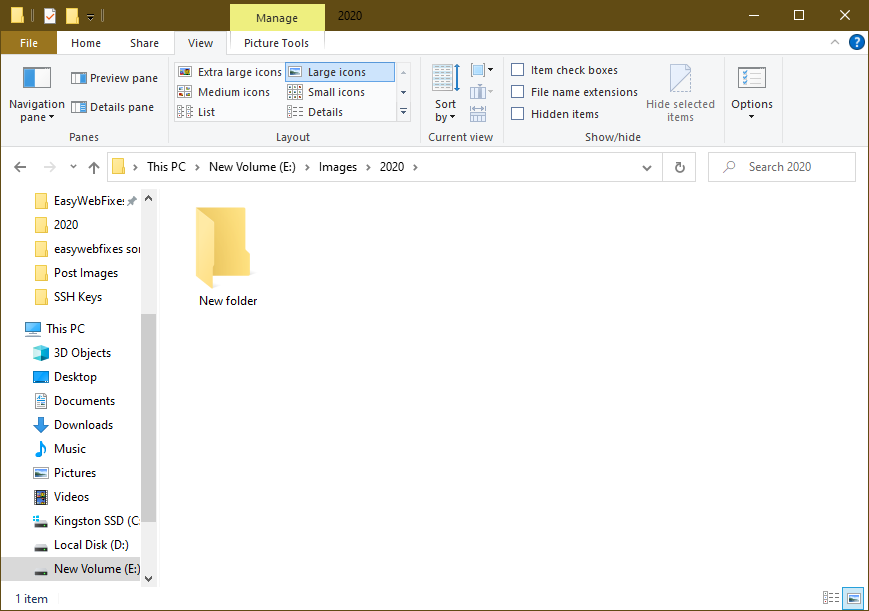
This command will hide a file or folder. You just have to write your file or folder after the +h command. If something goes wrong your important file you can also fix the corrupted files on your computer.
Command to unhide new image file: attrib -h “new image.jpeg”.
To hide all the folder and subfolder in the New Folder you have to enter two other commands.
- attrib +h “New Folder”
- cd New Folder
- attrib +h /s /d
So likewise you can hide files and folder on your Windows 10 computer. This method will cover files, folders, and subfolders too, you just have to alter the command as I have stated. You can unhide files and folders just by replacing +h with -h in all the commands.
Use File Explorer to Hide Files and Folder
File Explorer is also known as File Manager. All files and folder of your Windows 10 are stored on the File Explorer and from it only you can navigate to the files and folder. If we talk about hiding files and folders using file explorer then it easy and simple to. To do so follow the below steps properly.
- Launch the File Explorer for the further process.
- Now go on the file or folder which you want to hide and do right tap on it.
- From options listed tap on the Properties option.
- You will have Properties screen showing multiple tabs so go on the General tab.
- Under the General tab and below the Attributes do tick on the Hidden option.
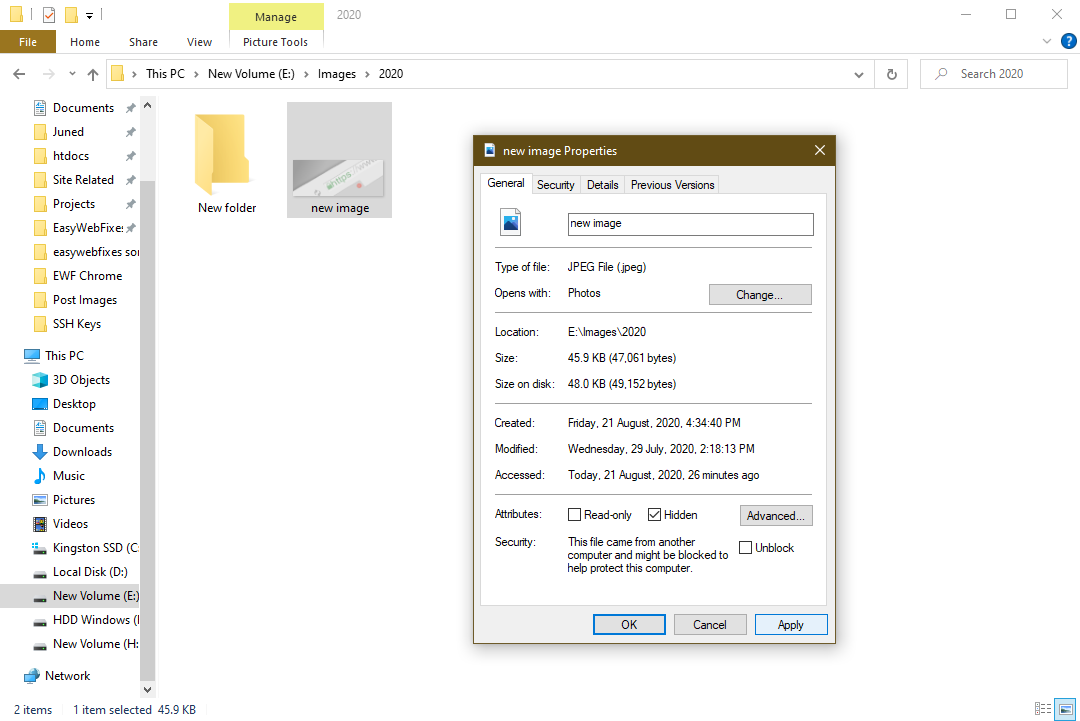
- At last hit on the Apply and OK button.
- If you have subfolders in a folder then make sure you select the Apply changes to this folder, subfolders, and files. After that hit on the OK button to end the process.
Now your hidden files and folders will not visible because Windows 10 will not show hidden files and folder by default. If you want to unhide files and folder launch properties and untick the option of Hidden. If you have issues with file manager then first fix File Explorer Windows 10 before changing the hidden file option.
Hide Windows Drives using Disk Management Utility
If you don’t want to use the above two methods then apply this once. This method will hide the whole computer drive at once. The Disk Management Utility is on all Windows computers. The aim of it is to show all the installed drives of your computer whether it comes preinstalled or you have attached it externally. So, to hide the whole drive follow the following steps.
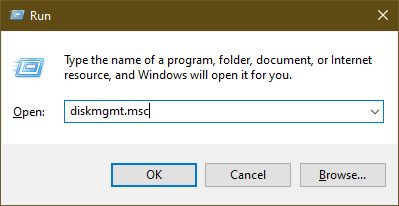
- At first, hold the Windows key and R key at the same time to launch the Run dialog box. Type diskmgmt.msc and hit on the OK button.
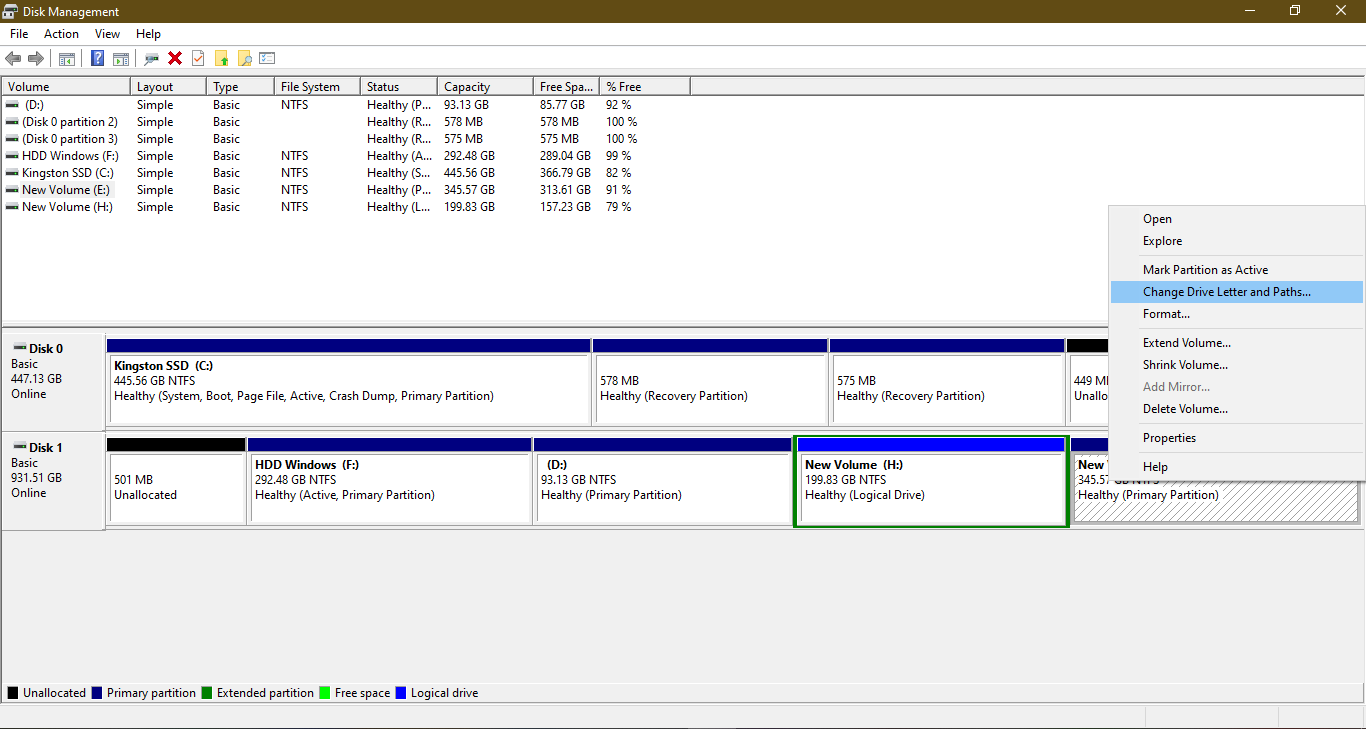
- Under the Disk Management Utility screen, you will have drives that are installed on your computer. So, do right tap on the drive that you want to hide and tap on the Change Drive Letter and paths option.
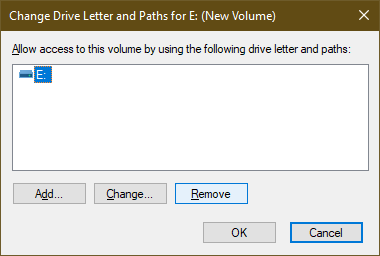
- Now on the Change Drive Letter and paths screen choose the drive letter and tap on the Remove button and then hit on the OK button.
- By doing this you will have a warning message saying Some programs that rely on drive letters might not run correctly. Are you sure you want to remove this drive letter? So if you agree then tap on the Yes button.
Now close the Disk Management Utility and launch the File Explorer. In it, you will not have the drive which you have hide. If you want to unhide the drive then launch Disk Management Utility and tap on the Change Drive Letter and paths option. This will open the Change Drive Letter and path screen. Now tap on the Add button and choose to Assign the following drive letter. From the drop-down menu choose the drive letter and hit on the OK button. Now you can open File Explorer and see you will have drive back.
I hope that these three tricks are enough to hide files, folders, and drives on Windows 10 computers. Make sure you go through all 3 fixes and choose the best one for you.