Well, have you ever think of doing backup on Windows? If yes, then which tool you have preferred to back up your whole system? Many users use third-party tools such as Macrium Reflect, EaseUS Todo Backup, etc. They forgot that they have an inbuilt tool name System image backup. As compared to a backup tool such as CrashPlan and the built-in File History feature the System image tool is best because it backups the whole hard drive including Windows settings. There are several advantages of the System Image tool but there is only one disadvantage that is you can not restore backup on another PC.
There are multiple situations where this system image backup proves beneficial. It proves useful when your whole window crashes and you are not able to boot back in windows. You can restore windows if you have back up earlier. The restoring backup will fix all issues as you have backup the whole system after clean installation. After restoring back up you will have your computer’s original condition.
In this article, you will see steps to create system image backup on Windows 10 and 7. If you are Windows 10 or 7 users refer to your respective guide. Before going on the below guide make sure you have a place to store the backup system image. There are 4 places or we can say the option to store the system image. The first is a secondary hard drive with enough space, the second is a USB or memory card, the third is a blank DVD, and the fourth is doing repartition on your primary hard drive.
Using the last option is risky because if a hard drive fails the system image back will be at risk as Windows installation and system image back up both are on a hard drive. So, make sure you keep all these things in your mind and proceed towards the actual guide.
Contents
How to create System Image Backup on Windows 10?
Well, on Windows 10 there are a number of backup tools to use. Using the System Image tool is great because this will snapshot your whole system. It means that it will back up the whole hard driver from bit to bit. In Windows 10 the System image backup utility is hidden. This is the main reason that users are not properly aware of the inbuilt utility. If you want to use the hidden System Image backup utility to create a system image backup, go through the steps below.
- At first launch Settings app holding Windows key and I key.
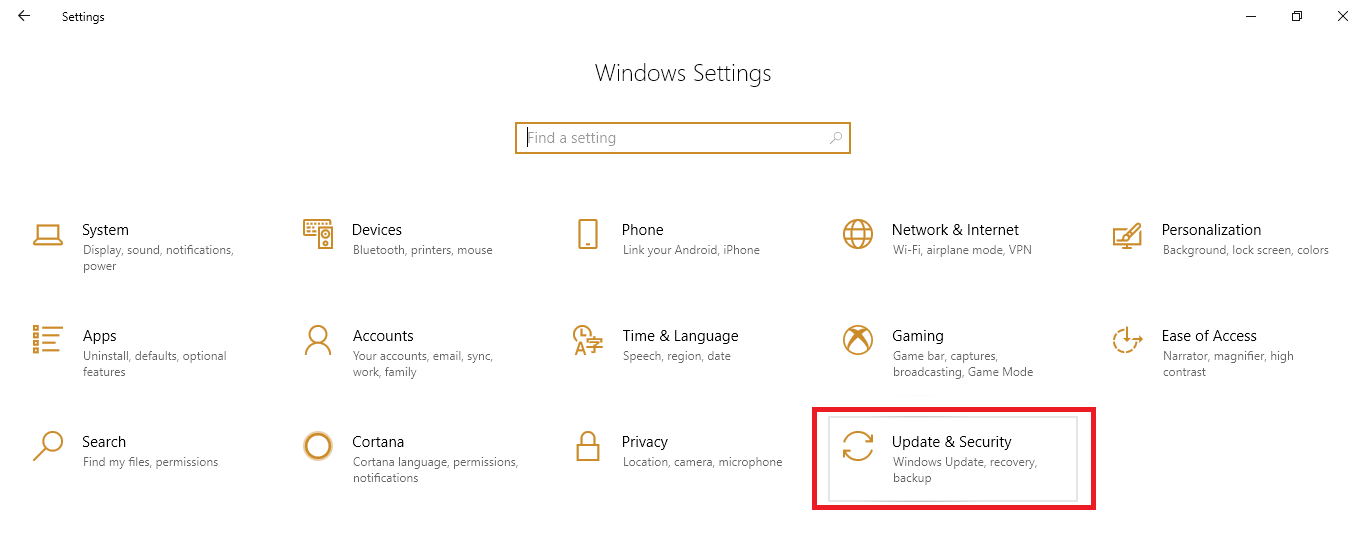
- From the settings screen tap on the Update and Security option for the further process.
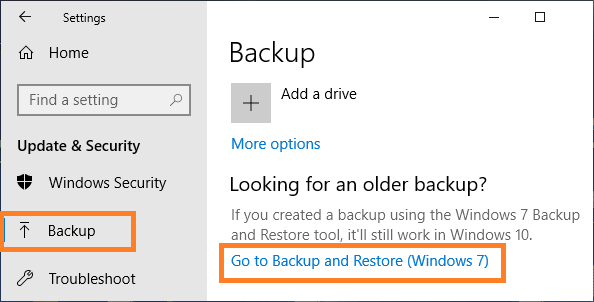
- Now tap on the Backup option from the left pane under the Update and Security section.
- Take your eyes on the right side and go on the “Looking for an older backup” section and then tap on “Go to Backup and Restore (Windows 7)”.
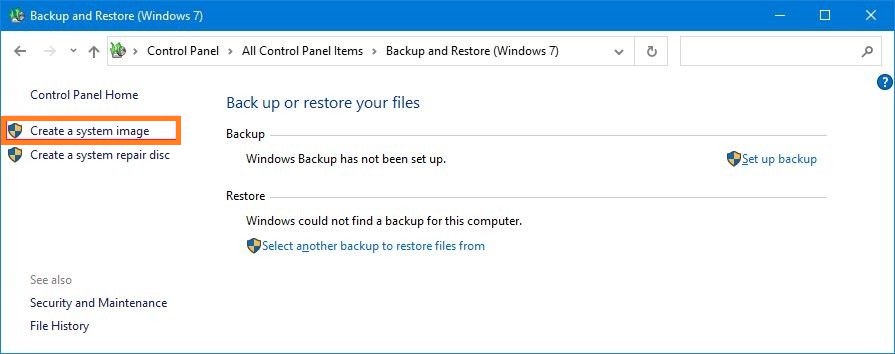
- From the left pane tap on the Create a system image option.
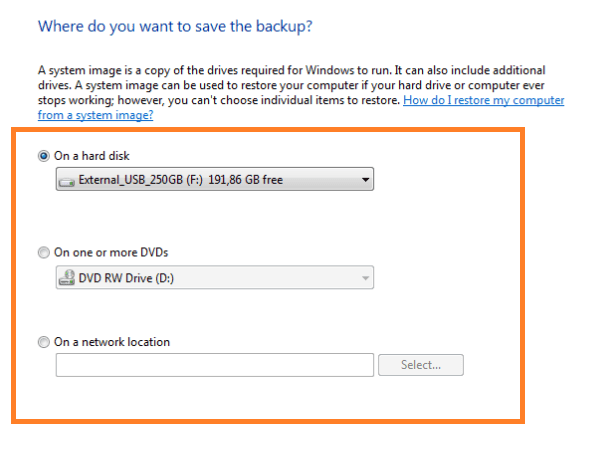
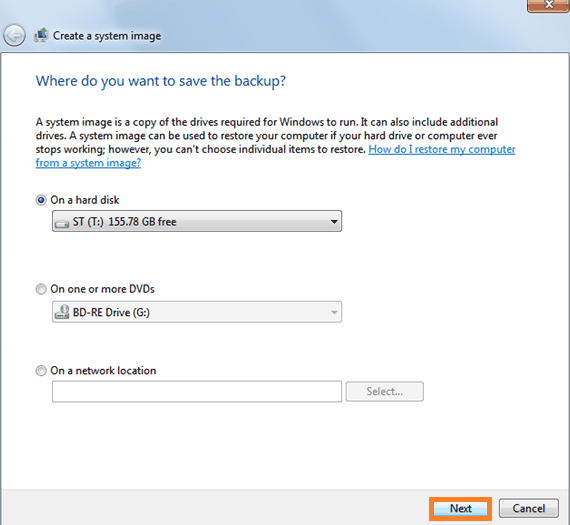
- Now it will ask you to “Where do you want to save the backup?” and you will have three options you can go for anyone. Use the drop-down menu for location selection. The further steps depend on which option you have selected from the three. If you have selected “On a hard disk” then make sure you have an external hard drive and you have connected it. If you have chosen “On one or more DVDs” then make sure you insert the blank DVD in your Windows 10. If you have chosen the last option that is “On a network location” then tap on Select and fillup location, username, and password. At last hit on the Ok button.
- Once you have decided where to store backup then hit on Next button from the bottom right corner.
- To start backup tap on the Start backup button from the bottom right corner.
After all, you will have a prompt to create a system repair disc. If you don’t want to create then tap on the No option. If you want to create then choose CD/DVD drive and then insert CD/DVD. Make sure you insert a blank CD/DVD into the drive. At last hit on Create disc. There are benefits of creating a system repair disc such as it is used to boot your system.
How to create System Image Backup on Windows 7?
The system image utility was introduced first on Windows 7. In Windows 8 and Windows 8.1, they tried to hide this utility. In Windows 10 they have hidden this system image utility. If you are Windows 7 user then follow the steps below to create a system image backup.
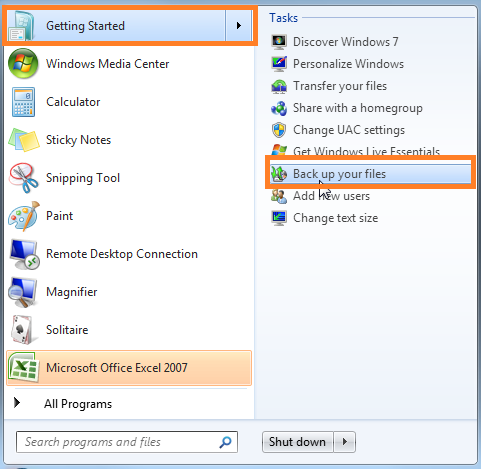
- First of all tap on the Start menu and then take your cursor on Getting Started.
- From the open menu tap on the Back up your files option.
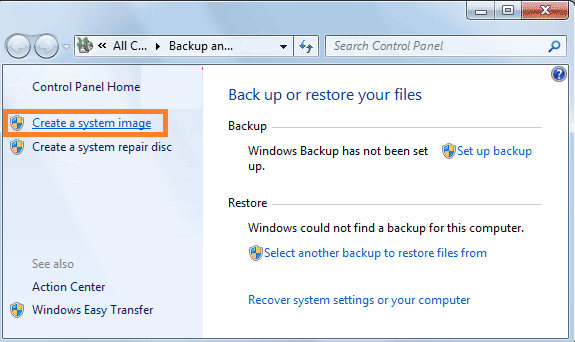
- Now tap on Create a system image option from the left pane.
- After this, you have to select the location of storing the backup. For easy selection read step 6 of the above guide.
- Once you have selected the location then tap on the Next button.
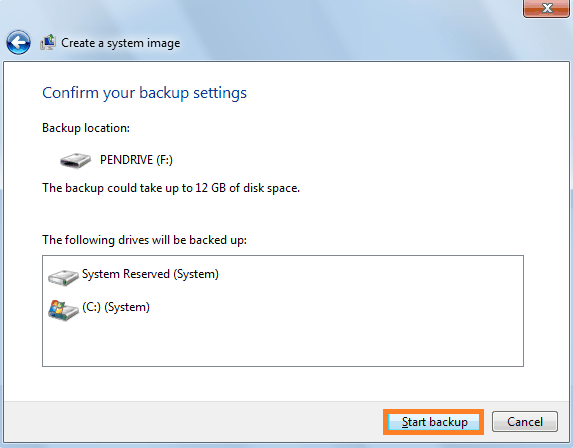
- Now it’s time to start back up so hit on the Start backup button from the bottom right corner.
Once the process is completed then you have a prompt for creating a system repair disc. It is on you whether you want to create or not. My advice is to create because there are a lot more benefits to it. It will boot your system and it has windows system recovery tools. With the help of these tools, it can fix errors. So, it is better to create it.
I hope that by applying the above guide you will successfully create a system image backup using system image utility on Windows 10 and 7. Now you can restore backup anytime when you needed. You will have fresh Windows after restoring.