Windows 11 came knocking on our doors with a futuristic interface, a familiar yet distinct look, and brand-new features. To get the most out of these, we must know how to enable them. Such as, How to enable Remote Desktop in Windows 11? This new version of the Windows 11 update is perfectly suitable to meet the needs of any high-intensity workplace, classroom, and so on. Knowing the configuration of the Windows 11 Remote Desktop feature will give users like us access to files and applications stored in the computer even when we are not physically present in the location.
Think about it, you may not be present one day at the office, but you continue receiving calls from your colleagues asking you to give access to a file stored in your Windows 11 computer. Now you do not have to run down to the office yourself to fix the situation. You can simply use the Remote Desktop Protocol and access and control your files from whatever Android, iOS, or Windows device you want. Similarly, through the Remote Desktop feature, you can offer assistance too.
All you need to know is how to enable it, and luckily for us, Microsoft has given us four different ways we can actually enable the Remote Desktop Protocol feature in our Windows 11 PC or Laptop. We are going to explore all of them one by one.
Read Also: Windows 11 Performance Vs Windows 10
Contents
Enable Remote Desktop via Settings
Enabling the Remote Desktop Protocol feature, or RDP in Windows 11 through the Settings app is easy and quick. To do so, follow the exact steps listed below;
- Press Windows + I on your keyboard. This will open the Settings app on your computer.
- Look to the left pane sidebar, and you will notice a System option on the top of the list. Stay on the System option.
- Now the System options will consist of the long list on the right pane of your computer screen. Scroll down, and you will notice Remote Desktop. Click on it.
- A new page on your computer screen will open up, which will show the various setting options inside Remote Desktop. You will notice a toggle with Remote Desktop written right at the top, turn on the toggle.
- The next prompt will ask you to confirm your choice to Enable Remote Desktop. You and users selected under User accounts will be able to connect to this PC remotely. Tap on the Confirm button.
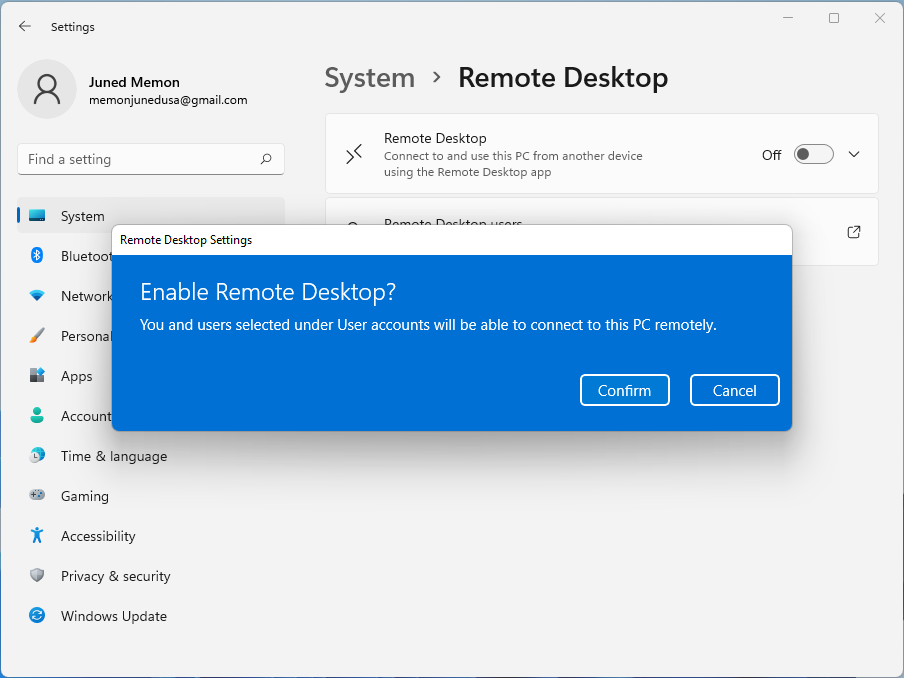
Now confirm the modifications to save the changes you have made. There is another recommended box under the drop-down of the same Remote Desktop option that Requires devices to use Network Level Authentication to connect. It will make the Remote Desktop connection more secure against any misuse.
If you need to configure a router separately, go to the Settings page again, and you will see the Remote Desktop status displayed. The port number ordinarily remains 3389.
If you are not able to find it on your Home edition then alternatively Chrome in Windows 11 also offers a remote access feature.
How to remotely access Windows 11 PC from another Android, iOS, or Windows device?
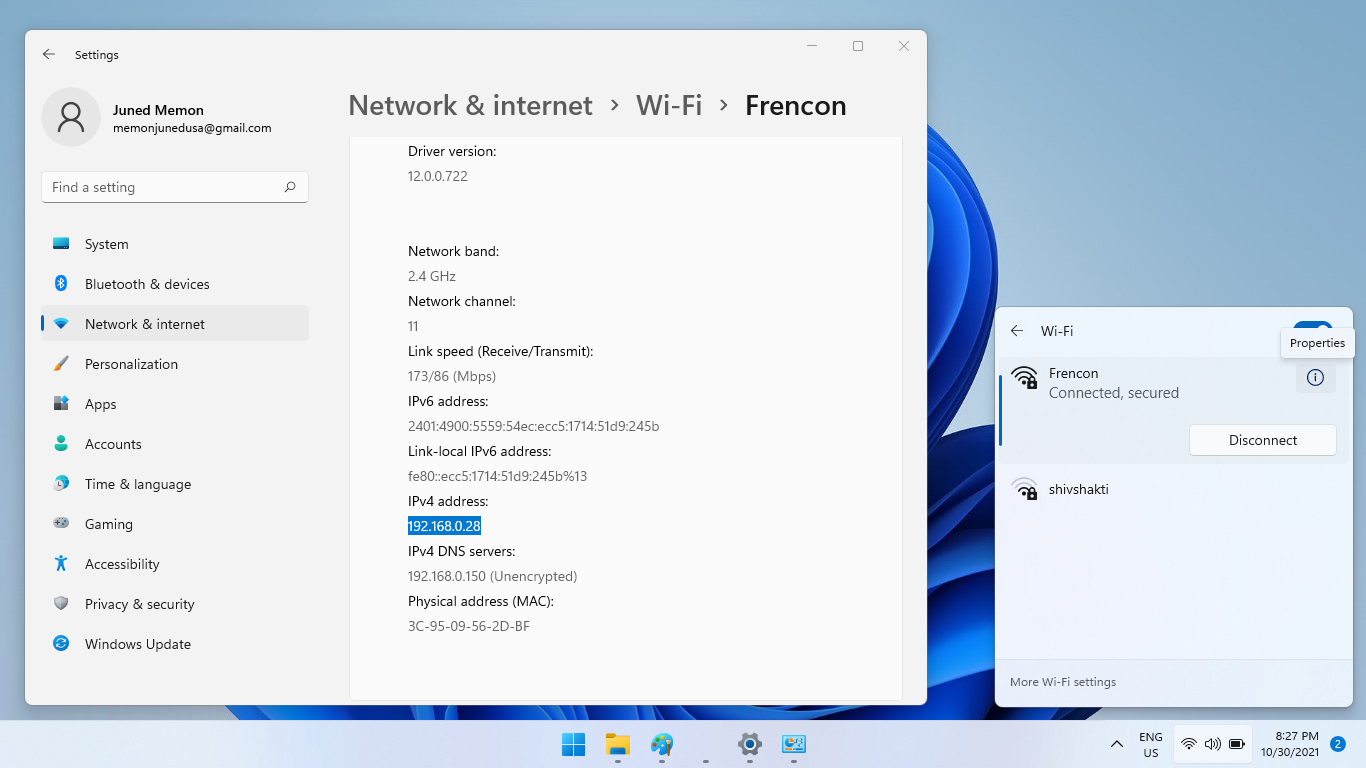
Now it’s time to remotely access the Windows 11 PC from another Windows, Android, iOS, or Linux device. You will need a few authentications to access the PC such as the IP Address of your PC, User Account, and its Password. If you haven’t added any local account then Microsoft Account credential will work. Just follow the below step to know the IP address of your Windows 11 with the connected network.
Tap on the action center with the WiFi icon, expand the WiFi network, click on the “i” icon to open the connected network properties. Then scroll down the page until you see the IPv4 address.
Now let’s showcase the Windows 11 remote connection from the Android phone, it will be the same from iOS or Windows device.
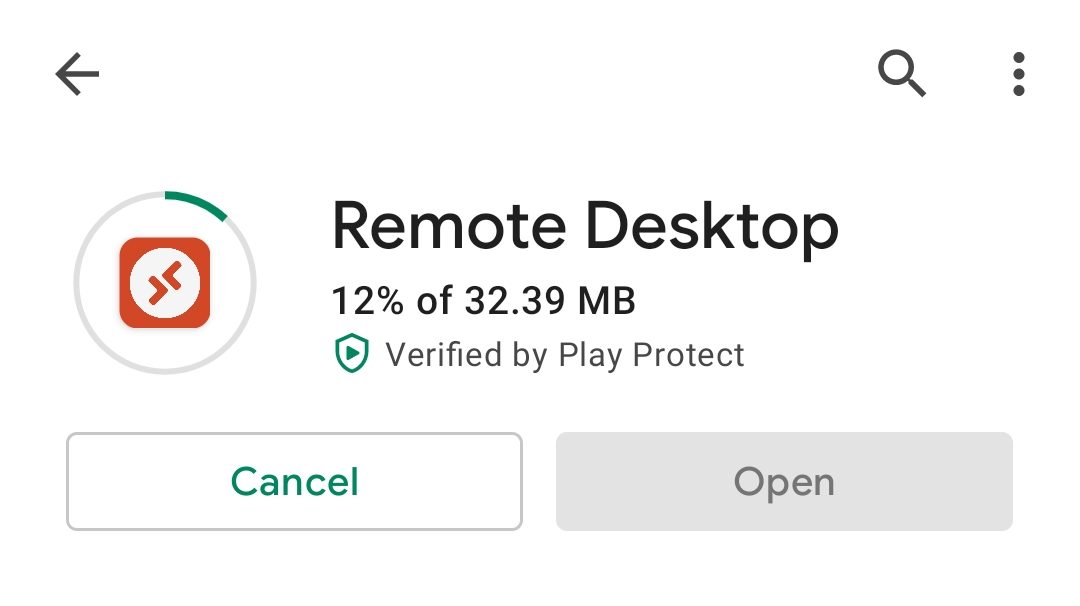
Go to Google Play Store and download Remote Desktop App by Microsoft. The iOS and Windows device users will find it on App Store and Microsoft Store.
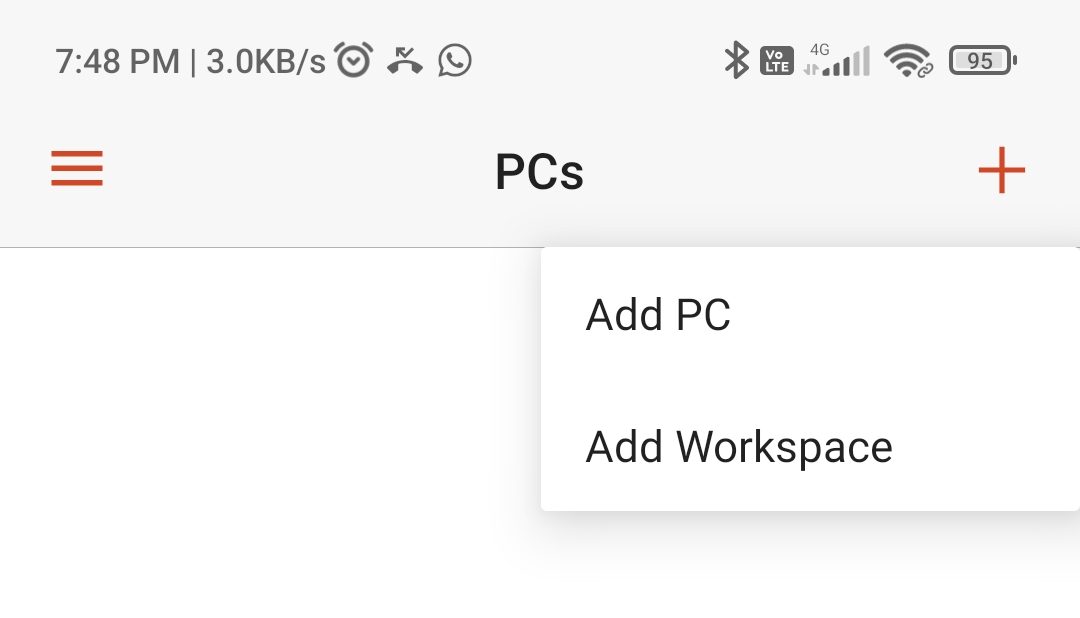
Open the app, accept the license agreement, and tap on the plus (+) button from the top-right corner to Add PC.
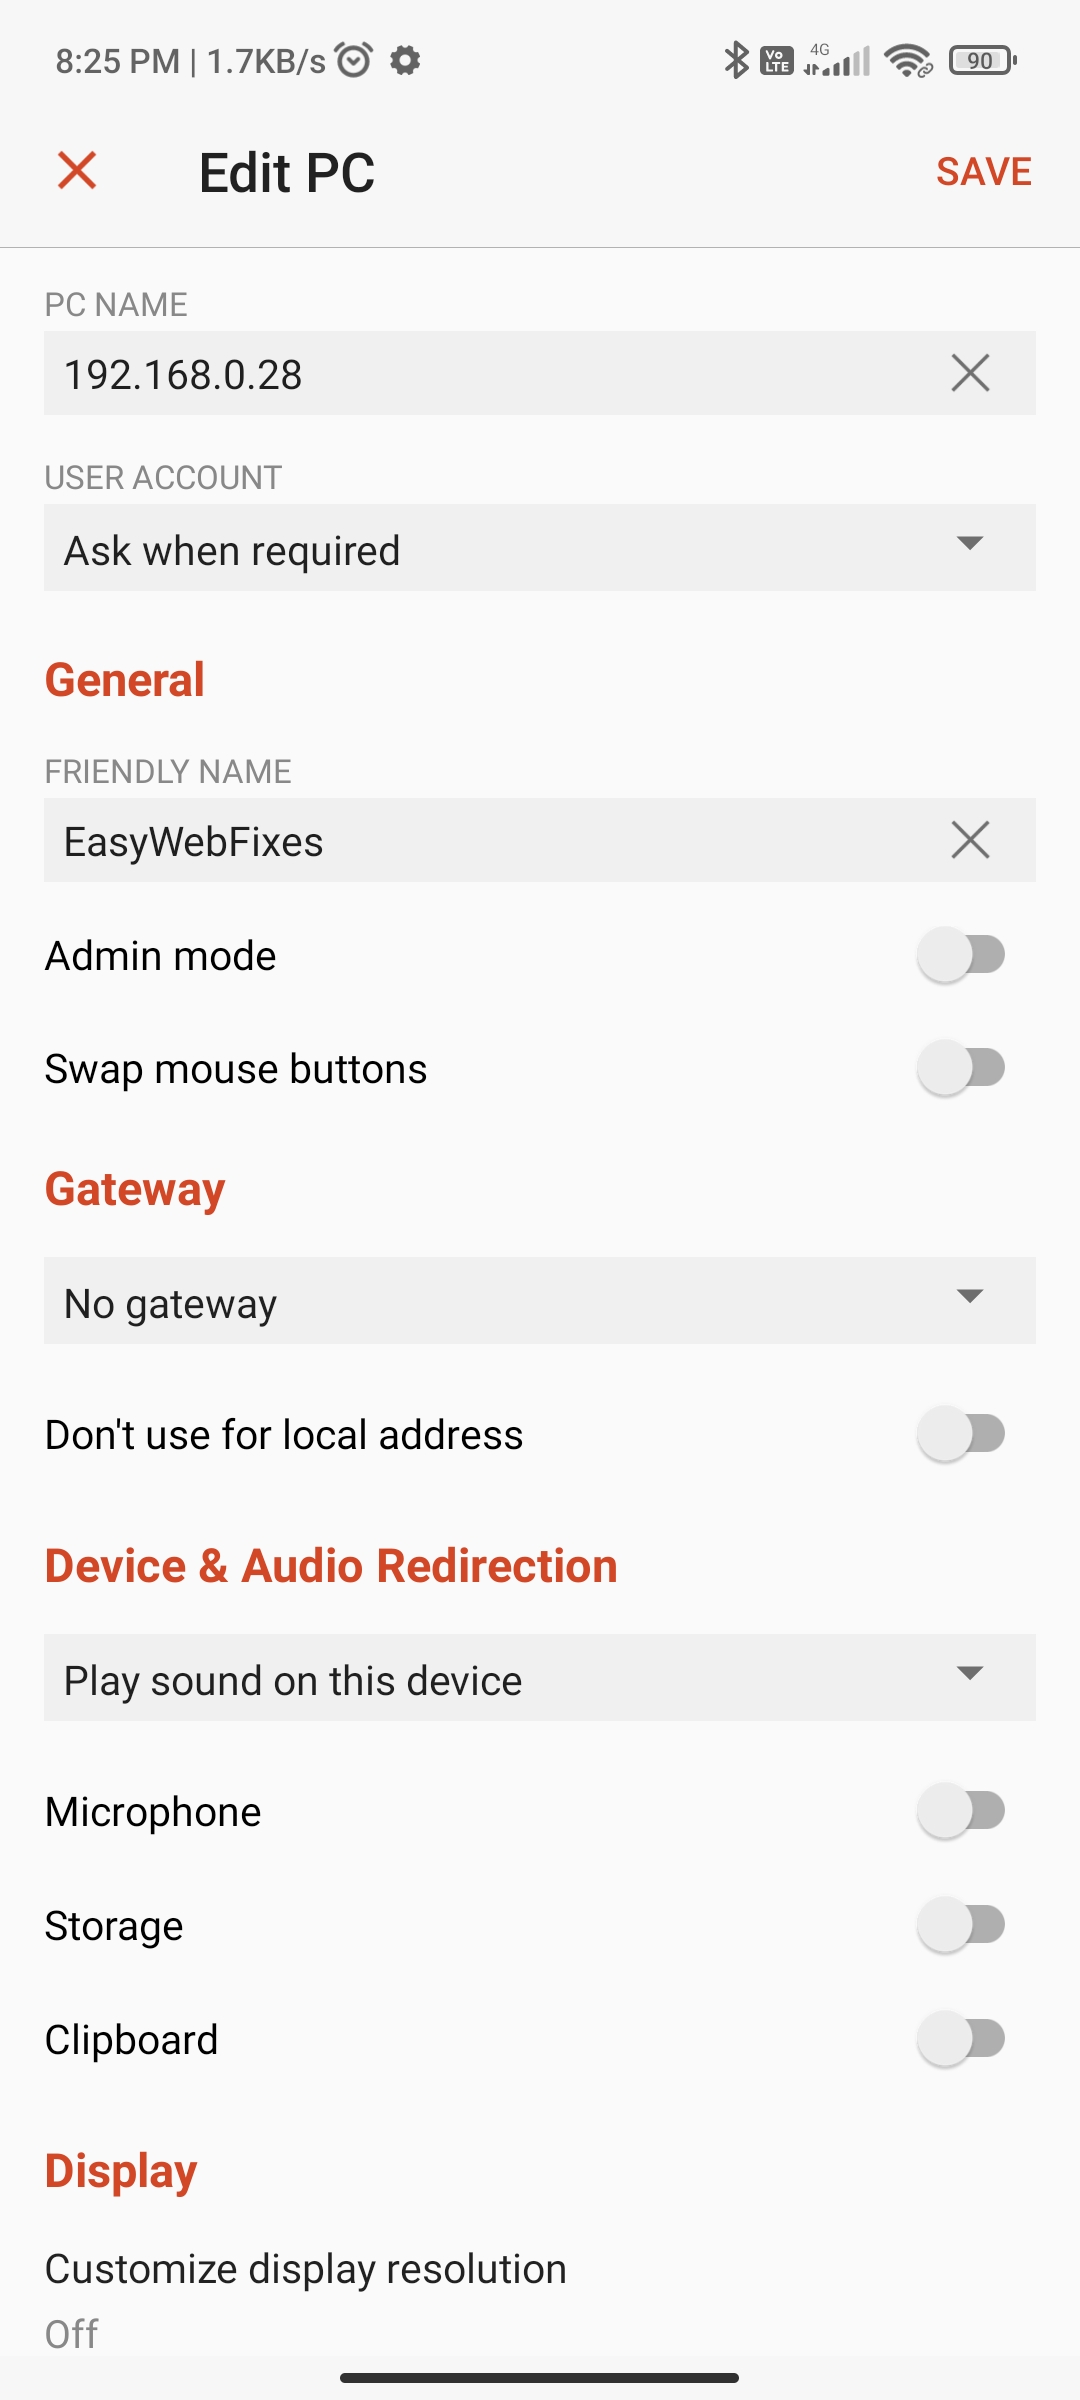
Add the IP Address as PC name that you noted from Windows 11, Friendly Name of your choice, and click on the SAVE button.
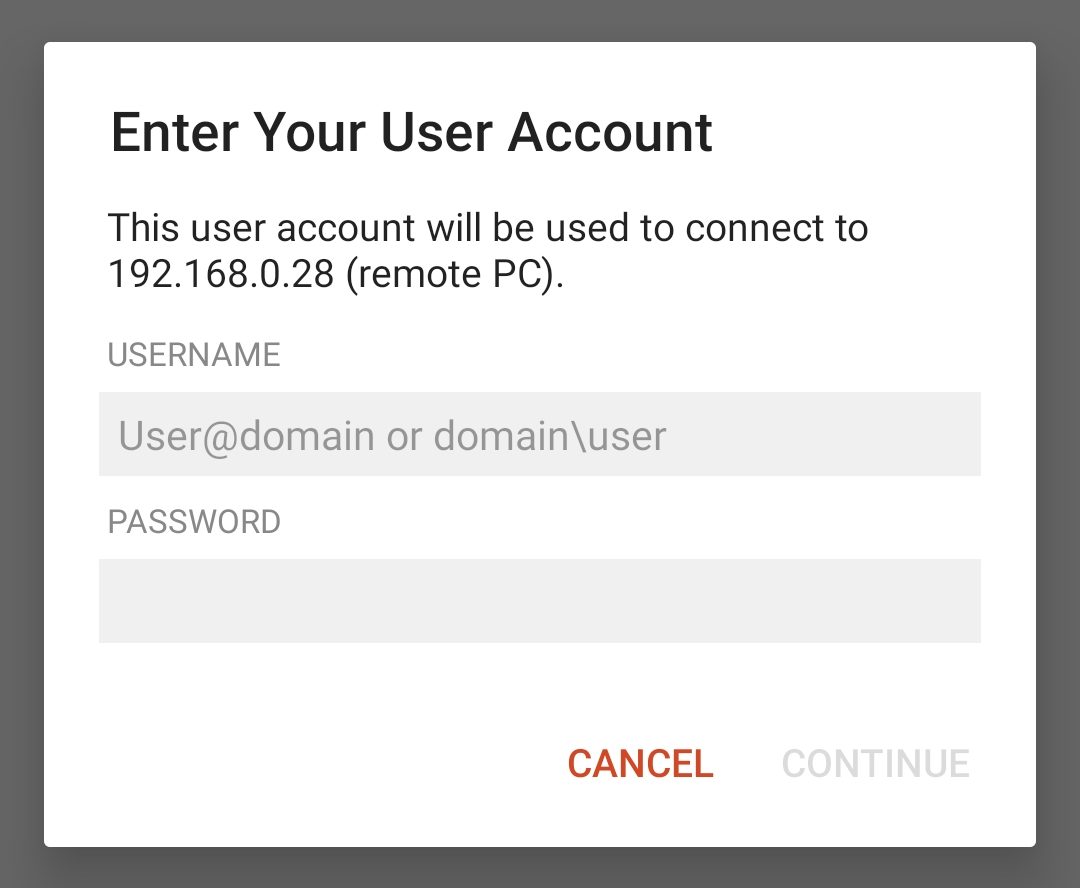
Tap on the added PC to enter its Username and Password.
That’s it, now you can remotely access Windows 11 from your any Android, iOS, or Windows device.

Also, check out alternative methods to turn on the remote desktop features on Windows 11 through cmd, control panel, or power shell.
Read Also: Get Android Google Play Store on Windows 11
Remote Desktop on Control Panel
Windows 11 Control Panel still has got all the control and settings options. Earlier Microsoft Windows used to offer all the important options from the Control Panel. Similarly, Remote Desktop settings are also available under Control Panel settings.
- To start with, enter in the Control Panel of your computer system. You can do so by typing Control Panel on your Windows search box and clicking on the result.
- You will see the Control Panel option appear on the screen. Specifically, on the larger right side of the screen, there will be loads of options displayed. You have to select the first System and Security option. Make sure you are viewed by category option.
- Now another window will open up on your screen, and you will have more options. Search for an option that says ‘Allow Remote Acess‘ which you will see underneath the System section. Click on it.
- A popup window for System Properties will appear on your screen. Under the Remote option, you have to check the ‘Allow Remote Connections to this computer‘ text.
- You also have to enable/check another text called ‘Only allow connections from computers running Remote Desktop with Network Level Authentication,’ which you will see in the popup window itself.
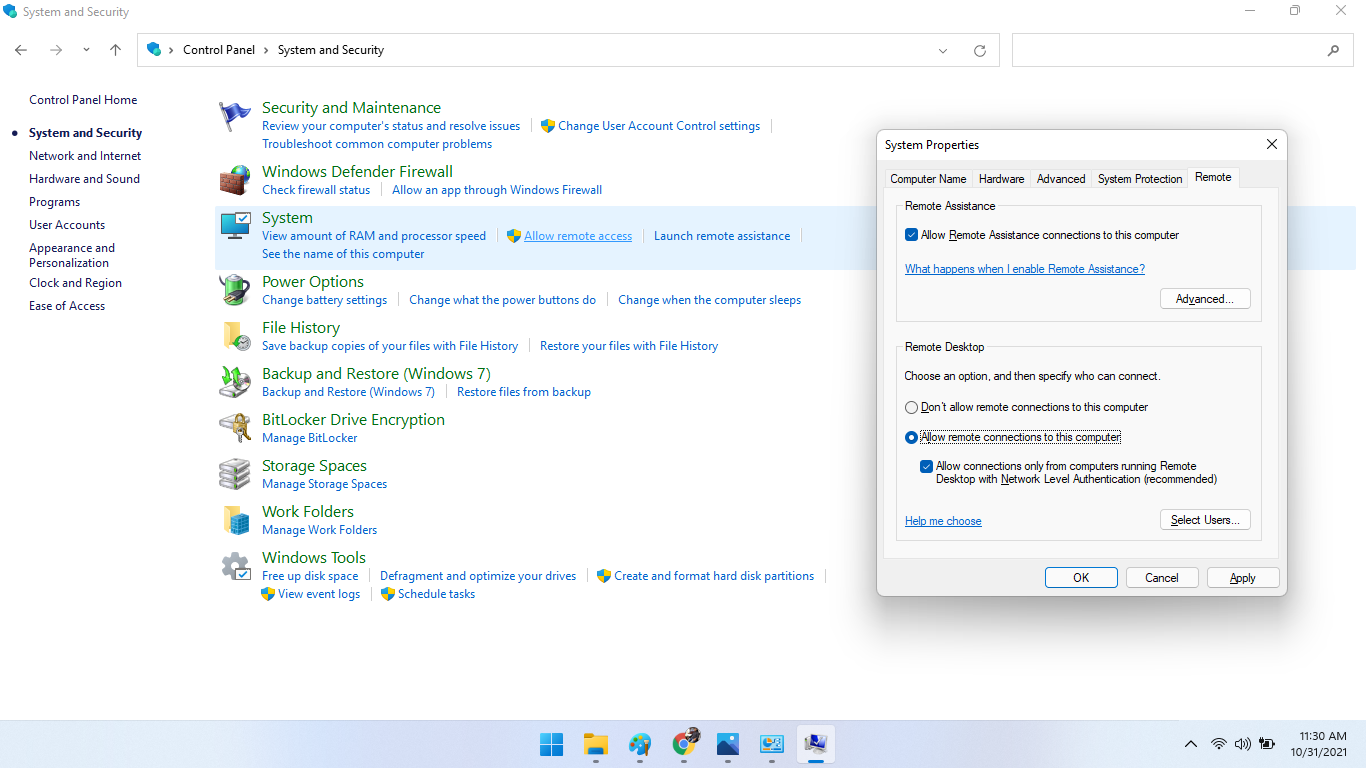
After you are done selecting and checking the options, press the OK button, and your Remote Desktop on Windows 11 is now in function.
Remote Desktop Using Command Prompt
Using Command Prompt, we can enable Remote Desktop in Windows 11 if we follow and perform a specific set of actions on our computer.
You will find the command prompt in admin mode. To access it, navigate inside the Start Menu and look for a ‘cmd’ in the search box. Then choose to Run as Administrator. You need to type the command below if you wish to enable the remote desktop protocol in your Windows 11 computer.
reg add “HKEY_LOCAL_MACHINE\SYSTEM\CurrentControlSet\Control\Terminal Server” /v fDenyTSConnections /t REG_DWORD /d 0 /f

After typing the command in the command prompt, press Enter, you have successfully turned on the Remote Desktop feature on your computer.
Alternatively, you can try another command too in the command prompt option, which will take you through the Windows Firewall to enable the RDP feature. Here’s the command which you can copy and paste in the Command Prompt.
netsh advfirewall firewall set rule group=”remote desktop” new enable=Yes

Remote Desktop via PowerShell
Powershell command also may start remote desktop on your Windows 11. Perform the following listed steps.
Navigate inside the Start menu and look for PowerShell. Choose to Run as Administrator by right-clicking the result at the top of the screen. This will allow you to function in Admin mode. On the deep blue screen that will appear next, type the command mentioned below by copy and pasting it and then hit Enter.
Set-ItemProperty -Path ‘HKLM:\System\CurrentControlSet\Control\Terminal Server’ -name “fDenyTSConnections” -value 0

To ensure that your remote desktop connection is not blocked by Windows Firewall, which happens sometimes, you can type in another command after that and again, hit Enter when you are done.
Enable-NetFirewallRule -DisplayGroup “Remote Desktop

Five of these methods to enable remote desktop in Windows 11 computer system will help you best when one or the other methods does not work suitably. It can be a game-changer for you while you are doing your work and sharing files, giving file access to people, offering technical assistance to your colleagues and family, and controlling a computer’s file and application remotely. The step-by-step mentioned above will make the transition of enabling the Remote Desktop feature easiest on your PC.