The most awaited Android Apps are now out to the Windows Insiders on the Beta Channel. Microsoft has started rolling Android Apps support to United State users through Amazon Appstore. Popular Developers have added around 50 apps to the Amazon Appstore including Android Games.
Do you want to test Android Apps on your Windows 11 PC? Then stick with our guide to configure Microsoft Store, Amazon Appstore, and Windows Subsystem for Android on your PC.
Popular Android Apps include Pinterest, Lords Mobile, Kindle, Coin Master, Lego Duplo, June’s Journey, Khan Academy, BBC Sounds, Game of Kings, Final Fantasy, and counting. More apps and games will be added after monitoring their apps and gaming performance on Windows 11.
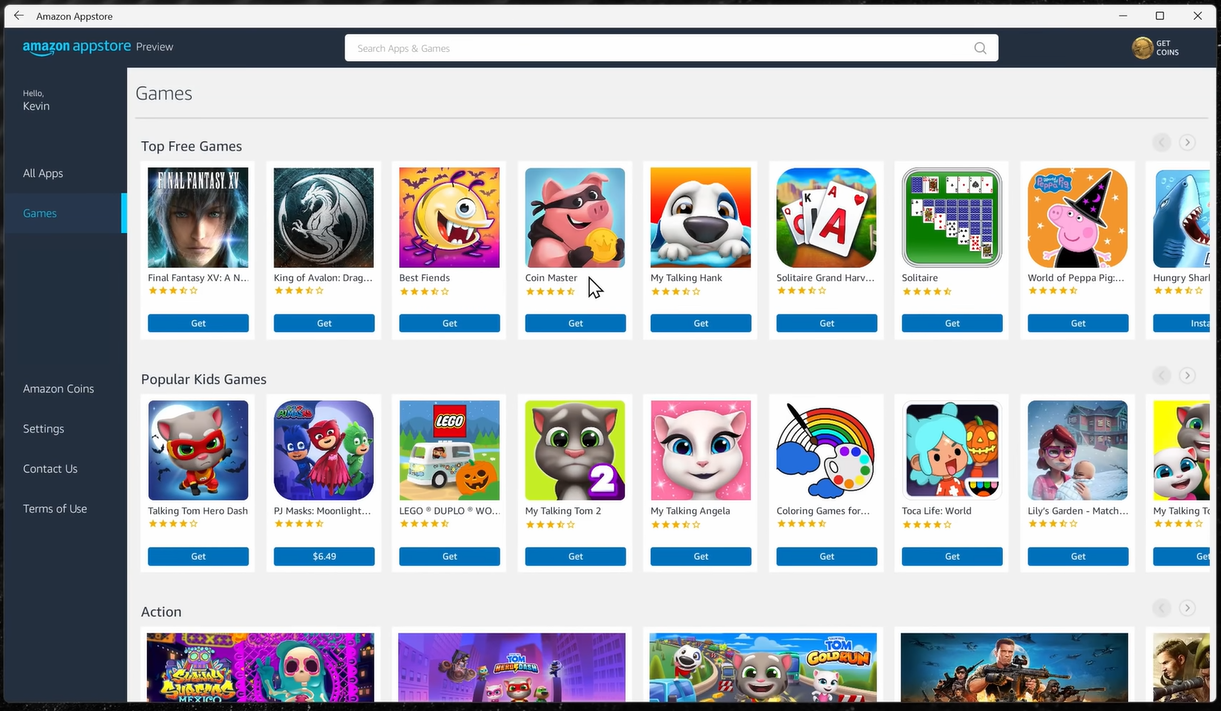
Android Apps will run on the new technology called Windows Subsystem for Android, which will be directly integrated with the Amazon Appstore. Windows Subsystem for Android includes Linux kernel and Android Open Source Project (ASOP) based on the Android 11. Amazon Appstore will run Hyper-V Virtual Machine to map Android layers to Windows. Hyper-v might require Windows 11 Pro upgrade.
Android Apps will be directly integrated into the Windows 11 system for seamless performance. You can pin the apps to the Start Menu or Taskbar and get their notifications instantly into the Action Center. Use their functionalities with the mouse or touch and also use multiple apps on one screen through the snap layout feature.
That’s enough introduction about Android Apps on Windows 11 through Amazon Appstore and Windows Subsystem for Android. Now let’s get into the action and get them on your PC.
Learn everything about in detail: Android Apps in Windows 11
Contents
- 1 Step 1: Enable Virtualization on your PC
- 2 Step 2: Join Windows 11 Insider Program through Beta Channel
- 3 Step 3: Change your PC region to the United States
- 4 Step 4: Install the latest Microsoft Store Update
- 5 Step 5: Enable Windows Subsystem for Android
- 6 Step 6: Download Amazon Appstore
- 7 Step 7: Download Android Apps on Windows 11
Step 1: Enable Virtualization on your PC
Virtualization feature will be required by Windows Subsystem for Android and Amazon Appstore to run Android apps on Windows 11 Hyper-V Virtual Machine. First, let’s check if Virtualization is already enabled from your UEFI settings or not.
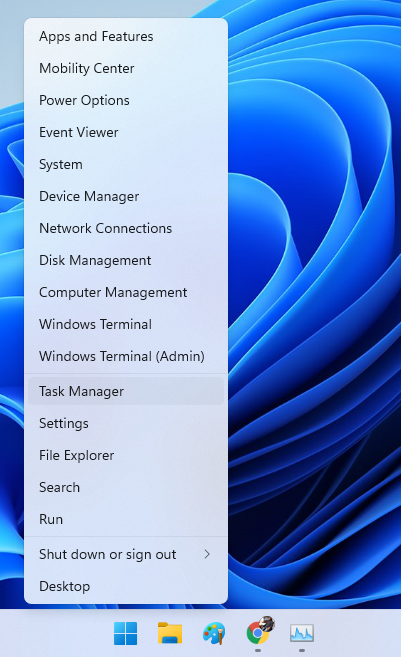
Right-click on the Windows 11 Start icon and click on the Task Manager.
Tap on More details if Task Manager shows only Apps and switch to the Performance Tab. Now the default CPU tab will give you information about Virtualization is Enabled or not.
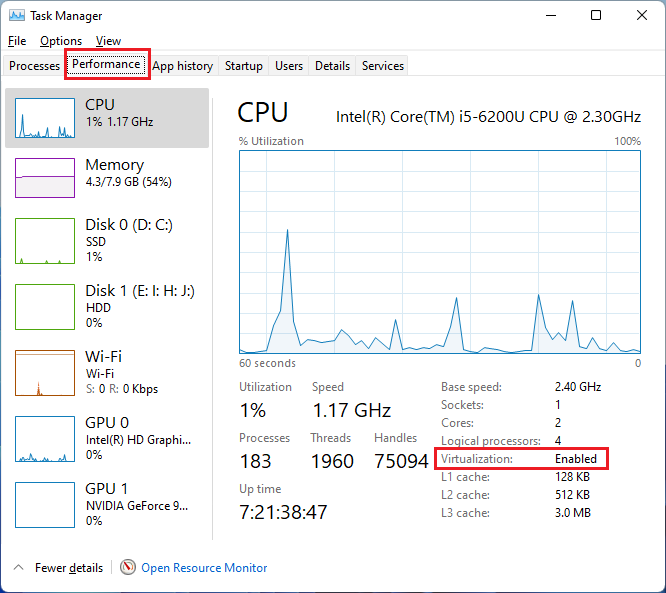
If it’s enabled by default then you are good to go to the next step, else let’s enable it from UEFI settings.
Restart your PC by holding the Shift key to launch Windows 11 into Recovery Mode.
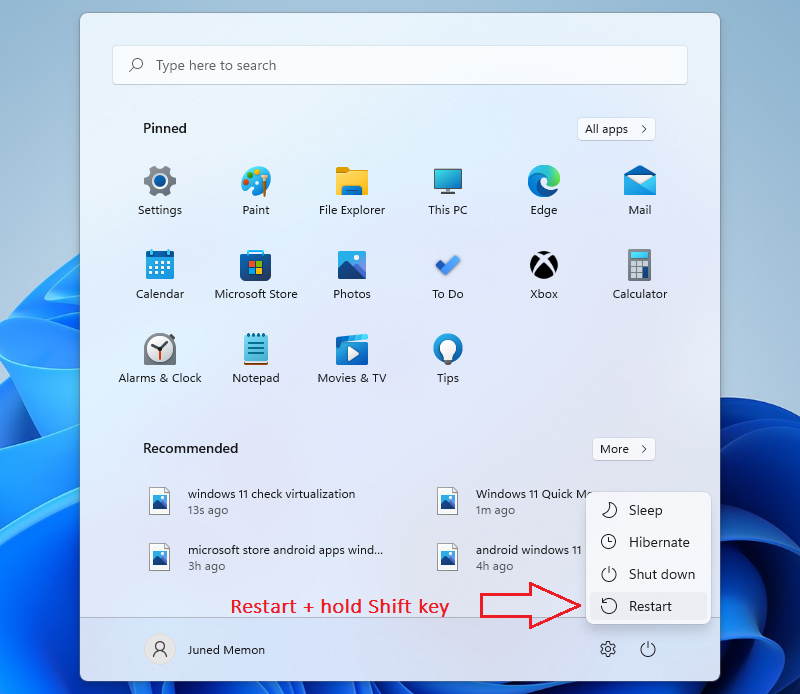
Then follow the path as Troubleshoot > Advanced options > UEFI Firmware Settings.
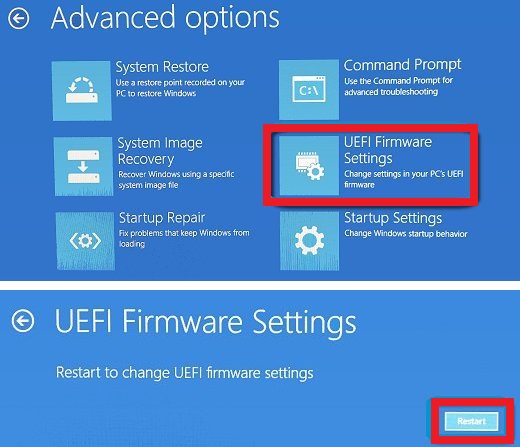
Go to the Advanced tab into the UEFI or BIOS settings and enable the Virtualization Technology option, it might be also under the System Configuration tab.
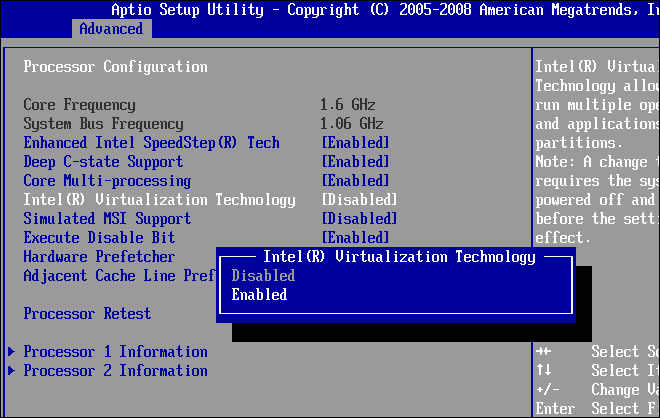
Save and exit the settings, look at the bottom of the UEFI or BIOS settings for saving the changes.
That’s it, now check out the Virtualization option under the Task Manager.
Step 2: Join Windows 11 Insider Program through Beta Channel
Microsoft has released Android Apps support only for the Windows 11 Insider on the Beta Channel. If you are already on the Beta Channel then go to the next step else follow this step till the end.
If you have recently downloaded and installed the stable version of Windows 11 without joining Windows Insiders Program then the procedure will be pretty simple and easy.
Launch Windows 11 Settings and go to the Windows Update option. Then tap on the Windows Insider Program and click on the Get started button.
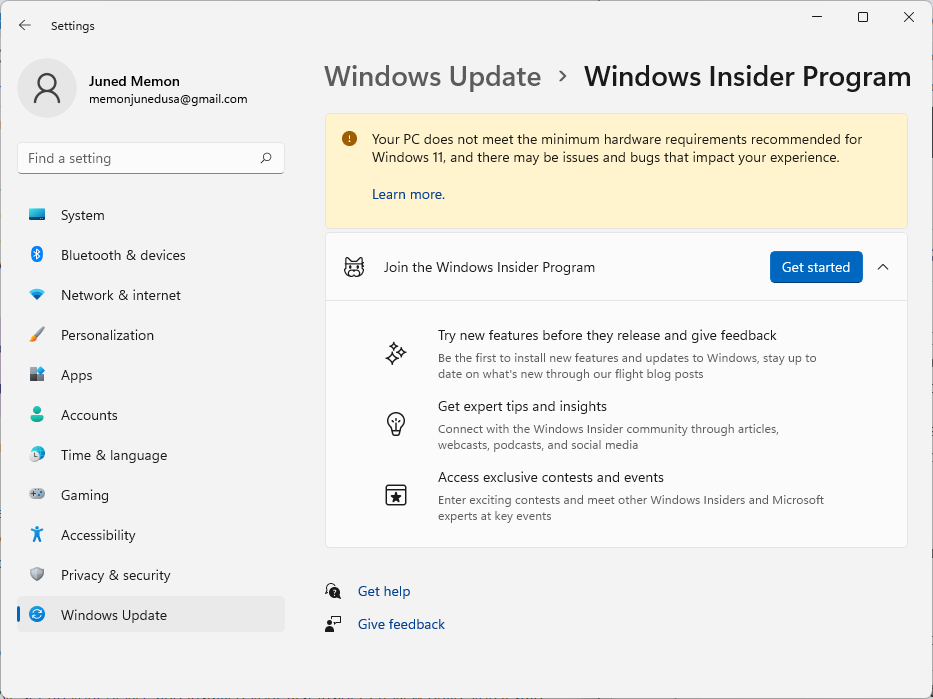
Connect your Microsoft Account or create a new one. Follow the on-screen instructions and choose Beta Channel to get updates from. Accept the Privacy Terms and Conditions and Restart Now to finish the process.
Now its time to download the latest Windows 11 Beta Channel Builds from the Settings > Windows Update > Check for updates.
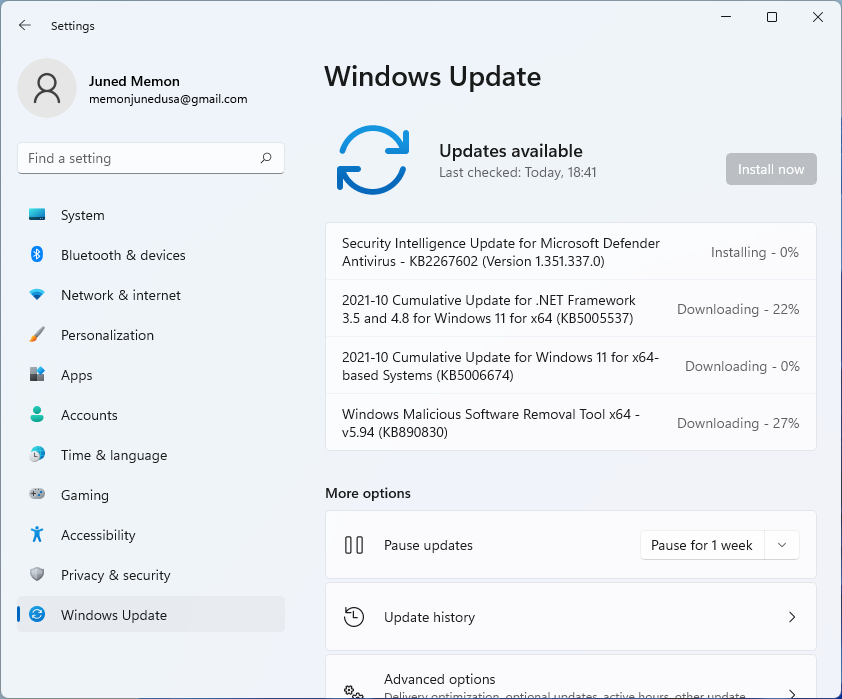
It will take time based on your internet connection to download and install the latest updates.
Now if you are already on the Dev Channel then it will take some time to get the Android Apps update. Currently, Dev Channel builds are totally different from the Beta Channel builds so it’s not possible to switch directly to the Beta Channel.
Step 3: Change your PC region to the United States
Amazon Appstore is currently available only to users in the United States on Windows 11. Microsoft will first test it out with the limited number of users then later it will be available to the public. So change your region on Windows 11 to the US to get Android Apps.
Tap on the Windows 11 Start Menu icon and click on the Settings from the pinned apps.
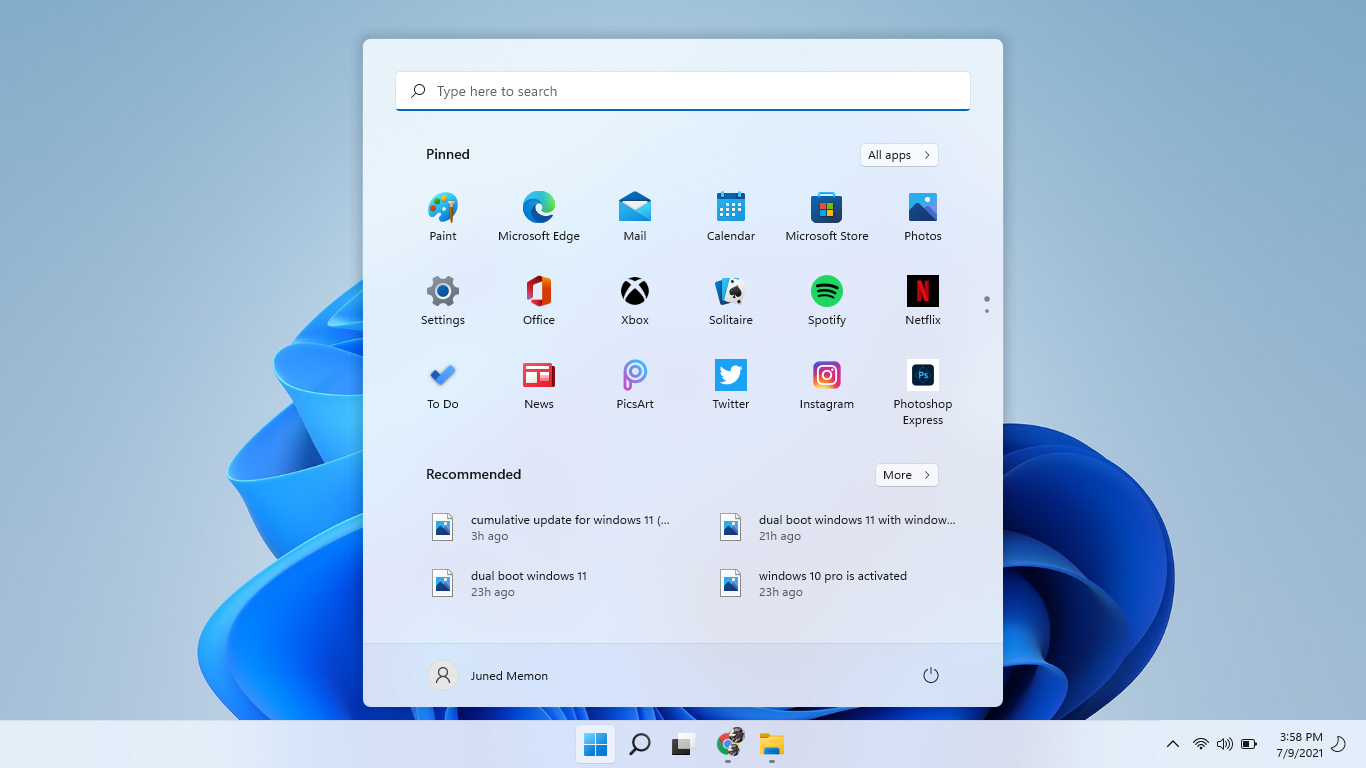
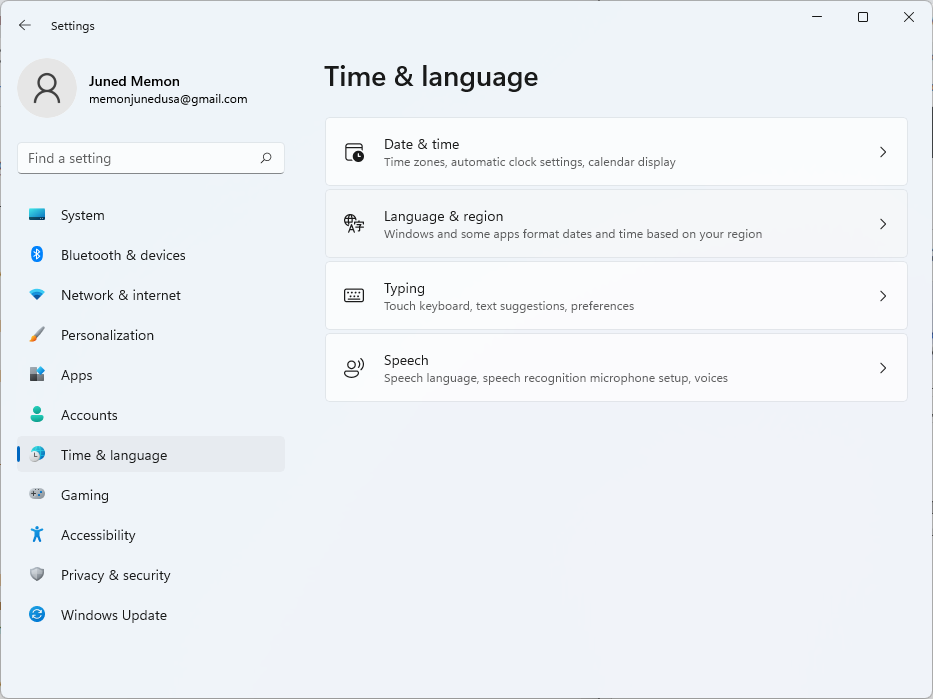
Go to Time & language option from the right side menu then select the second option to change Language & region.
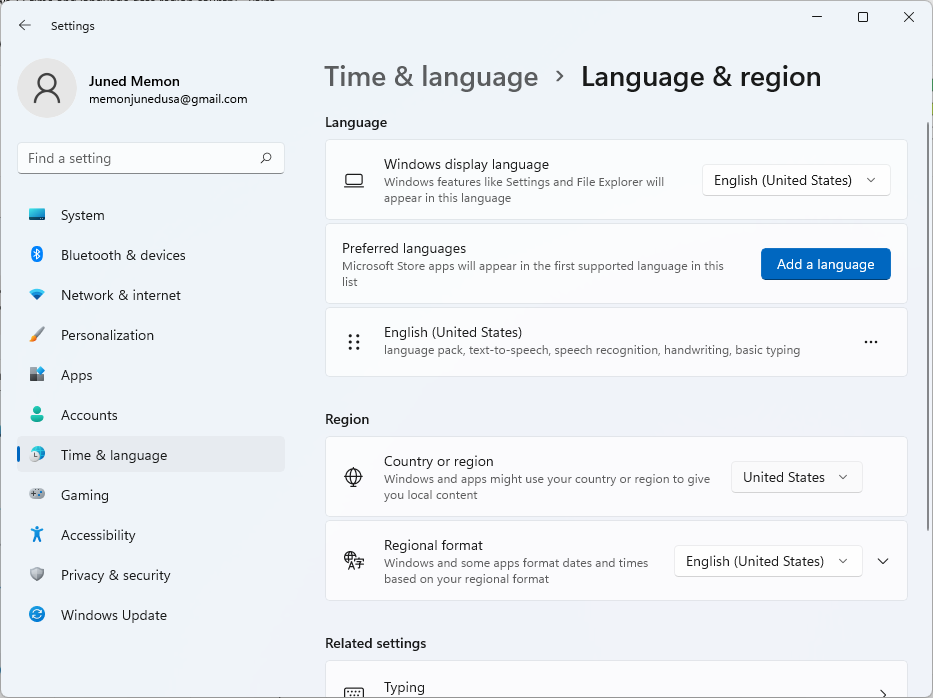
You will find the Country or region option under the Region section. Change your country to the United States and Restart your PC to apply the changes.
Step 4: Install the latest Microsoft Store Update
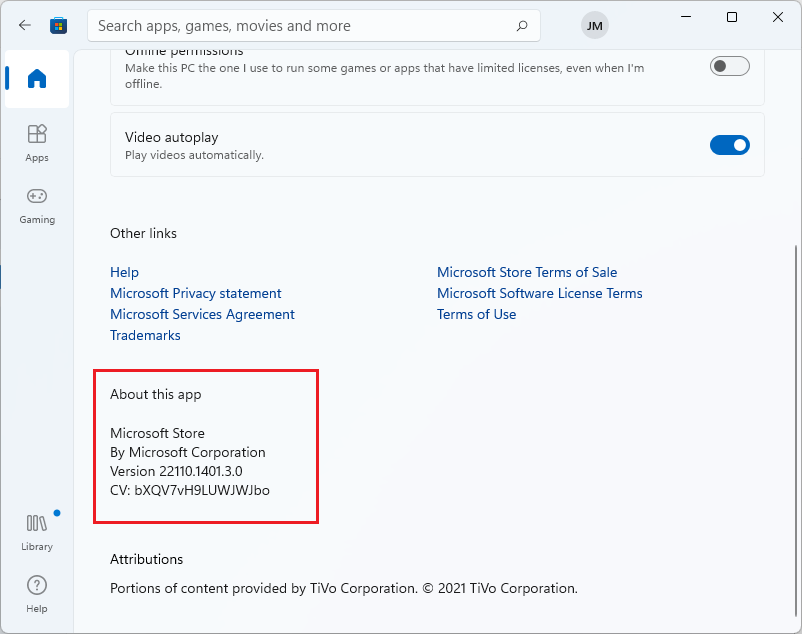
Android Apps update is available only on the latest Microsoft Store version 22110.1402.6.0 or higher. You have to make sure that the latest Microsoft Store is installed on your Windows 11. A newer version will also get you more features compared to an older one.
Launch Microsoft Store from the Taskbar, Start Menu, or Search.
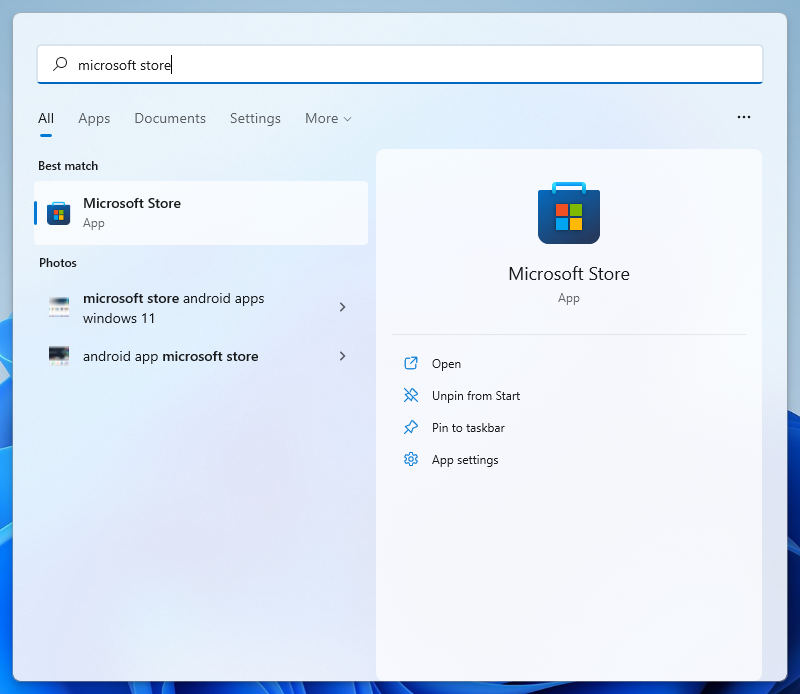
It might take some time to load if you are opening it after decades. Tap on your profile icon after the search box to open App Settings.
![]()
Scroll down to check the current Microsoft Store Version under the About this app section.
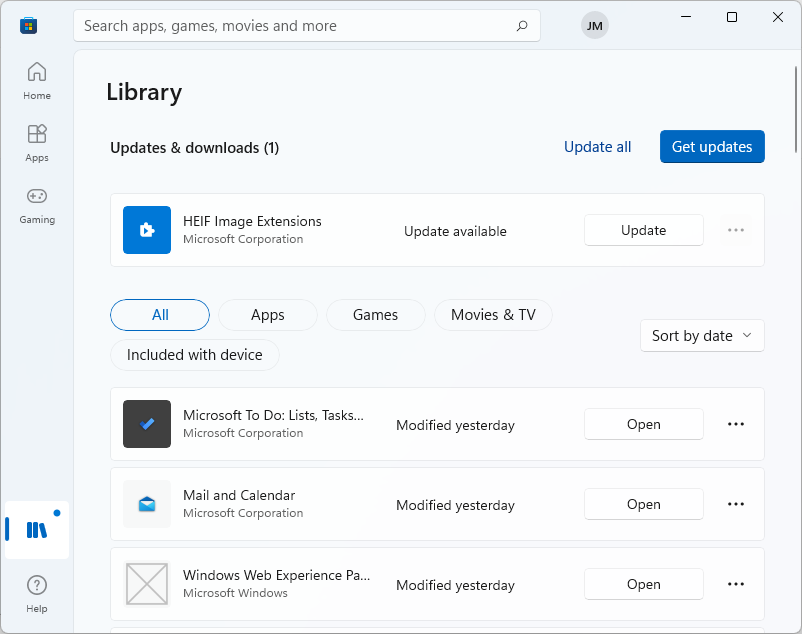
Now tap on the Library icon above Help from the bottom and click on the Get updates button to find, download, and install the latest apps along with Microsoft Store Version.
Step 5: Enable Windows Subsystem for Android
Windows Subsystem for Android will provide a Virtualization environment to run Android Apps on top of Windows 11. It enables Amazon Appstore to allow users to download and install Android Apps.
The Windows 11 Subsystem for Android is made up of Linux kernel and Open Source Project of Android 11. It runs the integrated Android Virtual Machine on Hyper-V, which looks like an android app running directly on Windows 11.
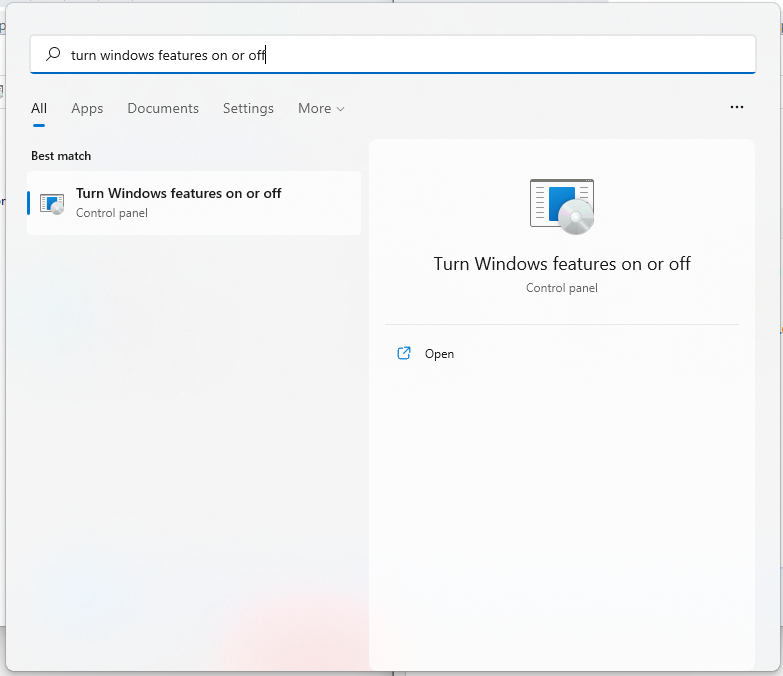
Open the Start Menu, search for Turn Windows features on or off, and tap on the first item with the same name.
Scroll down to the last, you won’t find Windows Subsystem for Android instead enable Windows Hypervisor Platform and Virtual Machine Platform.
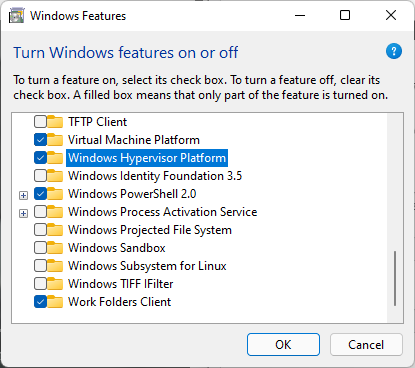
That’s it, you have indirectly enabled the Windows Subsystem for Android on Windows 11.
Step 6: Download Amazon Appstore
Now it’s time to download, install, and run Amazon Appstore from Windows 11 Microsoft Store. Amazon Appstore will provide a Virtual Machine Platform to use Android Apps and Games.
Go to the Microsoft Store, search for the Amazon Appstore, and Get the app.
The next prompt will ask you to Set up and use mobile apps on your PC.
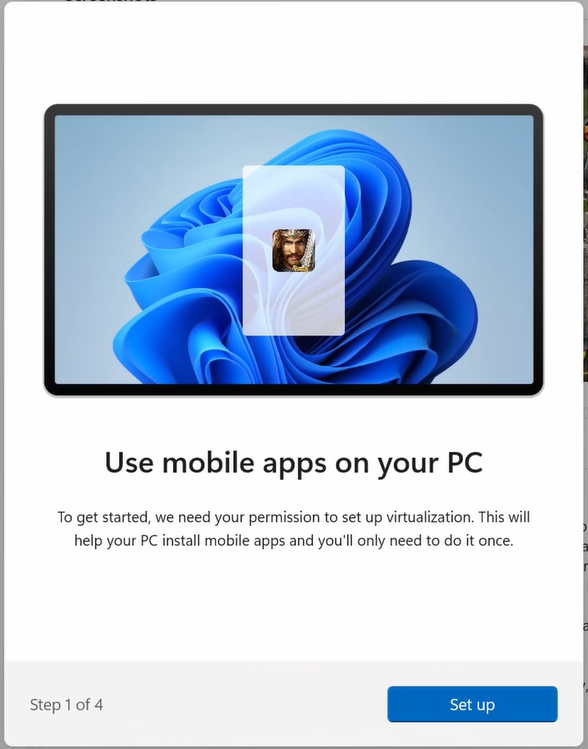
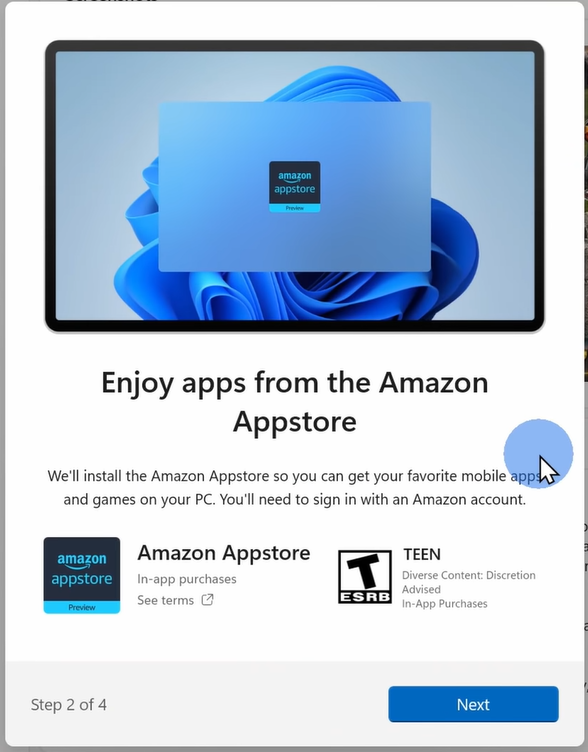
Tap on the Next step to enjoy apps from the Amazon Appstore.
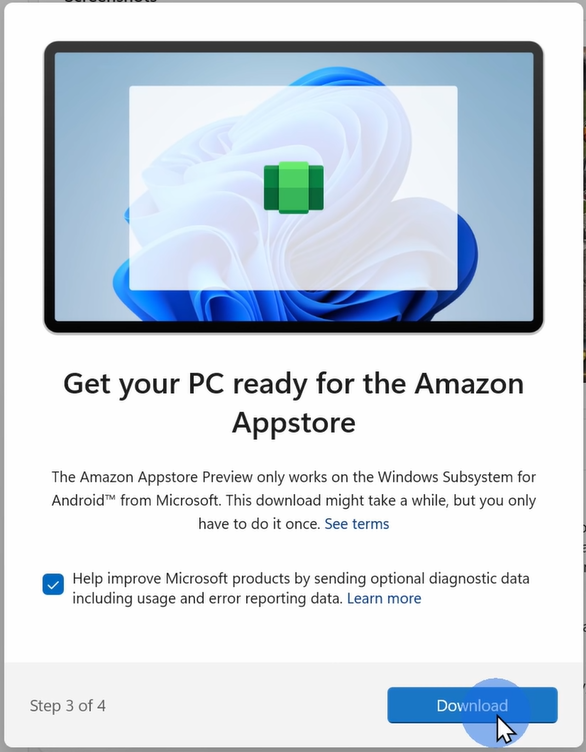
Finally, the next prompt will offer you to download Windows Subsystem for Android. It will take a while to download and install on your PC.
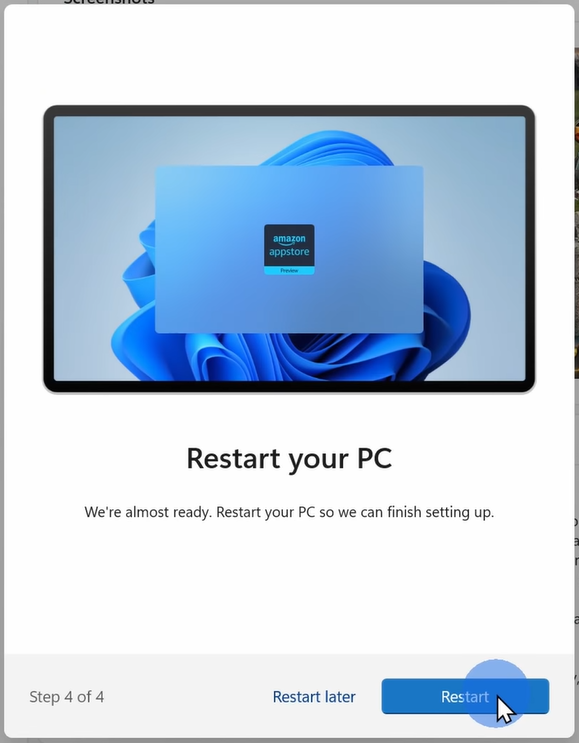
At last, you also need to Restart your PC to apply the changes.
Step 7: Download Android Apps on Windows 11
That’s it, you have completely set up the whole Android Ecosystem on your Windows 11 PC. Now you just have to sign in with your United States Account on Amazon Appstore and you are good to go.
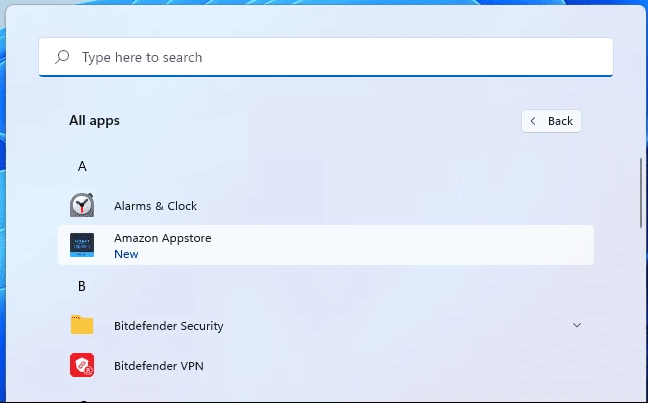
Tap on the Start Menu and launch the Amazon Appstore.
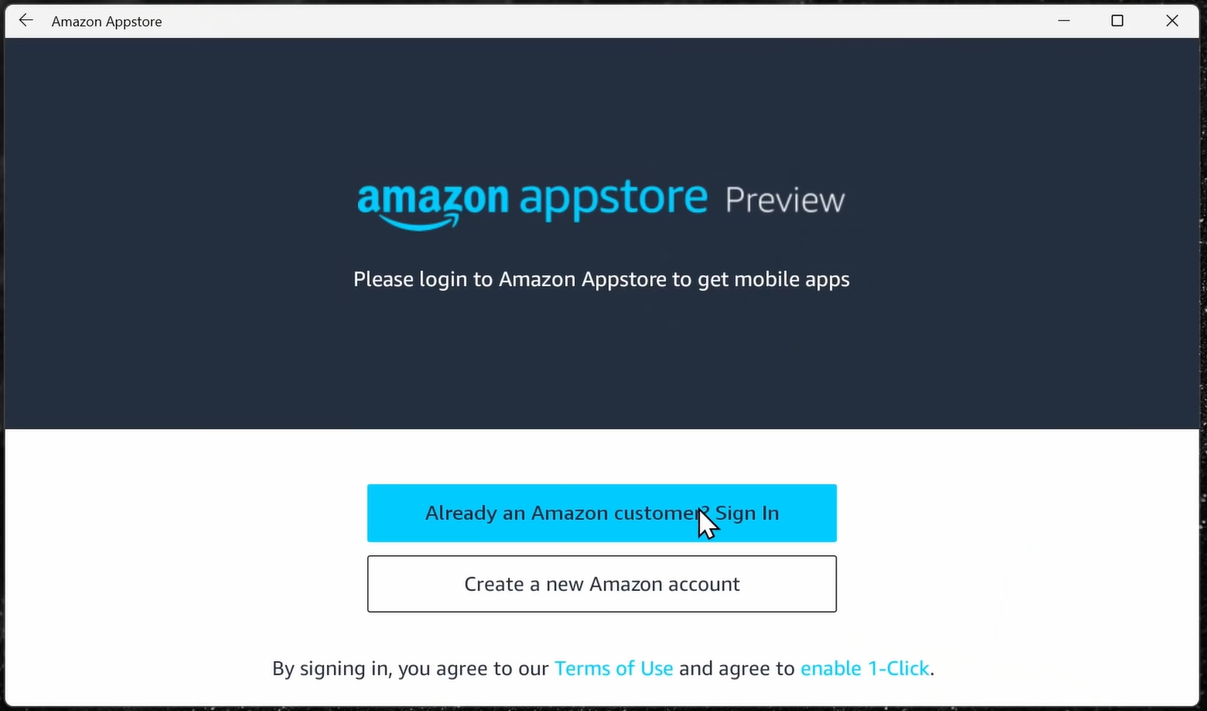
Sign in with your Amazon United States account or create a new one with the country set to the US.
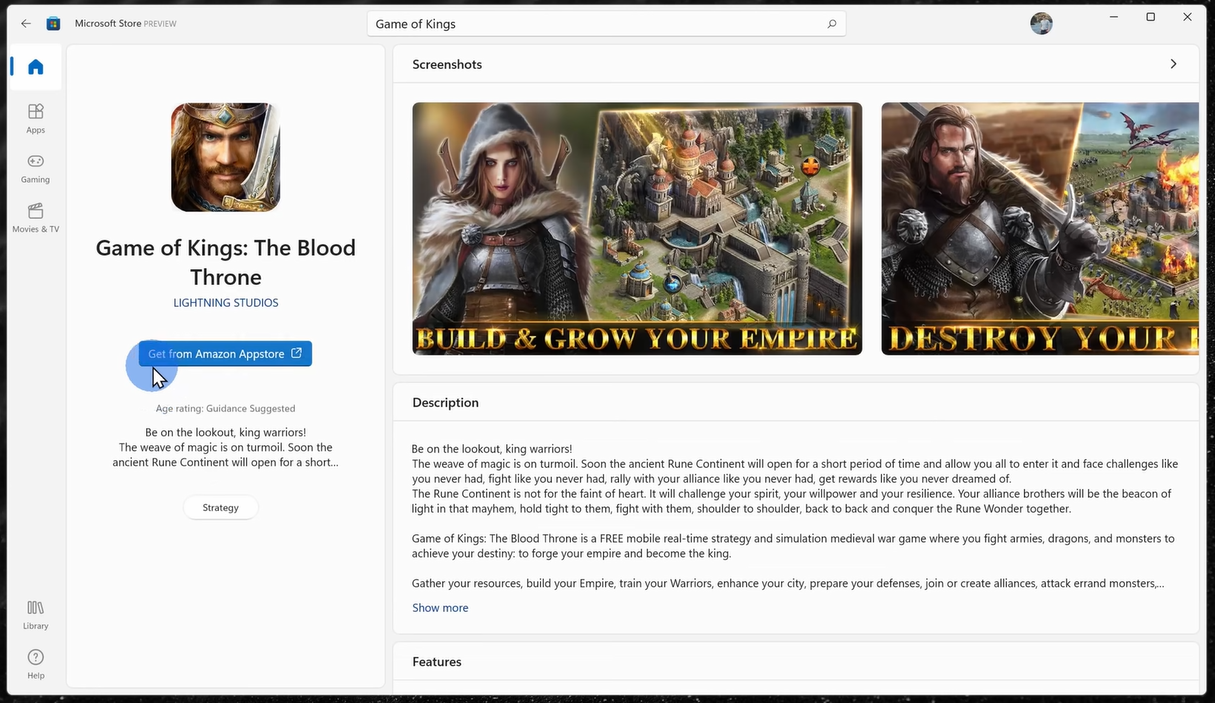
Now you can directly download and launch your favorite game or app from the Amazon Appstore.

Android Apps and Games will also appear in the Microsoft Store but fortunately will be downloaded from the Amazon Appstore.
Android Apps and Games can be pinned into the Start Menu and Taskbar and their notifications will appear in the action center, just like normal Windows 11 apps.