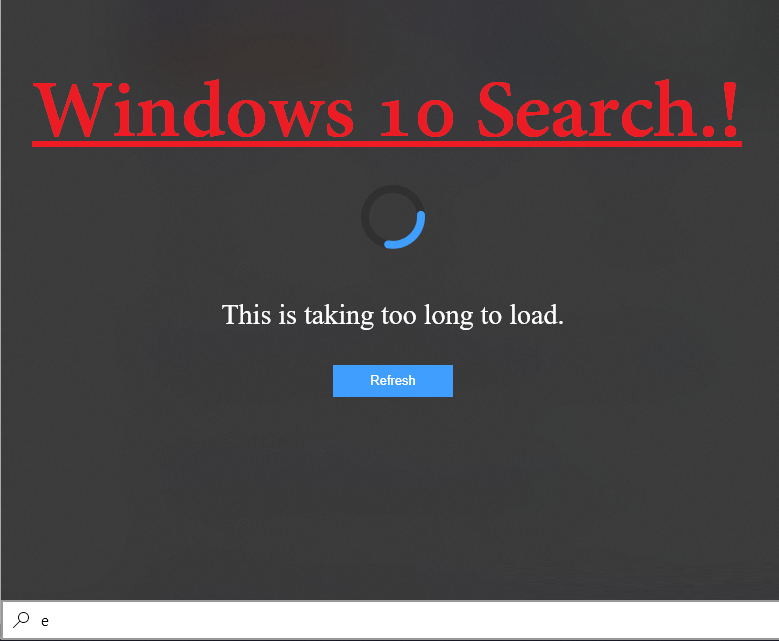
As we know that on Windows 10 there are many bugs as it is used by many users. In this article, we will discuss one of the bugs related to the Windows 10 search bar. When the user tries to search for something on the Windows search bar, he won’t get the result and have the error message saying “This is taking too long to load”. This error message consists of a Refresh button. Users reported that Refreshing and restarting Windows 10 also won’t fix this Windows 10 Search Bar Not Working error. If you are one of them then this article is for you so read it properly till the end. The article will provide you the causes and fixes with detailed steps to get back missing Windows 10 Search Bar. If Windows 10 Search Bar is not showing on your screen then reading the below causes you will have an idea of which fix will be beneficial in your case.
- Users reported that the recently installed update is one of the main reasons behind Windows 10 Search Bar not working. If you have installed recent updates then try uninstalling it.
- Recently installed software also create problems. For this, you can uninstall them. But make sure you uninstall recently installed software.
- Corrupted Windows 10 system files.
- If there is damage Windows 10 system image then also you will have this error message.
- Due to hidden files from Windows Search.
So, these were the causes of the search bar errors. Now below are the fixes with detailed steps. Do follow them to get rid. But before this try restarting Windows Search. If you won’t get positive output then go through below detailed fixes.
- Try uninstalling recent installed Software and Updates
- Run SFC scanner and DISM
- Run Search and Indexing troubleshooter
Contents
Try Uninstalling Recent Installed Software and Updates
One of the main reasons behind Windows 10 Search Bar errors are recent Updates and software. It said that recent updates may contain bugs which leads to different error codes and messages. If we talk about recent software then it may contain viruses that create the problem for your Windows 10 computer or laptop. This fix will show you how to uninstall recent Software and Update on Windows 10 PC.
Steps to Uninstall Software
- At first launch the Settings app for the further process.
- From the Settings app tap on the Apps.
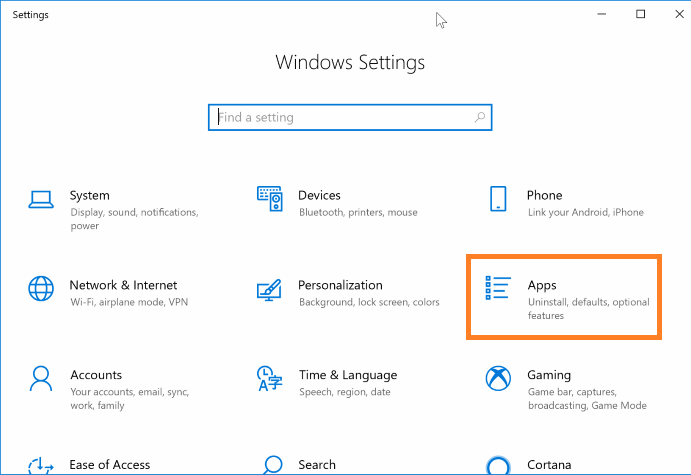
- Under the Apps section, you will have multiple options so tap on the Apps and features option.
- In it, you will have all the installed programs of your Windows 10.
- To uninstall program go on the particular program and on it you will Uninstall button so tap on it.
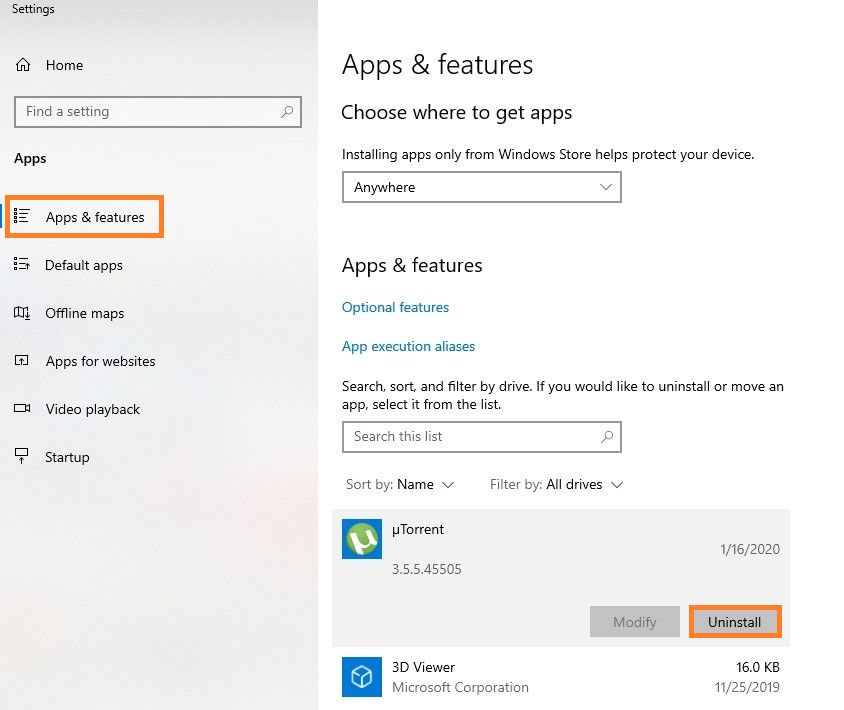
Make sure you uninstall the recent program so that you can see the effect of uninstalling it. Now check Windows search bar load for a long time or not.
Steps to Uninstall Update
- Go on the Start Button and tap on the Settings app to open it.
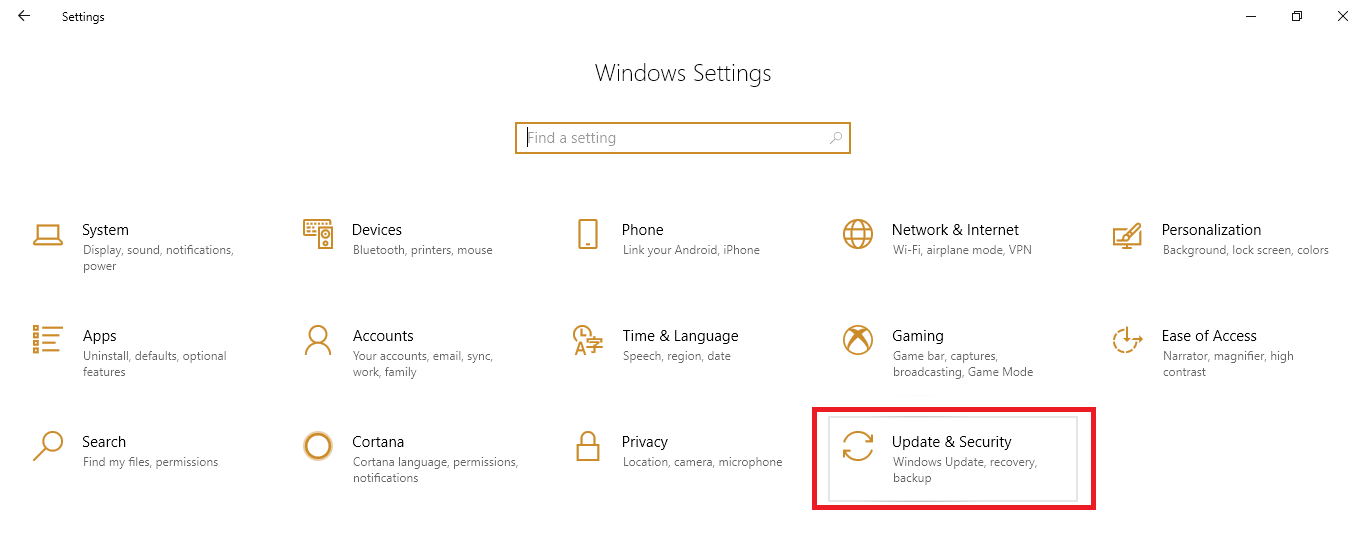
- From the Settings app tap on the Update and Security option.
- On the Update and Security screen tap on the View update history.
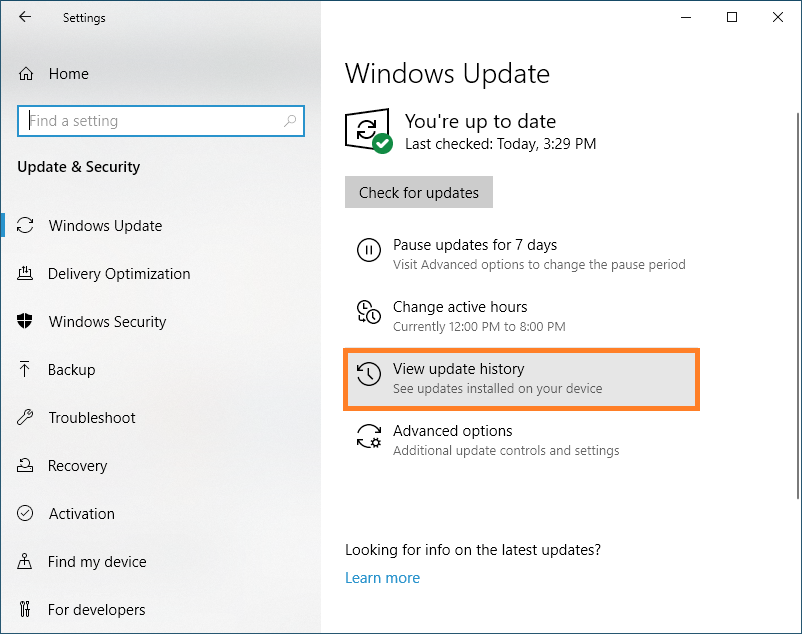
- From the left top corner, tap on the Uninstall updates.
- By doing this you will have a control panel with a list of recently installed updates. So, you can uninstall them.
So, these were the steps to uninstall recently installed updates on Windows 10. If this fix won’t work then go on the below fixes.
Run SFC Scanner and DISM
Well, the SFC scanner and DISM tool both are different in their place. SFC Scanner fixes the corrupted files and restores the missing files. Whereas the DISM tool is used to repair the Windows 10 image. In this guide, I will show you how to run the SFC scanner and DISM tool in windows 10 one by one. Once you run this tool on your system you need to reload Windows 10 Search program by restarting your device.
Run SFC Scanner
- Hold the Windows & R keys to an open Run dialog box. In it type cmd and hit on the OK button.
- In Command prompt screen type SFC /scannow and tap on enter.

- This will scan your whole system and it will detect the corrupted system files and it will also restore the missing files.
Run DISM tool
- Search for Windows PowerShell and open it with Run as administrator permissions.
- Once you have it then in it enter the command as DISM /Online /Cleanup-Image /CheckHealth.
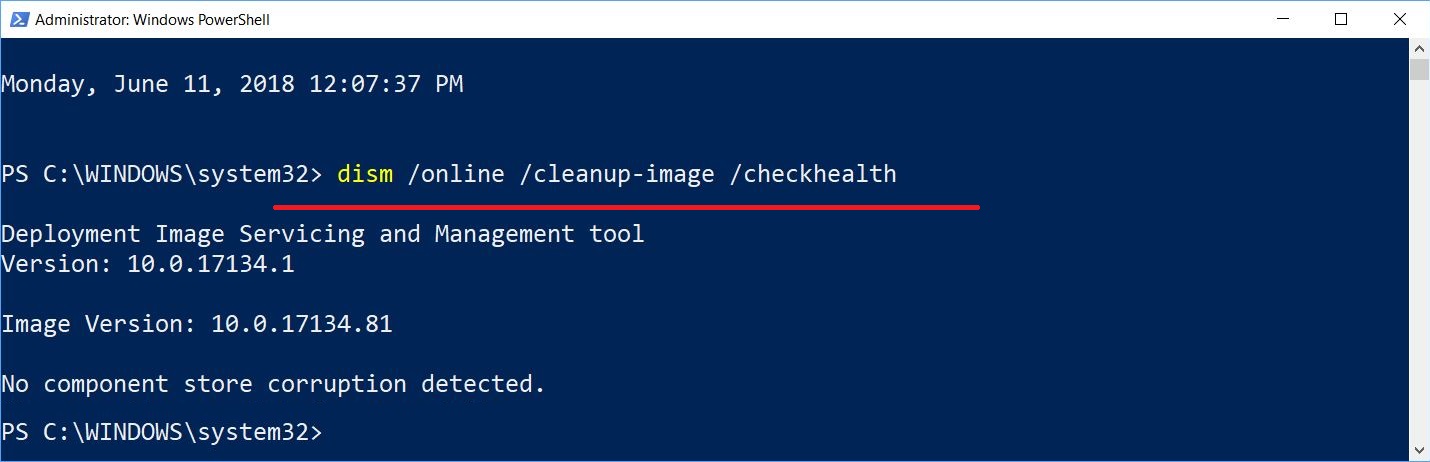
- This will scan your whole system and will detect if there is corrupted data on your Windows 10. It will also repair the damaged image of Windows 10.
So, these were the 2 tools to repair corrupted files of Windows 10.
Run Search and Indexing Troubleshooter
- Launch the Settings app and tap on the Update and Security option.
- From the Update and Security section tap on the Troubleshoot.
- It will be open on the right side of the same screen. On it go on the Search and Indexing option and tap on the Run the troubleshooter button.

- Now you have to select the problem from listed. If you do not have an option on it then choose My problem isn’t listed above and tap on the Next button.
- After all, follow the on-screen instructions.
Once this fix is properly applied then Windows 10 Search Bar will again start working properly on your device, no Windows Search error will distract you from your work. I hope that the above three fixes prove helpful to get rid of all the Windows 10 Search Bar errors.