Well, many users nowadays use a Wi-Fi connection in place of an Ethernet connection. This blog is for those users who are habitual of using the Ethernet connection and have an issue with it. Before going on to the actual content you should understand the difference between the Wi-Fi connection and Ethernet connection. Wifi connection is wireless in nature whereas an ethernet connection has a wire connected to the internet router. The Ethernet not working issue is somewhat complicated. If you are a victim of this issue then go with this blog to get rid of this. There are many causes of the “Ethernet not working” issue.
- Cable issues can cause an ethernet not working problem.
- If you have a corrupted or outdated network driver on your system.
- If there is a loose connection.
- The antivirus software also causes an ethernet not working issue.
Apart from this, there are many software and hardware issues that cause the “Ethernet not working” issue. The first and basic thing to do is to disable the Wi-Fi. Go on the Wi-Fi icon and do tap on it. After this tap on the Open Network & Internet settings option. Now hit on the Wi-Fi option to disable the Wi-Fi. If this won’t work then try to disable Antivirus software. If these two won’t work then it’s time to go on the actual fixes.
Contents
Enable Ethernet
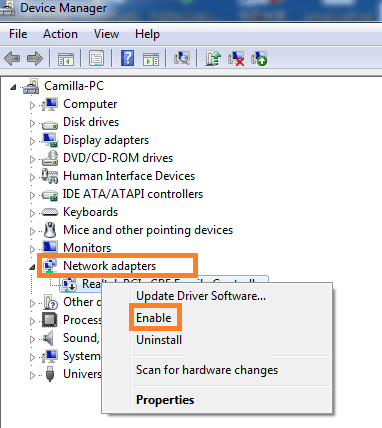
The ethernet, not working problem can occur if there is disabled ethernet. User questions that how can ethernet can be disabled until the user has not done. Let me clear you that from the Device Manager any device can be disabled automatically. So, it is our duty to enable it to get things normal. Go with the below steps to enable ethernet on your system.
- At first, hold the Windows key and R key to launch the Run dialog box.
- Once you have it then type devmgmt.msc and hit on OK.

- By doing this you will have a Device Manager. In it go on the Network Adapters option and do twice tap on it.
- Now it’s time to do the right tap on the network device.
- After this, you will have a list of options from it tap on the Enable option. If you have a Disable option then it means that ethernet is already enabled. In this case, you can restart the ethernet by disabling and enabling it at the same time.
After all check for the Ethernet not working issue. If this won’t work then go on the below fixes.
Update Network Driver
Well, there are two ways to update the driver. The first one is manual and the second one is automatic method. In both methods, you will need internet access. You have to update the driver on the second device and transfer it using USB on the victim device. You have to use the manual method because in an automatic method you will need internet as well as you can’t transfer drivers to the victim’s device. So, in this guide, you will step for the manual method.
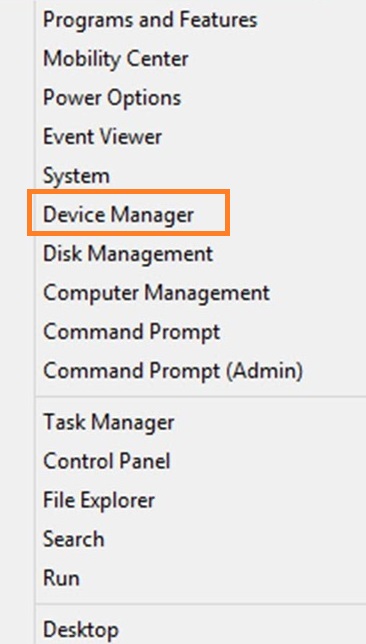
- First of all launch the device manager. You can do it by opening the quick access menu and clicking on the Device manager option.
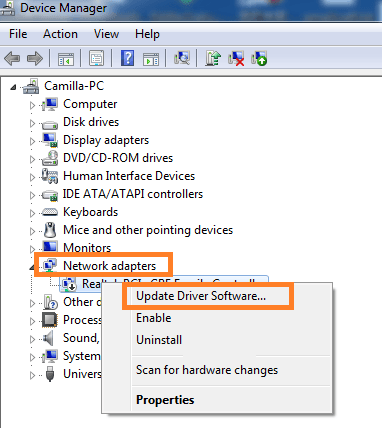
- Once you have it then do twice tap on the Network adapters.
- Now do the right tap on the network driver and tap on the Update Driver Software option.
- After this, it will ask you how do you want to search for driver software. So tap on the option saying “Browse my computer for driver software”.
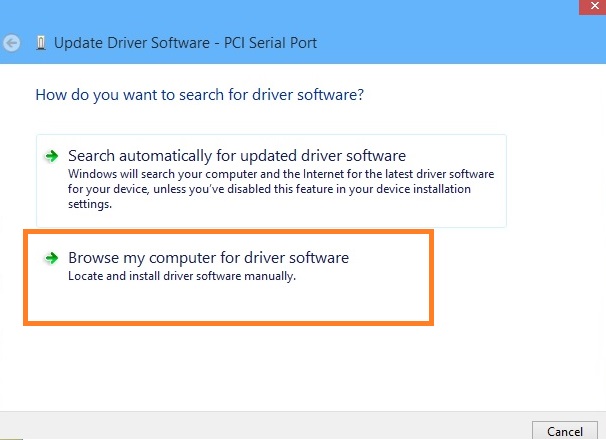
- Hit on the Browse and do select downloaded driver.
- Now you have to follow on-screen instructions.
So, this is how you can update the network driver manually on your system. After this make use of USB to transfer the updated network driver on your problematic system. Make sure you follow steps properly.
Run Internet Connection Troubleshooter
For each and every problem or issue, there is a troubleshooter. For the internet connection problem, the system provides you internet connection troubleshooter. This troubleshooter will fix issues related to an internet connection. Follow the below steps to run this troubleshooter.
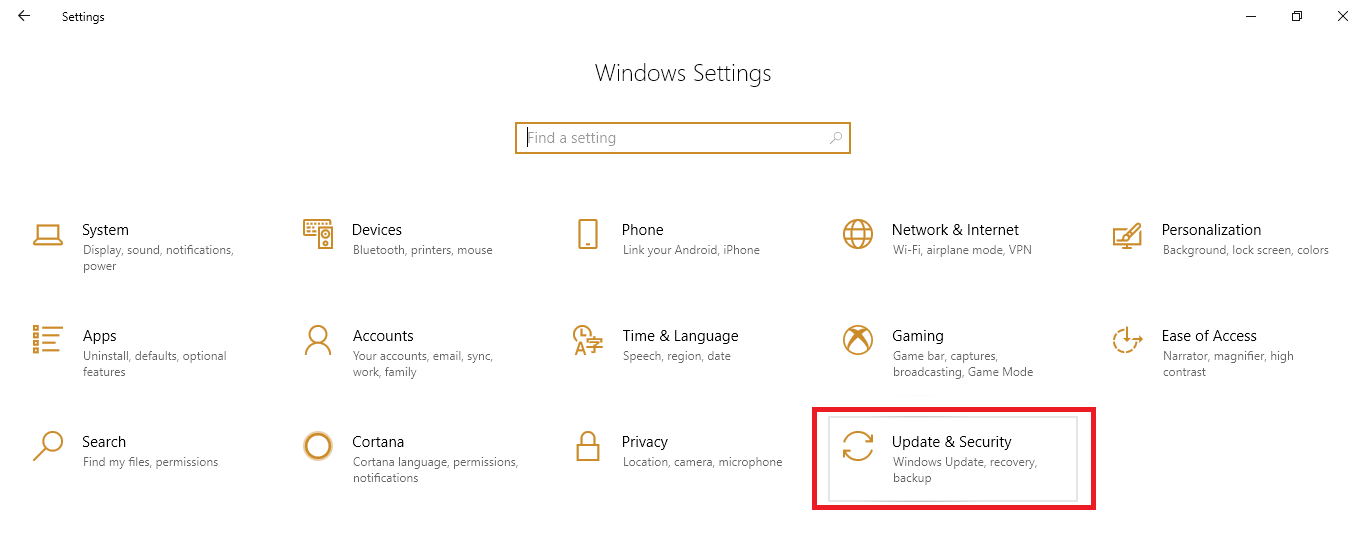
- Launch the Settings app by holding the Windows key and I key.
- From it tap on the Update and Security option.
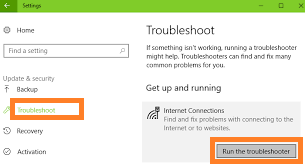
- Now you will have a list of options on the left side so from it tap on the Troubleshoot option.
- It will be open on the right side of the screen. Go on the Internet Connections and tap on the Run the troubleshooter button.
Now it will detect the network problems and will fix them. If all these above fixes won’t work then go with the last one I hope this will fix the ethernet not working issue.
Reset Network
Ethernet not working issue may occur due to improper network. To solve this you have to reset the network. Users reported that resetting the network has worked for the ethernet not working issue. Below are steps for resting network.
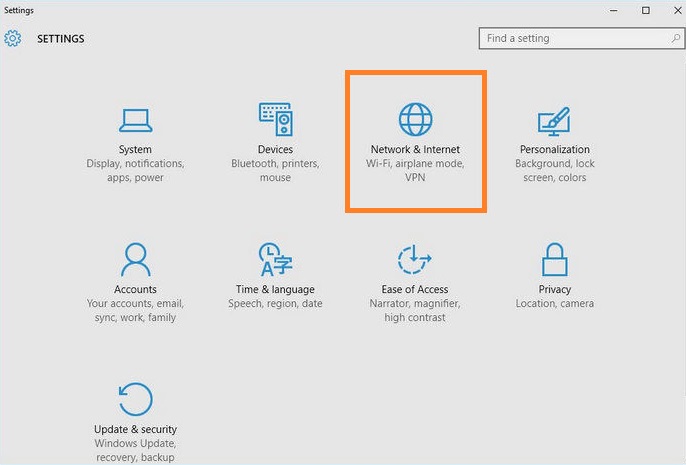
- At first launch the Settings app and tap on the Network and Internet option.
- Below the Network and Internet section, you will have a list of options so from it tap on the Status option.
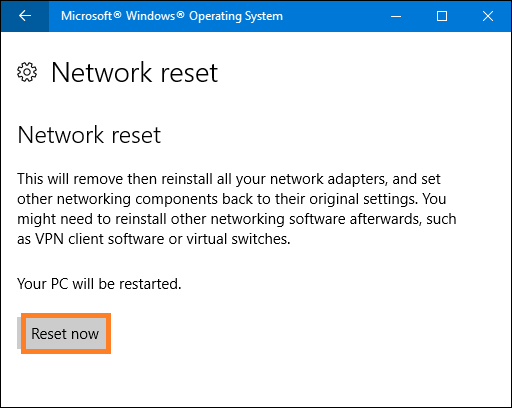
- It will be open on the right side of the screen. Tap on the Network reset option for the further process.
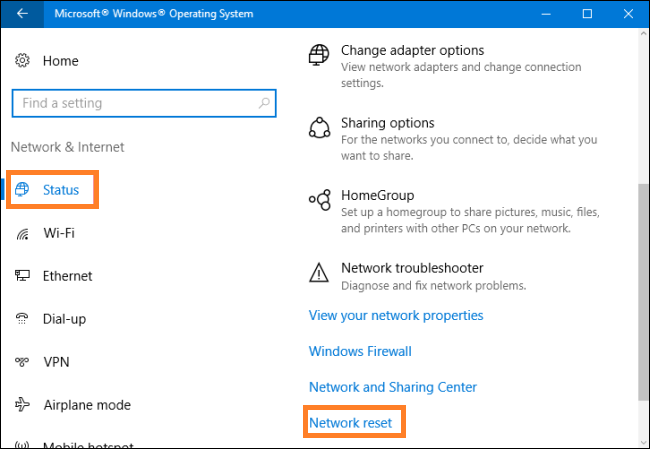
- Now tap on the Reset now button and then hit on Yes option.
Once you have reset the network then check for the ethernet not working issue.
I hope applying the above fixes has fixed the “Ethernet not working” issue. You don’t need to apply all fixes but go with the sequence till you won’t get rid of this issue.