Well, RAM on Windows OS plays a vital role. If your Windows is running out of RAM then you will get many issues on your device and you will not able to run programs or software smoothly. Hence, the straightforward solution behind the RAM issue is purchasing new and higher capacity RAM for your Windows 11 and 10. But mark my words “It is an expensive solution” in order to boost the performance of your Windows PC.
However, we have one more option to have extra RAM space to boot the performance of Windows 11/10. The great option or we can say a feature is a Virtual Memory. To get extra memory you have to set up Virtual Memory on Windows 11/10. Changing virtual memory on Windows OS is not that easy.

How to use: Xbox Game Bar on Windows 11/10
Contents
What is Virtual Memory on Windows 11/10?
On Windows OS there are two types of Memory. The first is RAM and the second is Virtual Memory. You are almost aware of RAM but you are blank about Virtual Memory. It is also known as the pagefile. It is used by Windows to have a smooth experience and to complete tasks that low RAM can’t.
When you try to open any software or application the Windows OS converts memory into temporary RAM from the internal storage. This is what virtual memory is. The conversion totally depends on the software or application you are trying to open and how much RAM it consumes.
However, virtual memory cannot replace RAM permanently. It is because you will not able to play high-end games with the support of virtual memory. It will crash the system. The virtual memory only gives somewhat stability to the system.
Using it you can reduce the load on the RAM. This will lead to smooth and better functioning of software and programs on Windows 11/10.
Read Also: Required RAM Memory for Windows 11
How to Change or Increase Virtual Memory Size on Windows 11/10?
If you are facing a performance issue on your Windows 11 or 10 then you must change virtual memory. There are two ways to increase or change virtual memory. The first is by using the Settings App and the second one is by using Command Prompt. Both methods are discussed below in this guide. Make your choice and work on it.
Change Virtual Memory using Settings App on Windows 11
This guide is for Windows 11 users. The steps for changing virtual memory are different on Windows 11 because it has a new user interface and somewhat changes in the settings app.
- Launch Settings app by holding Windows key and I key.
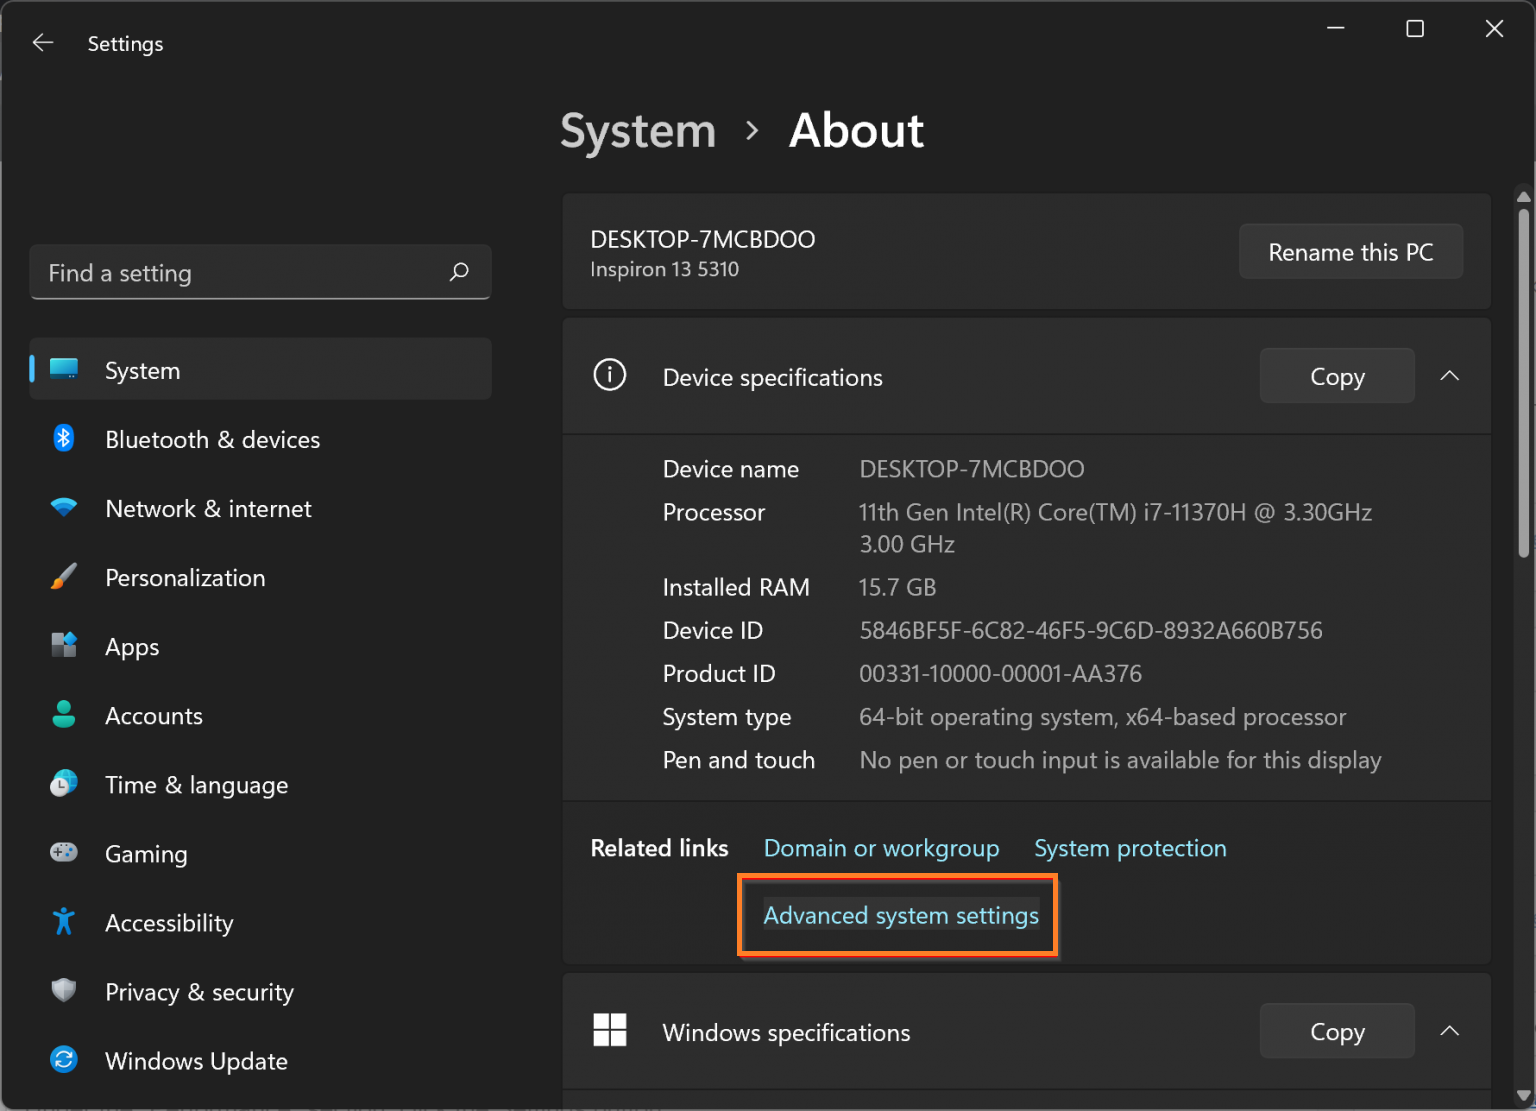
- From the left pane tap on the System tab and then look for the About option on the right side screen. Once you get it then hit on it.
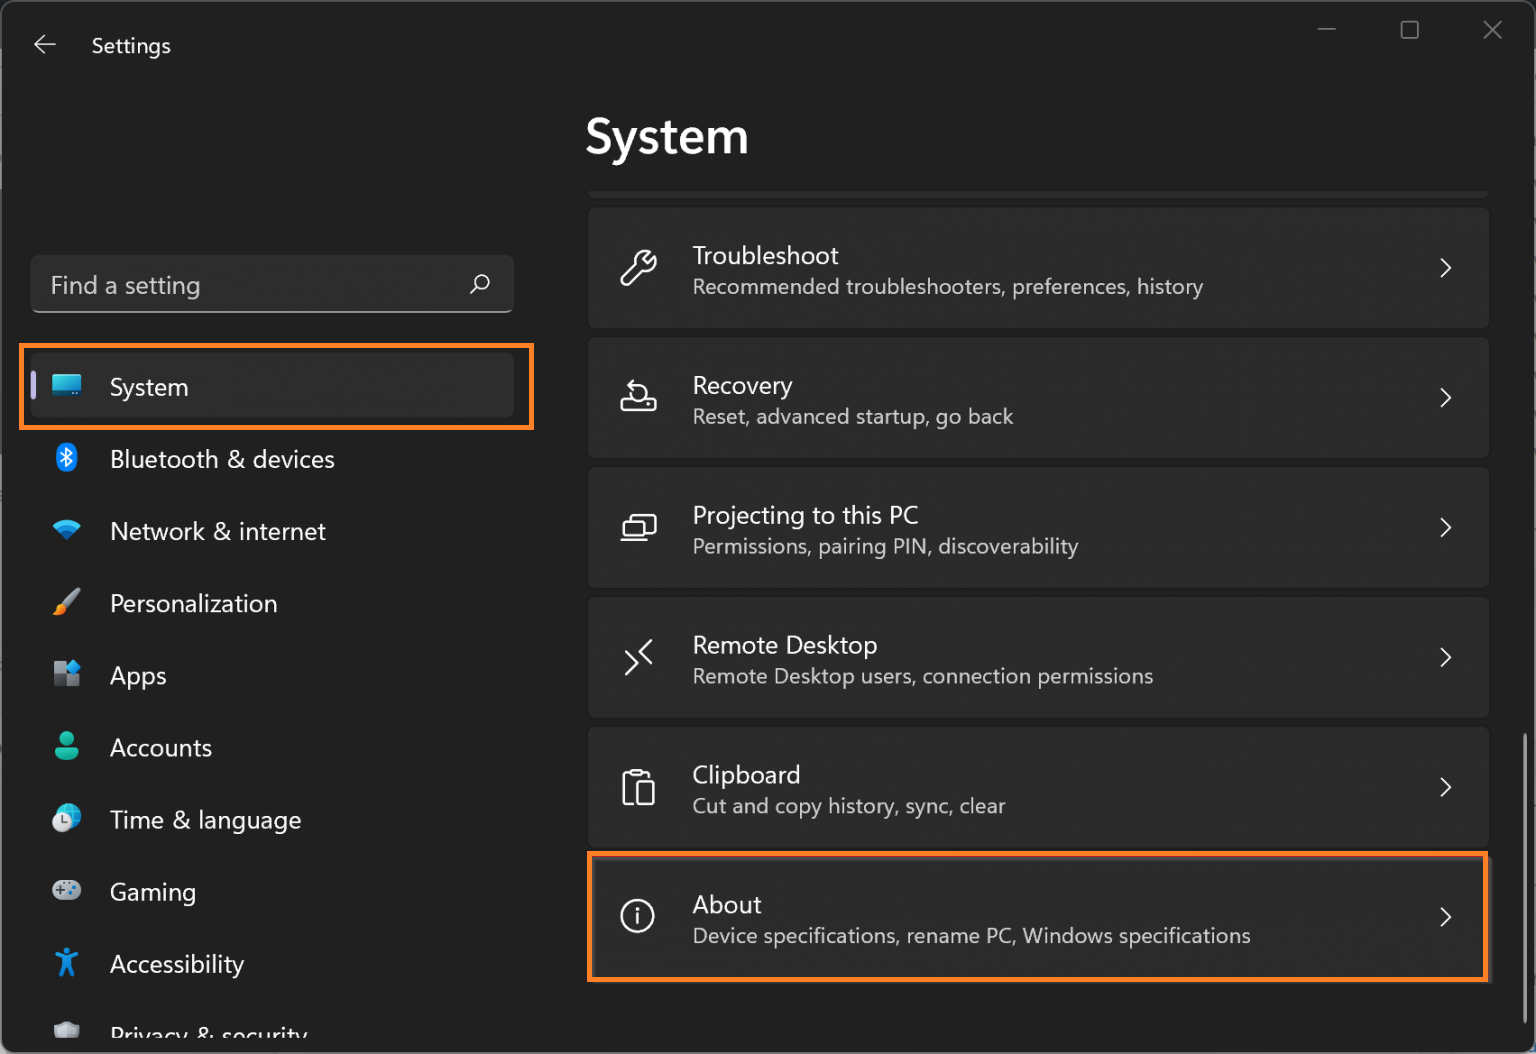
- Now tap on the link which says “Advanced system settings” for the further process.
- After this, you will have different tabs on the System properties screen. Go to the Advanced tab and hit on Settings button from the Performace section.

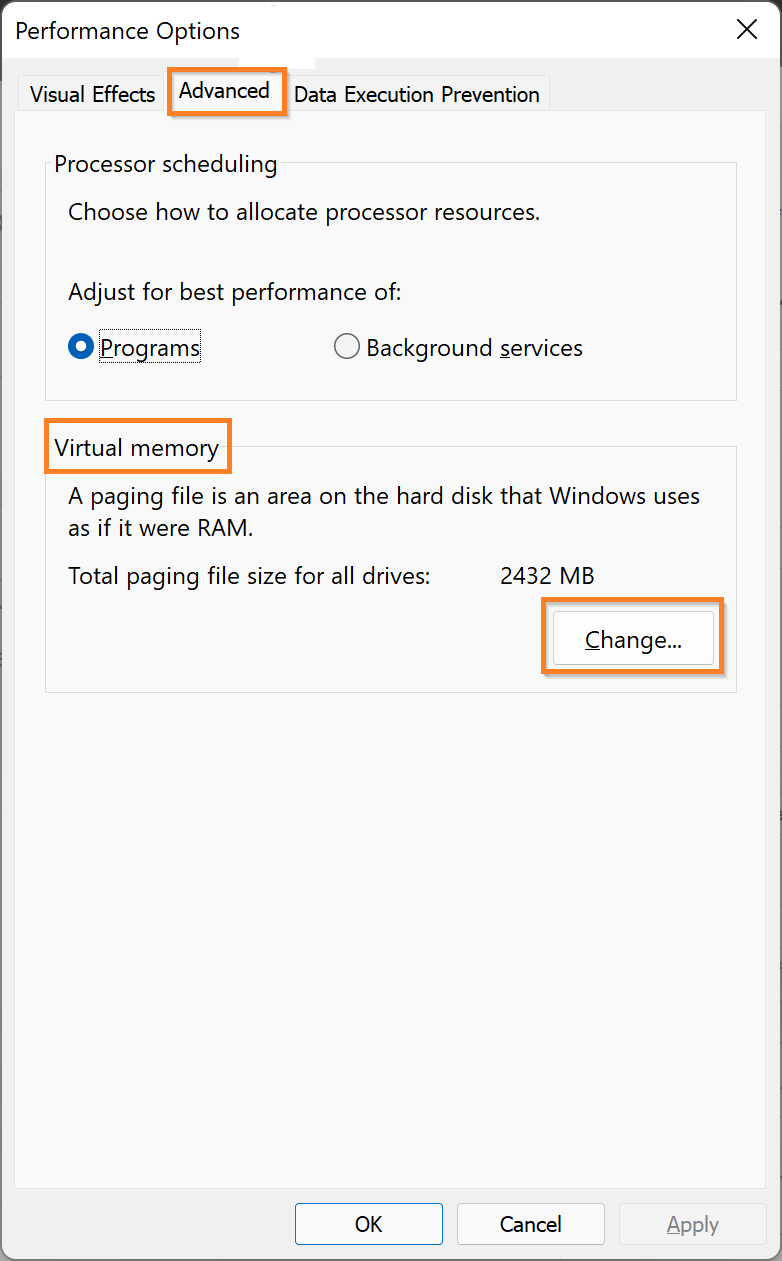
- Now once again you will have multiple tabs. Navigate to the Advanced tab and hit on Change button from the Virtual Memory section.
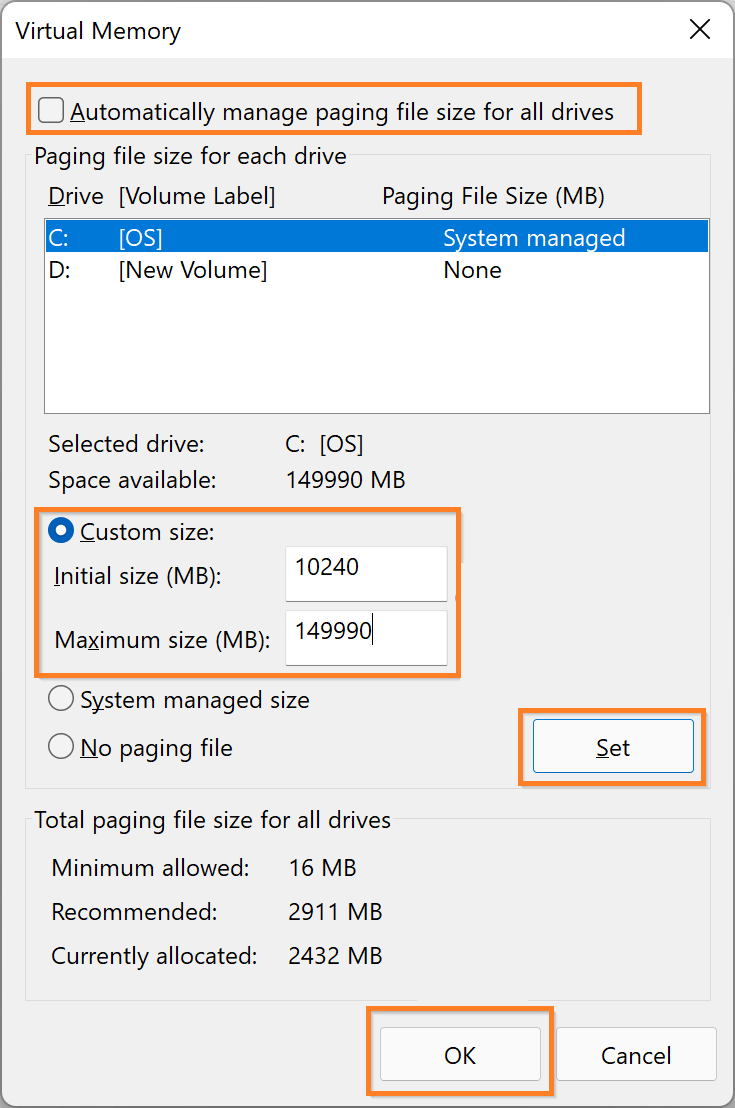
- After this, untick the box which says “Automatically manage paging files size for all drives” and then choose the Custom size option.
- Now you have to enter the Initial size and Maximum size. Make sure you enter it in MB. It is for the paging files.
- After all, hit on Set and then on the OK button.
At last, restart your Windows 11 PC to save all the changes you have made. You are done with changing virtual memory on Windows 11 using Settings.
Read Also: Cast Windows 11 to TV
Change Virtual Memory using Settings App on Windows 10
If you are Windows 10 user then this guide is for you. Make sure you follow the below steps in order to increase virtual memory on Windows 10 using its Settings App.
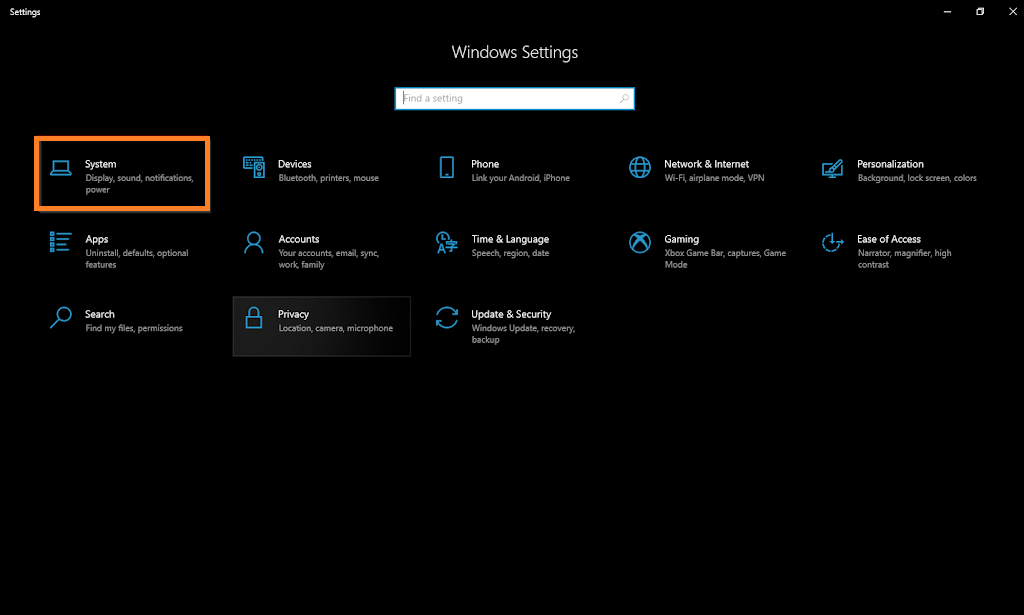
- Launch Settings App on Windows 10.
- Tap on System for the further process.
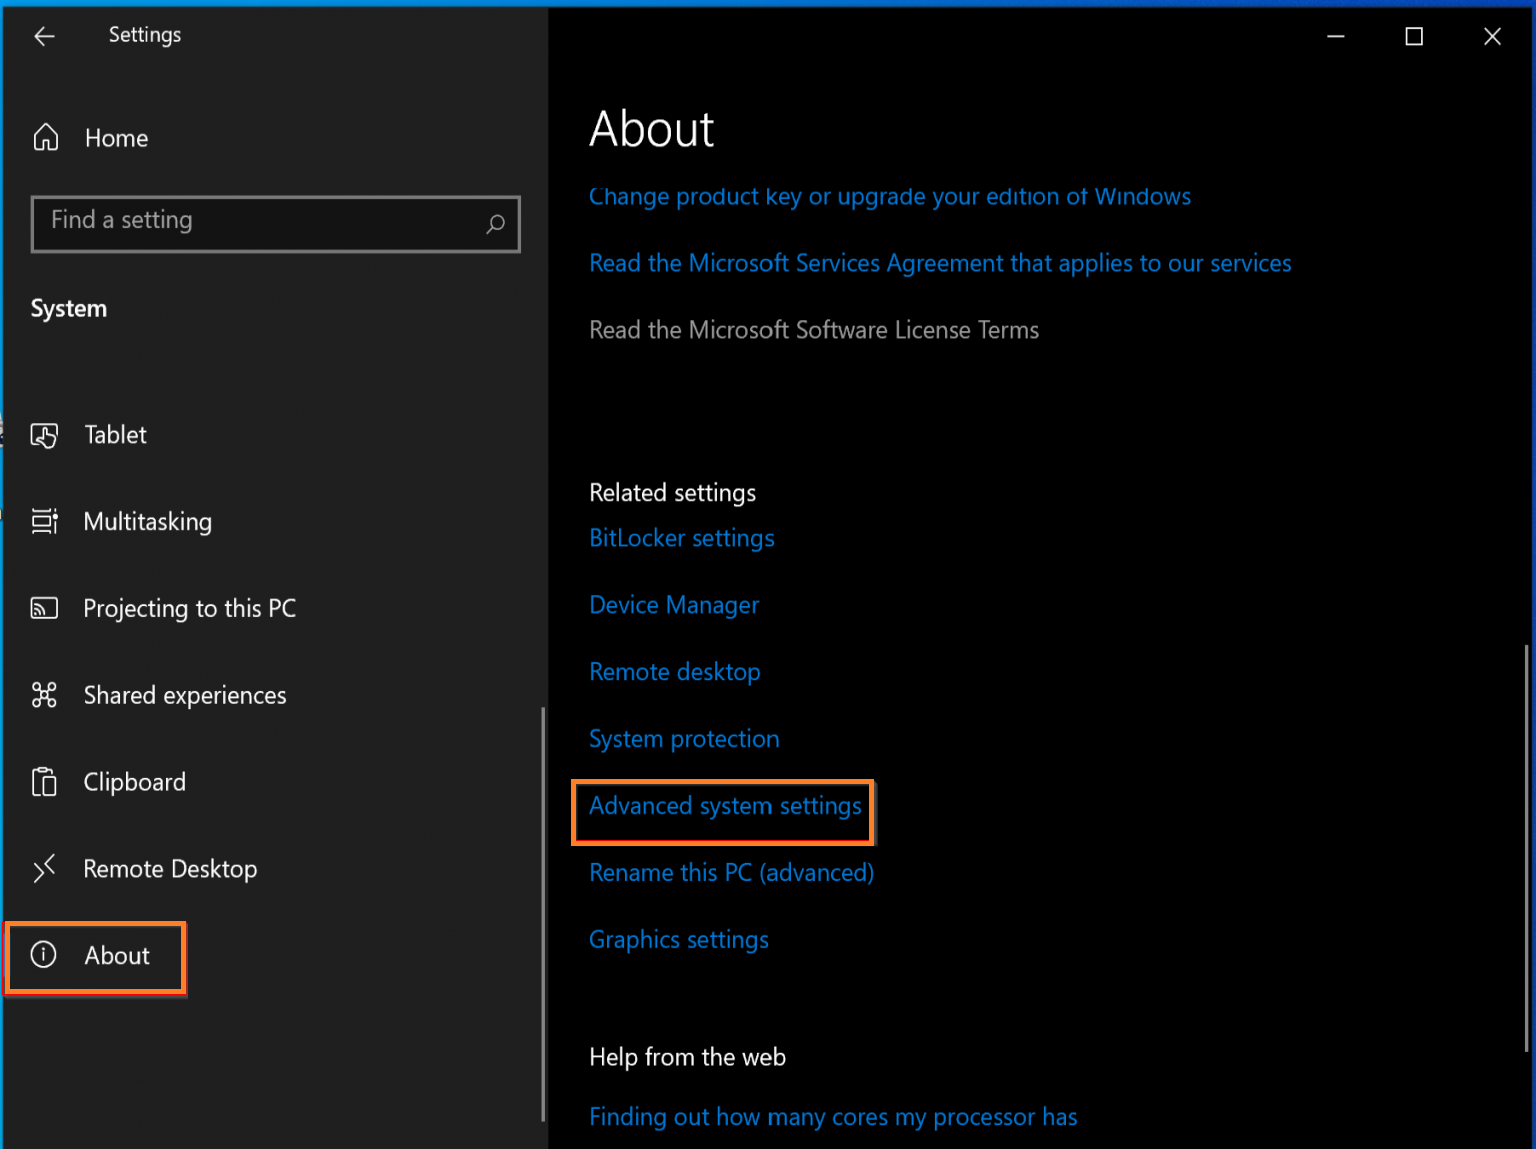
- From the left menu hit on the About option.
- Now from the right side screen tap on the Advanced system settings link.
- Do tap on the Advanced tab from the System Properties screen and then hit on the Settings button from the Performace section.
- Now once again go to the Advanced tab and tap on the Change button from the Virtual memory section.
- After this, make sure you untick the option name as “Automatically manage paging files size for all drives” and then select the Custom size option.
- Now enter the Initial and Maximum size into MB. It is for paging files.
- Finally hit on Set and then on the OK button to save all the changes.
So, this is how you can change or increase virtual memory on Windows 10 using the Settings Window.
Change Virtual Memory using Command Prompt on Windows 11/10
This method is applicable on both Windows 11 and 10. You just have to play with commands to change virtual memory using Command Prompt on Windows 11/10.
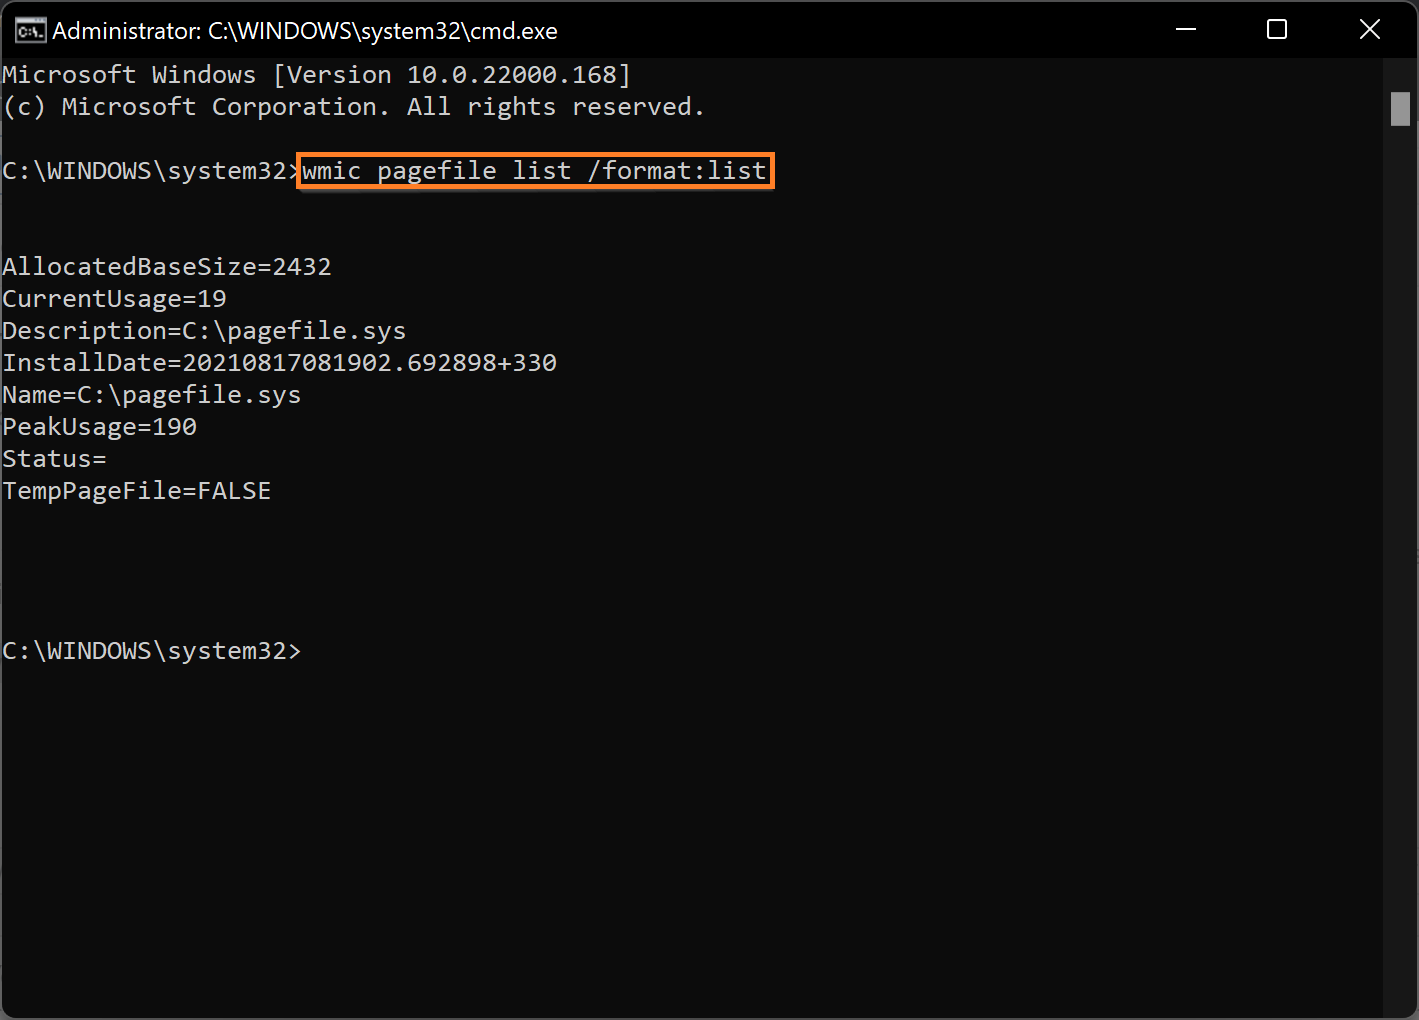
- Launch Command Prompt on your Windows OS. Make use of the search bar to open it.
- In the command prompt screen enter the command as “wmic pagefile list /format:list”. It is for seeing the current virtual memory status.
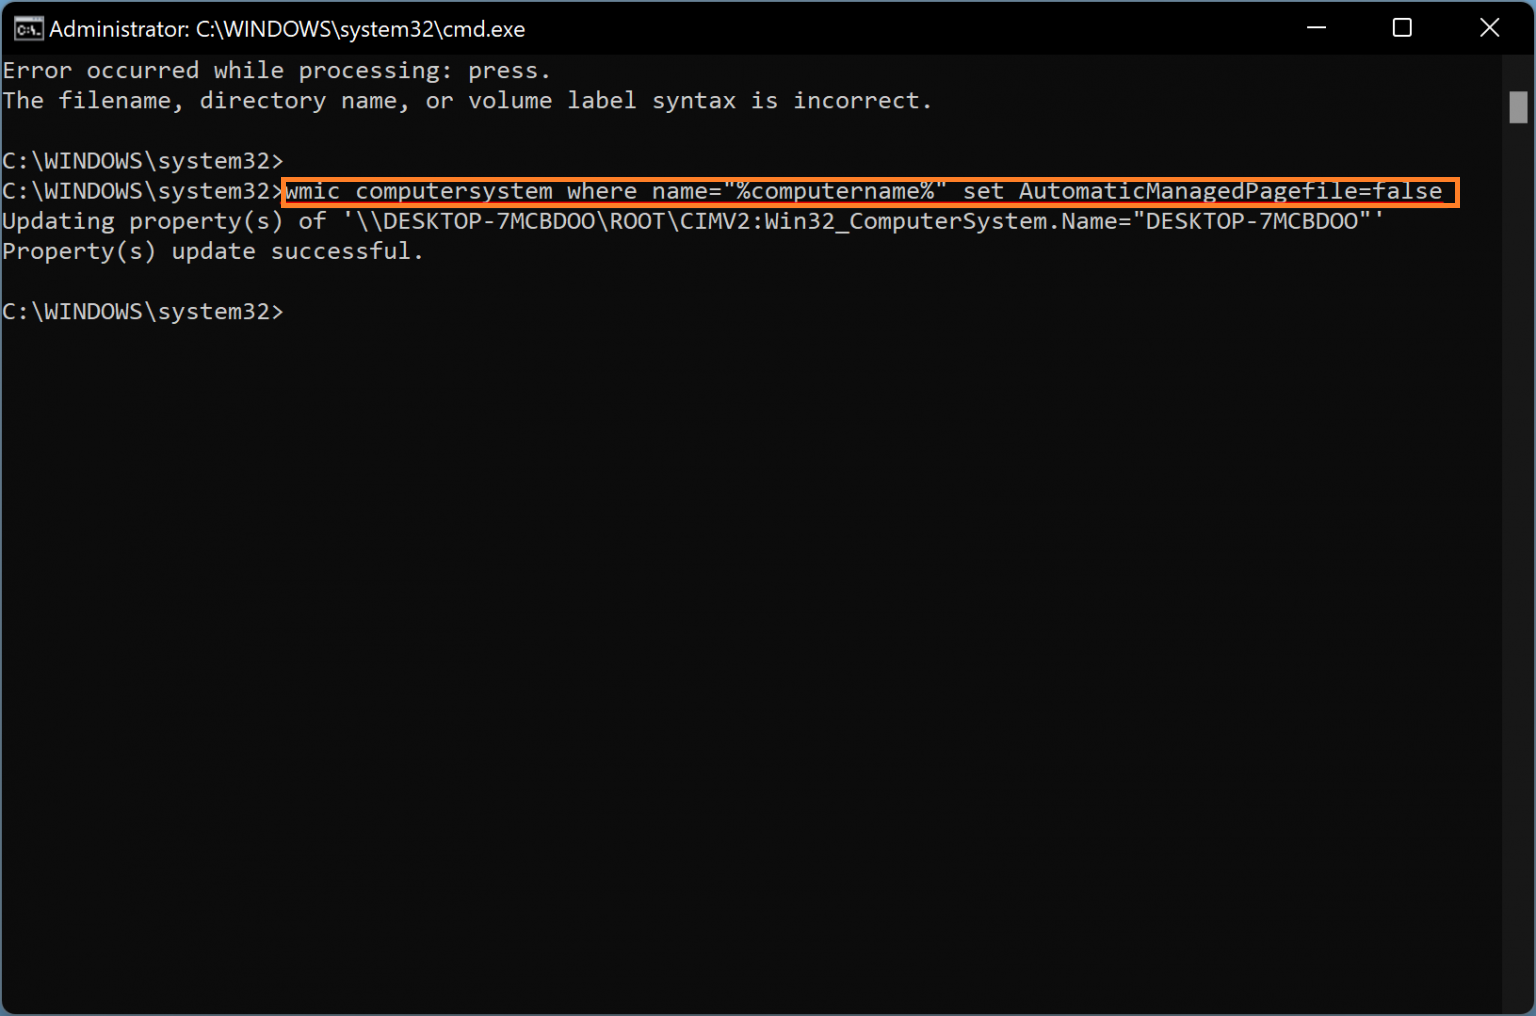
- After this enter the command as wmic computersystem where name=”%computername%” set AutomaticManagedPagefile=false.
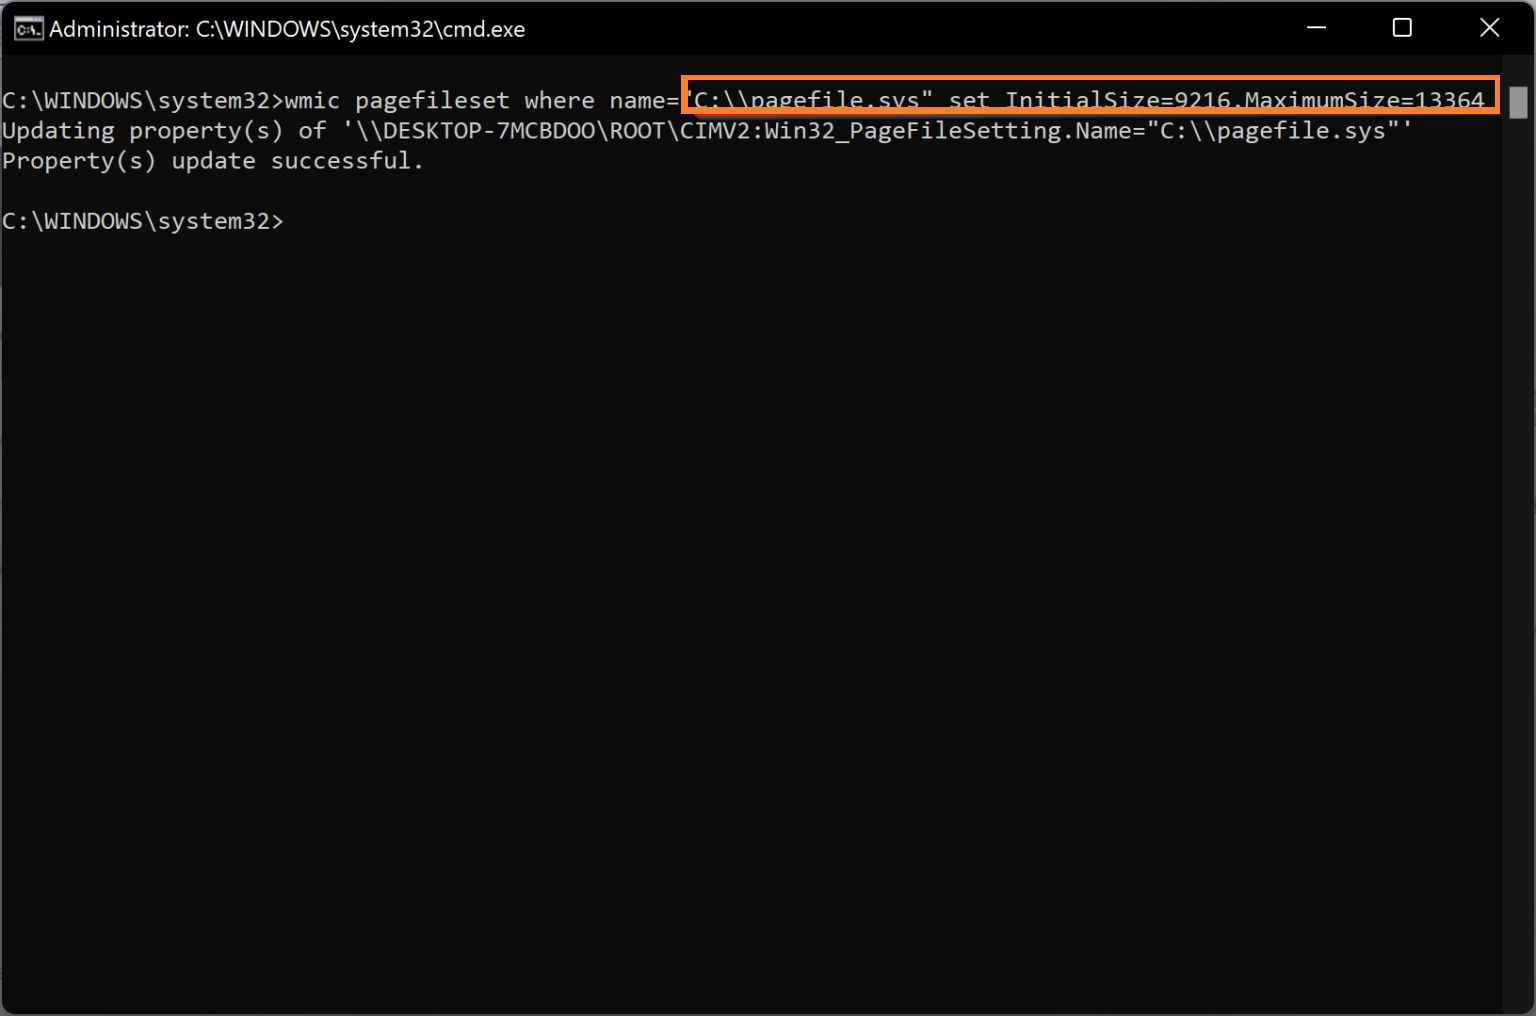
- Now enter the command as wmic pagefileset where name=”C:\\pagefile.sys” set InitialSize= Initial Size in MB,MaximumSize= Max Size in MB. This command is for changing the initial and maximum size of the virtual memory. Make sure you enter an actual initial and maximum size in MB in place of Initial Size in MB and Max Size in MB.
- At last, do restart your Windows 11 or 10.
After changing or increasing virtual memory your Windows will use new values for Virtual Memory. This will lead to improvement in performance enhancement.
I hope that after reading this blog you are able to set up Virtual Memory on Windows 11/10.