Well, Microsoft has released the latest Windows 11 KB5006746 Preview Update for PCs. After installing this update you will get newly updated apps including the Snipping tool, Calculator, Mail, Microsoft Paint, and Calendar. Here in this post, we will discuss all details on, How to download and use the New Snipping Tool in Windows 11?
This New Snipping tool is a combination of the Classic Snipping Tool and the Snip & Sketch App. These two tools are not removed but the best features of these tools are combined to make a Snipping tool more useful with the best design to suit Windows 11. It has also got additional functionalities and features.
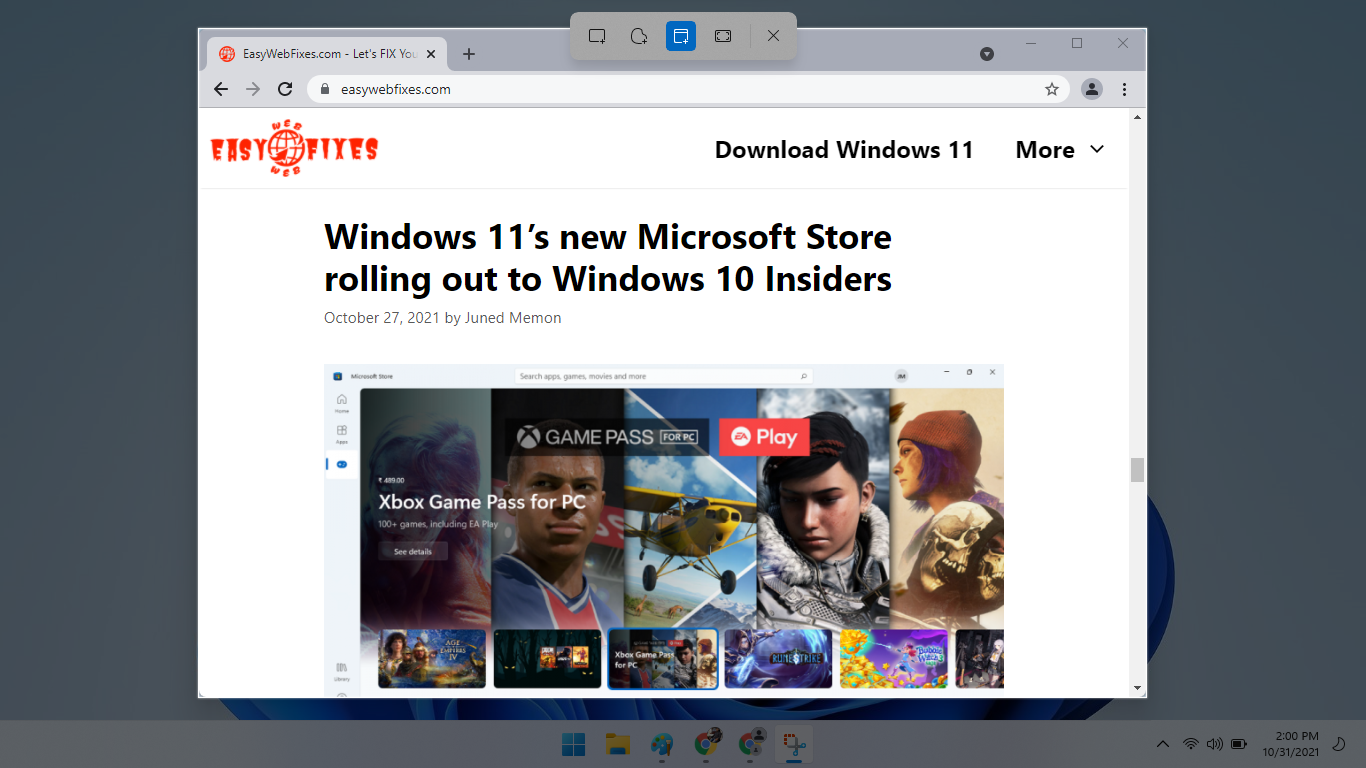
The Snipping tool is used for taking four different types of screenshots in Windows 11 including Rectangular, Freeform, Fullscreen, and Window. It is the best screen capture utility for all versions of Microsoft Windows. The fullscreen mode will take a screenshot of the entire screen and the Window mode will only capture the particular app screen. It is one of the quickest ways to save the proof, memories, and all. We also use it to capture and share it with our readers.
You can also set a seconds timer before the final capture. If you set it to 3 seconds then the Snipping tool will take a screenshot after 3 seconds. Apart from it, there are many other new features in the updated apps including editing the screenshots.
Read Also: How to Screenshot on Windows 11?
Download the new Snipping Tool on Windows 11
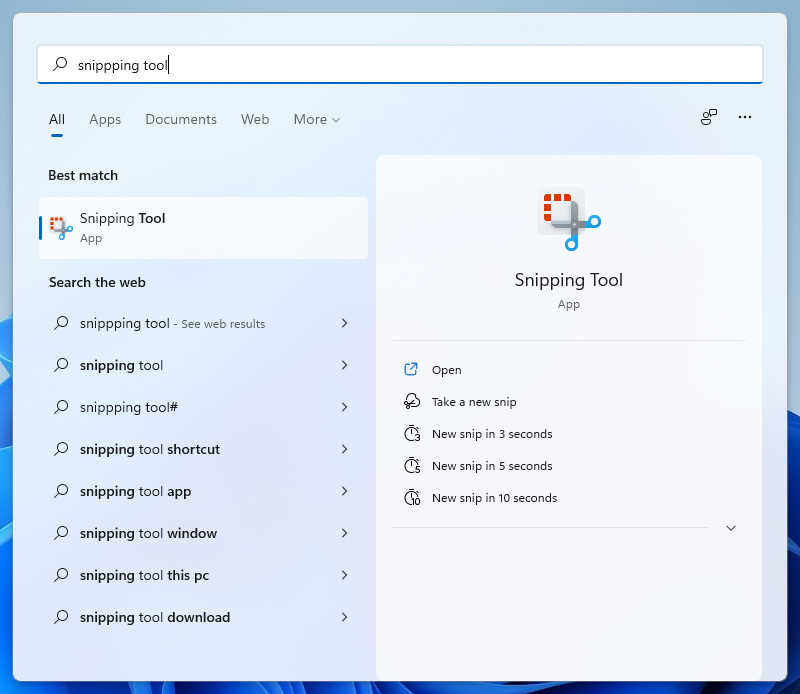
The New Snipping Tool comes preinstalled on Windows 11 for all the 22000 builds. Even Windows 11 Insider Preview on the Dev or Beta offers the New Snipping tool without any problem. You can find the new Snipping Tool from the Start Menu or its shortcut, if you are facing a problem with opening it on your PC then also stick with this post to get the solution.
Tap the Windows button from your keyboard to open the Start Menu and search for the Snipping Tool.
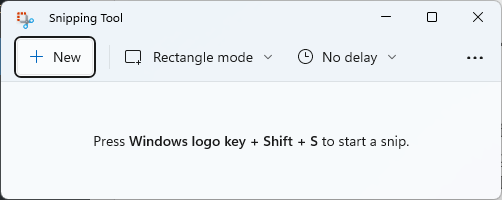
Tap on the very first search result to launch the Snipping Tool on Windows 11. Tap on the “+ New” button to start the snip.
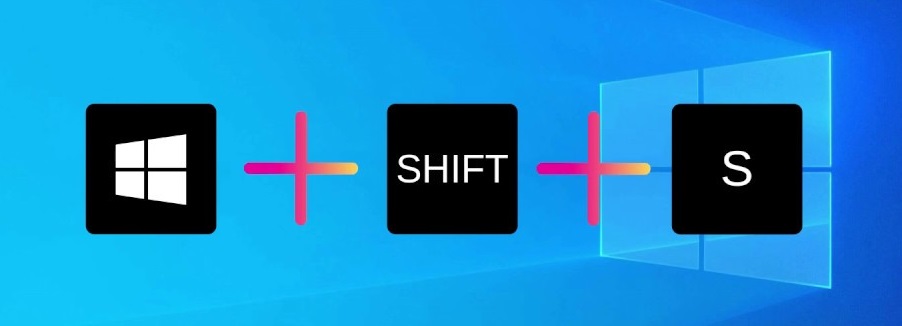
Alternatively, press the Windows + Shift + S keyboard shortcut to open Snipping Tool. If you are getting an error then refer to our blog.
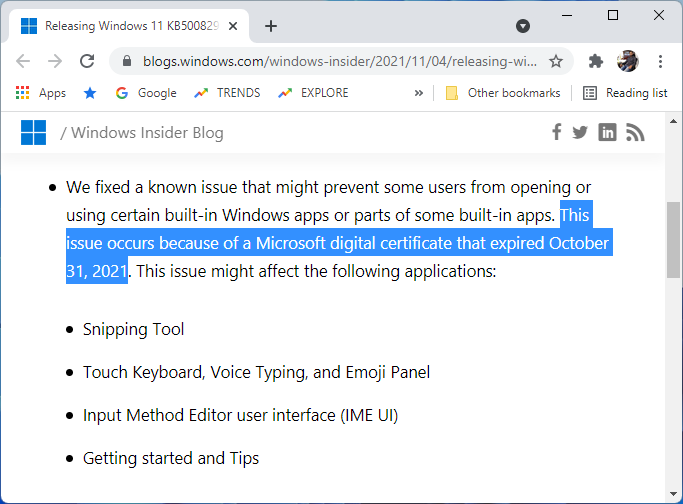
Well, if you are not able to open the downloaded Snipping Tool on Windows 11 and getting a problem with Windows is preventing Screen Snipping from Opening. Then as per the recent announcement by Microsoft, Digital Certificate for the built-in apps on your PC might have expired by the 31st October 2021. Microsoft has addressed this issue with the new Windows 11 KB5008295 update.
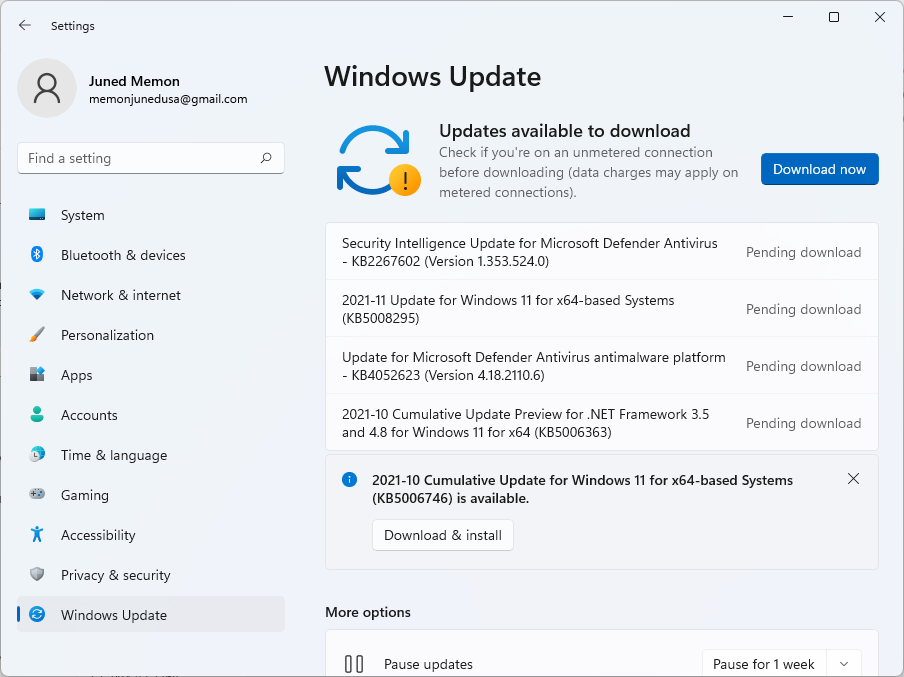
Now, let’s install this update to again download the new Snipping Tool on your Windows 11. Launch the Settings app from the Start Menu or with Windows + I shortcut. Then go to Windows Update and check for the latest “2021-11 Update for Windows 11 for x64-based Systems (KB5008295)” update. Download and Restart your PC to install this update, it will take a few minutes.
That’s it, now you have successfully downloaded and installed the new Snipping Tool on your Windows 11 PC. You may launch it from the Start Menu or with its Windows + Shift + S shortcut.
How to use New Snipping Tool on Windows 11?
The New Snipping Tool of Windows 11 has come up with multiple snipping modes and advanced editing options.
The Screenshot is important in this digital world. It is seen as proof, a source of knowledge, and much more. The screenshots are captured to share for projects, assignments, social media, blog posts, and even as legal law proofs.
The New Snipping Tool has made it easy to capture a screenshot on our PC. Here below are detailed steps to use Windows 11 Screenshot Tool.
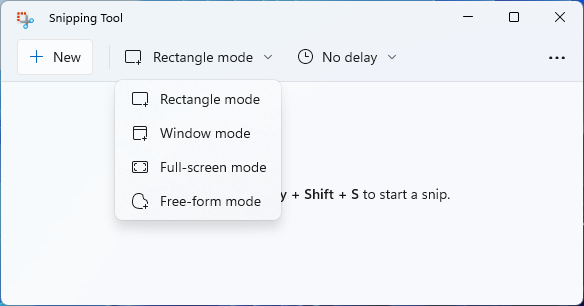
At first, you have to launch the Snipping tool on Windows 11 using the keyboard shortcut key (Windows + Shift + S key). After holding these keys at the same time you will have 4 snipping modes or options on the top of the screen. The 4 snipping options are named Rectangular Snip, Free form Snip, Windows Snip, and Fullscreen Snip.
Another way to launch the Snipping tool is by searching it on the Windows search bar. Then seelect the Snipping tool mode from the drop-down menu. If you select Rectangular Mode then the screenshot will be shaped as rectangular. If you select Freeform Mode then here you have to select the area of the screen to capture screenshots. If you select the third option that is Window Mode then you can only take the screenshot of a particular open window. If you select the last option name as Fullscreen Mode the Snipping toll will take a screenshot of the entire screen.
If you have launched the Snipping tool using the second method then to take a screenshot you have to tap on the “+ New” button. Make sure before this you don’t forget to select the Snipping Mode.
Now it’s time to edit the screenshot. The screenshot is also copied to the clipboard. You just have to paste it your favorite editing tool. If you don’t want to copy-paste then tap on the notification from the bottom right corner to edit in the Snipping Tool editor itself. It offers various editing tools such as Highlighter, Touch Writing, Ruler, Protractor, Ballpoint Pen, and image cropping.
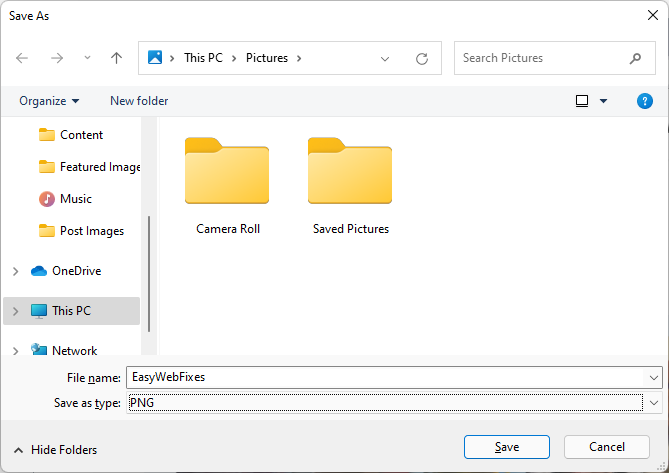
Press Ctrl + S or the Save icon from the top to save the screenshot to your Windows 11 PC. Now name the file, choose a format and then select the location. At last tap on the Save option from the bottom.
In case, if you want to share the screenshot then tap on the Share icon from the top right corner. Select the mode of sharing for a screenshot and then choose the contact.
If you want to print the screenshot then do tap on the three horizontal dots and from the open menu tap on the Print option. After this select the connected printer.
So, this is how you can make use of New Snipping Tool on Windows 11. In case if you want to set the timer then tap on Time before snip (By default it is set to No delay). Now select the time after which you want to capture a screenshot. It has three time modes to Snip in 3 secs, Snip in 5 secs, and Snip in 10 secs.
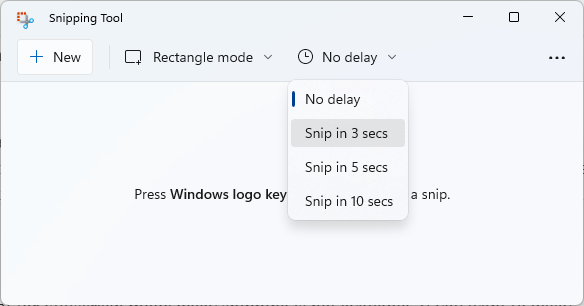
At last, I must say that for Fullscreen mode delay snipping is not available. If you want to delay snipping then you have to change the Snipping mode.
I hope that after reading this article you will be able to Download and Use New Snipping Tool on Windows 11.