Well, the newest Windows OS is Windows 11 which is designed by Microsoft keeping in mind gamers because on Windows 11 there are multiple gaming features such as Auto HDR, DirectStorage, Xbox Game Pass, and many more. On Windows 11, gamers can have a great experience. Here the questions arises “What is DirectX? Which is the latest version of DirectX? and How to Download and Setup DirectX 12 on Windows 11?”.
Here in this article, you will have answers to all your question in detail.
Read Also: Download Python on Windows 11
Contents
What is DirectX?
DirectX is one of the most important API (Application Programming Interface). It contains multiple libraries and multimedia resources. It increases the performance of audio and video components. After all, its main or basic purpose is to enhance the experience of video gameplay and video playback. If you want to play a game on Windows 11 you will need DirectX for its best performance. It is because when you try to play a game, it has to access the video card, sound card, and memory of your Windows 11 PC or Laptop. So, DirectX makes it possible by ensuring low-level access.
The DirectX libraries consist of multiple components such as Direct Graphics, DirectMusic, DirectShow, DirectCompute, DirectPlay, Direct3D, DirectSound, DirectSetup, DirectX Raytracing (DXR), DirectInput, DirectML, and DirectCompute. Using these all tools or we can say components a user can take benefits to enhance and improve overall performance and experience.
Read Also: What is Auto HDR in Windows 11?
Which is the latest version of DirectX?
DirectX has a long history. The first version of DirectX was 4.020095 and it was released in 1995 on 30 September. After one year the next version of DirectX came out in 1996. After this, the series keeps on going, and today we are blessed with DirectX 12 on Windows 10 and 11. Hence, the latest version of DirectX is DirectX 12. If you want to check Which version of DirectX is installed on your Windows 11 then follow the below steps.
- Hold the Windows + R key to open the Run dialog box then enter the ‘dxdiag‘ command.
- Now you will have a DirectX Diagnostic Tool screen with multiple tabs. Under the System tab, look for DirectX Version.
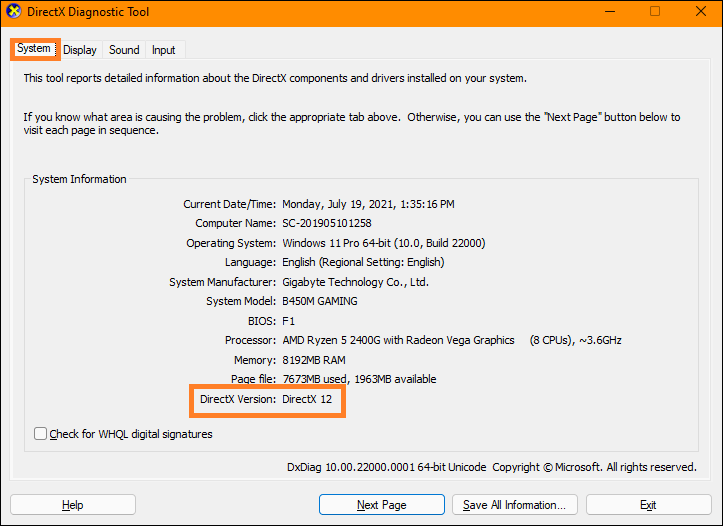
So, this is how you can check the version of DirectX on your Windows 11 OS. I must say that only some of the graphics cards support DirectX 12. The GeForce and TITAN RTX Series of graphics are included in the support list. In case, if your Windows 11 PC or Laptop is not having these graphics cards then DirectX 12 won’t be supported on your system.
Find out: Latest Version of Windows 11
How to Download and Setup DirectX 12 on Windows 11?
On Windows 11 and 10 you don’t need to download DirectX because it already comes with the system. To have the latest version of DirectX you have to check for Windows Updates on your Windows 11. To do so follow the below steps.
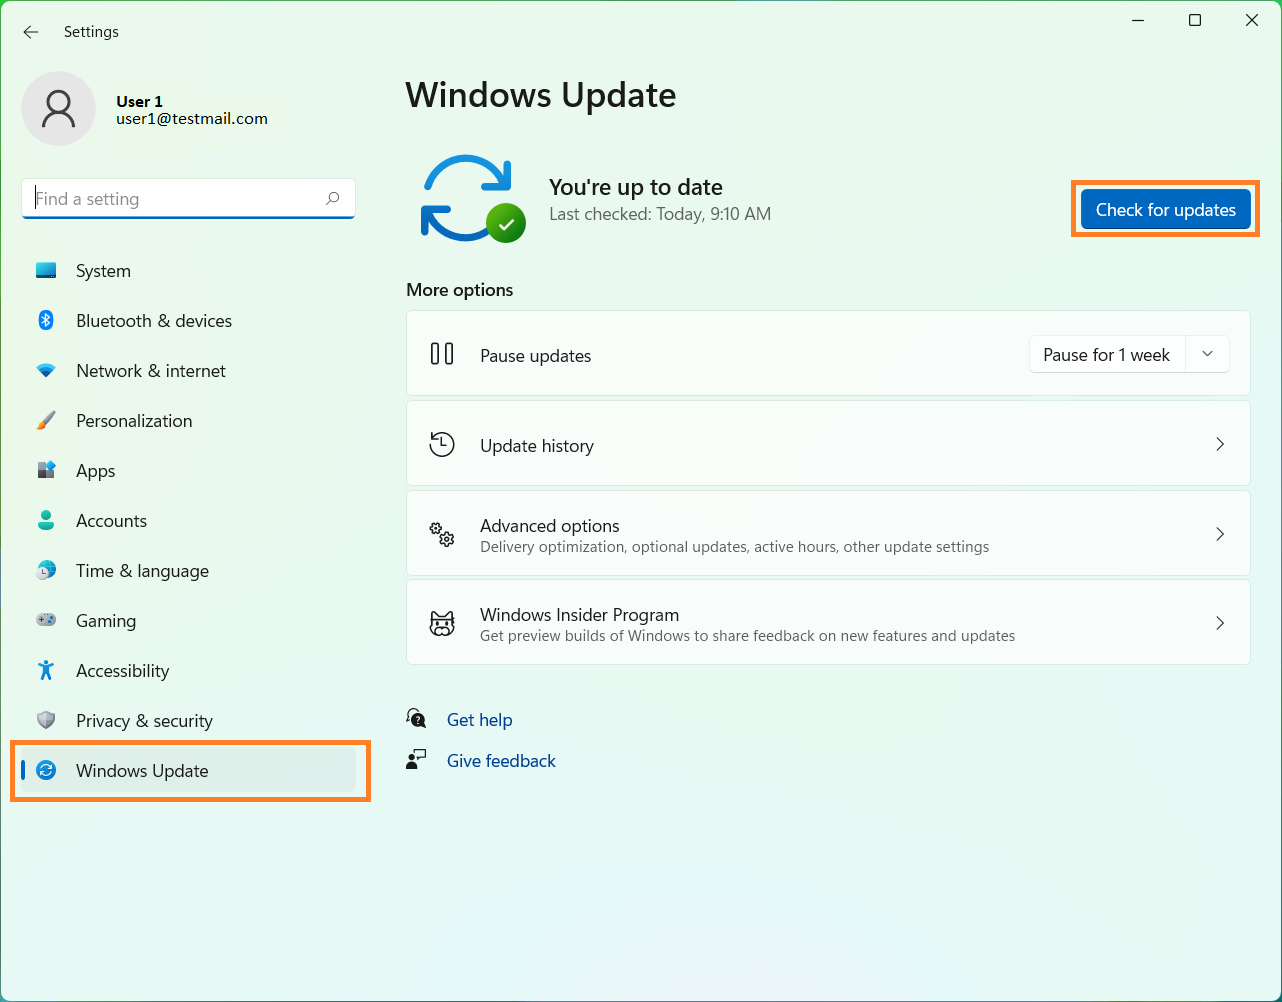
- Go to Start Menu and tap on the Settings option.
- From the left pane tap on the Windows Update tab for the further process.
- Now hit on Check for updates button from the right side screen to manually install updates.
Once the recent update is installed then you will have DirectX 12 on your Windows 11 OS. However, if you don’t have DirectX 12 after installing Windows Updates then it means that something went wrong. In this situation, you can download and install DirectX 12 manually using Microsoft’s DirectX End-User Runtime Web Installer on your Windows 11. If you don’t know how to use it then apply the following steps in sequence.
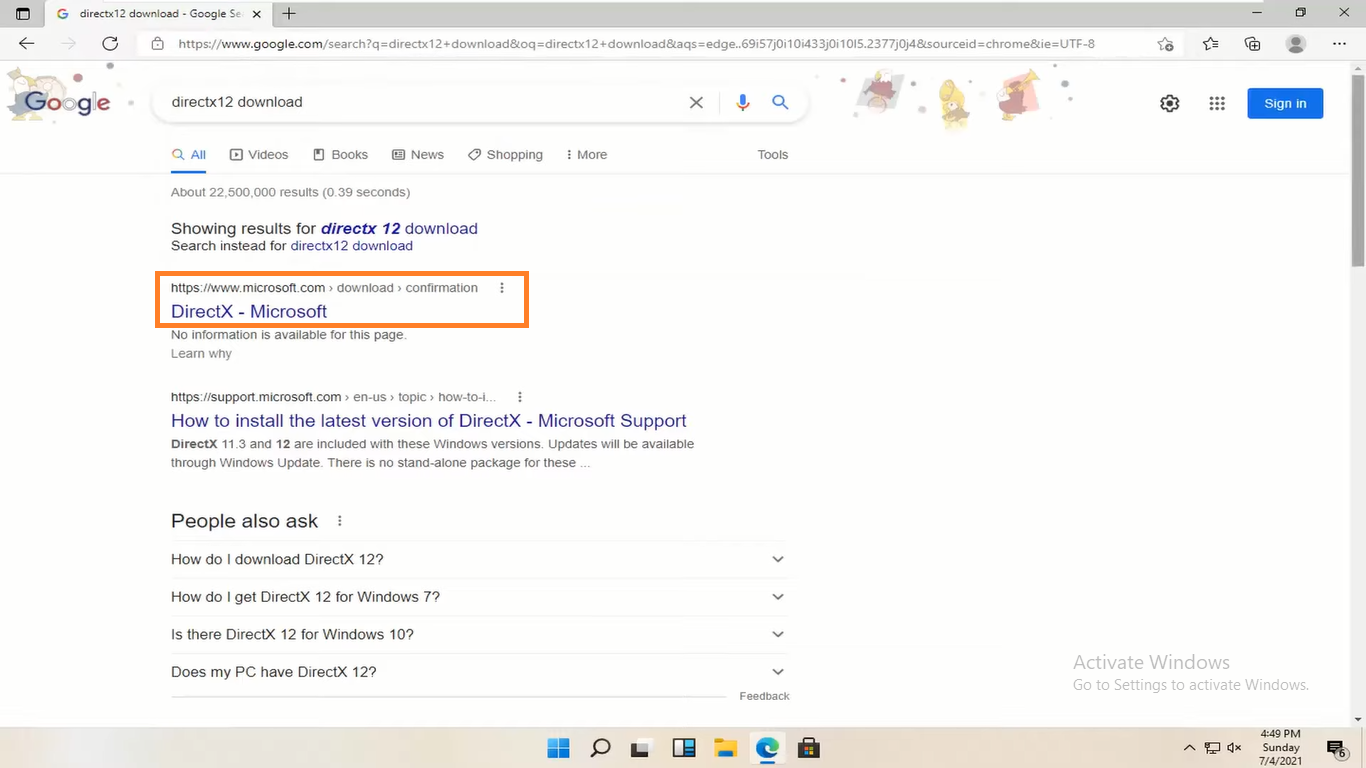
- First of all launch any web browser on your Windows 11. Here we have Microsoft Edge. In it search for DirectX 12 download.
- From the listed result do tap on the DirectX – Microsoft as it is the best source and it is an official site of Microsoft.
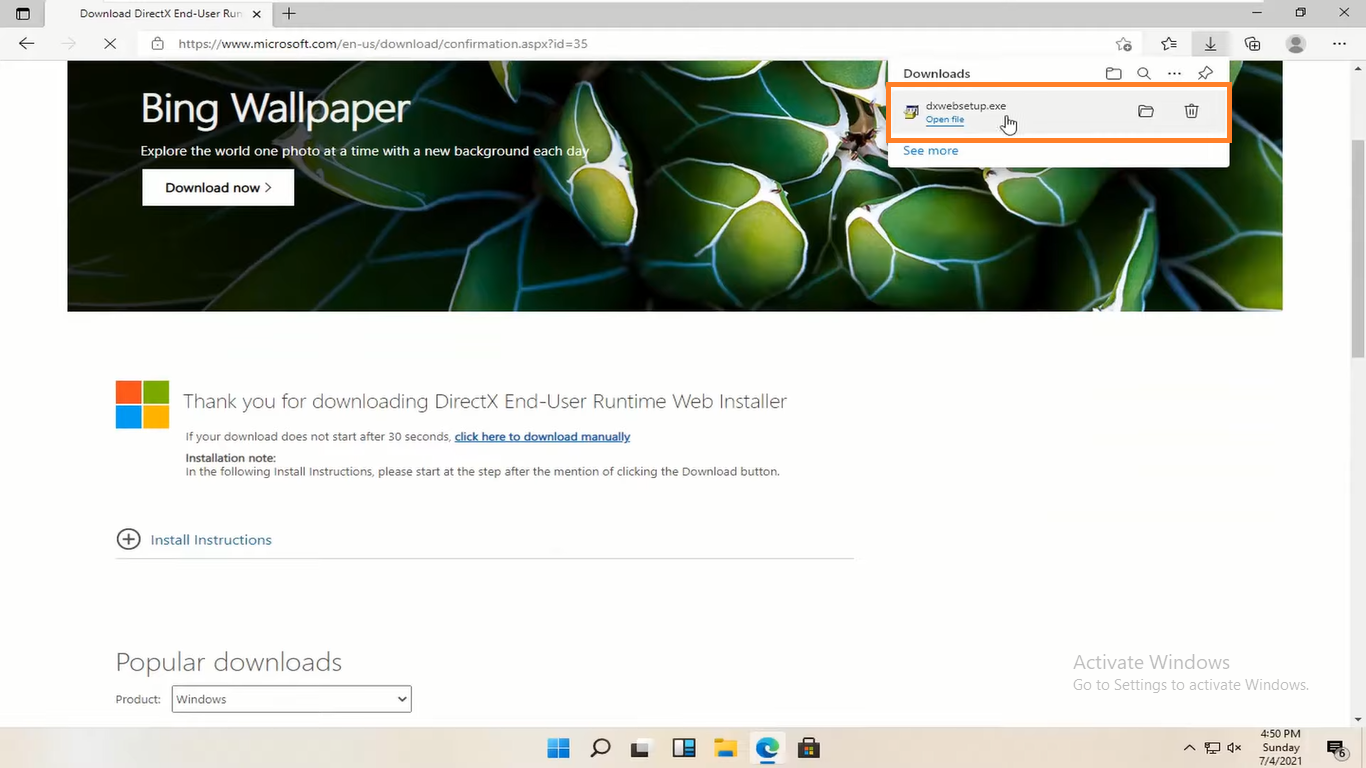
- Now hit on the red Download button for downloading the dxwebsetup.exe file.
- Once it is downloaded then tap on it to start the installation process.
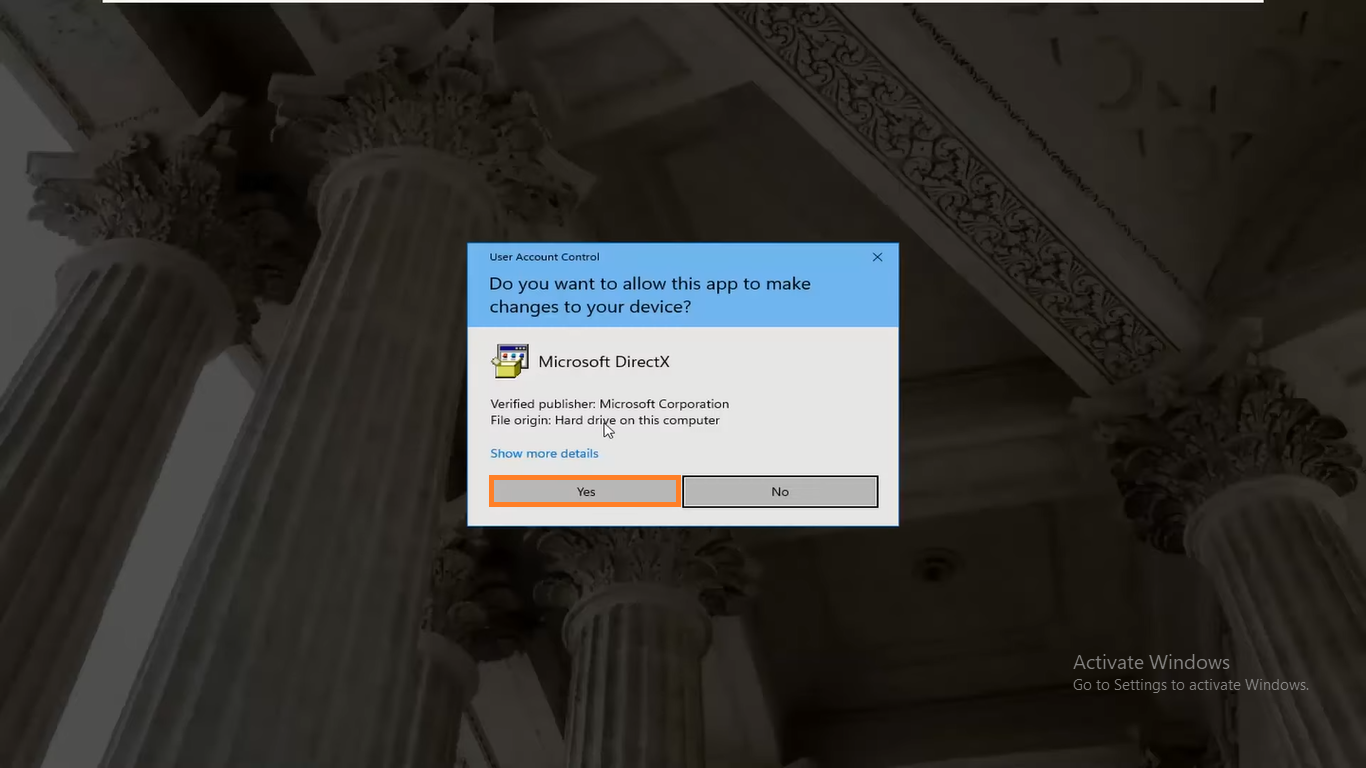
- After this, you will have a permission window. To accept it hit on the Yes option.
- Now you will have a Setup screen. From it select option name as “I accept the agreement” and then hit on Next option.
- From the next screen untick the option which says “Install the Bing Bar” and then hit on the Next button.
- Now from the prompted screen tap on the Next option once again. By doing this the components will start downloading and installing.
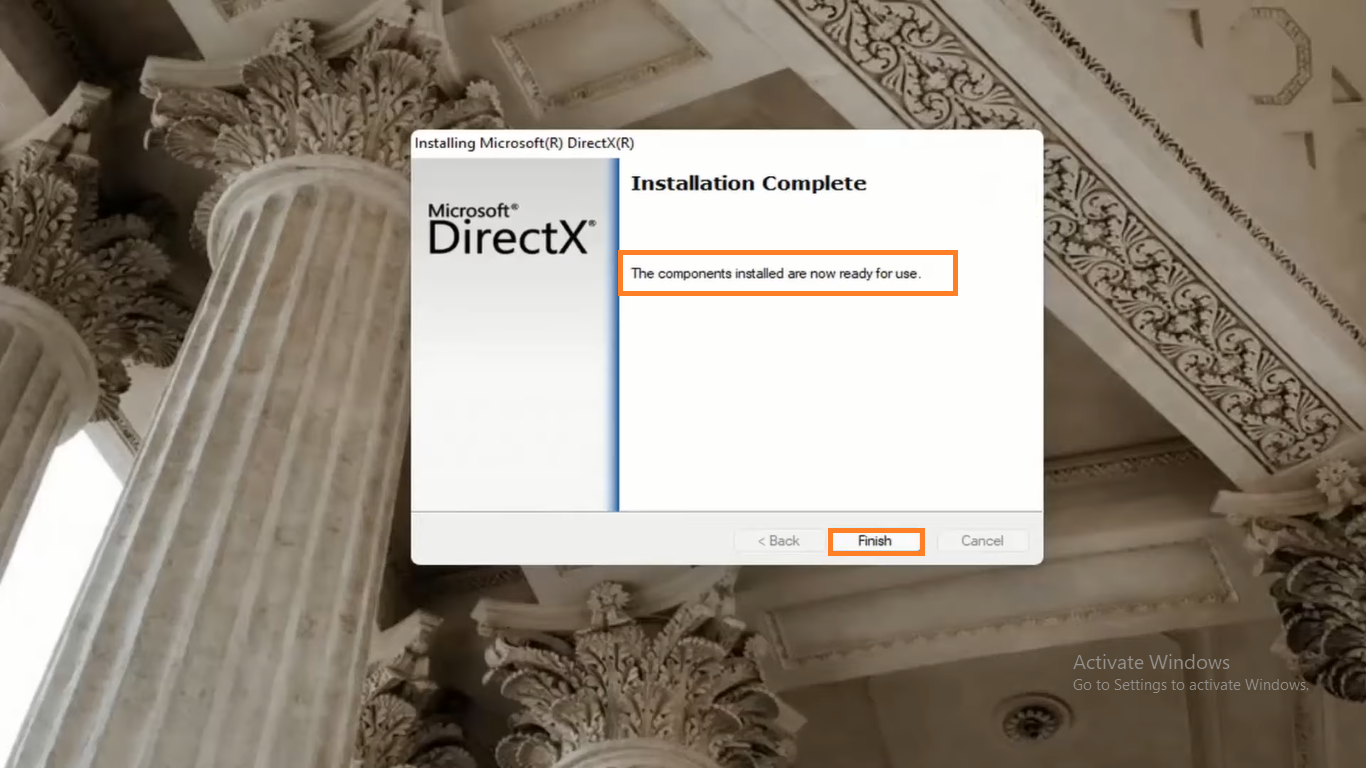
- At last, you will have an Installation Complete screen saying “The components installed are now ready for use”. To exit the screen hit on the Finish option.
Finally, now you have the latest version of DirectX that is DirectX 12 on your Windows 11.
I hope that after reading this article you have successfully “Downloaded and Setup DirectX 12 on Windows 11”. Make sure you read the whole blog till the end in order to have DirectX 12.