Many Windows 10 users are in problem that Service Host: Local System is eating all resources of the windows 10 system. Resources like RAM, memory, and internet data are fully used by the service host local system. The main problem is that it slows down the windows 10 system. Service host local system contains many other windows system services which cause a problem like high CPU usage and all. So, to get rid of this you just have to permanently disable the service host local system on windows 10.
Contents
What is a Service Host: Local System?
Service host local system is one type of program which contains or runs many other services automatically by which all resources are used in high quantity especially high CPU usage problem occurs. And the other two resources are also consumed in high quantity that is memory and internet connection. Now many windows 10 users think that how the internet connection is used in it? So, your answer is here, as I have told you that the service host local system contains many other services or task so one of the task is to update windows automatically means the update is started without asking the user by which internet is used in high quantity because it contains big files.
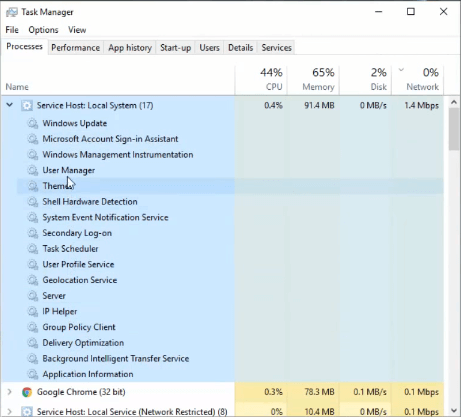
If you want to see all the services which are running on your system you just have hold ctrl + Alt + Del at the same time to have task manager. In the task manager go on the Process tab in which you will have multiple services that are running on your system. Just scroll and go on service name as Service Host: Local System and see the scenario of it. You will see that CPU usage will be high. By seeing the task manager you will able to know which service is consuming more CPU and other resources. So, my advice is to disable the service host local system permanently so that this problem won’t occur again and again. There is 1 way to disable service host local system permanently but to do so you have to follow to method one by one.
- Disable Windows Update
- Disable Service Host: Local System directly
So, above is the 1 best trick or we can say way to disable service host local system permanently and below is the detailed solutions so that you can implement this trick on your windows 10 system.
Disable Windows Update
Yes, to disable service host local system permanently you just have to disable windows update. This method is easy and simple to apply on windows 10 PC. There are many other tricks to disable service host local system but they will disable the service host local system temporary not permanently. So, to permanently disable follow the below steps in sequence so that you can get an expected result by applying the trick.
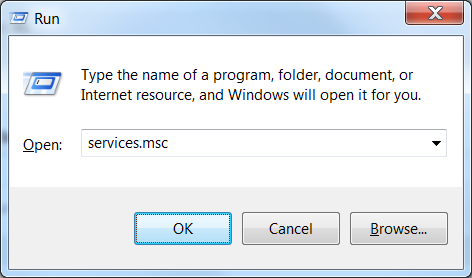
- Step 1: First of all hold Windows + R key to have Run dialog box. In the run dialog box write the command name as services.msc and hit on the OK button.
- Step 2: By clicking on the OK button you will have a new screen showing services. At the same screen scroll the services and go on Windows Update service.
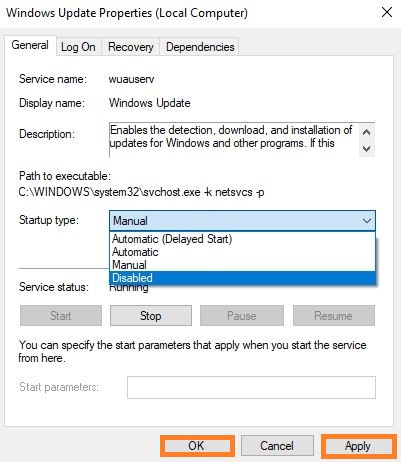
- Step 3: Now its time to do twice click on Windows Update. By doing so you will have a new screen showing Windows Update Properties.
- Step 4: On the same screen change the startup type from Manual to Disabled and tap on the Apply button and then OK button to save changes that you have made.
So, this was the process to disable windows update so that automatic update won’t occur but if you want to disable service host local system permanently you have to follow one more method after disabling windows update. So, the name of the method is Disable Service Host: Local System directly. To do so follow the below steps:
Disable Service Host: Local System directly
- Step 1: At first hold Windows + R key to have Run Dialog box. In the run dialog box type taskmgr and hit on OK button.
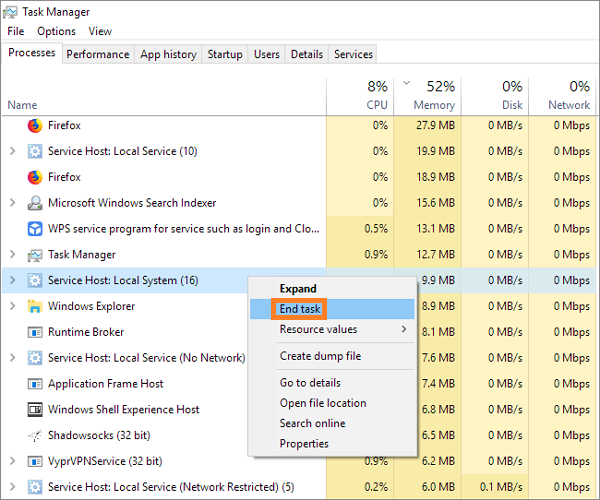
- Step 2: Once you click on the OK button you will have Task Manager. In it go on the Process tab and scroll all services and go on Service Host: Local System.
- Step 3: Now do right tap on it and hit on End task option.
- Step 4: By doing this you will have a confirmation message of disabling the service host local system. For confirmation do the tick mark on Abandon unsaved data and shut down and hit on shut down option.
So, by applying the above 2 methods you can disable the service host local system permanently. Make sure you follow all the steps properly.
I hope that this much information is enough to understand the concept of Service Host: Local System and the method I have discussed to disable it is simple to understand and easy to apply.