On October 5th Microsoft officially launched a free upgrade to all the users who meet the system requirements for Windows 11. Some Windows 11 requirements such as TPM 2.0 chip and Unsupported CPU can be officially bypassed from the Registry Editor, Microsoft has officially published about AllowUpgradesWithUnsupportedTPMOrCPU registry bypass on their website.
So currently, Windows 11 is the newest operating system in the city, and it appears to have caught everyone’s attention. The new OS includes several new features, such as the ability to simulate and run Android apps, a new frosted glass UI, background improvements, kernel updates, app integrations, and much more. Everyone appears eager to get their hands on Windows 11, but the operating system has a few hardware requirements that make it tough to install on older computers.
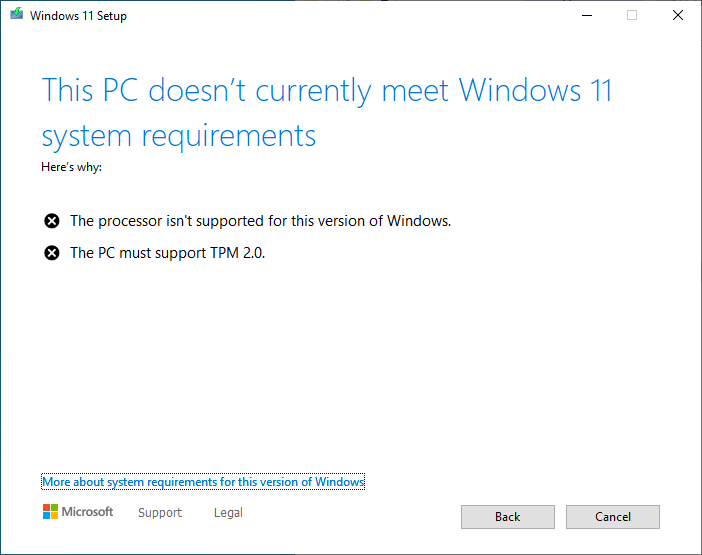
Apart from the basic system requirements like the desired ROM and RAM for Windows 11, TPM 2.0 is also essential.
Some PCs purchased before 2017-16 that don’t have the latest TPM 2.0 feature are stuck on the TPM 1.2 chip. Users using these systems cannot install Windows 11 despite having the resources to operate the OS effectively because their CPU isn’t listed on the Microsoft site.
This article is going to be all about bypassing these requirements through Windows 11 Registry AllowUpgradesWithUnsupportedTPMOrCPU file.
Read Also: Bypass Windows 11 all Requirements (TPM, CPU, UEFI, Secure Boot, etc)
Windows 11 Registry Bypass: AllowUpgradesWithUnsupportedTPMOrCPU
When installing Windows 11, the registry bypass is a little adjustment in your registry that allows you to disable the TPM 2.0 and the latest CPU check on your PC.
The TPM (Trusted Platform Module) is a secure chip on a computer’s motherboard that holds sensitive information like Windows Hello Sign-in credentials, passwords, encryption keys, etc.
This registry bypass will work with TPM 1.2 and at least a dual-core processor with 1 GHz or more clock speed.
Step 1: Open the Registry editor. To do so, press Windows + R on your keyboard, type regedit, and then press Enter.

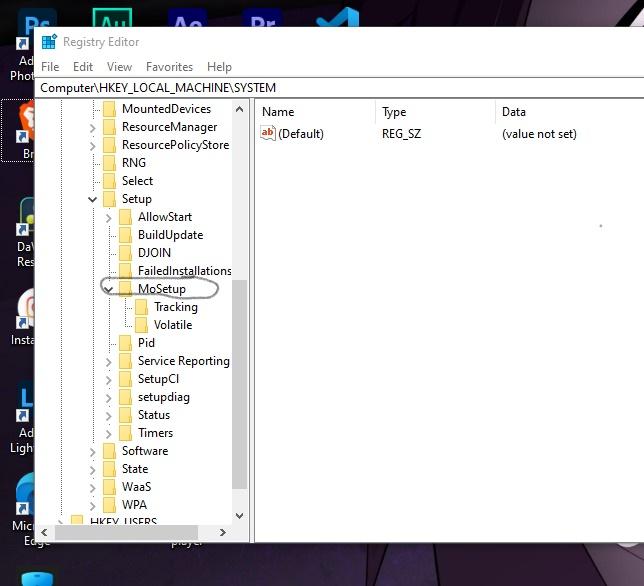
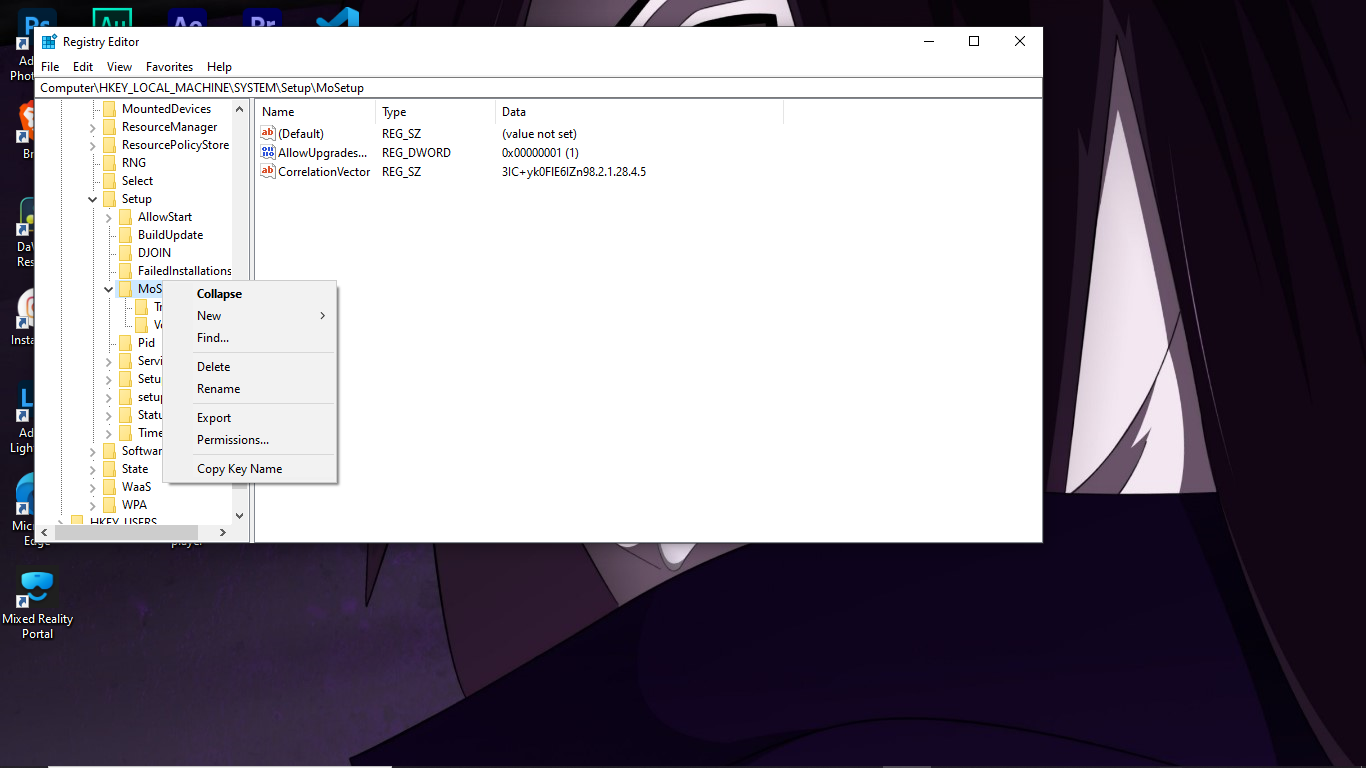
Step 2: Navigate to the following key: HKEY_LOCAL_MACHINE\SYSTEM\Setup\MoSetup in the left sidebar when the Registry Editor window opens
Step 3: Right-click the MoSetup folder and choose New
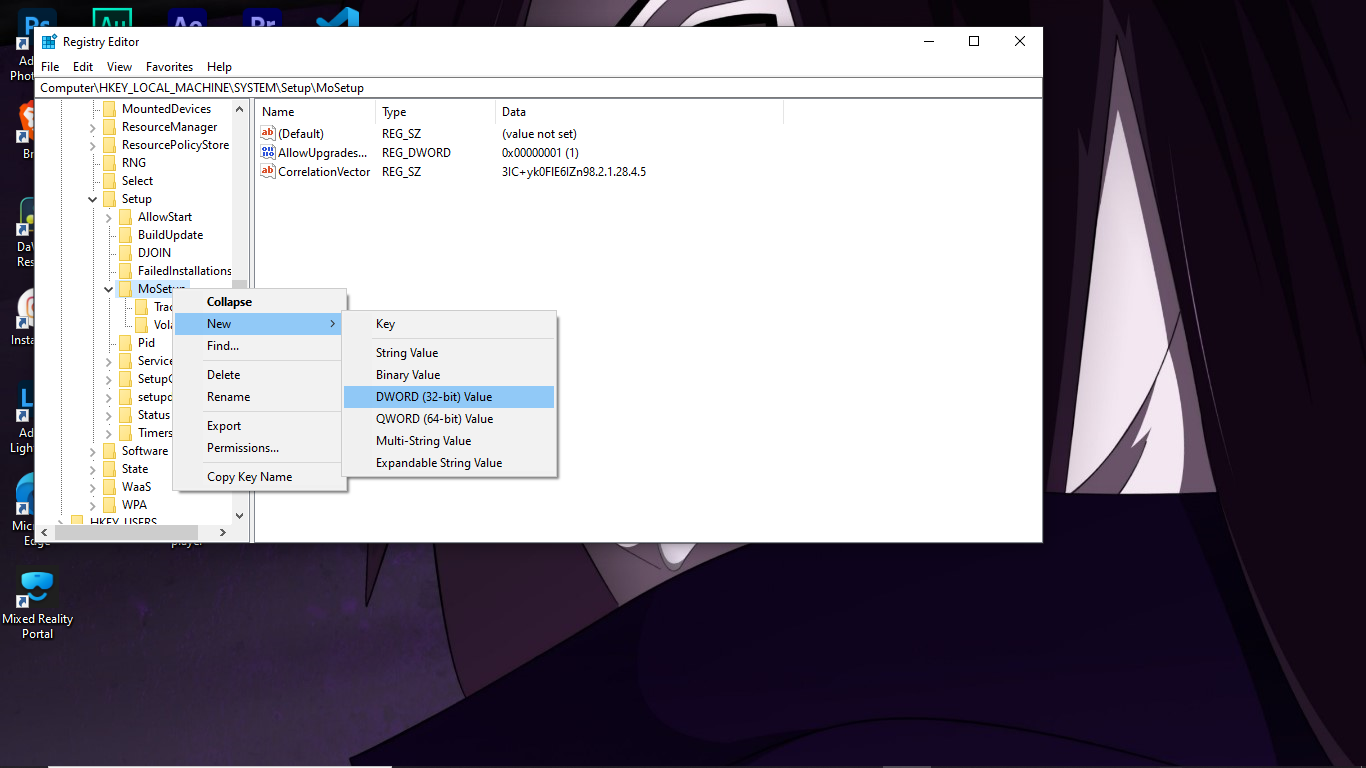
Step 4: Then, choose DWORD (32-bit) Value from the context menu and name it as AllowUpgradesWithUnsupportedTPMOrCPU.
Step 5: After that, double-click on the newly created AllowUpgradesWithUnsupportedTPMOrCPU file or right-click on it to modify its value and set its Value data to 1 in the box.
Step 6: When you’re finished, press the OK button.
Now you are all set to download and install Windows 11 from the Update & Security, Installation Assistant, or Bootable USB without Windows 11 update error.
Windows 11 installation through bootable USB will require you to restart your computer. Press F2, F9, DEL, or any other key pair with your PC will take you to the boot menu. Set the boot sequence. Install Windows 11 on your PC by booting it from a bootable USB device or a DVD. If you have successfully executed the steps mentioned above, you won’t get any error of TMP or unsupported CPU.
Conclusion
Windows 11 is the newly introduced OS by Microsoft for its users. However, many people are not able to install windows 11 despite meeting the hardware requirements. That is because TPM is not available on PCs purchased before 2017-16. Because TPM 2.0 is lacking in these PCs, users who have the resources to run Windows 11 cannot install it, although having the resources to do so.
This article has discussed what registry bypass is and how it enables you to install Windows 11 without getting TPM 2.0 or Unsupported CPU errors.