The WSL stands for Windows Subsystem for Linux, which allows users to run command-line Linux along with Windows 11 without a virtual machine or dual boot setup. The WSL includes all the unmodified GNU tools, utilities, and applications.
The WSL has got two versions on Windows 11, namely WSL 1 and WSL 2. As their names suggest, WSL 2 is the latest Linux version with more advanced features. Let’s look at the WSL Linux tool features for Windows.
- Install your favorite Linux distribution such as Ubuntu, Kali Linux, Linux Mint, or Debian from Windows 11 Microsoft Store.
- Run Linux tools such as file shell, starship, z, fzf, bat, grep, or other ELF-64 binaries.
- Get support for the most useful Linux apps such as Wget, Htop, Nano, Lynx, Pydf, and etc.
- Best Programming languages for Linux Developers are Python, C++, C, Perl, and Java.
- Test all the Linux Server Services from SSHD, MySQL, Apache, MongoDB, PostgreSQL, and Lighttpd directly on Windows 11.
- Get access to thousands of free software through the Linux distribution package manager.
- Invoke Windows 11 programs from the Linux shell.
- Use Linux Applications on Windows 11.
The WSL will integrate the power of the best operating system for developers that is Linux into Windows 11. Also, readout major differences between Linux and Windows 11 before WSL 1 Vs WSL 2 architecture.
Contents
WSL 1 Vs WSL 2
The WSL 2 is the latest version of the Windows Subsystem for Linux tool on Windows 11. The WSL 2 uses the real Linux kernel in the backend to enable additional support for the ELF64 Linux binaries along with better performance and root access to the Windows 11 OS.
On the other hand, WSL 1 is a widely used architecture in the market. Though, WSL 2 interacts differently with Windows 11 system and hardware but still has kept the same user experience as WSL 1.
Ubuntu, Kali Linux, Linux Mint, or Debian can run with either WSL 1 or WSL 2 at a time. Individual Linux distribution architecture can be changed between them. Anyway, we have covered both WSL 1 and WSL 2 installation on Windows 11.
Install Linux through command line on Windows 11
Earlier Windows Subsystem for Linux required manual steps to enable from the settings on Windows 10 but it has become easier since insider preview build 20262. Now WSL installation just requires a command with administrator permissions on Windows 11.
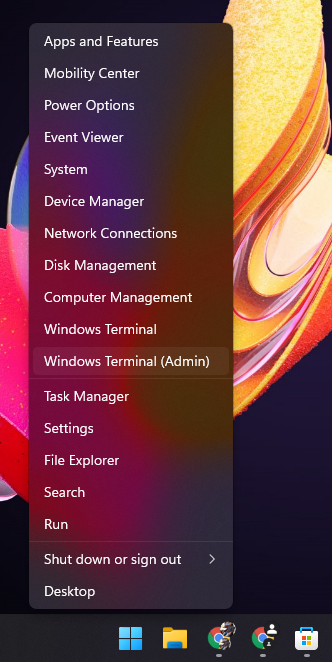
Right-click on a Start button to launch Windows Terminal with Admin privileges. Tap on a Yes to the next User Account Control prompt.
To get the list of available Linux distributions, enter the wsl –list –online command. Note down the name of Linux distribution to install and replace it with <Distribution Name> from the wsl –install -d <Distribution Name> command. Suppose if it’s Debian then the final command to install Debian will be wsl –install -d Debian.
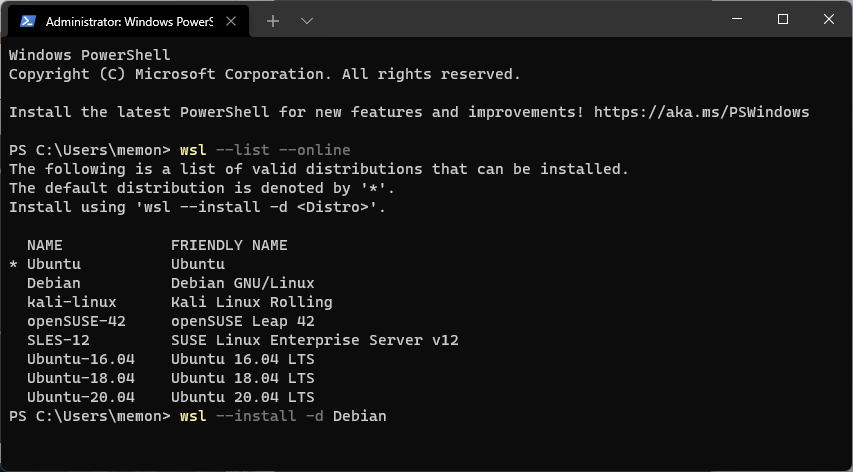
You can pick any Linux distribution to install on Windows 11 from Ubuntu, Debian, kali-linux, openSUSE-43, and SLES-12. Anyway wsl –install command will install Ubuntu by default.
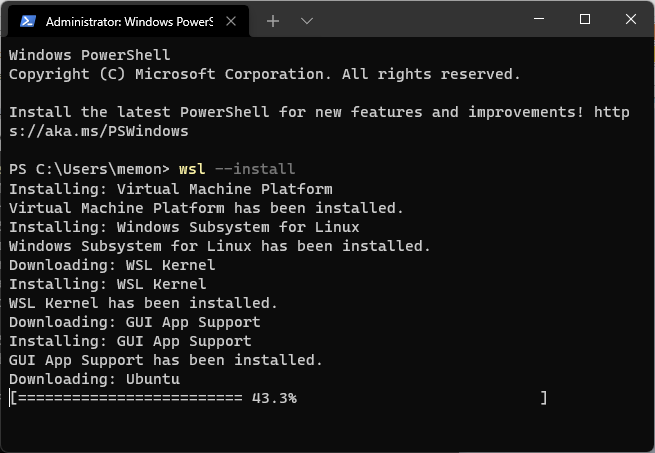
The one wsl –install command will perform multiple tasks in the queue. It will download and install Virtual Machine Platform, WSL 1, WSL 2, WSL Kernel, GUI APP Support, and Linux distribution from Ubuntu, Debian GNU/Linux, Kali Linux Rolling, openSUSE Leap 42, or SUSE Linux Enterprise Server v12. Also, set the WSL 2 as the default architecture for the installed distros.
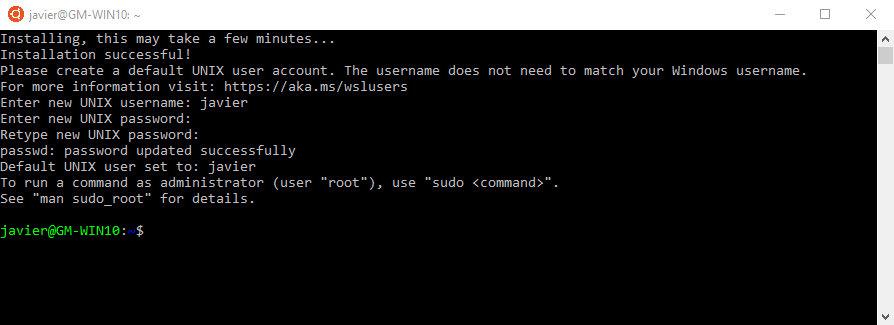
The Linux distros installation will also ask you to Restart your PC then launch it from the Start Menu. The first launch will decompress to save the Linux distribution on your PC. Also, create a user with a strong password to access the Linux distros in the future.
Install Linux distros from the Microsoft Store
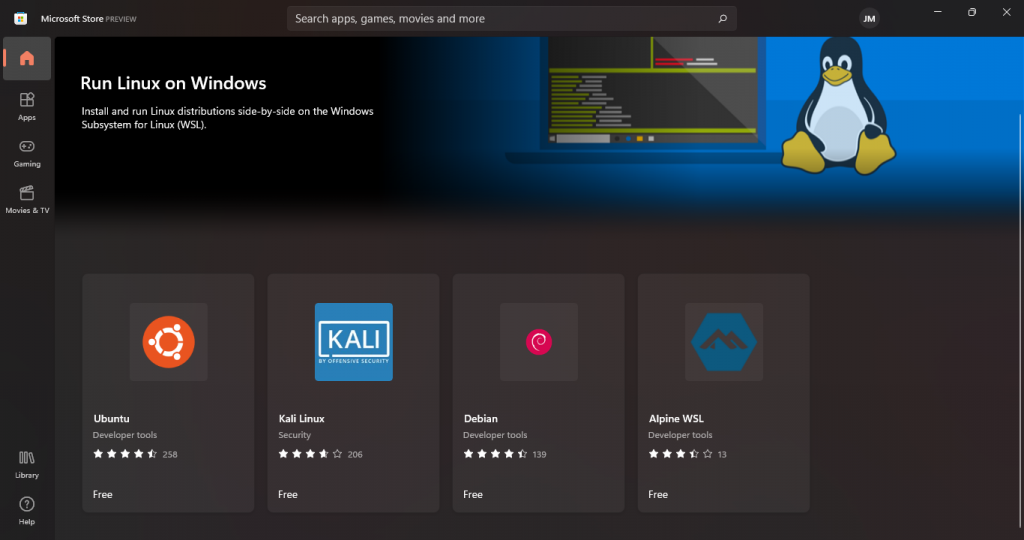
Windows 11 Microsoft Store has also got multiple Linux distributions to directly download, install, and start using on our PC. Microsoft Store includes the latest Ubuntu, Kali Linux, Debian, Fedora, Pengwin, Alpine WSL, SUSE, and OpenSUSE terminals.
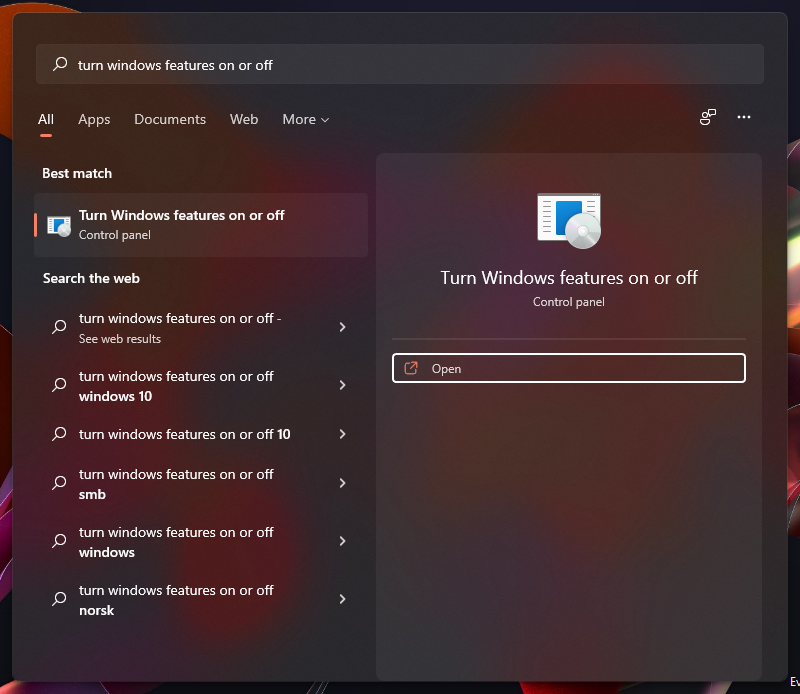
First, you have to enable WSL 1 support from the Windows 11 features. Later it can be upgraded to the WSL 2. Launch the Start Menu, search for Turn Windows features on or off, and tap on the first control panel option.
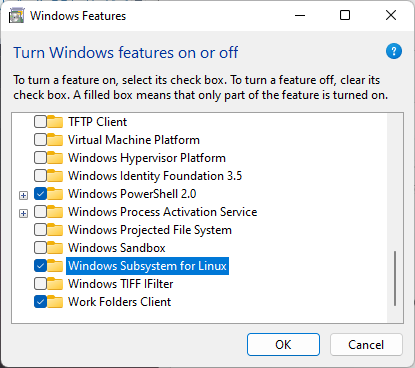
Scroll down to tick mark the Windows Subsystem for Linux checkbox and tap on the OK button. The next prompt will ask you to restart your PC.
Launch Microsoft Store and search for Ubuntu, Debian, or Kali Linux distros you want to install. Download and install it on your PC.
The first launch will ask you to set up a username and password.
Install WSL 2 on Windows 11
If you install Linux from the above Microsoft Store guide then you can upgrade from WSL 1 to the better WSL 2 architecture. First, you have to enable the Virtual Machine feature then Update the Linux kernel package and set WSL 2 as the default version.
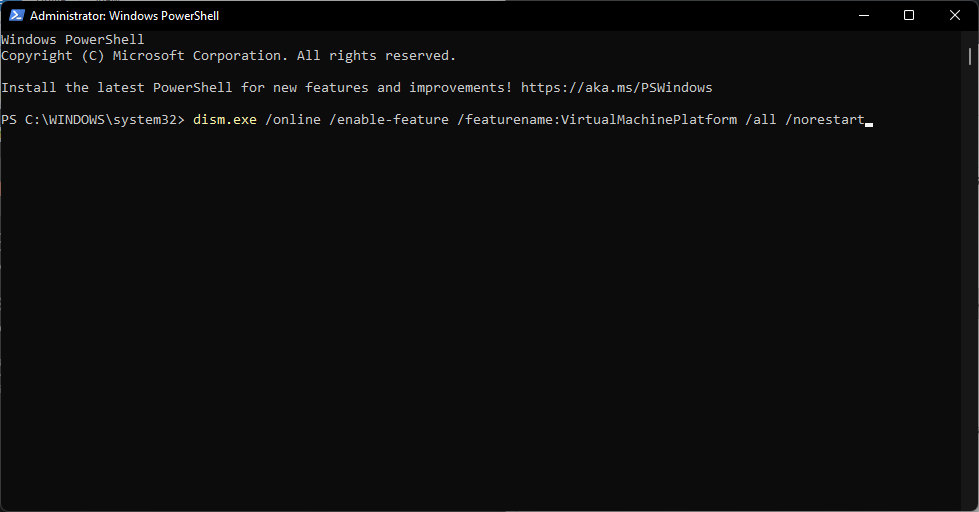
Tap on the Start Menu, search for Windows Powershell, right-click on it to Run as administrator, enter the below command, and restart your machine.
dism.exe /online /enable-feature /featurename:VirtualMachinePlatform /all /norestart
Download and install the latest WSL 2 Linux kernel package on your system.
Again launch the PowerShell and set WSL 2 as the default architecture with wsl –set-default-version 2 command.
At last, download and install the Linux distros of your choice from the Windows 11 Microsoft Store.