Microsoft unveiled the new Windows 11 on 24th June with very specific requirements about the TPM 2.0 version. This happened for the first of Microsoft very concerned about the TPM chips so you must know about What is TPM chips? Why it is required and what are the benefits of the TPM chips? and How to enable TPM 2.0 for Windows 11?
Contents
What is TPM 2.0 chip?
The TPM stands for Trusted Platform Module use for encrypting the passwords and data from the firmware level. It works on blockchain technology to store the data into key and value pairs. This microprocessor also enhances hardware security.
The TPM chip was especially used on business or cryptographic computers to strengthen their firmware security. More than 80 percent of computers are vulnerable to firmware attacks and only 25 percent of them use this technology.
The TPM 2.0 chip is the upgraded version from the TPM 1.2 version which was used since Windows Vista. Microsoft was taking the TPM 2.0 chips into consideration from the past Windows 10 updates. Also, has sustainably maintained its usage on all the enabled PCs. Hence, Microsoft decided to ask for the TPM 2.0 chips requirements for Windows 11.
Read Also: Windows 11 Free Upgrade
What’s TPM 2.0 vs TPM 1.2 Windows 11 Confusion?
First, Microsoft published the Windows 11 compatibility with the minimum requirements of the TPM 1.2 version and later updated it with the TPM 2.0 version. All the fellow users with the TPM 1.2 version are asking to solve this confusion.

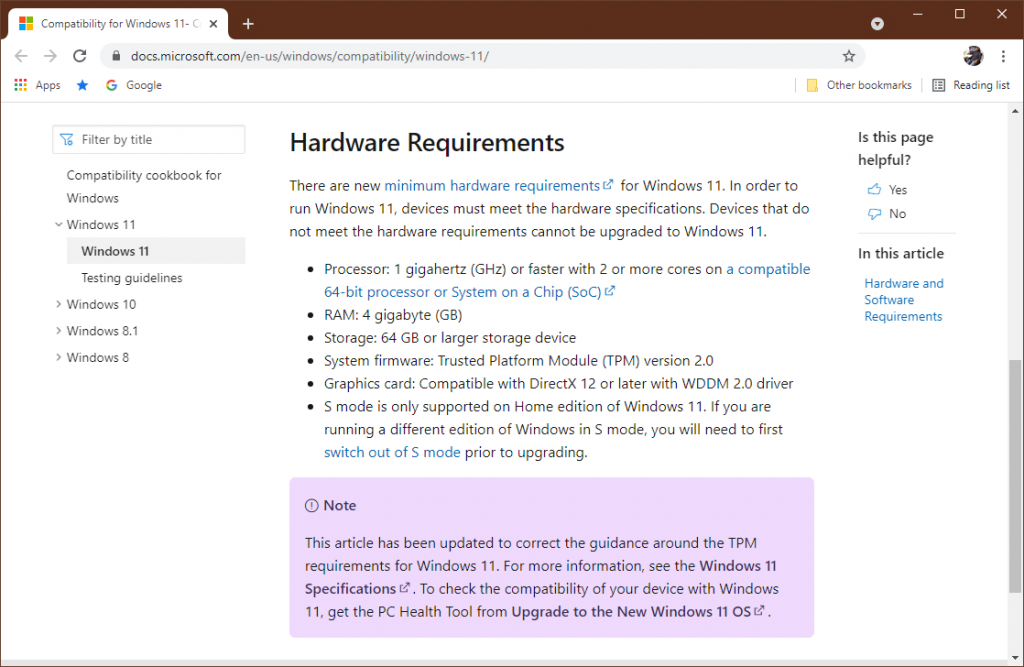
Microsoft has confirmed on their support and also on their official page that TPM 2.0 is must for Windows 11 support whereas TPM 1.2 was removed from their minimum requirements. So it’s total bad luck as well as your PC isn’t that strong to defense your firmware.
TPM 2.0 has many same features than 1.2 but it’s not fully backward compatible. TPM 1.2 has three common parts whereas the 2.0 version has four parts with different specifications. Only Storage hierarchy is managed by the TPM 1.2 whereas additional Platform and Endorsements hierarchies are also controlled by the TPM 2.0. The TPM 2.0 also supports Bitmap and PIN data along with the Extend and Unstructured data. TPM 2.0 has so many extra features and advanced features hence Microsoft has to deny the TPM 1.2 version.
Read Also: What are the minimum requirements of Windows 11?
Check for TPM 2.0 Support on Your PC
TPM chips might be new information for us users but it’s a decade-old technology for the manufacturers. Microsoft first time used the TPM chip with Windows Vista and even Apple has shipped the Macintosh with the TPM technology. The Chromebooks also have it to strengthen their security defenses.
Microsoft also asked for the TPM 2.0 support along with Windows 8.1 hardware requirements in 2015. Following all the hypes and major requirements, most of the manufacturers have already included the TPM 2.0 support on the PCs.
Especially, the PCs with Intel CPUs have used the Intel Platform Trust Technology (PTT) to follow all the TPM 2.0 standards. Intel has also merged its PTT with the TPM 2.0 to further enhance data security. As of now, major PCs have got the support for TPM 2.0 to pass the Windows 11 compatibility, they just have to check from the settings.
Check for TPM 2.0 on Windows 10
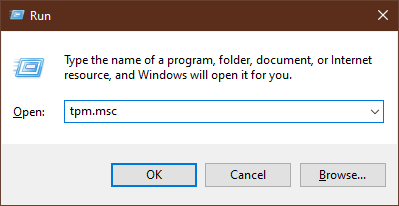
- Launch the RUN box by holding Windows + R keys.
- Type tpm.msc in the RUN box.

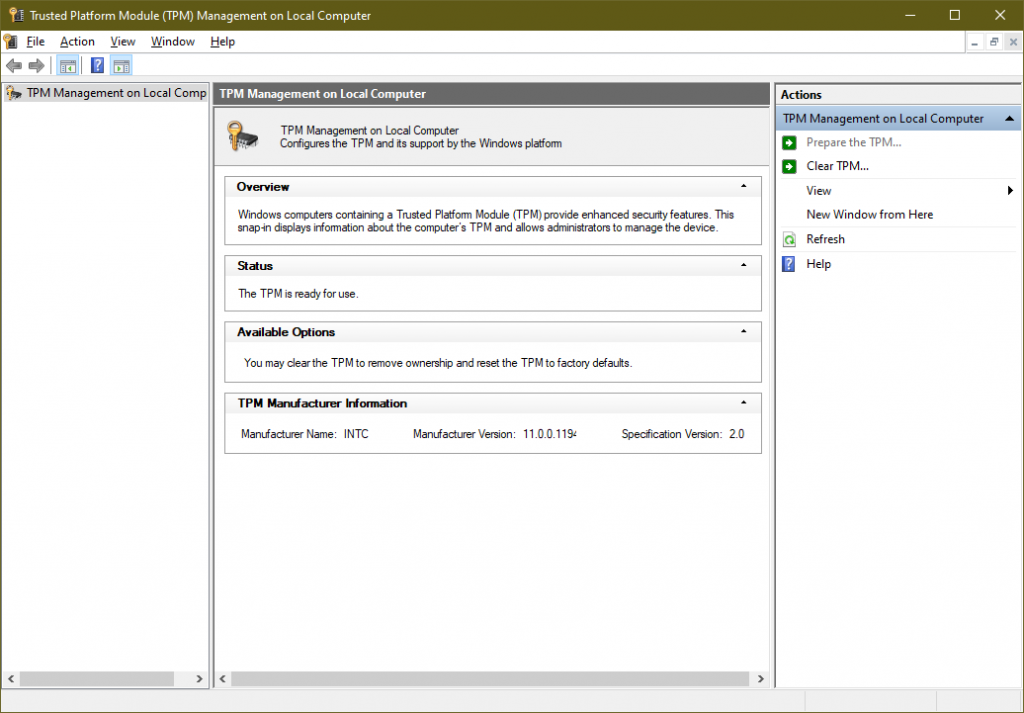
- Press Enter or tap on the Ok button to launch the Trusted Platform Module (TPM) Management on Local Computer.

The TPM Management window will either specify the Overview, Status and the TPM version or will give an error. The error message will read as Compatible TPM cannot be found on this computer and verify this computer has a TPM 1.2 or later from the BIOS settings.
Check TPM from PC Health Check App
Windows 11 compatibility can be verified from the PC Health Check App by Microsoft. It will also point to the non-availability of TPM on the PC. Install PC Health Check on Windows 10 and tap on the Check now button. The app will give an error for This PC can’t run Windows 11 due to the disabled TPM 2.0 feature.
How to enable TMP 2.0 from the BIOS Settings?
The TPM 2.0 is a firmware level setting which you have to operate from the BIOS settings. All BIOS settings will differ for different PCs along with their BIOS keys.
The BIOS is a small program installed on the motherboard of a computer to boot up the Processor, HDD, RAM, and Monitor Screen with an established connection. All the hardware level settings can be accessed from the BIOS settings.
Make sure to completely shut down your computer or laptop. Again press the power button along with keep tapping its BIOS key even before the brand logo appears. The BIOS key will vary from the set of F1, F2, F10, F11, and Delete keys.
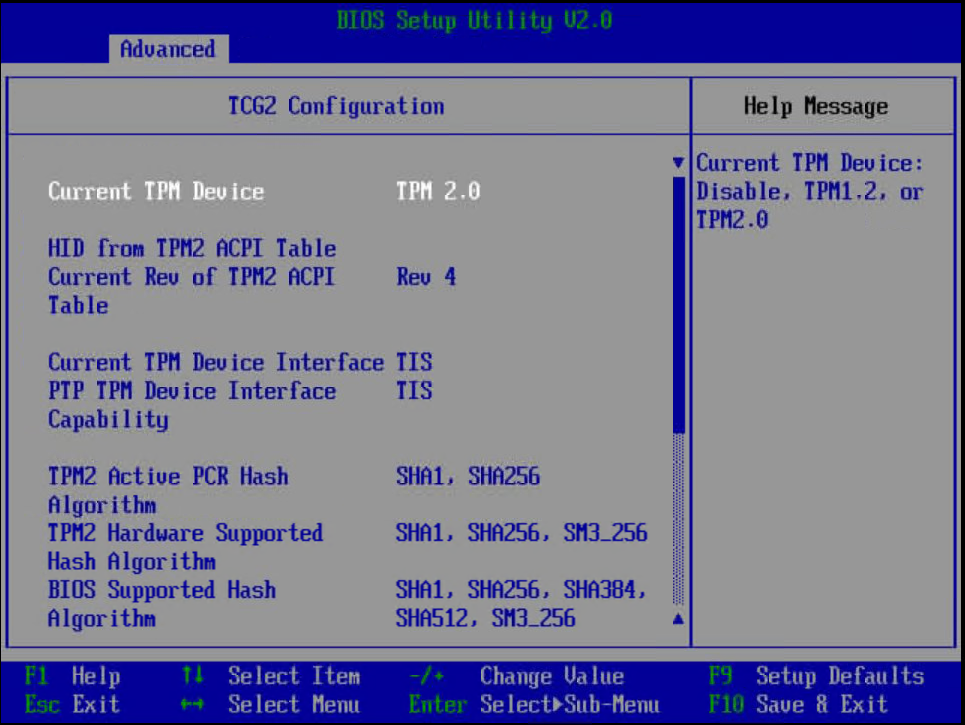
The BIOS settings will generally appear with blue background and white fonts. All the options will be listed vertically and the settings tabs will appear in the top horizontal menu, just like the table. It may vary for different brands and may have a graphical interface for the gaming brands such as Acer and MSI.
First, make note of the TPM label, it will appear with simple TPM 2.0 or fTPM names. On some PCs with Intel processors, it also appeared as PTT or Intel Platform Trust Technology name which stands for Intel Platform Trust Technology and uses the enhanced TPM 2.0 technology. Whereas, on AMD processors its name appears as AMD PSP fTPM.
Now let’s explore the different BIOS settings to find the TPM option to enable. First, go to the Security tab to look for its settings. It might appear with the Current, Change, and Clear State. Just Enable it under the Change TPM State option. If can’t find it under the Security tab then navigate to the Advanced tab. Mostly it’s under the Security or Advanced settings. It may be found under TCG or TCG2 settings page.

Save and exit the BIOS, once you have enabled the TPM 2.0 support. Also, recheck for TPM 2.0 availability for Windows 11 installation.
nowhere does it say anything about bypassing this requirement
TPM 2.0 chip is a decade-old technology, check your BIOS for its option. It must be present.!