Microsoft launched Windows 11 with a very specific CPU, UEFI with Secure Boot, TPM 2.0 chip, 4 GB of RAM, and 64 GB of storage requirements. All the Windows 11 hardware requirements are meant for strengthening the security or advancing the performance of your device.
Windows 11 requires the latest dual-core CPU with a 1 GHz of clock speed. The latest CPU must be listed in the Windows 11 Intel and AMD Supported Processors list. The list consists of only newer processors declining even Intel 7th Gen and powerful AMD CPUs.
An integrated TPM 2.0 chip in a processor will enhance Windows 11 security. The TPM specification was introduced much earlier by Microsoft and hence it’s already available on the major Intel and AMD laptops. The TPM 2.0 chip just has to be enabled from UEFI or BIOS. If you have confirmed its absence on your PC then we have also covered the steps to bypass TPM 2.0 for Windows 11.
Now comes the mandatory and genuine compatibility specs for Windows 11 that are UEFI with Secure Boot, 4 GB of RAM, and 64 GB of Storage. The UEFI is the advanced, faster, and secured firmware interface to boot the OS along with the Secure Boot option. Also, 4 GB of RAM ad 64 GB of Storage are very well justified for smoothly running your favorite apps on Windows 11.
Further, we have covered this post to bypass Windows 11 requirements in separate sections, one by one. Each section has got it’s important to give you the best advantages of all the specifications. At last, we have covered an ultimate solution to install Windows 11 on all the unsupported PCs if your device truly misses out on all the requirements.
Contents
Switch to UEFI with Secure Boot and GPT Partition for Windows 11
There are only two types of boot modes namely Legacy and UEFI to boot an operating system from the motherboard. The Legacy is a decade-old very basic boot mode to just start Windows from the HDD or SSD. The Legacy settings appear only in blue background with white text and its options are navigated through a keyboard.
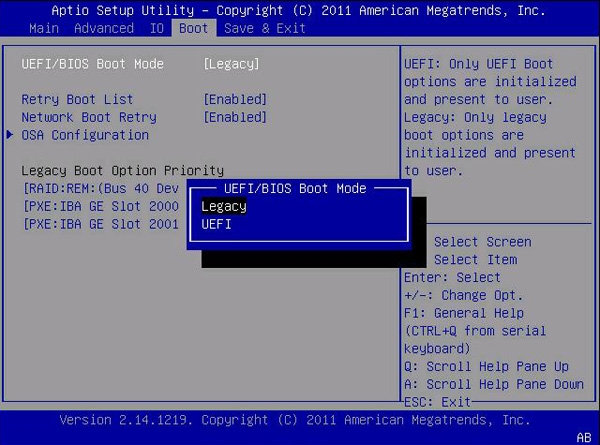
On the other hand, the UEFI is an advanced boot mode and has got a graphical user interface to change its settings. The UEFI Boot Mode was an optional requirement for Windows 10. Well, due to UEFI features and pros over Legacy Boot has been made mandatory for Windows 11.
The UEFI boot also needs a GPT Partition Type which supports more than 2 TB of SSD or HDD with up to 128 primary partitions. Well, the conversion is pretty easy from MBR to GPT on Windows 10 without losing data but you also have to immediately switch to UEFI and enable the Secure Boot feature from the BIOS. Please refer to our detailed article with steps to enable UEFI, Secure Boot, and GPT for Windows 11.
Windows 11 TPM 2.0 Chip
The Trusted Module Platform (TPM 2.0) chip encrypts the important data and passwords at the firmware level. The majority of PCs miss out on defending threats at the firmware level. Microsoft ensured to protect Windows 11 PCs with the TPM 2.0 module.
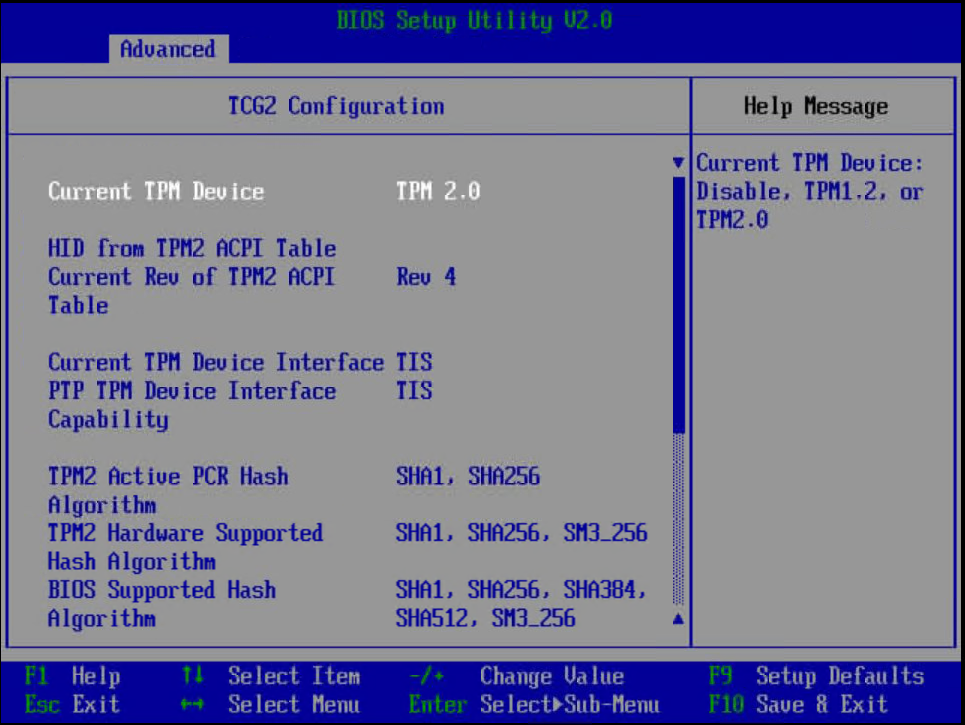
The TPM 2.0 chip was introduced five years back by Microsoft and a lot of manufacturers have already included it in their devices following the guidelines. You can easily turn on the TPM 2.0 chip support from the UEFI, even TPM 1.2 will also work with the next Windows 11 bypass settings. The last solution will work if your PC doesn’t carry any TPM chips.
Install Windows 11 on Unsupported Processors and TPM
If your PC passes at all the Windows 11 compatibility tests except for the latest CPU and TPM 2.0 chips then it’s still officially eligible for free Windows 11 Upgrade with a few tweaks. Make sure to switch to UEFI and the TPM version to be at least 1.2 from our above two references. If there is no TPM chip, UEFI Boot Option, Secure Boot, or minimum RAM then apply the last and ultimate bypass method.
Installing Windows 11 on an unsupported processor with a TPM 1.2 chip by making changes to the Windows Registry you are aware of all the risks and future issues. Your device might miss out on important quality, security, and features updates in the future.
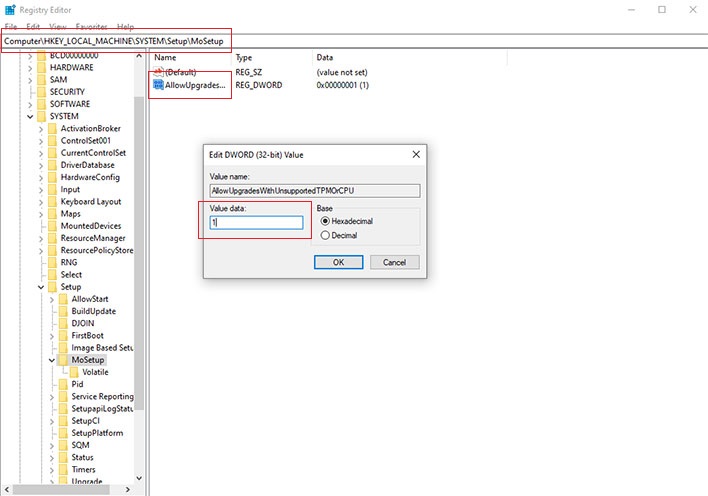
Launch the Windows 10 Start Menu and search for the Regedit and tap on the very first result to open Registry Editor. Then expand the HKEY_LOCAL_MACHINE directory under Computer on the left side menu. Then navigate to SYSTEM, Setup, and MoSetup directories. You can also simply paste the following address below the top menu.
Computer\HKEY_LOCAL_MACHINE\SYSTEM\Setup\MoSetup
Then right-click on the right panel of the MoSetup directory and create a new DWORD (32-bit) Value file with AllowUpgradesWithUnsupportedTPMOrCPU name. Then right-click on the same created file to modify its value data to 1 and tap on Ok to save the changes.
That’s it, restart your PC and Windows 11 installation to bypass the CPU and TPM requirements.
An Ultimate Bypass to all Windows 11 Requirements
There are multiple ways to install Windows 11 on our PC such as Free Upgrade from Windows 10, Windows 11 Installation Assistant, USB Installation Media, and ISO. We will directly Windows 11 ISO to bypass CPU, TPM, UEFI, Secure Boot, RAM, and all the compatibility tests.
There is one file in a Windows 11 ISO which performs all the compatibility tests before the installation, so we just have to edit that file to bypass them. Well, making a number of changes to such an important file might also be risky so just replace it with our file.
Make sure you have downloaded Windows 11 ISO from the Installation Media tool or from their website.
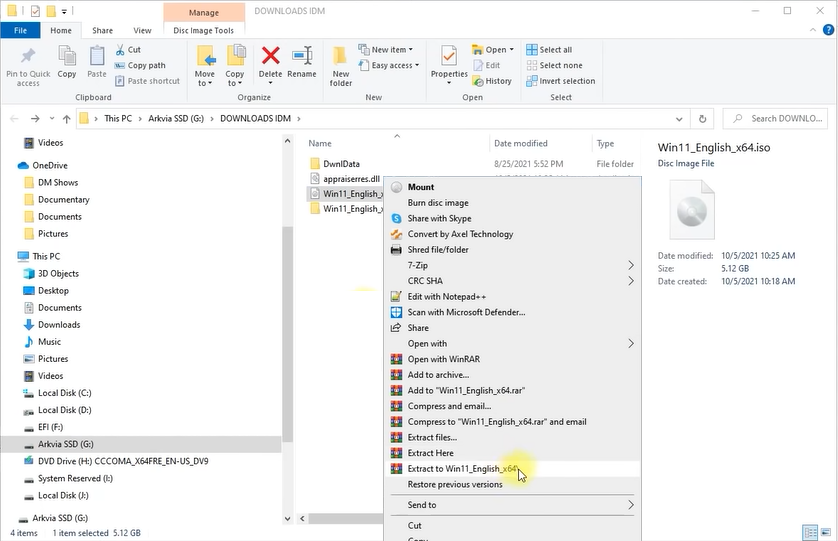
Now right-click on the downloaded file and extract it to your desired folder with WinRAR, 7Zip, or your desired app.
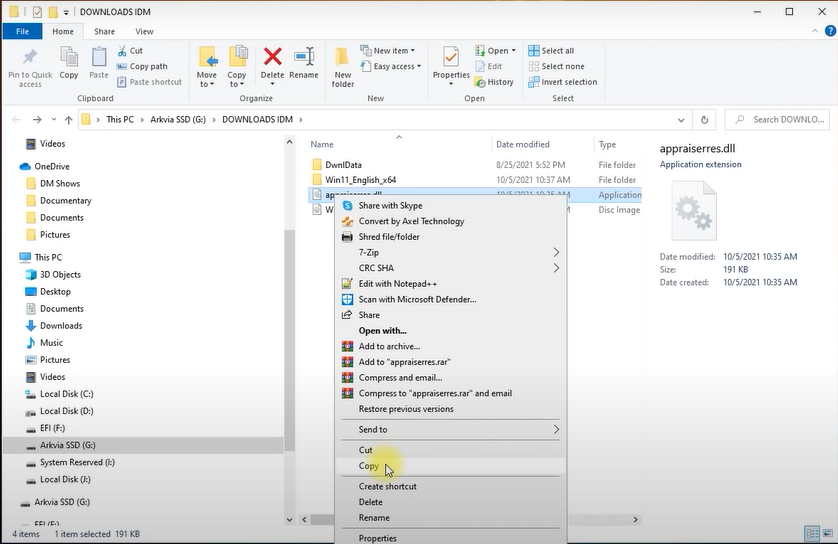
Download the appraiserrs.dll file and copy it to your clipboard with Ctrl + C shortcut.
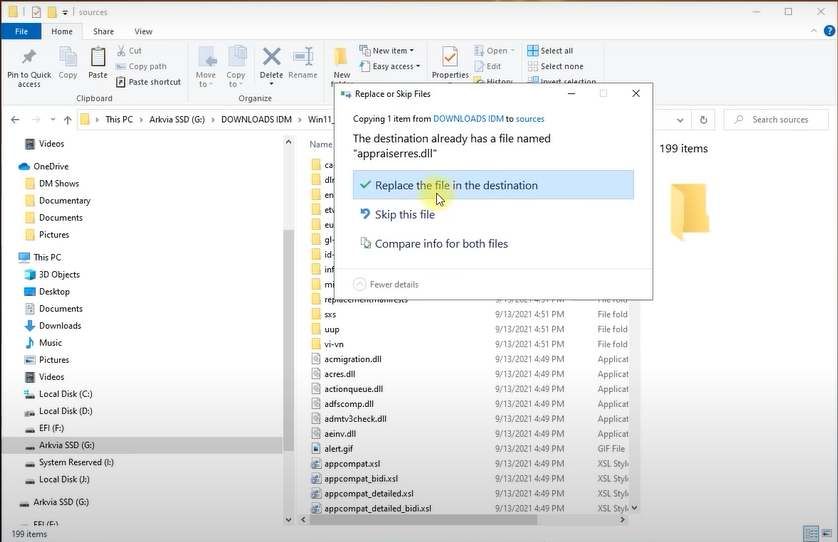
Now go to the sources directory of extracted Win11_English_x64 folder and paste the copied appraiserrs.dll file with Ctrl + V shortcut. It must give the Replace or Skip Files prompt, choose the first Replace the file in the destinations. If it doesn’t give the replace prompt then you are doing something wrong.
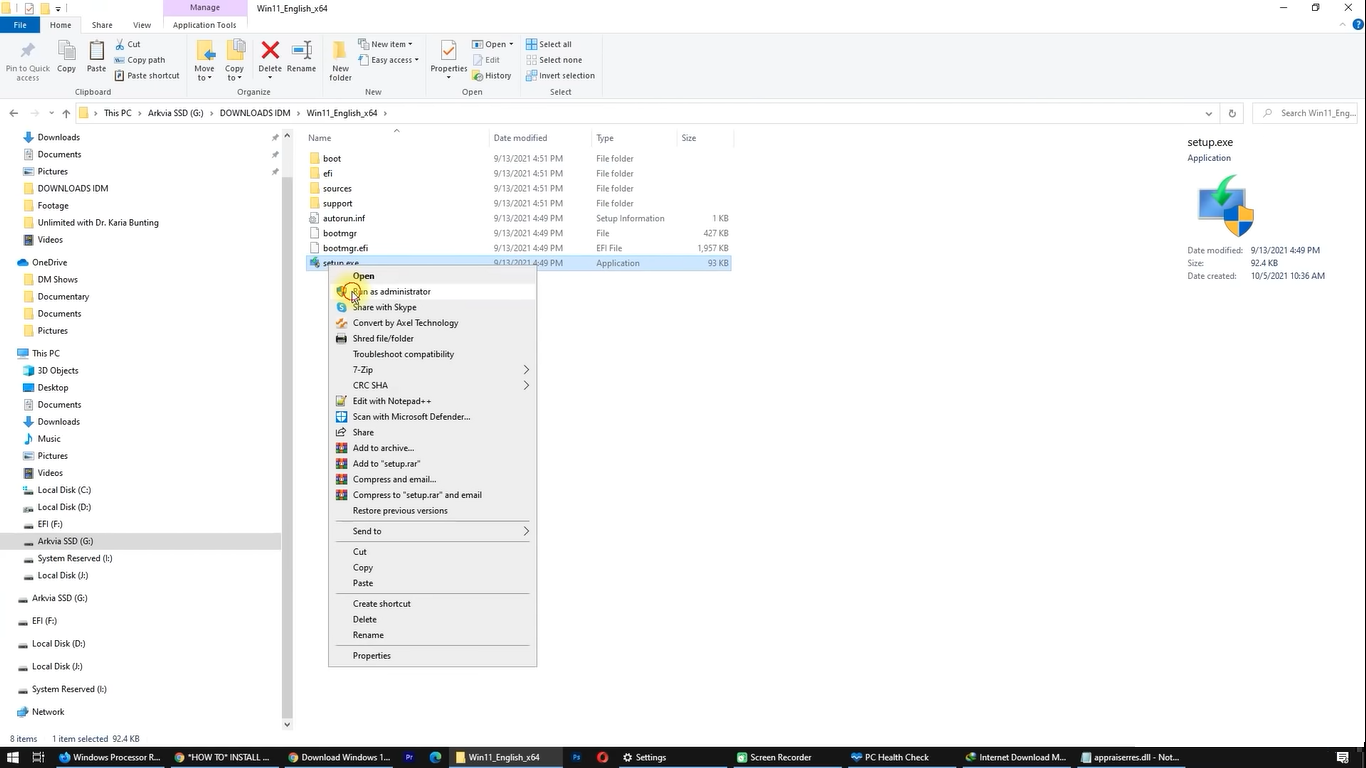
That’s it, go back to the Win11_English_x64 extracted folder and run the setup.exe file as administrator to begin the Windows 11 installation without checking for any requirements.
The tool will follow the usual Windows 11 installation steps.