You just assume that you have urgent work and the work is with the internet and you don’t have data on your device but you have wifi at your home or office where you are there. The main problem is that the wifi is connected but there is no internet access on Windows 10 or 7. The situation will be frustrating and confusing because you have urgent work and it won’t be finished on time if the internet is not connected. Likewise, there are many people who have the issue name as Wifi connected but no internet access. But don’t make the situation frustrating and confusing because you are on the right platform which will provide you all the information about this issue and also easy fixes to come out from this problem.
If you suffer from this situation there can be a problem in 2 things that is in router or modem and second is your Windows 10 or 7 device. Before taking an eye on the fixes just check once that in which thing there is a problem. So, to check the router connect the other device with wifi and see whether the internet is accessible or not. If yes then there is a problem in your device and if no then there is a need to restart the router and modem. If the problem is with router and modem then apply the restart steps.
- Turn off the router and modem.
- Now wait for a couple of seconds so that the system can take the rest.
- Now its time to turn on the modem and after 1 minute or a couple of seconds turn on the router.
- And lastly wait for a couple of minutes and then check whether the problem persists or not.
So likewise, you can restart the router and modem to fix can’t connect to this WiFi network. This process will solve many small issues related to router and modem. Apply the steps to fix the problem with the Windows 10 or 7.
Recheck DNS Server Address
It is important that DNS server settings won’t be wrong. If DNS server settings will be wrong it will create problems like wifi connected but there is no internet access. Change the DNS server address on Windows 10.
- Open the run dialog box press windows start key and R key on your keyboard.
- Now once you have the run dialog box, type control/name Microsoft.NetworkAndSharingCenter and hit on the OK button.
- Now you will be navigated to the Network and Sharing Center screen. In it tap on Change adapter settings.
- Then do the right tap on the wifi and hit on the last option that is Properties for the further process.
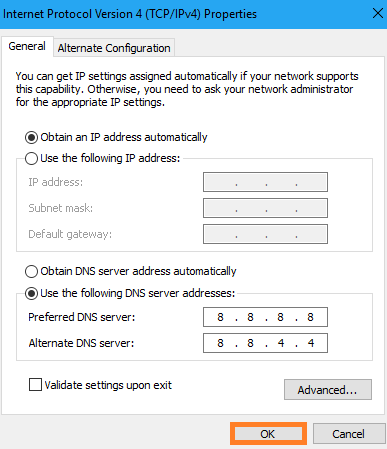
- Now you will be navigated to Ethernet Properties. In it tap on Internet Protocol Version 4(TCP/IPv4) and then on Properties.
- Finally hit on Use the following DNS server addresses: and enter the server as follow: Preferred DNS server: 8.8.8.8 and Alternate DNS server: 8.8.4.4.
- Now hit on the OK button to save the changes.
Now connect the network and enter WiFi password to see whether the internet is accessible or not. if yes its good! and if no then go to our next solution.
Remove DNS cache
In DNS cache you will have all visited sites. But the problem is that on those sites there are a number of advertisement which contains malicious code which tries to corrupt DNS cache. So, the ultimate solution to this issue is to flush or remove the DNS cache. Remove the DNS cache.
- Hold Start and R key for Run dialog box and in it type cmd to have Command prompt.

- Once you open command prompt then type the command as ipconfig/flushdns and hit on enter.

- Once you are done with this then restart your device.
Finally, check once that after applying this trick you get good internet speed or not. If you get a negative response then jump to our next trick.
Update WiFi Driver
Yes if you are using an old or corrupted wifi driver then wifi connection problem will persist on your Windows 10 or 7. But don’t worry because there is one software name as Driver Easy that updates the driver automatically. So, you can download it and install it on your device but as we know that on your device there is no internet access so you have to download and install it on another device which has internet access and you have to transfer it to your device which does not have internet access. One main advantage of Driver Easy is that you can update the driver offline.
-
- On your device open the Driver Easy and select Tools from the left side.
- Now tap on the option named as Offline Scan and choose Offline Scan (on the computer without Internet access) then hit on Continue.
- Once you hit on Continue then tap on Browse… and select the folder where all offline scan files will be saved and then click on Offline Scan.
- Now suddenly you will have a message saying Offline scan file has been saved so to confirm it hit on OK button.
- Once you save it then once again save it in USB flash drive and send this file on the device which has internet access.
- Now its time to download and install the Driver Easy on your device which has internet access.
- So, once you download and install it tap on Tools which is at left side of the screen.
- Now click on Offline Scan and then choose Upload Offline Scan File (on the other computer with Internet access) and then click on Continue.
- Now its time to give the location to offline scan file so tap on Browse… and hit on Continue.
- Finally tap on the Download button which is on the right side of the driver.
- Wait till the download is not complete and once download then save the downloaded file to a USB drive and transfer that file to the device which does not have internet access.
So, this was the simple and easiest way to update your wifi driver and fix wifi internet. Make sure you follow all the steps in sequence.
Repair Network Adaptor
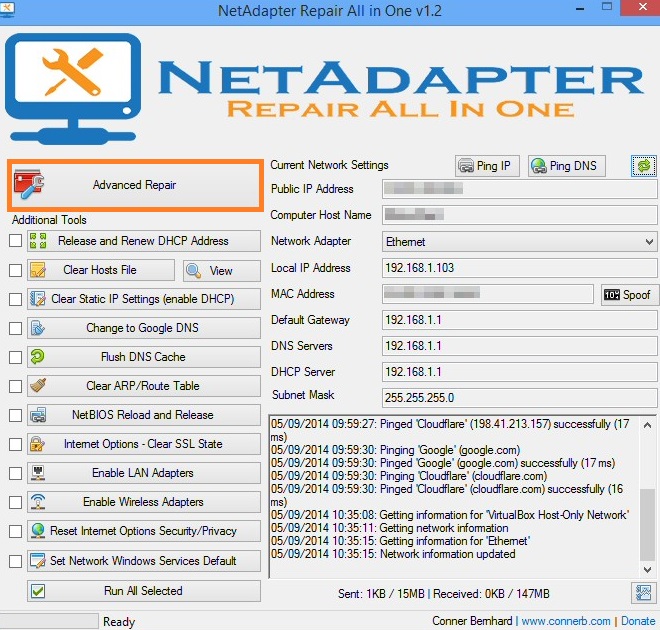
If above all tricks won’t work on wifi of your Windows 7 or 10 then you should apply this trick which will be surely beneficial for your internet connection. You just had to download Network Adaptor repair all in one software and you have to run it. Repair the Network Adaptor.
- Download and install the Net adaptor repair all in one software and install it on your computer.
- Now open it as administrator for the further process.
- Once you open it you will have an option named Advanced Repair so do tap on it.
- Once the above steps complete you will have a message suggesting to do the restart so that changes take place. So to agree on it hit on the OK button.
So, this was a simple and easy way to repair WiFi of Windows 10.
This blog post was all about fixing WiFi connected but no internet issue on Windows 10 and 7. All four solutions will surely fix the WiFi internet connection problem on your computer.