Several Windows 11 and Windows 10 users are reporting VAN 1067 errors in the Valorant Game. The VAN 1067 error mostly appears after the new update of the Valorant game or Windows. The Riot Games and Microsoft Windows both have made severe changes to the system which is crashing Valorant game with the following error.
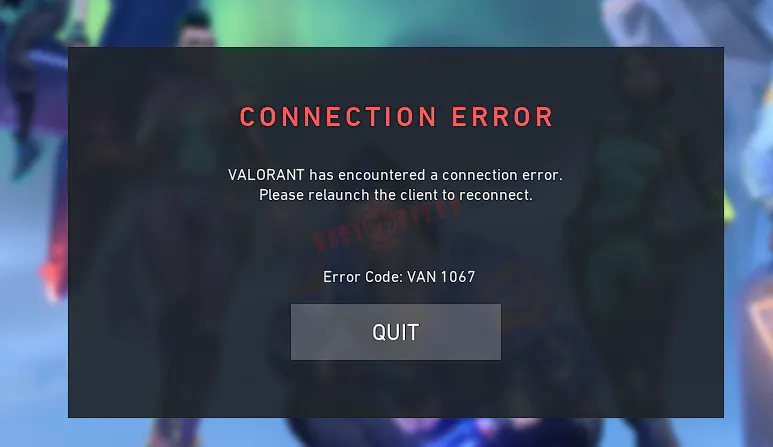
CONNECTION ERROR
VALORANT has encountered a connection error.
Please relaunch the client to reconnect.Error Code: VAN 1067
Quit
The VAN 1067 Error Code isn’t new to the Valorant Game or only appearing on Windows 11. Earlier Vanguard has also caused these issues on Windows 10. Many running or ongoing apps such as Discord, Antivirus, Steam, or Screen Recorder may also cause this error.
No need to panic to go back to Windows 10 or reset the system, rather apply our solutions in order to fix this VAN 1067 error. We have gone through the tens of forums threads and the Riot Technical Support to hunt down these solutions.
Read Also: Best Games for Windows 11
Contents
Restart and Run Valorant as Administrator
Many installed apps on the system such as Discord, Steam, Antivirus, or Screen Recorder may be interfering and not allowing you to play the Valorant game on Windows 11 or 10 devices. Some antivirus apps like Smadav were stopping Valorant from running and causing the Connection Error, Van 1067.
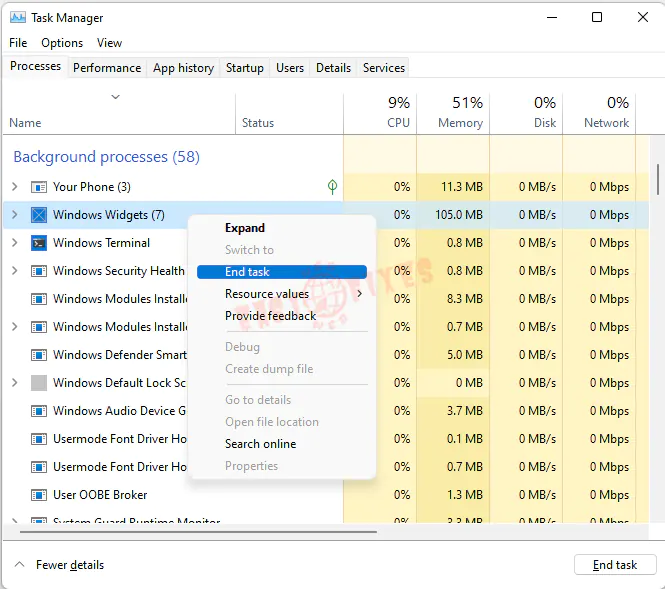
So we will suggest restarting Windows 11 or 10 PC and closing down all the running applications from the Task Manager. Some apps like Steam, Discord, Antivirus, or Skype automatically load on the start-up so make sure to end them from the Task Manager. Even turn off the running third-party antivirus.
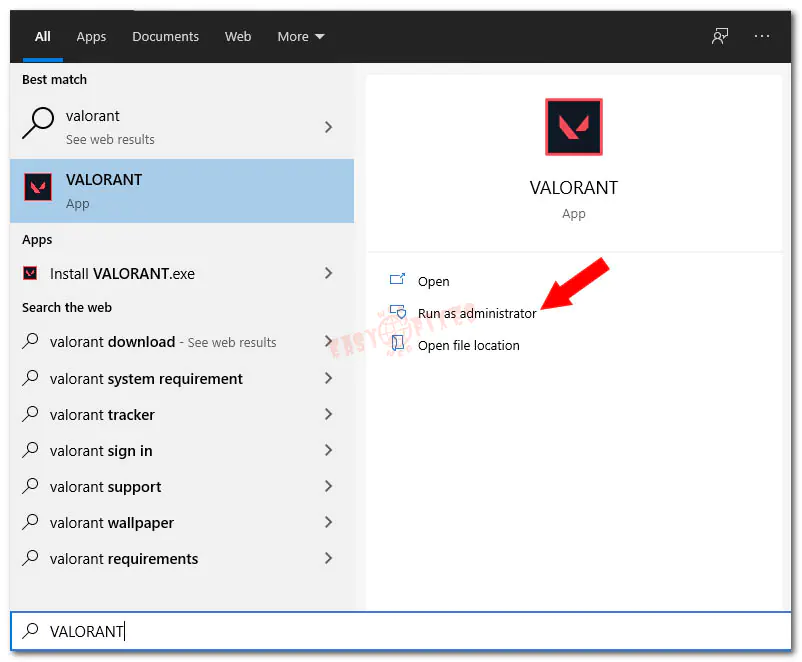
Then press the Windows key to search and launch the Valorant as an Administrator.
Hopefully, you will be able to play Valorant without facing any VAN 1067 error. If you doubt any unimportant app like VPN or Proxy then also uninstall them from Windows. Also, restart and run Valorant as Administrator after applying each solution below.
Turn Off or Uninstall Third-Party Antiviruses
Sometimes, third-party antivirus like Smadav, Avast, or Malwarebytes may not allow Valorant to run on Windows 11 or 10 devices. It’s worth disabling or uninstalling antivirus to fix VAN 1067 error. Antivirus may have removed the important required files by Vanguard, which might be disconnecting the connection within a few minutes.
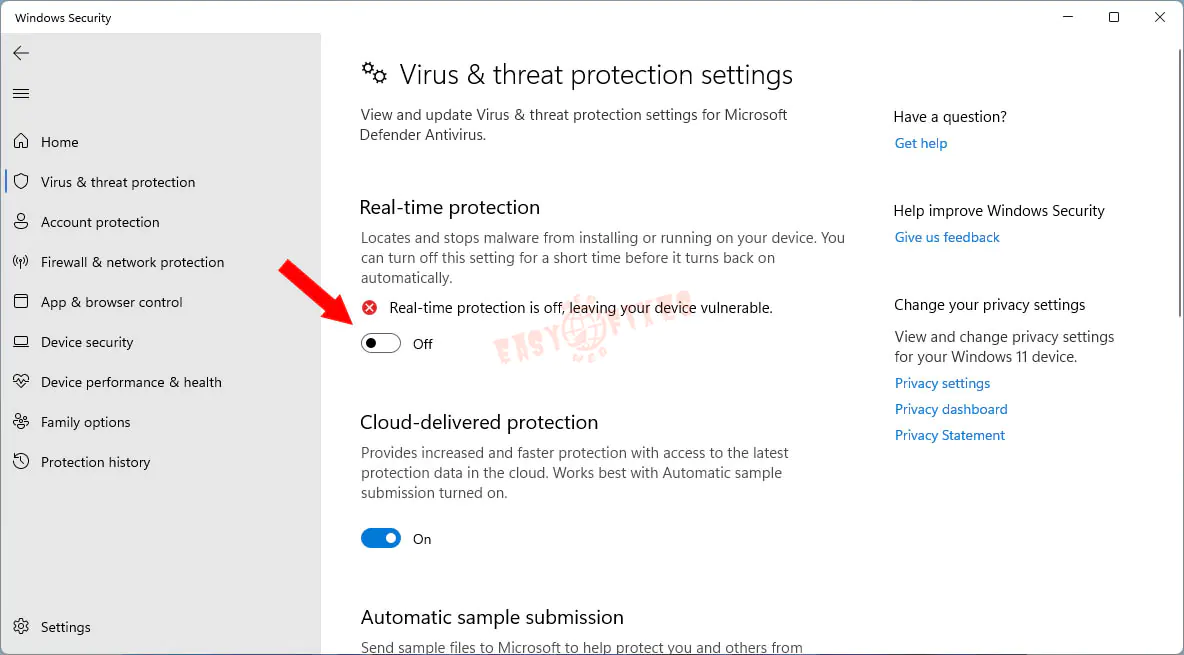
First, turn off the active antivirus before starting the Valorant and if has fixed the error then antivirus was the culprit. Follow the steps to turn off the real-time protection on Windows Defender, the same option can be found under the third-party antivirus settings.
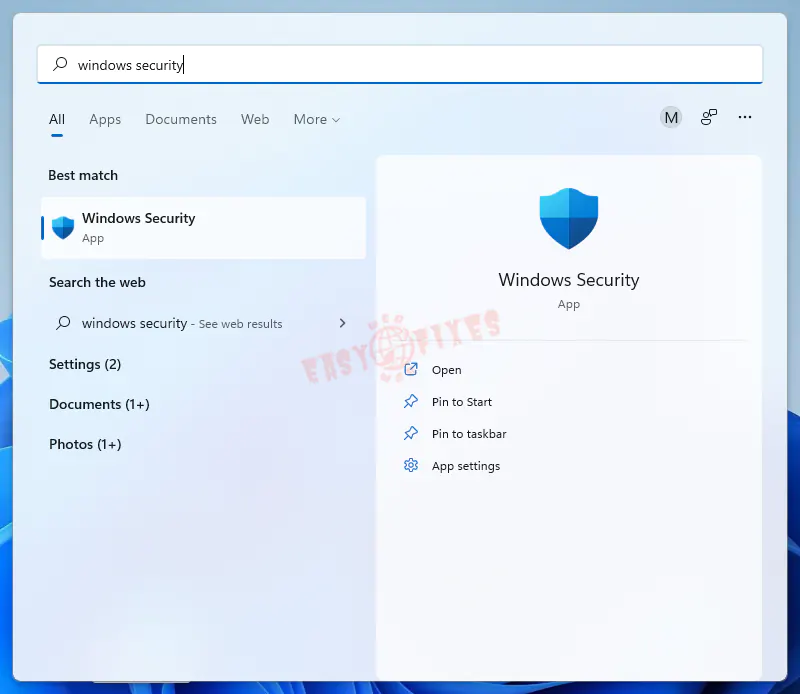
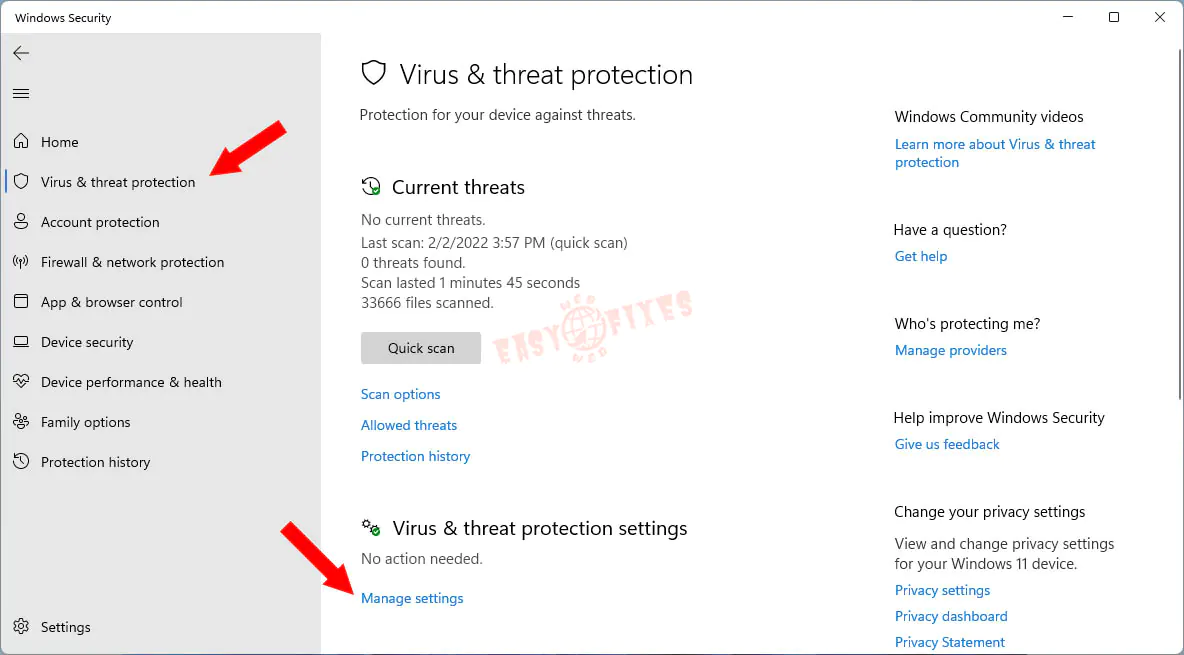
- Press the Windows + S keys to search and launch the Windows Security.
- Go to the Virus & threat protection option from the left side menu.
- Scroll down and hit on the Manage settings link.
- Toggle off the Real-time protection option.
If you are using third-party antivirus then it can be disabled from its app settings. Then close the Antivirus App and end all remaining instances from the Task Manager. Then check if you can play Valorant without errors. If possible then also whitelist the Valorant game files from the Antivirus app. If third-party antivirus was causing VAN 1067 error then just uninstall from Windows.
Disable All Startup Apps
Some of the installed apps like Discord, VPNs, Proxy Apps, Discord, and Screen Recorders may be conflicting with the Valorant game. If closing all the running apps from the Task Manager is allowing to play Valorant without issues then disabling them all on the startup may fix this issue forever.
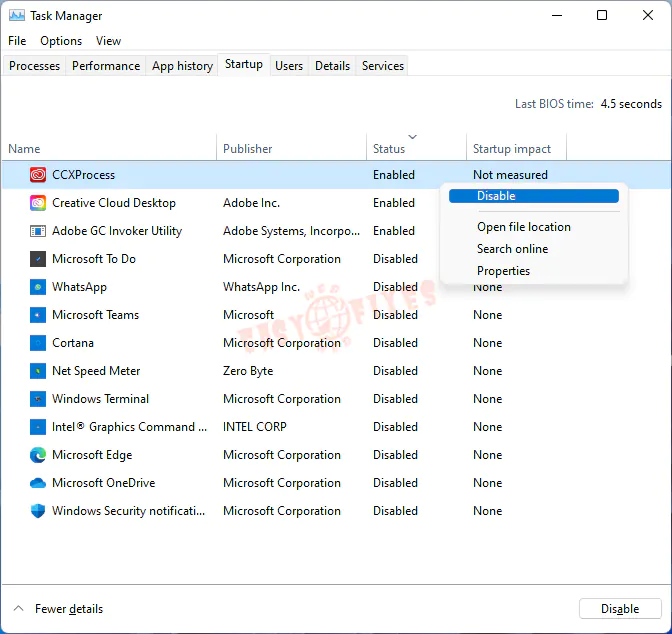
The foremost step to disable startup apps is from the Task Manager itself. Use Windows + Shift + Esc, Windows 11 shortcut to launch the Task Manager and go to the Startup tab. Right-click on the enabled app to disable it from running on the startup. One by one, disable all apps on the startup.
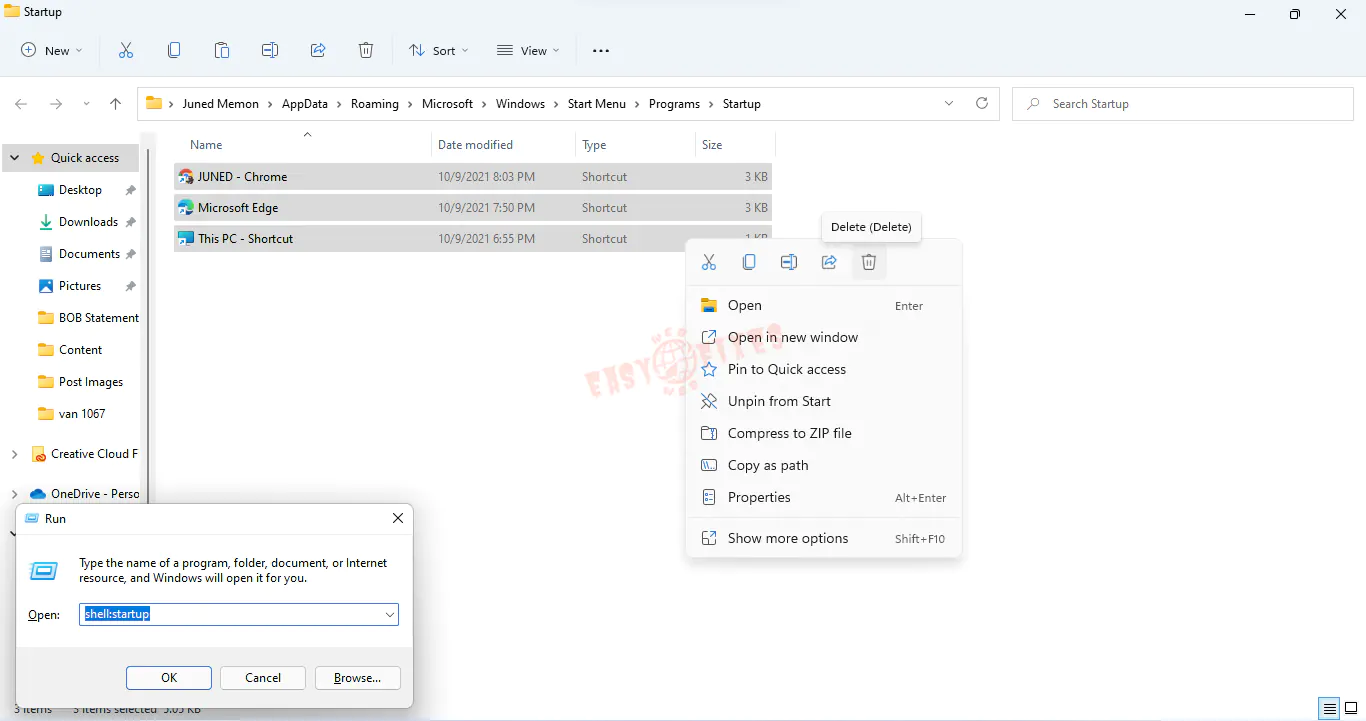
Also, delete apps from the startup folder on Windows 11 or 10. Press Windows + R keys to get the RUN prompt to enter shell:startup command to open the Startup Folder. Delete all the shortcuts and files from the folder. Then restart your PC to check Valorant game works or not.
Windows Update
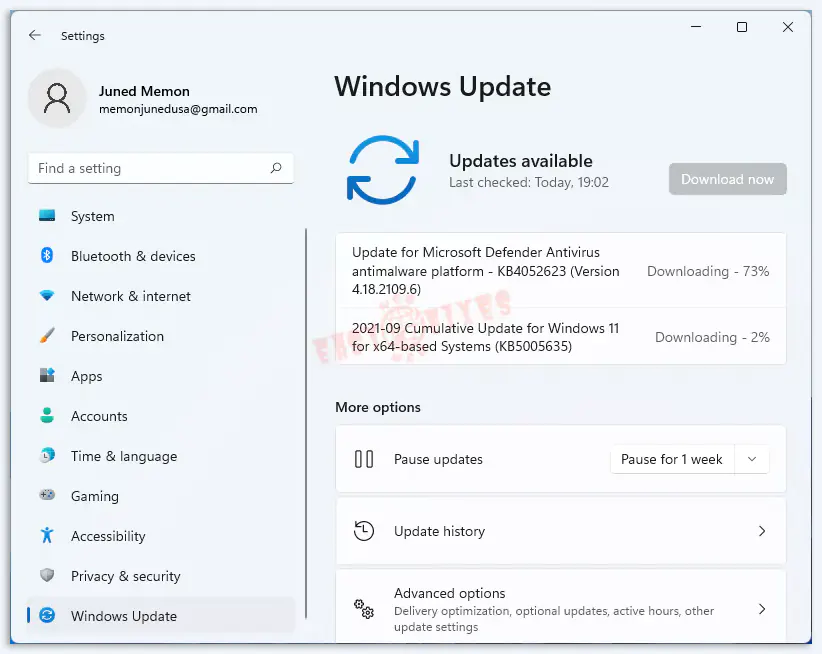
At times, installing all the latest Windows Updates may also fix the issues with the installed apps and games. Go straight to the settings to download and install all the released updates for your devices. We have showcased the steps to update on Windows 11, which are quite similar to Windows 10.
Go to the Settings app and hit on the last Windows Update option from the right side menu. Then Check for updates to fetch the latest version from the Microsoft servers. Download and Install all the available and optional updates one by one. Some may require a restart for the installation.
Disable Overclocking
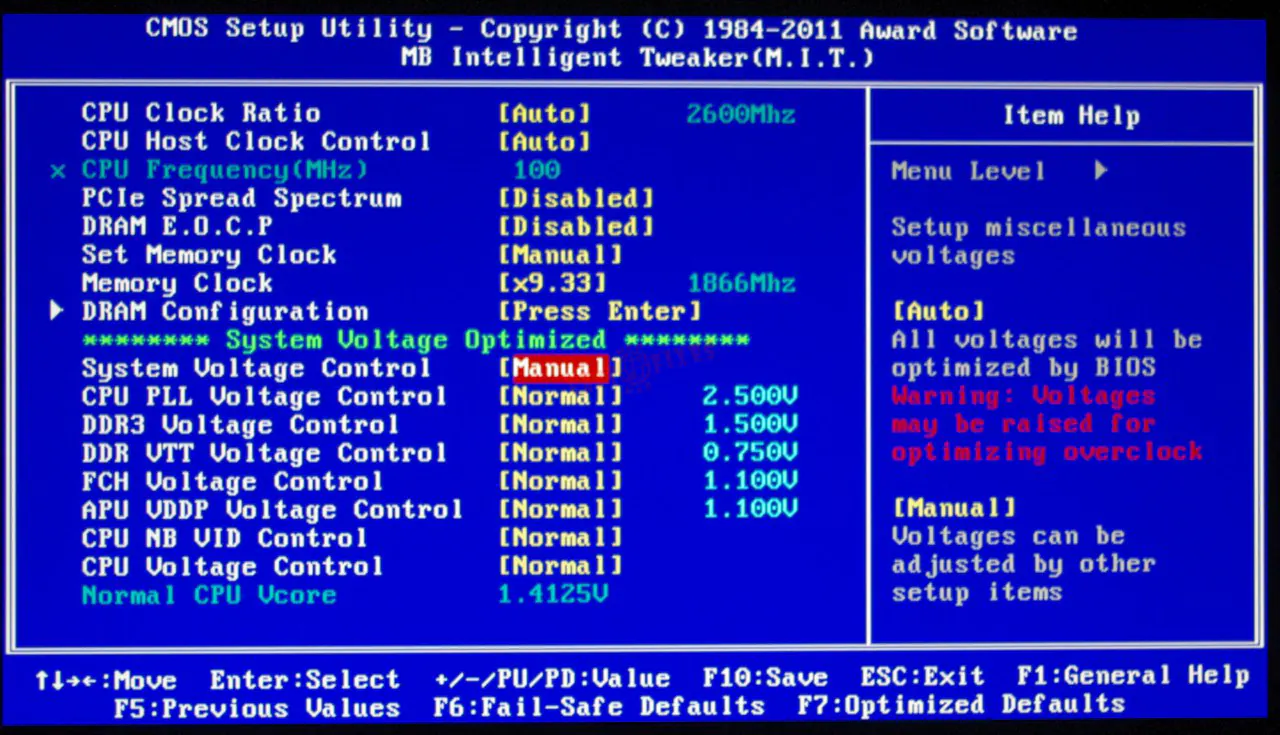
The overclocking runs the CPU and GPU faster than their recommended optimal speeds. The overclock settings are mostly changed from the BIOS or UEFI Firmware Settings. The mistakes under the BIOS settings may lead to critical problems, which may further create blue screen errors on Windows.
So, if you remembered overclocking your GPU or CPU in the past then just undo those settings from the BIOS. The BIOS or UEFI settings can be accessed by pressing BIOS keys on booting your device or from the Recovery Environment. The BIOS key may vary from the set of F12, F2, F10, or F1 keys depending on your device brand from the HP, Dell, Lenovo, Acer, or Asus. The Overclock settings and values mainly reside under the Advanced BIOS tab.
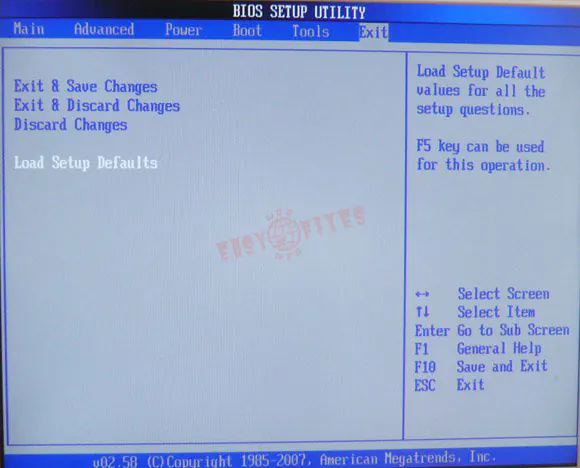
The experts also recommend Load Setup Default settings to undo all the past changes made to the BIOS but it may further disallow from booting Windows based on your selection of the UEFI, TPM 2.0, and Secure Boot. So be careful before making changes to the BIOS.
Enable TPM and Secure Boot
The Vanguard isn’t allowing Valorant to the Windows 11 users who have bypassed the TPM 2.0 chips and the Secure Boot requirements. The VAN 1067 error might be due to the same TPM and Secure Boot features. The TPM and Secure Boot options are located under the BIOS or UEFI settings.
Go to the BIOS settings by pressing BIOS keys from F12, F10, F2, or from the Recovery Environment. Enable the Secure Boot option from the Boot, Security, or System Configuration tab.
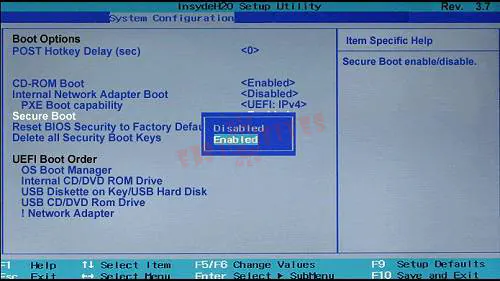
The TPM 2.0 option can be found as the fTPM or PTT option.
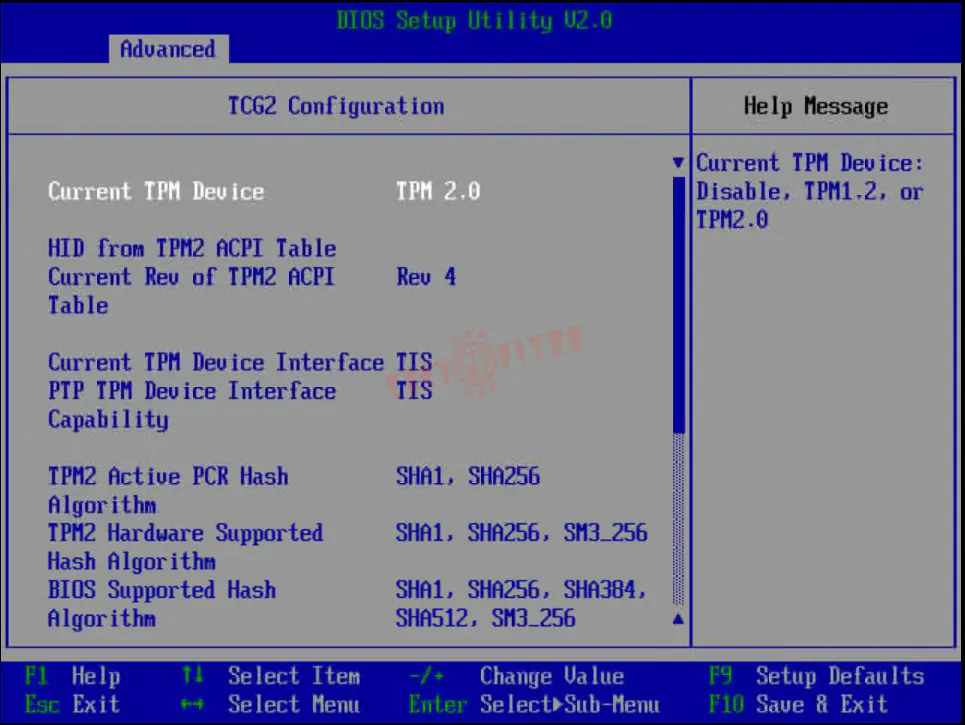
Save and exit the BIOS settings to boot back to Windows 11 or 10 to check Valorant gameplay.
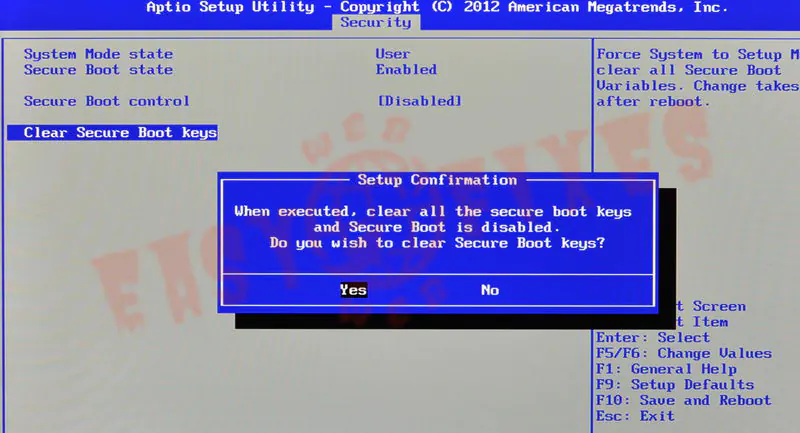
Clear Secure Boot Keys
One more BIOS settings option is fixing the VAN 1067 error in the Valorant game. The Clear Secure Boot Keys option will be listed under the Security tab on most of the BIOS. Select this option with the keyboard and press enter and tap on Yes to apply the settings. It will also disable the Secure Boot option from the BIOS.
That’s all the available solutions to troubleshoot Valorant game issues on Windows 11 and Windows 10.