Well, Windows 11 is rolling out with a new and easy User Interface, and adding to it, it has changed in Windows Settings. It is good news that the new Windows 11 Settings is easy as compared to Windows 10. Many users have reported that “How to turn on and connect to Bluetooth Device on Windows 11?”. With the change in Windows Settings enabling and using Bluetooth on Windows 11 become a cup of tea for all. In this article, you will get to know “How to enable and use Bluetooth feature on Windows 11?”.

The Bluetooth feature is one of the most popular features of Windows OS. It is used for connecting wireless devices such as keyboards, mice, speakers, printers, smartphones, headphones, etc. It is mandatory that all these devices should have a Bluetooth feature too. It has replaced wires and cables as it is wireless in nature. In this tech world, Bluetooth has become a necessity. The all-new electronic gadgets offer Bluetooth features so that a user can connect other Bluetooth devices with them.
In order to turn on and connect to Bluetooth Devices on Windows 11 read and apply the below guides with all your concentration.
Read Also: Fix Bluetooth Not Turning ON
Contents
Turn on Bluetooth on Windows 11
On Windows 11 there are two ways to enable Bluetooth. The first is by using Windows Settings App and the second is by using the Quick Settings Menu. Both ways are easy and simple. We have shown both ways with detailed steps. You can use any method it depends on you.
Windows Settings App
- Hold Windows key and I key to have Settings App.
- From the Settings screen tap on Bluetooth & devices option. It is located at the left pane.
- Now you will have Bluetooth-related options on the right side screen. Look for Bluetooth toggle, once you get it then turn it ON.
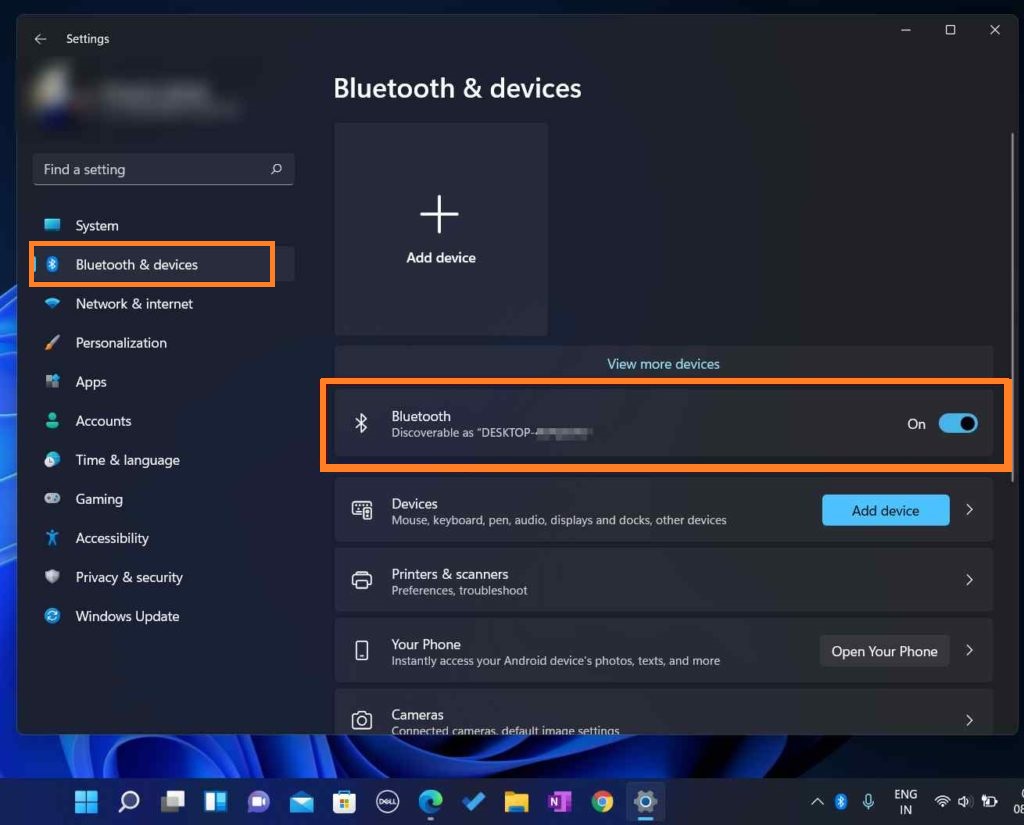
You have turned on Bluetooth on Windows 11 using the Settings App.
Quick Settings Menu
Using this method you can enable Windows 11 Bluetooth quickly. To enable it tap on indicator icons from the bottom left corner. Now you will have Quick Settings Menu. In it look for stylized B which is made up of sharp angles. Once you get it then tap on it. Now you have enabled Bluetooth using Quick Settings Menu on Windows 11.
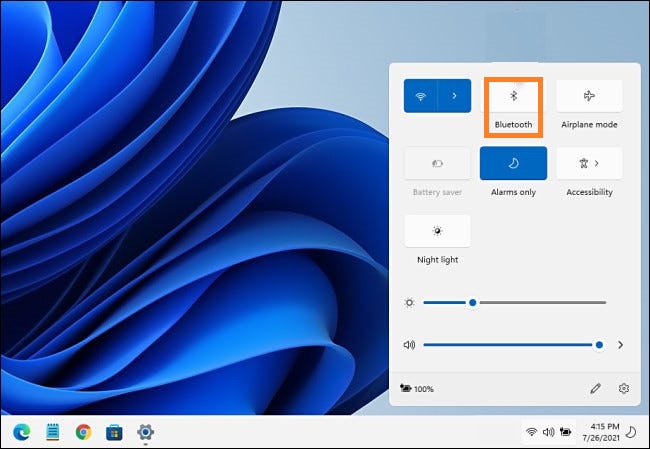
In case, if you don’t have a Bluetooth icon or feature in Quick Settings Menu then you have to add it. To add it tap on the pencil icon from the bottom left corner. After this, you will have the option name as Done and Add with its icons. As you want to add Bluetooth so hit on Add. Now from the open menu tap on the Bluetooth option. At last, hit on the Done option from the bottom to save all changes you have made.
![]()
Now try to enable Bluetooth on Windows 11 as you tried earlier as Bluetooth is successfully added to the Quick Settings Menu.
Read Also: Enable Auto HDR on Windows 11
Pair Bluetooth Device on Windows 11
This guide will help you if you want to pair your Windows 11 Bluetooth with Bluetooth devices such as speakers, printers, keyboards, mice, headphones, smartphones, etc. Before pairing the Bluetooth device make sure that Bluetooth is turned on on both devices. Now apply the below steps properly.
- At first, bring your Bluetooth device closer to your Windows 11 PC or laptop.
- Now launch the Settings app by holding the Windows key and I key on Windows 11 OS.
- From the left pane tap on the Bluetooth & devices tab for the further process.
- After this tap on View more devices and then hit on Add device button.
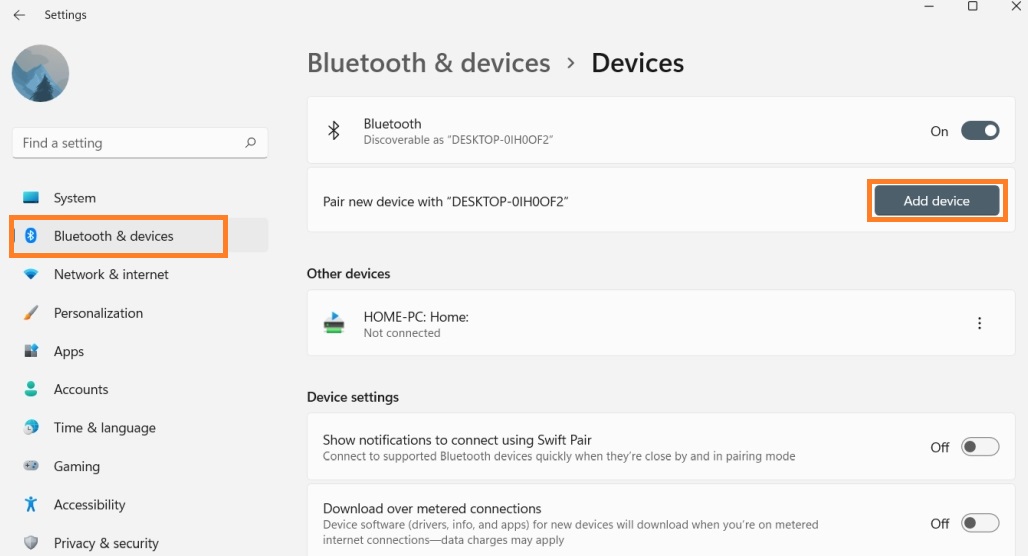
- Now you have to select the device type an
 d then hold on to the pairing button from the device you want to pair.
 - After this select the Bluetooth device from the list.
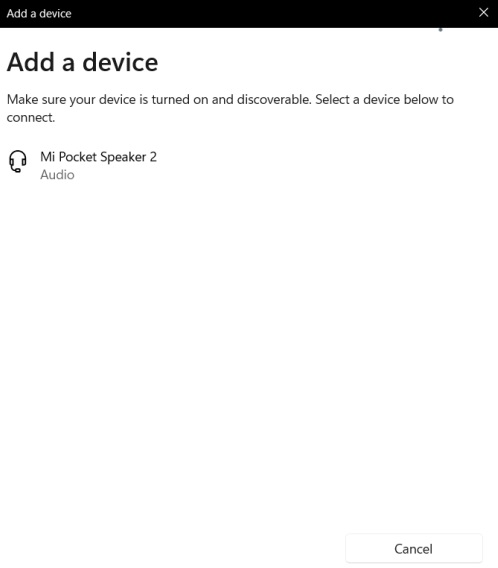
It will take a couple of seconds to pair. After pairing devices you can share and receive media such as files, folders, images, videos, audios, etc.
Connect Bluetooth Device on Windows 11
If pairing is done successfully then it means that you have connected Bluetooth Devices on Windows 11. There are situations where after paring you have to manually connect Bluetooth devices with Windows 11 Bluetooth feature. If you are facing the same situation then follow the following steps.
- Launch Start menu tap on Settings option.
- Do tap on the Bluetooth & devices tab from the left pane.
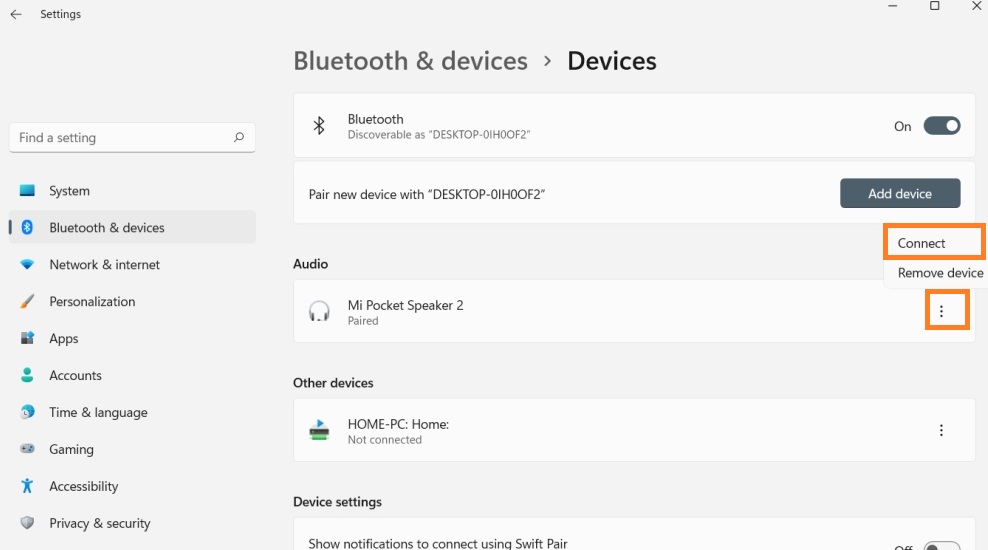
- Now click on three vertical dots from the paired device.
- From the open menu hit on Connect option.
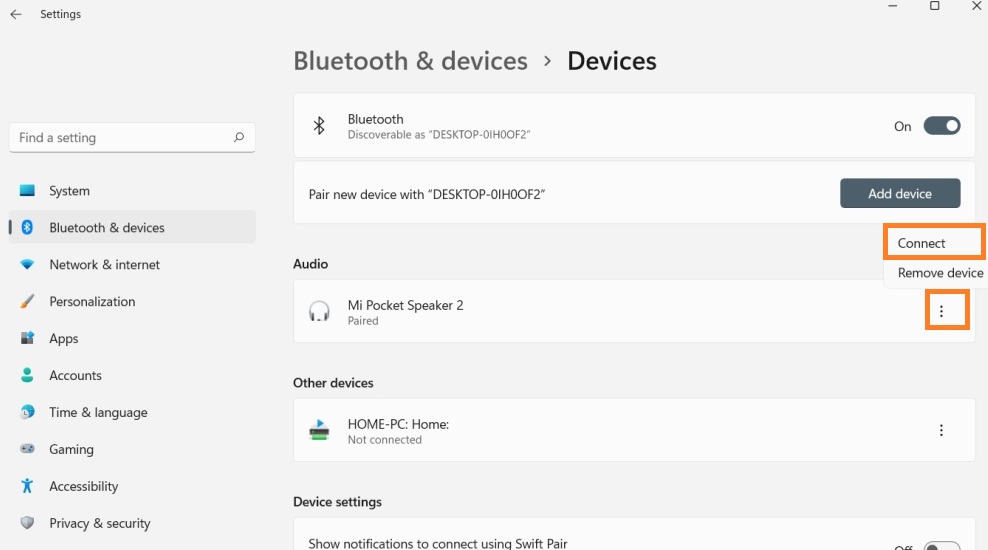
Now you have successfully connected Bluetooth Device with your Windows 11 using the Bluetooth feature.
Remove Bluetooth Device on Windows 11
If you want to pair or connect another Bluetooth device to your Windows 11 Bluetooth then you have to remove the currently connected Bluetooth device. You can not connect multiple devices at once. At one time you can only connect a single or one device.
In order to remove the Bluetooth Device launch the Settings screen and then tap on Bluetooth & devices option. Do click on the three vertical dots and hit on the Remove device option.
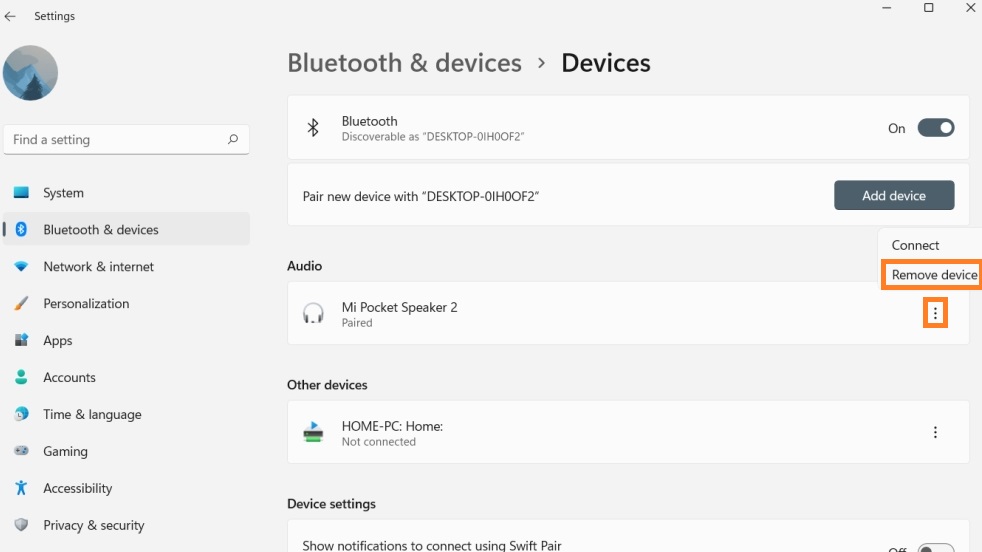
You have removed the Bluetooth device from your Windows 11. Now you can add another device for Bluetooth connection.
Read Also: Remove Cortana from Windows 11
I hope that after reading this blog you have turned on and connected Bluetooth Device on Windows 11. In case, if Bluetooth won’t work or is missing then restart your Windows 11 as well as Bluetooth device. The Bluetooth driver update is also rolling out. You can update the Bluetooth driver to fix Windows 11 Bluetooth not working and showing.