Hey Guys, Welcome to our EasyWebFixes blog. Today we are going to cover the developer’s topic for Windows 11 users. That’s, How to download the latest Java JDK with NetBeans or Eclipse IDE on Windows 11? We have included all the steps in detail with screenshots. You will be able to run your first Hello World Java program on Windows 11 after going through this article.
The JDK stands for the Java Development Kit which is required to build the Java Applications. It is most widely used by new developers to learn and practice the Java programming language. First of all, we will download, install, and test the latest Java JDK on Windows 11.
All the developers also require Java IDE like Eclipse or NetBeans to manage their programs. These IDEs offer the integrated development environment to learn or develop Java Applications. They have got all the tools to create, edit, and compile the project source codes. Now, let’s get into the action to get started with Java on Windows 11.
Read Also: Play Minecraft Java on Windows 11
Contents
Download the latest Java JDK on Windows 11
There are multiple recommended Java JDK versions to download and install on our Windows 11 device. If you joined the offline or online course to learn Java then your teacher might have instructed you to use the appropriate Java JDK version such as Java 11 or Java 8. Even some Java Application Developers prefer Java 8 to get the maximum support.
If you prefer NetBeans or Eclipse IDE for Java then the latest JDK will be included within their installation hence you may skip directly to next topics.
Well, for getting adequate with the latest technology we will recommend downloading and installing the latest Java JDK on Windows 11. Then we will show the steps to set the Path to the System Environment Variables.
- Visit the Oracle website and select the latest Java LTS Version or your desired version. As of now, Java 17 LTS with Java SE Development Kit 17.0.1 is the latest edition. Switch to Windows and download x64 Installer with .exe file and 152 MB size.

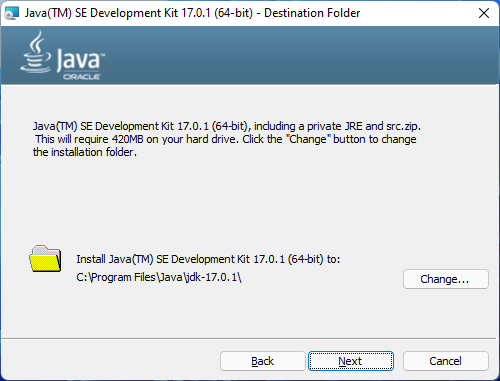
- Run the downloaded file and follow on-screen instructions by clicking on the Next button with default options to start the installation.
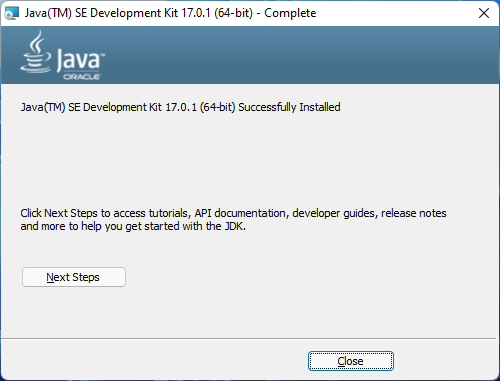
- Wait until the Java JDK installation has finished installation and Close the Window. That’s it, the latest Java JDK is successfully downloaded and installed on Windows 11. Now its time to set up its variable path in the control panel.
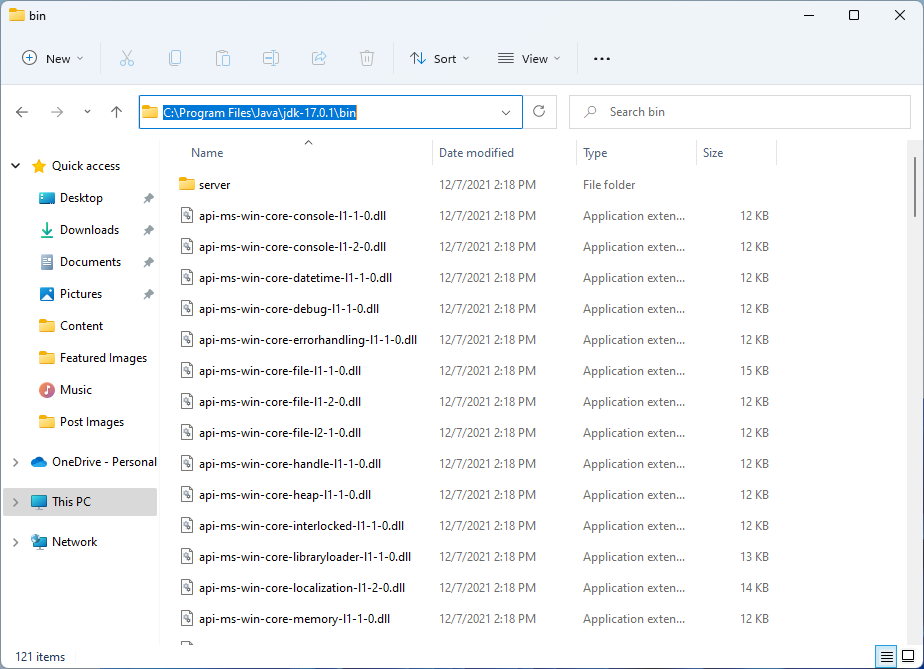
- Go to C > Program Files > Java > jdk-17.0.1 (or installed version on your PC) > bin folder to copy its path from the address bar.
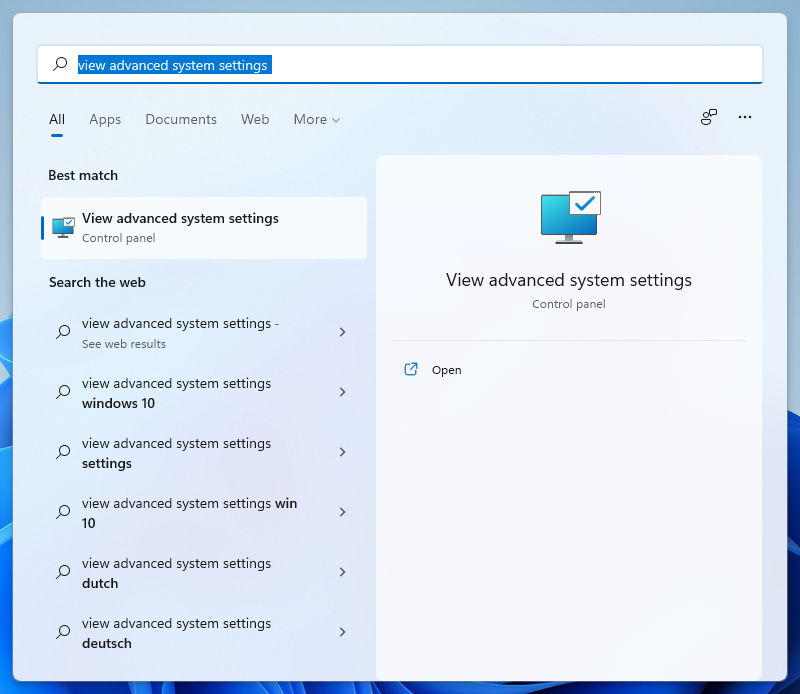
- Tap on the Start button, type view advanced system settings, and click on the first and best match option.
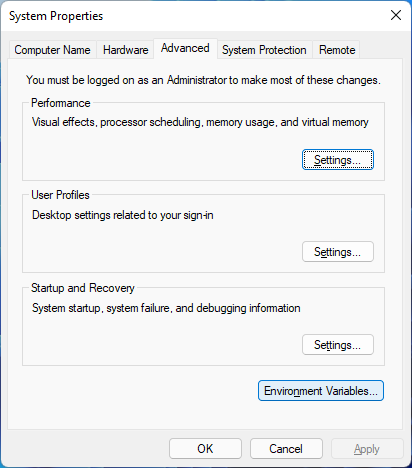
- It will open the Advanced options of the System Properties window. Click on the last Environment Variables button.
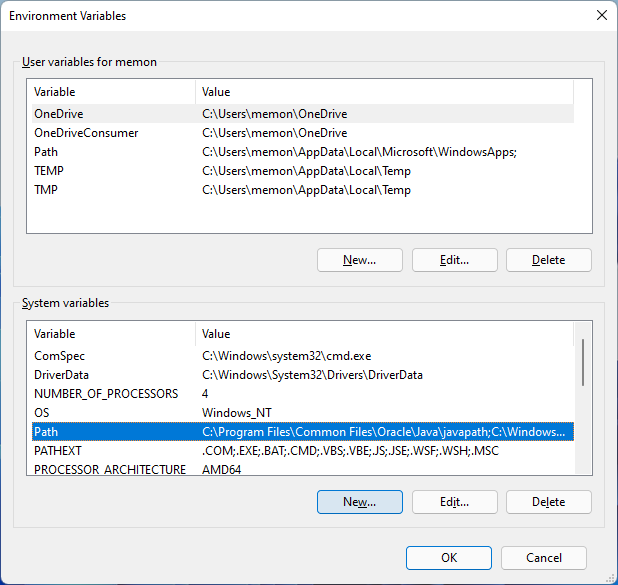
- Double click on the Path Variable under System variables.
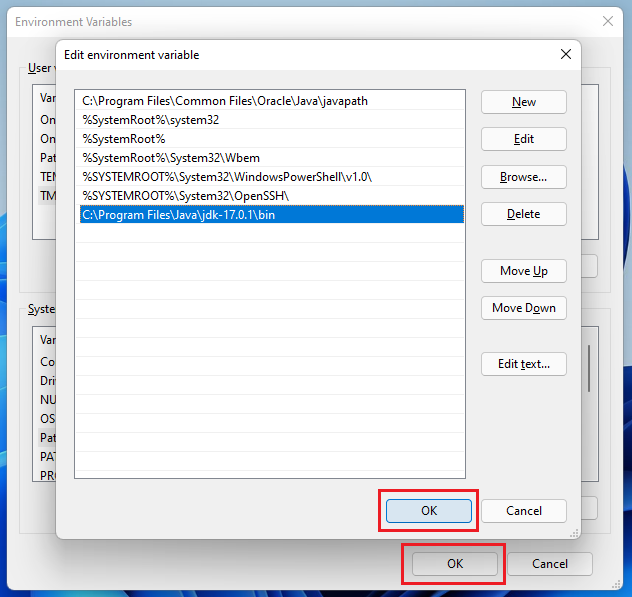
- Create New to paste the copied path and hit Enter.
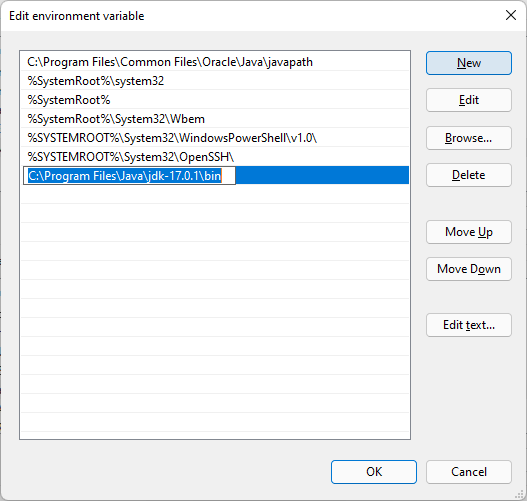
- Click on Ok button to all three windows of Edit environment variable, Environment Variables, and System Properties to save the changes.
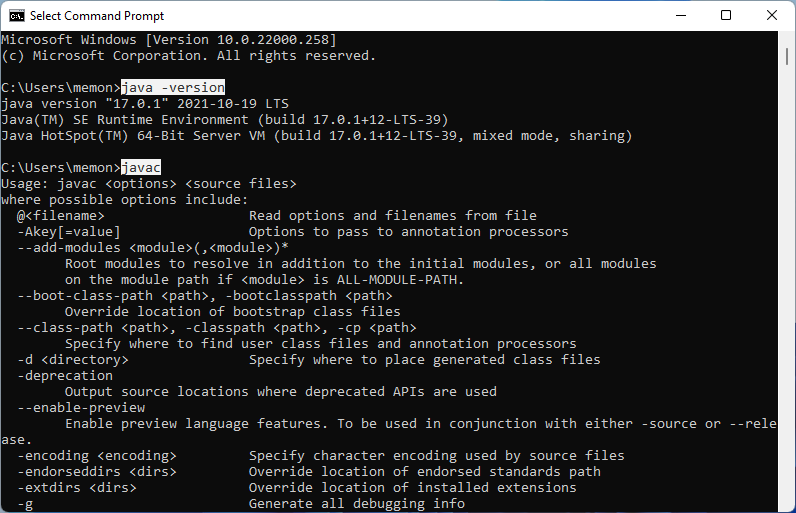
- Now, let’s test Java JDK is running or not from the Windows 11 Command Prompt. Search for the Command Prompt from the Start Menu and enter the commands as java -version and javac. If both the command has run without errors then Java is successfully configured on your system.
The latest Java JDK is up and running on Windows 11 and now it’s time to install your favorite IDE from NetBeans or Eclipse.
Read Also: Download WhatsApp for Windows 11
Install NetBeans for Java on Windows 11
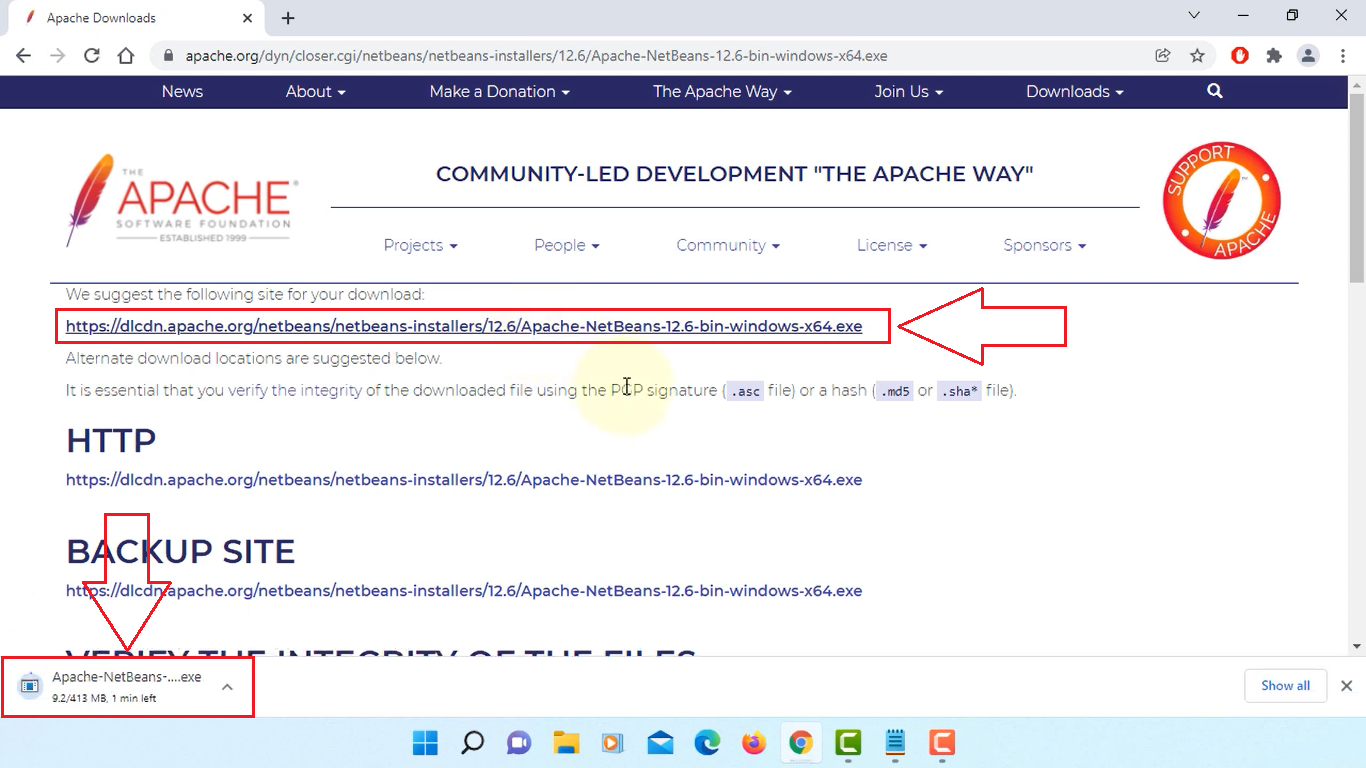
- Go to the NetBeans website and click on the download button of the latest Apache NetBeans 12.6 or higher. Download the Apache Netbeans Installer .exe file. It may take you to the mirror links, click on the first or other backup links to start the download.
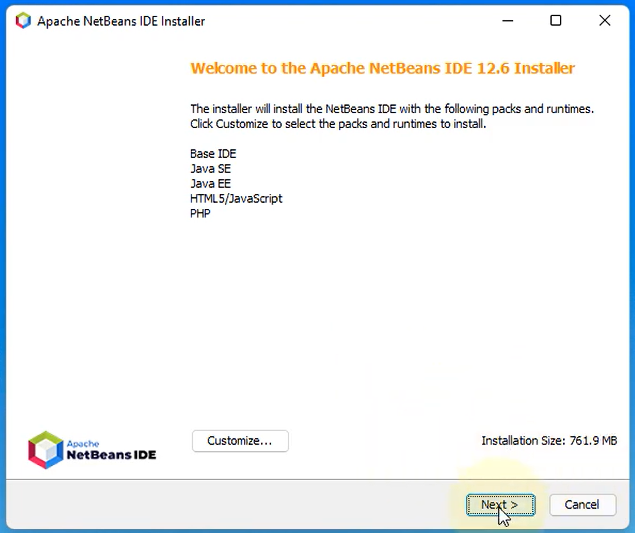
- Run the downloaded NetBeans file to let it configure the installation. The Apache NetBeans IDE Installer offers the options to deselect from Base IDE, Java SE, Java EE, HTML5/JavaScript, and PHP. Customize as per your liking or just go to the next step with the default selected options.
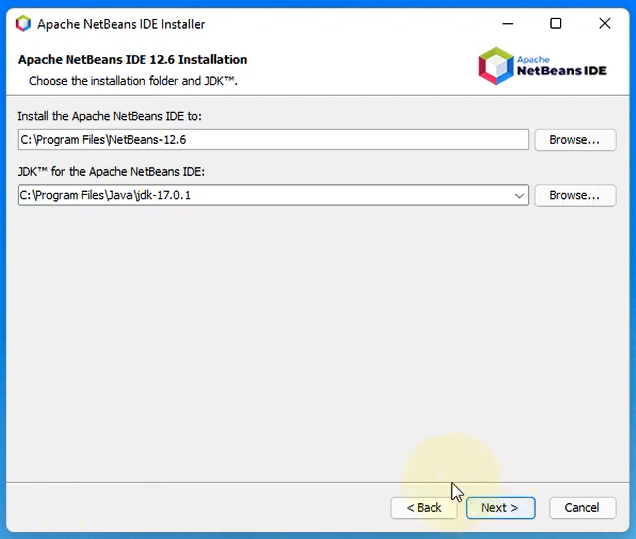
- Accept the license agreement and keep the default path for NetBeans and JDK in the Next windows.
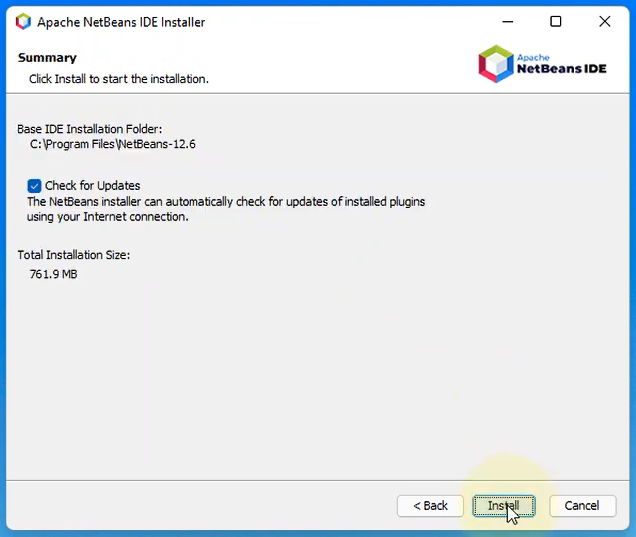
- Install the Apache NetBeans IDE Installer on Windows 11 with the latest Java JDK 17.
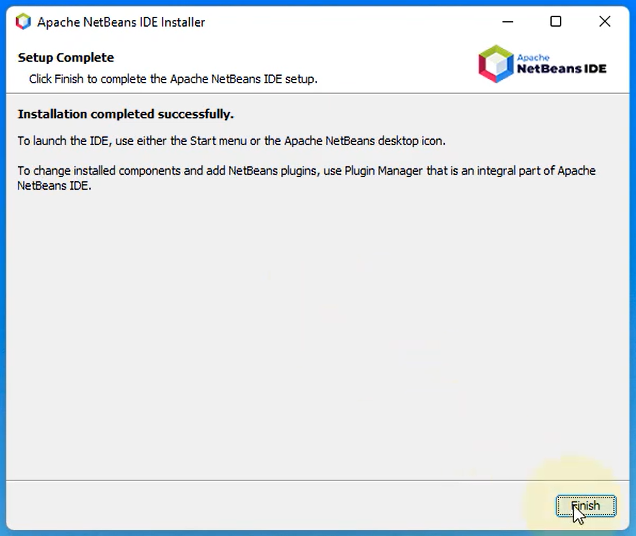
- Finish once the installation is complete.
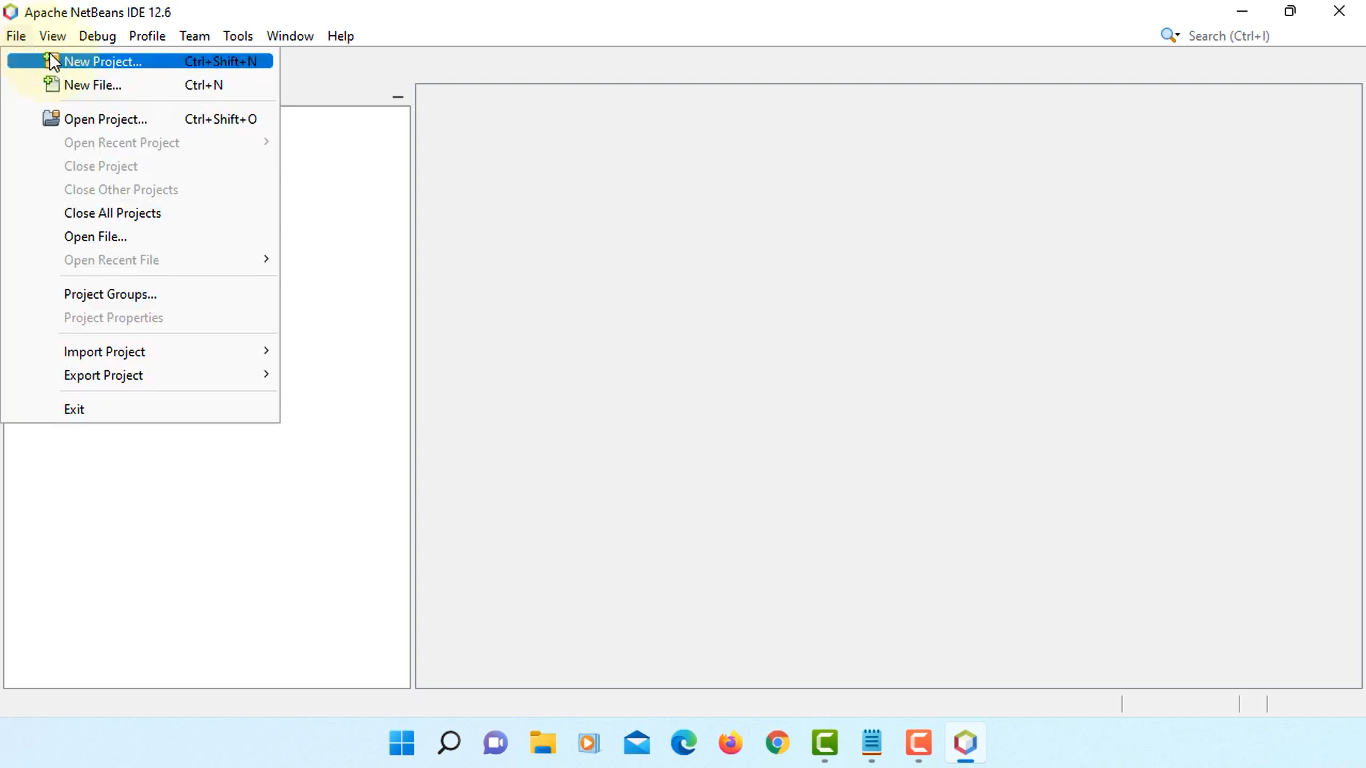
- Launch Apache NetBeans IDE from the Desktop or Start Menu and tap on the File option from the top menu to create New Project.
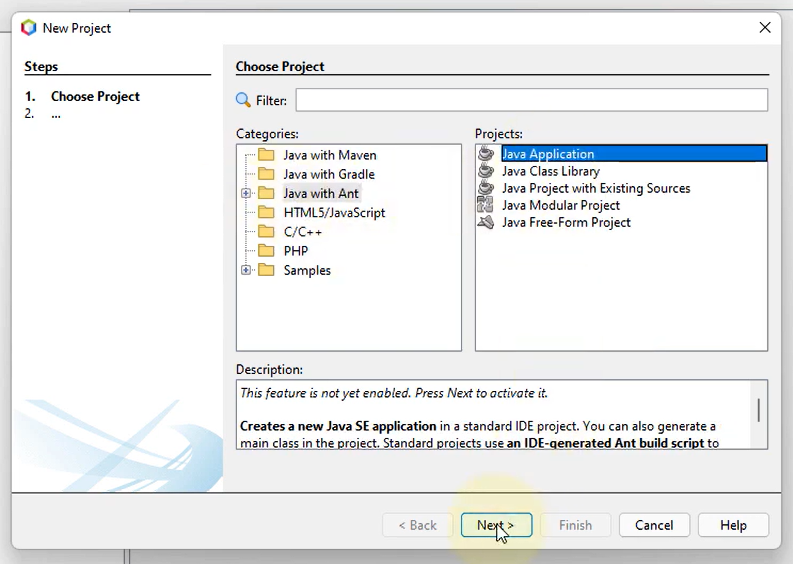
- Select the Java with Ant from Categories and Java Application from Projects click on the Next button.
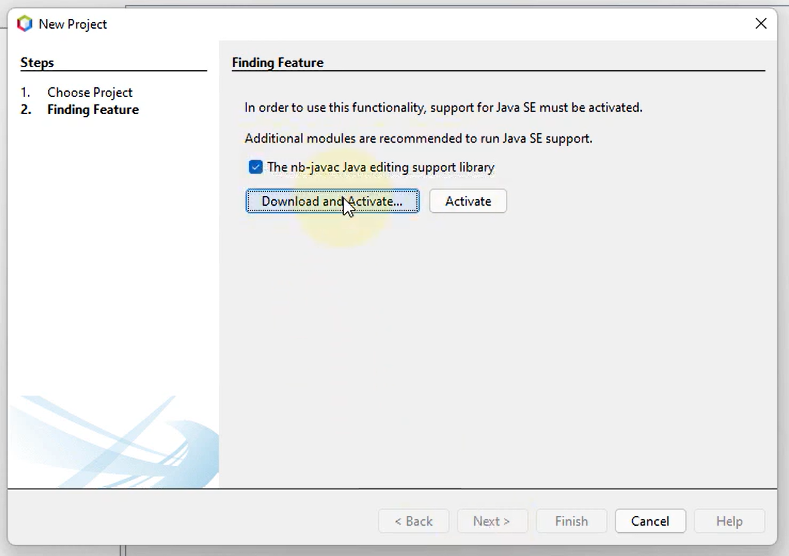
- You may need to Download and Activate The nb-javac Java editing support library for the first time. Follow on-screen instructions and be patients to install this additional plugin from the installer.
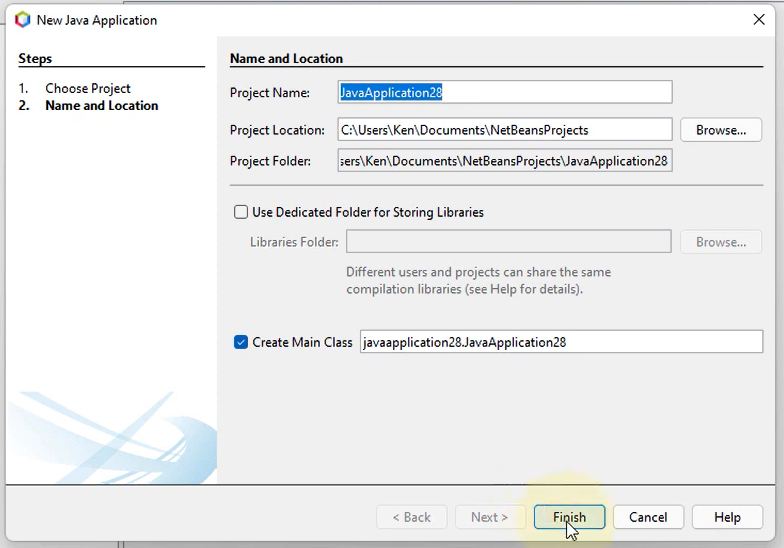
- Give the appropriate project name and finish.
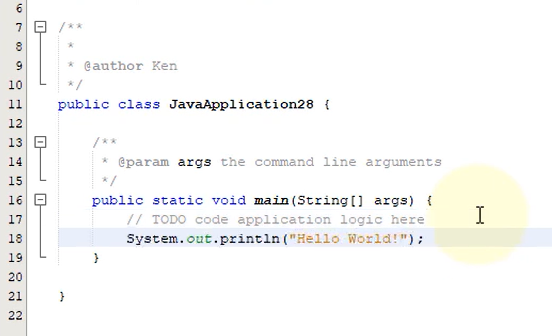
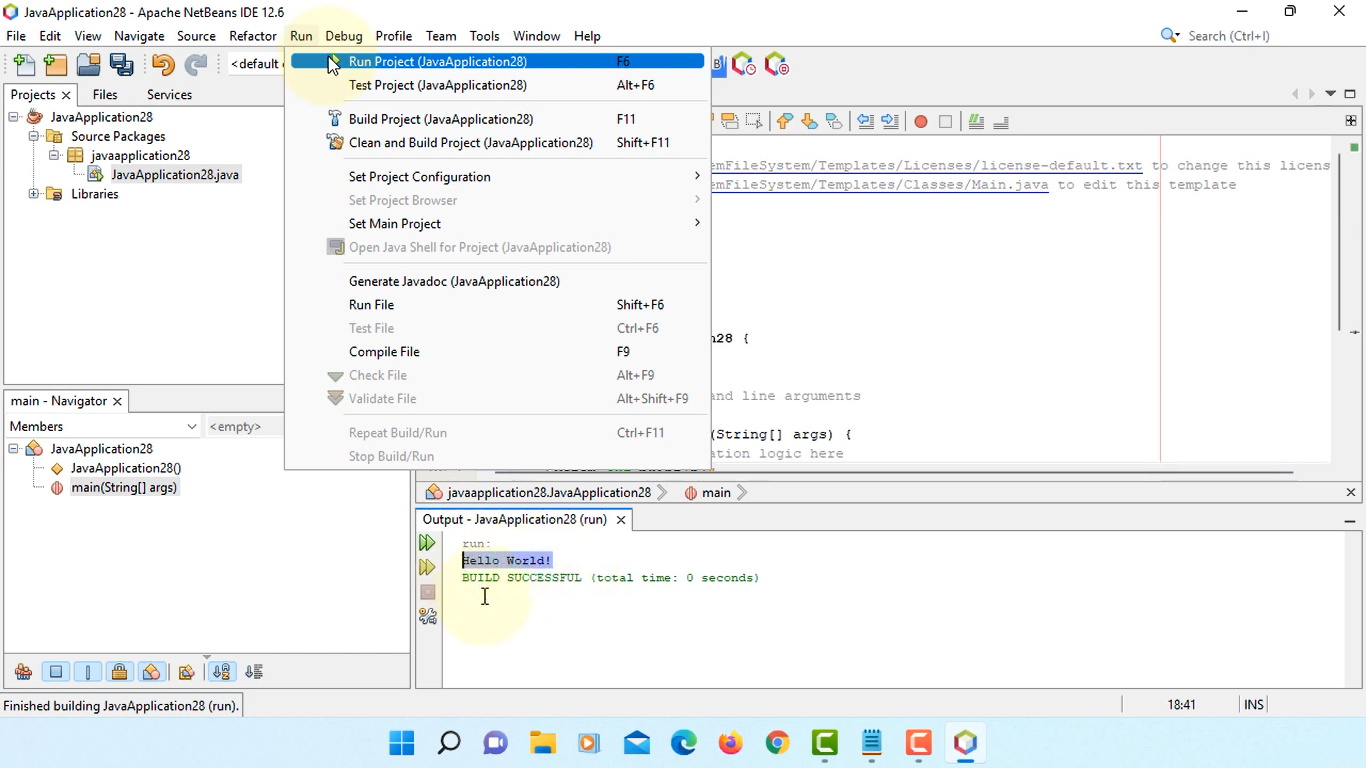
- Type the following code under the main method.
System.out.println(“Hello World!”);
- Run the java program from the above menu to get the “Hello World!” output.
That’s it, the latest Apache NetBeans IDE is downloaded and installed with the latest Java JDK on Windows 11.
Download Eclipse for Java Developers on Windows 11
- Visit Eclipse website and scroll down to click on the Download x86_64 button. Again click on the Download button to start the save it on your PC.
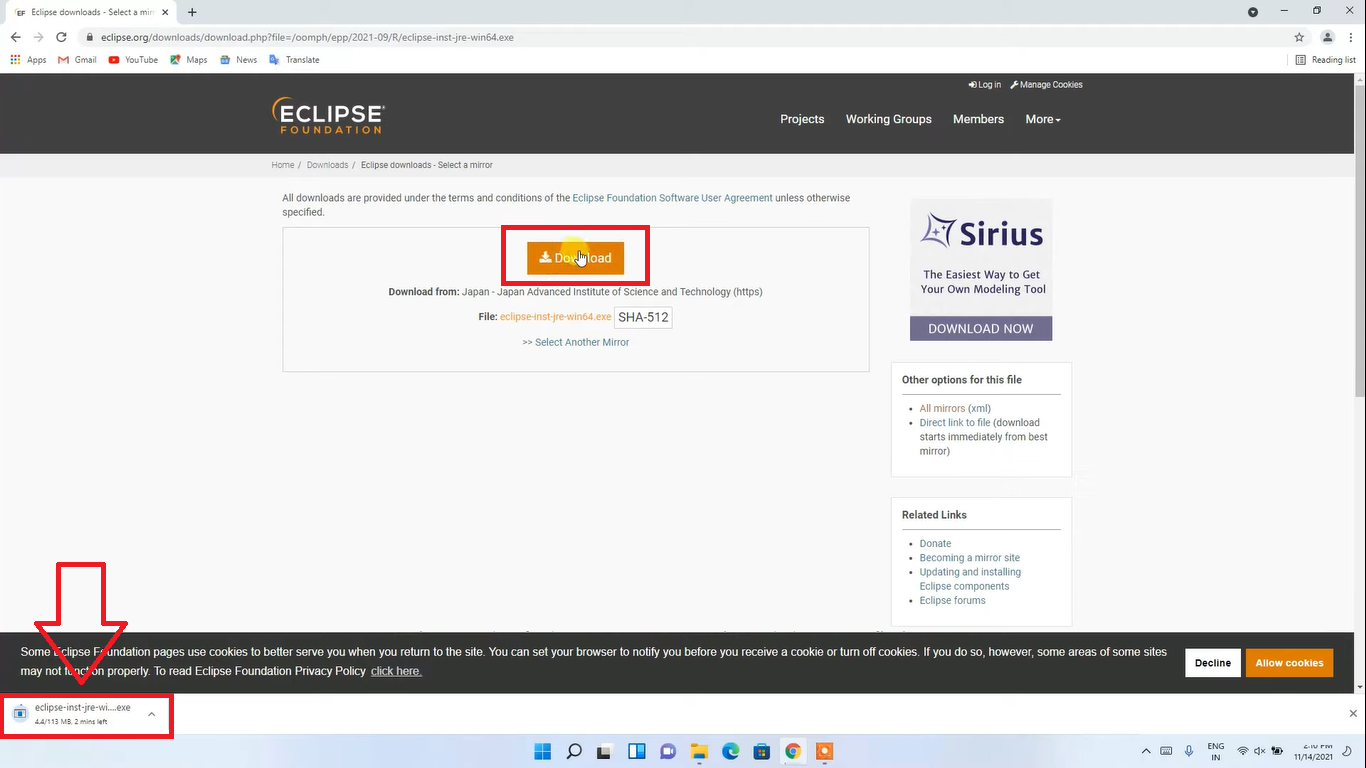
- Run the downloaded eclipse-inst-jre-win64.exe file.

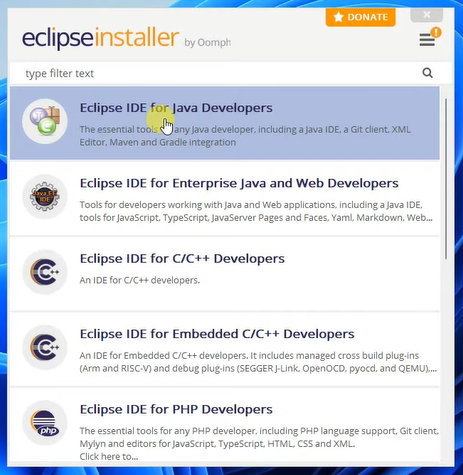
- Choose Eclipse for Java Developers.
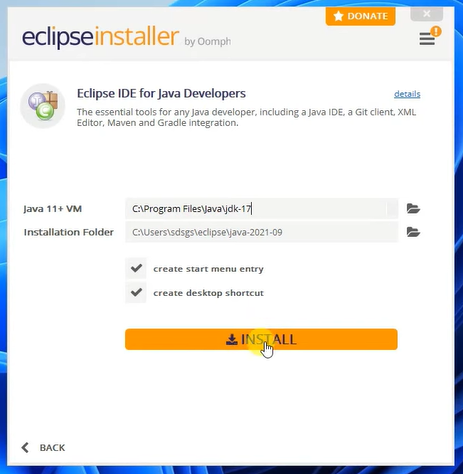
- Eclipse installer will automatically choose the latest Java JDK 17 and its installation folder. Just Install Eclipse with the default selected Java options on Windows 11. Do accept its license agreements in the next prompt.
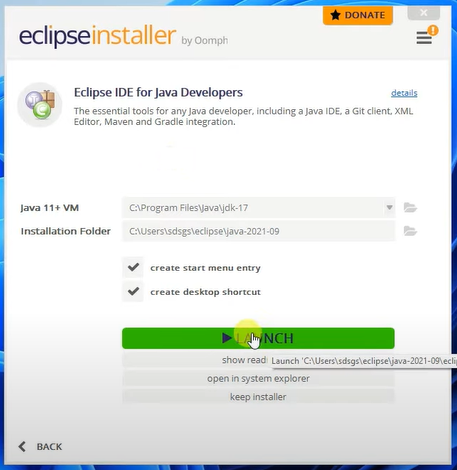
- Then tap on the green Launch button with the default Workspace folder.
- Maximize the Eclipse window and close its Welcome page to Create a new Java Project.
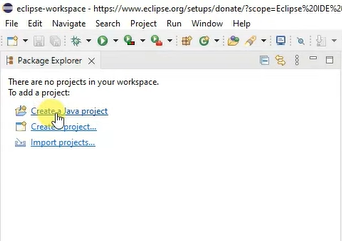
- Name the project as HelloWorld and Finish the process. Don’t Create create new module.

- Expand the Hello World and right-click on the src directory to create a new Class.
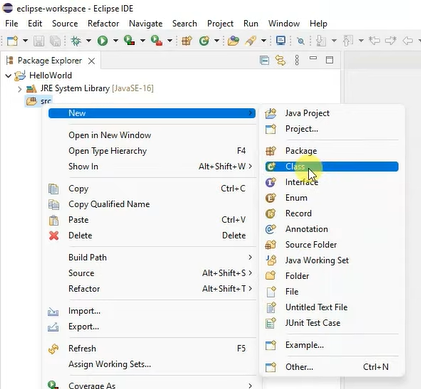
- Name the new Class as HelloWorld and make sure to tick the public static void main(String[] args) option and click on the Finish button.

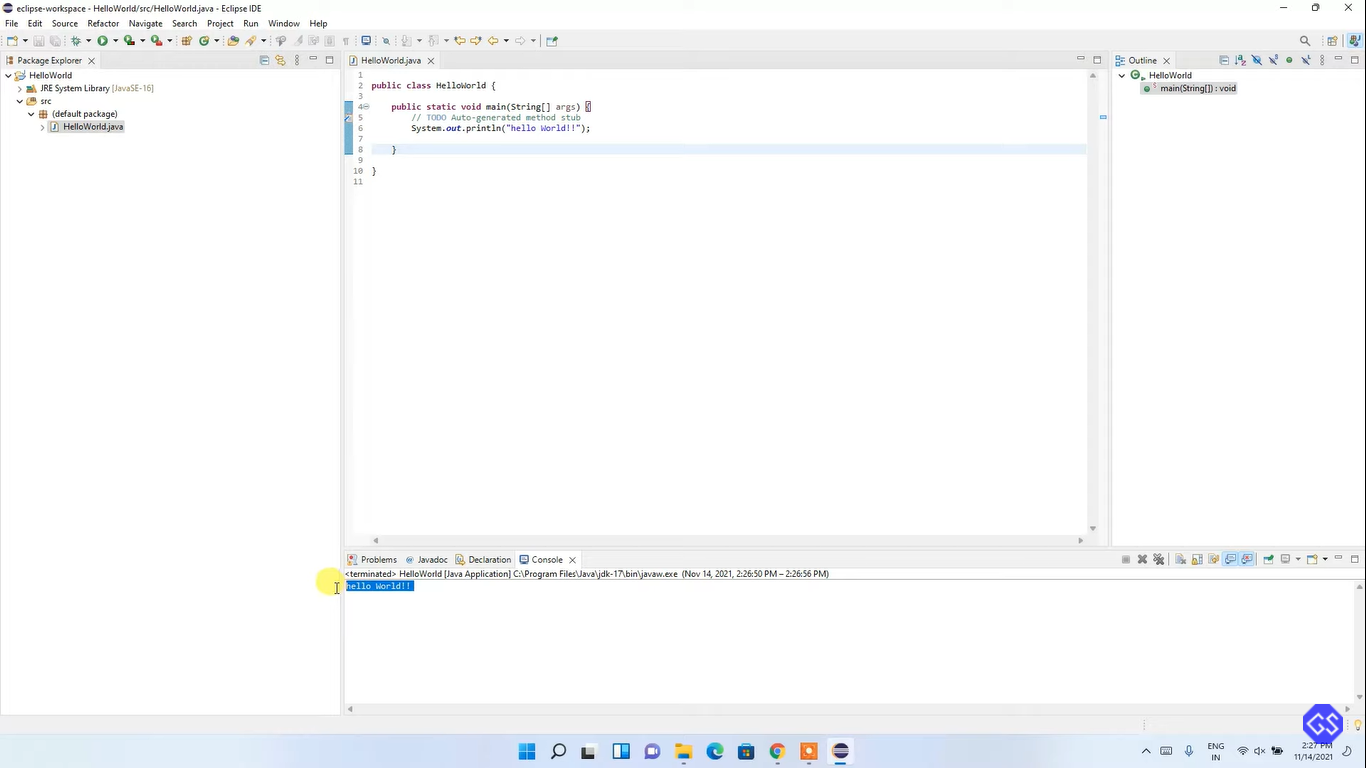
- Add the following code to the main method and run the code.
System.out.println(“hello World!”);
That’s it, you have successfully configured the Java JDK with Eclipse and NetBeans IDE on Windows 11.