Well, many users of Windows 11 are reporting that their hard drive is running out of space. The reason behind this issue is adding more and more files to it. The best solution for this issue is to compress the files. There are many compression software for Windows 11 but among them, the best one is 7-zip software. Here in this article, you will have a guide to “Install and Use 7-zip for free on Windows 11”. Before going on the actual guide make sure you read “Why you should use 7-zip on Windows 11?”.
Contents
Reasons to use 7-zip on Windows 11
There are multiple reasons for using 7-zip on Windows 11 PC or laptop but we are here with a list of some main or we can say important reasons.
- The first and foremost reason is that 7-zip is completely free software.
- It facilitates 87 languages. You can choose any language as per your taste.
- It facilitates a high compression ratio for formats such as ZIP, 7z, and GZIP compared to other compression software.
- It supports a number of packing and unpacking formats such as XZ, 7z, TAR, WIM, GZIP, ZIP, and BZIP2.
- It supports multiple unpacking formats such as CAB, CramFS, AR, FAT, ISO, MSI, NTFS, XAR, UDF, RAR, ARJ, CPIO, VHD, RPM, UEFI, VMDK, Z, WIM, IHEX, GPT, EXT, LZMA, QCOW2, NSIS, MBR, CHM, DMG, CPIO, and SquashFS.
- Using this software you can compress files up to size 16 exbibytes or 264 bytes.
- For ZIP and 7z formats you will get 256-bit AES encryption support.
- You can integrate it with Windows Shell.
- It is available in lightweight versions and also in the command lines.
Once you have read the above all importance of using 7-zip software on Windows 11 then go on the below guide to download and install it on Windows 11.
Check out: 11 Best Apps for Windows 11
Install 7-zip for free on Windows 11
Before installing 7-zip at first you have to download it on Windows 11. To download it navigate to the download center. Now you will have a list of 7-zip versions on the page. Make sure you choose according to your Windows bit version. After selection hit on the blue Download button.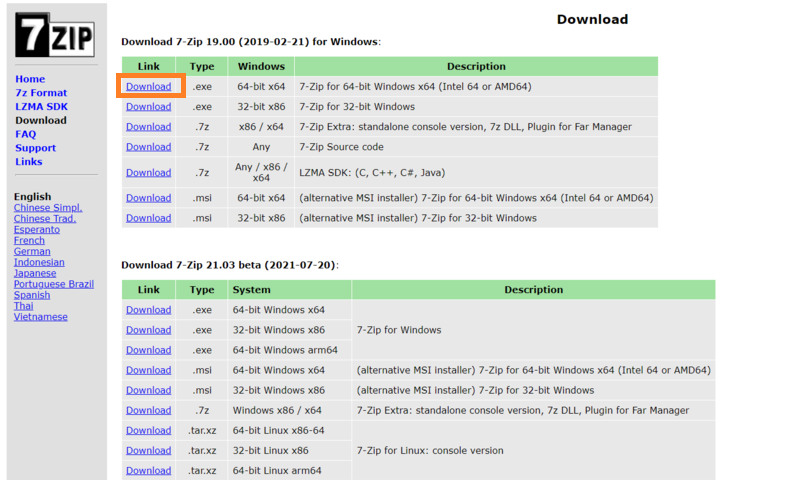
Once the downloading finishes then go to the actual steps of installing it.
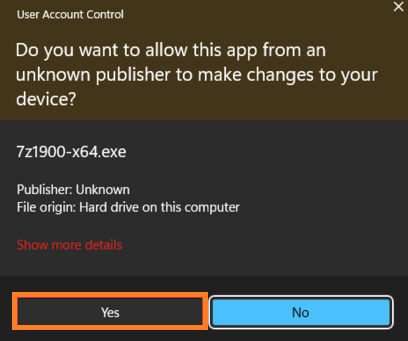
- First of all launch the folder in which the 7-zip setup file is located. In it look for the 7-zip setup file. Once you get it then do twice tap on it.
- By doing this it will ask you for permission so, tap on Yes for the further process.
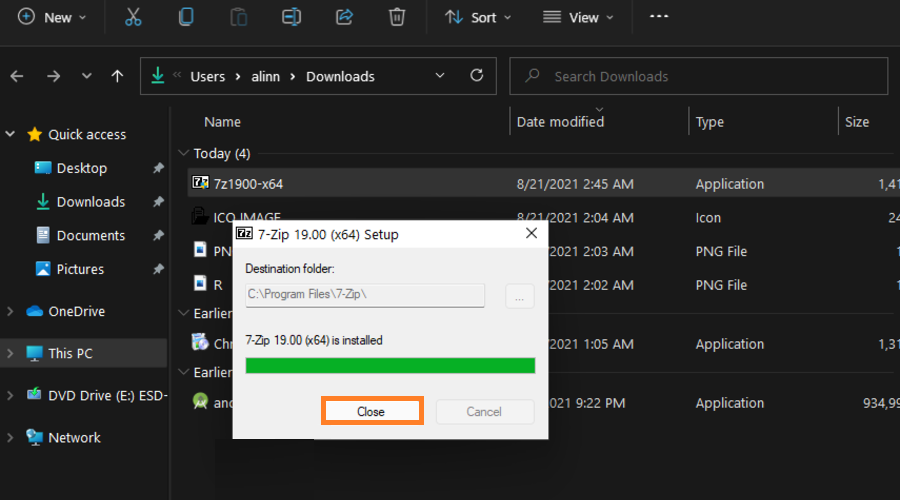
- From the 7-zip setup window, tap on the three horizontal dots and select the destination of a folder. In case, if you want to keep the default destination then hit on Install button directly.

- Now the installation process will start. Wait until the process finishes.
- At last hit on Close button.
Now you have successfully downloaded and installed 7-zip on Windows 11. If you don’t know how to set up it on Windows 11 then apply the below guide properly.
Download: Windows 11 Intel Drivers
Setup 7-zip Software in Windows 11
Well, before making use of the 7-zip application in Windows 11 you have to make it the default archiver to open archive files and to create archive files. Here below are detailed steps.
- Go to the search field and search for 7-zip as you have installed it on Windows 11. Make sure you open it as an administrator.
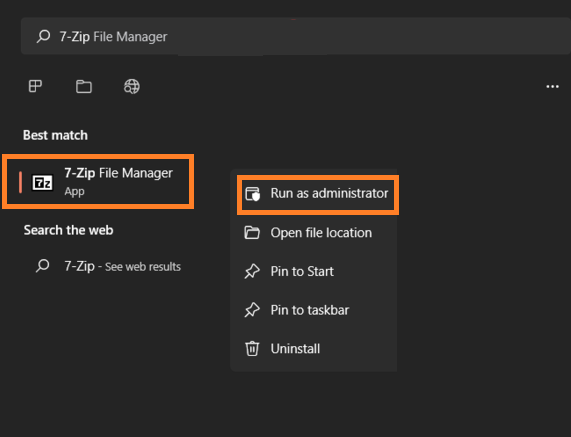
- If the permission window is prompted then hit on Yes.
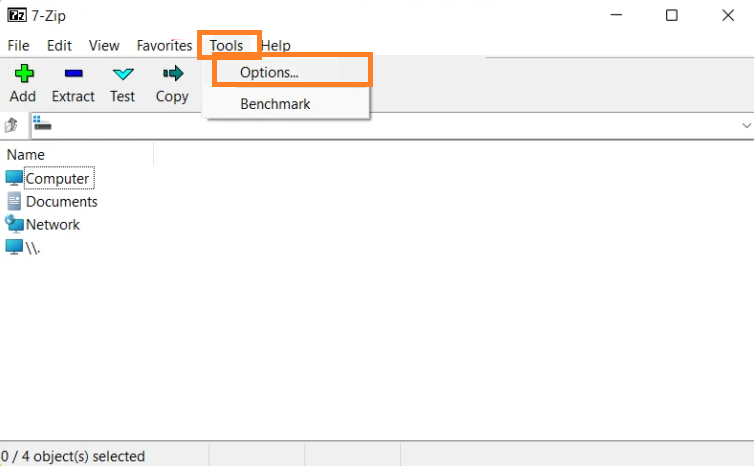
- From the 7-zip screen tap on the Tools and then hit on the Options from the open menu.
- Now click on the first + button to make it default for all kinds of archive files for the current user. After this click on the second + button to make it default for all users.
- To save these changes tap on the Apply and then on the Ok button.
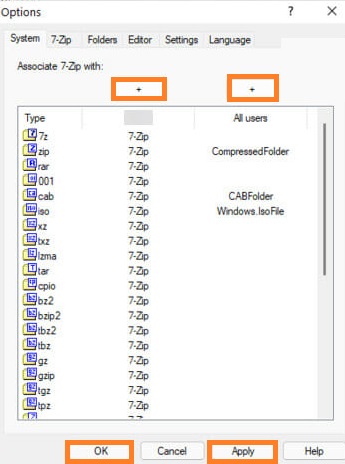
- On it, you can also associate and dissociate 7-zip with files types individually. Adding to it you can add and remove files type in a single click.
- By doing the right tap on the compressed file you will have a series of options.
- If you want more 7-zip options with the Classic context menu then tap on Show more options.
Finally, you have set up 7-zip software on Windows 11.
Read Also: Download VLC for Windows 11
How to use 7-zip on Windows 11?
Steps for Compressing Files
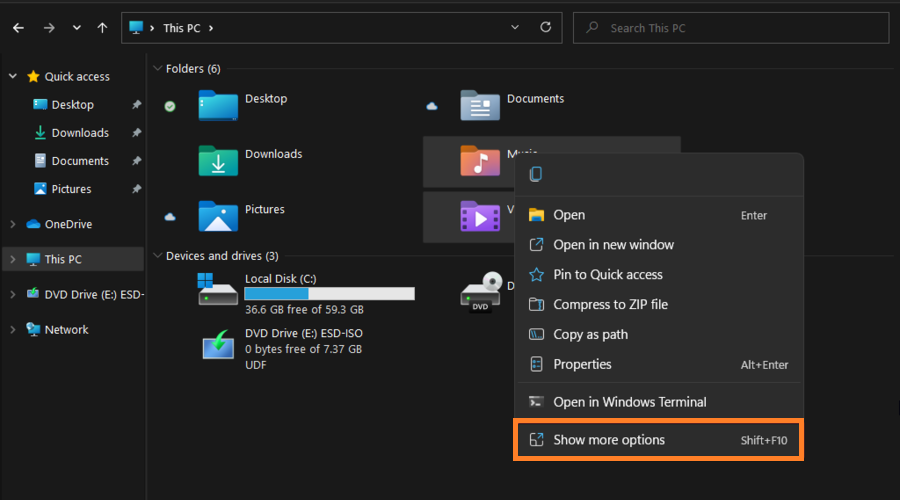
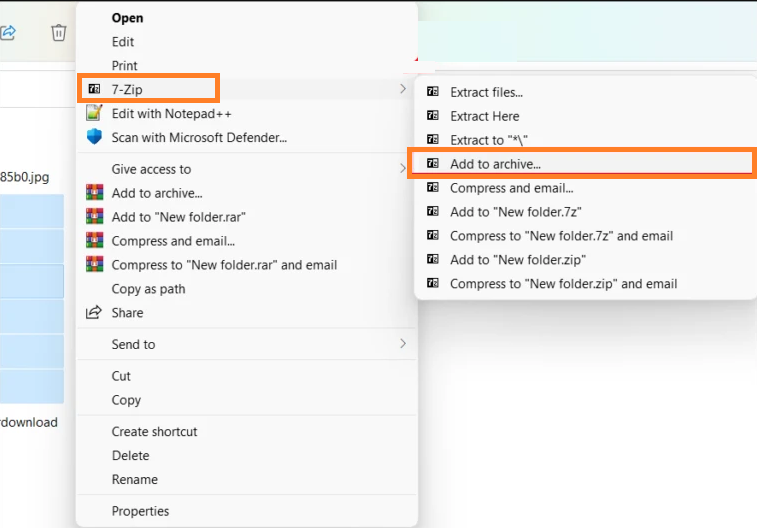
- Do right tap on the file and then tap on Show more options.
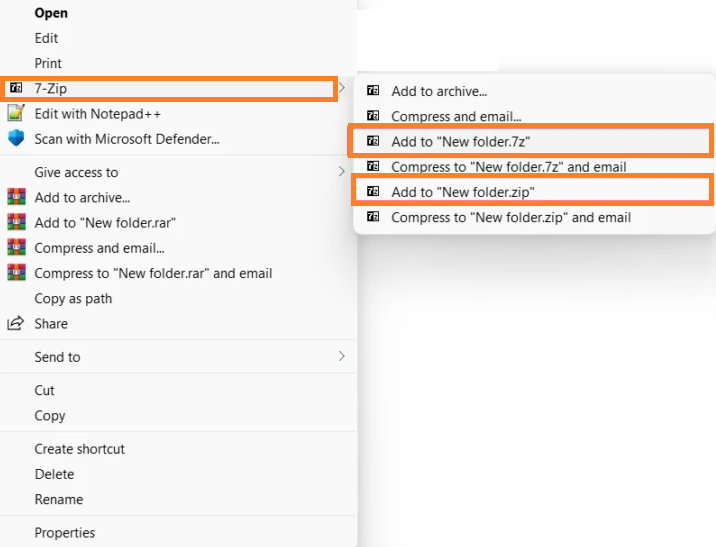
- From the list of options tap on 7-zip and then on Add to filename.zip or Add to filename.7z to compress the file quickly.
- In case, if you want to go for a different file format and you want to change the compression settings then instead of selecting Add to filename.zip or Add to filename.7z, tap on Add to archive option.
- Now you will have Add to archive window. On it, you can see multiple settings such as Archive field, Archive format, Compression level, Compression method, Dictionary size, Word size, Solid block size, and Number of CPU threads. You can change the location of the archive, format of an archive, compression level, and method.
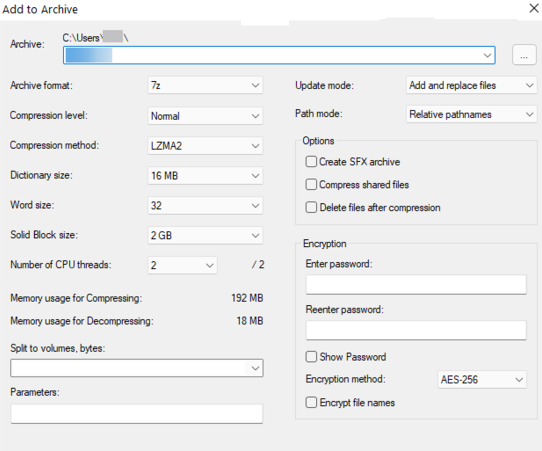
- Once you have done changes as per your need then hit on OK button to start the process of Compressing.
So, this is how you can compress files using 7-zip on Windows 11.
Steps for Extracting Files
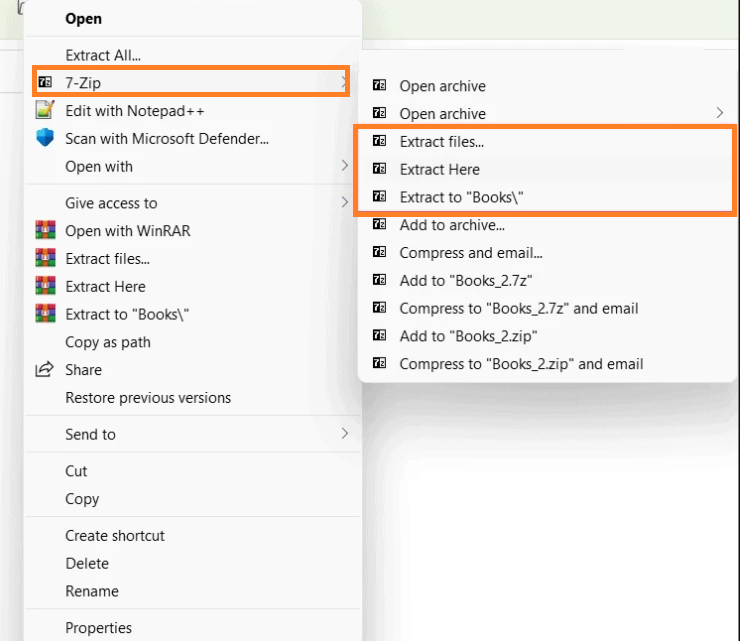
- At first do right tap on the file you want to extract. From the open menu tap on the Show more options.

- Go on the 7-zip option to have further options.
- Here you have to choose how you want to extract the file. If you will tap on the Extract files then it will allow you to select a destination and then extract. If you click on Extract Here then it will extract all the files into the current location. If you go for the last option that is Extract to “filename\” then it will allow you to extract the file into a new folder with an archive file name.
After all, make your choice and extract files.
Steps for Encrypting Files with Password Protection
- Navigate to Add to archive window. If you don’t know the path then read the 3 steps of compressing file guide.
- Here choose the destination folder, name of the encrypted file, and zip or 7z as an archive format.
- Confirm the passwords under the Encryption.
- Also, select AES-256 from the Encryption method drop-down.
- If you have 7z archive format then tick on Encrypt file names. This is for security.
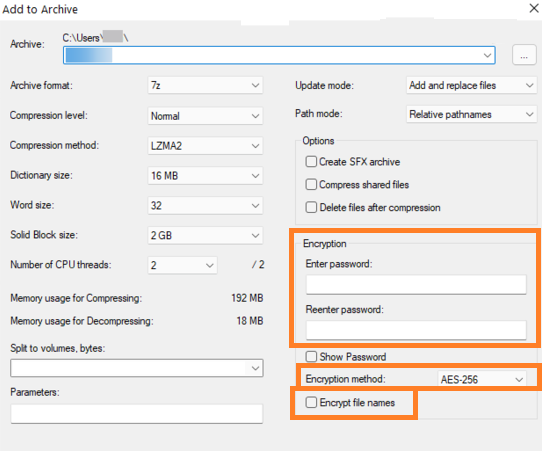
- At last hit on the OK button for saving all changes, you have made.
You have encrypted files with password protection.
I hope that after reading this blog you are able to Install and Use 7-zip for Free on Windows 11.