Well, using multiple monitors at the same time boost efficiency and consume less time. Having multiple monitors consumes space and it is costly as well. What if you can have the same feeling on a single monitor? It is possible that you can use multiple screens on a single monitor at the same time without wasting time in switching windows. On Windows 10 there is a feature name Split Screen which helps you in splitting the screen into two, three, and four parts horizontally or vertically. In this blog, you will see What is Split Screen and Snap Assist? and How to use them on Windows 10?
Contents
What is Split Screen?
The Split screen is a feature on Windows 10 which gives you the same feeling as you have on multiple monitors. The difference is that the multiple monitors are costly and somewhere time-consuming also. On the other hand Split screen has the ability or capacity to split the monitor screen into two, three, and four horizontally and vertically. Using the split-screen feature you can use multiple apps at the same time. If you are a developer then it makes sense to use this feature because the developers need multiple monitors as they have to do coding and all.
In a Split screen, the Snap assist feature plays an important role. With help of the Snap assist feature you can drag the window and place it on the screen. It is on you how you want to adjust the window vertically or horizontally. There are multiple reasons or we can say advantages to use Split screen feature on Windows 10. We are here with some of the best advantages of this feature.
- Using the split-screen feature saves your time as you have all require windows opened on the same screen. Many users use multiple windows. This consumes more time as you have to switch to multiple Windows.
- This feature is beneficial for developers and data entry operators as they have to enter the data in one window from another window. They can do it by keeping both windows side by side using the split-screen feature. It makes it easy and it consumes less time as compared to multiple windows.
- You can make the best use of this feature if you have a large monitor. You can place more than two windows.
- If you are doing copy and paste work then this feature is really beneficial for you.
So, this was all about Split-screen and Snap assist feature. Now if you are ready to make use of this feature on your Windows 10 then read the below guide properly. Well, before using the Split-screen feature you have to enable the Snap Assist feature on your Windows 10.
Steps to Enable Snap Assist Feature
As I have discussed above the Split-screen feature needs a Snap Assist feature enabled. The Snap Assist feature helps you in dragging and placing the windows on one screen. If you don’t know how to enable it on Windows 10 then follow the below steps.
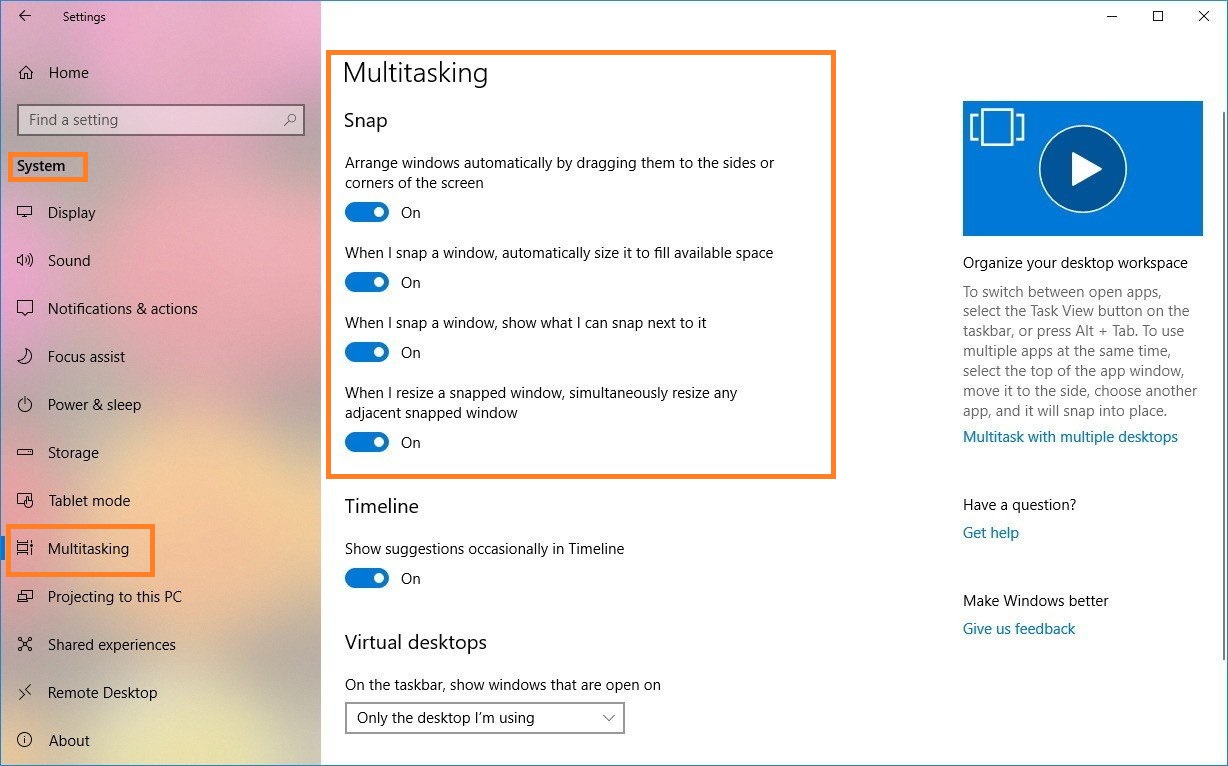
- First of all, launch the Settings app by holding the Windows key and I key.
- From the Settings screen tap on the System option for the further process.
- Now tap on the Multitasking option from the left pane.
- By doing this it will be open on the right side at the same screen. Now you will have four options. Enable that all four options.
Well, you have successfully enabled the Snap Assist feature on Windows 10. Now it’s time to split the screen into two or four.
How to Split Screen on Windows 10?
In this guide, we will show you how to split the screen into two and four windows. Splitting a screen into two is simple and easy as compared to splitting a screen into four Windows. At first, we will see how to split the screen into two windows.
Split-screen into Two Windows
You can split-screen into two windows using side by side method. The two windows mean one will be on right and the second window will be on the left side. It depends on you which window you want to set on left and right. At first, open the two Windows. Now make use of the Windows key and left/right move keys to set one window. If you hold the Windows key and right key then the one Window will be set on the right side. Once you have set one window on the right side then on the left side you will have the number windows option. Now select the one window for the left side and hit Enter.
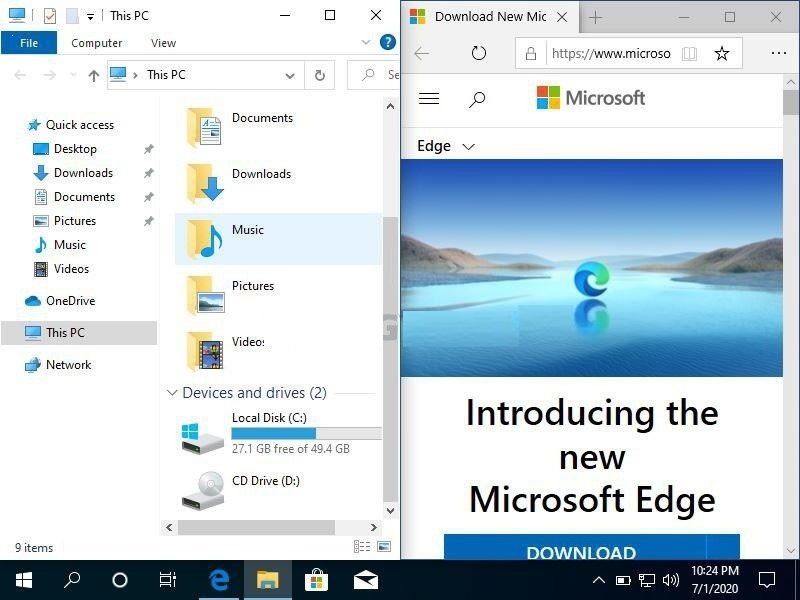
Now you can see that both windows are on one screen side by side. This will make your work easy. If you want to split the screen into four windows then go through the below guide.
Split-screen into Four Windows
As I have told you that splitting the screen into four windows is somewhat advance as compared to splitting the screen into two windows. Here you have to set windows properly as you have four Windows. You can split-screen into four windows using Mouse and keyboard shortcuts. If you are habited to mouse then go for a mouse and if you are not then the keyboard shortcuts are there.
Using Mouse: At first, make sure you open four Windows. With the help of a mouse or laptop cursor drag the windows and place them into the right corner. Using this method you will not able to set the proper size of the windows on the monitor’s screen. Make sure you set it properly so you can work well.
Using Keyboard shortcuts: This method is easy and simple as compared to the mouse one. In this, you don’t need to set the size of the windows. It automatically sets the size. As you know that to split the screen into two we have used the Windows key and left/right key. In this, you have to use the Windows key, left/right key, and up/down key. The left and right keys are for side by a side window and the up-and-down key is for the upper and down windows. If you want to keep one window bigger then place the cursor on the corner of that window and drag it to increase the size.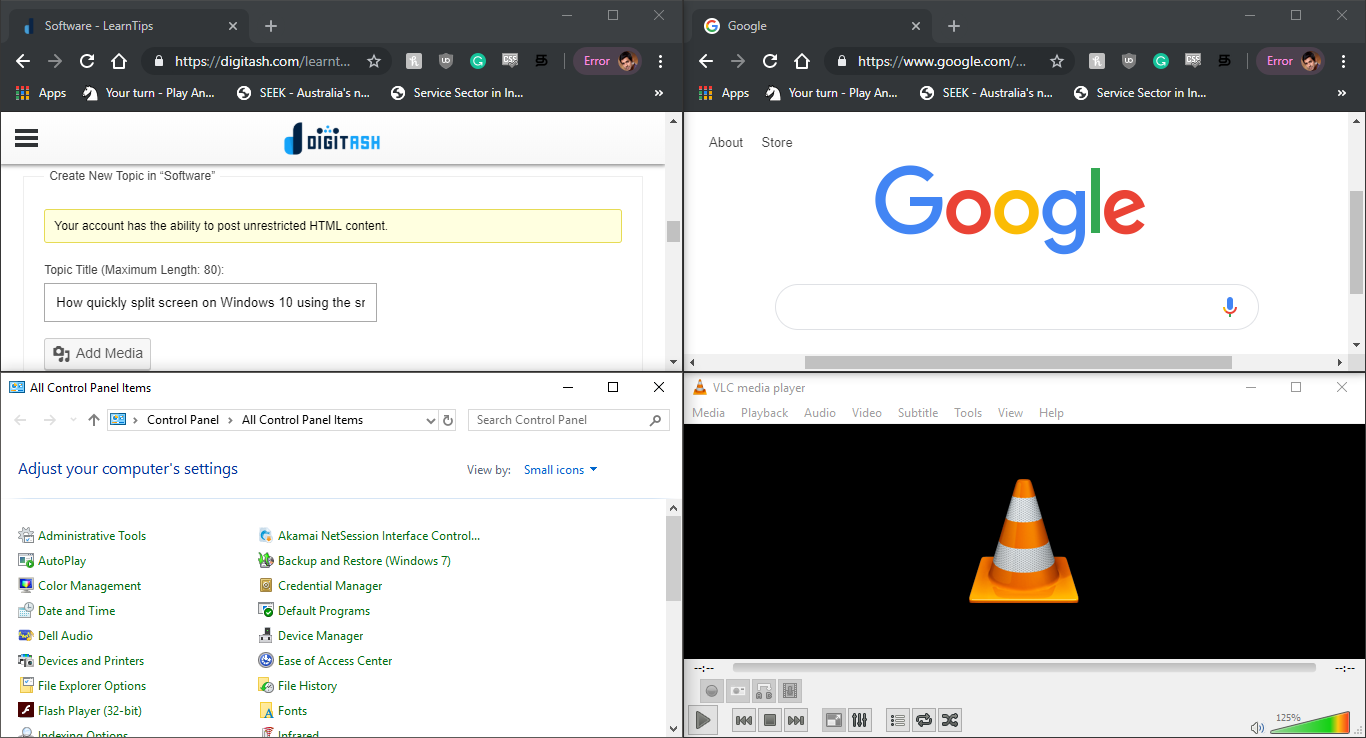
Now you have set four windows on the monitor’s screen. By doing this your monitor’s screen will become multitasking.
I hope that by reading the above guides you are able to split the monitor’s screen into two and four windows.