If you are working on something that involves using multiple windows, you might get frustrated and jumbled. This is where the Split-Screen comes to save you. It allows you to view multiple screens at a time and saves you from the hardship that arises from constantly switching back and forth.
Split-Screen rearranges all the working windows to a more suitable view. You can easily switch and edit information in different windows. It will not only make your job easy but also save time and increase efficiency.
The new version of Mac – macOS will allow you to split-screen in an easy way. You only have to launch the Split-View on your Mac (Catalina and later versions) to split your screen into small parts for multitasking.
Now, it’s time to learn how to view in the split-screen mode. Here are some easy steps for you to follow.
Contents
Steps To Launch Split-Screen On Mac
Open Tabs
To view in the split-screen mode, you must have more than one window open on your Mac. So, the first step is to open some new windows that you need on a split-screen. You can open an app, browser, files, or anything that you need.
Locate Three Colored Buttons
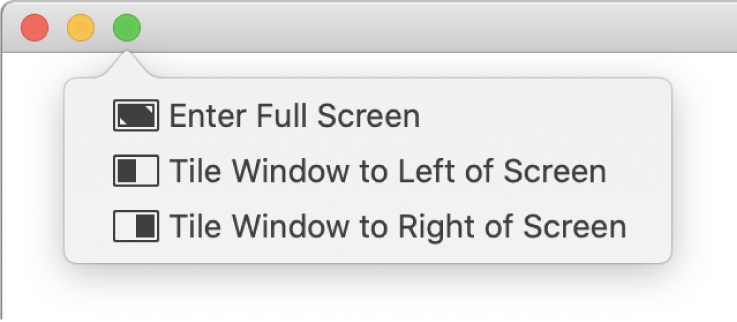
Now, you have to select your first window. You need to see the top-left corner of this window and locate three colored dots. The colors will be red, yellow, and green.
Tile A Window
When you locate the three dots, you need to hover over the green dot and select and hold it. The window will display a range of options to view the screen. Options will be the following: Enter Full Screen, Tile Window To Right Of Screen, Tile Window To The Left Of Screen. Among these options, you can select the second or the third one. The window you selected will accordingly display that portion on your screen.
Select Another Window And Get The Split Screen View
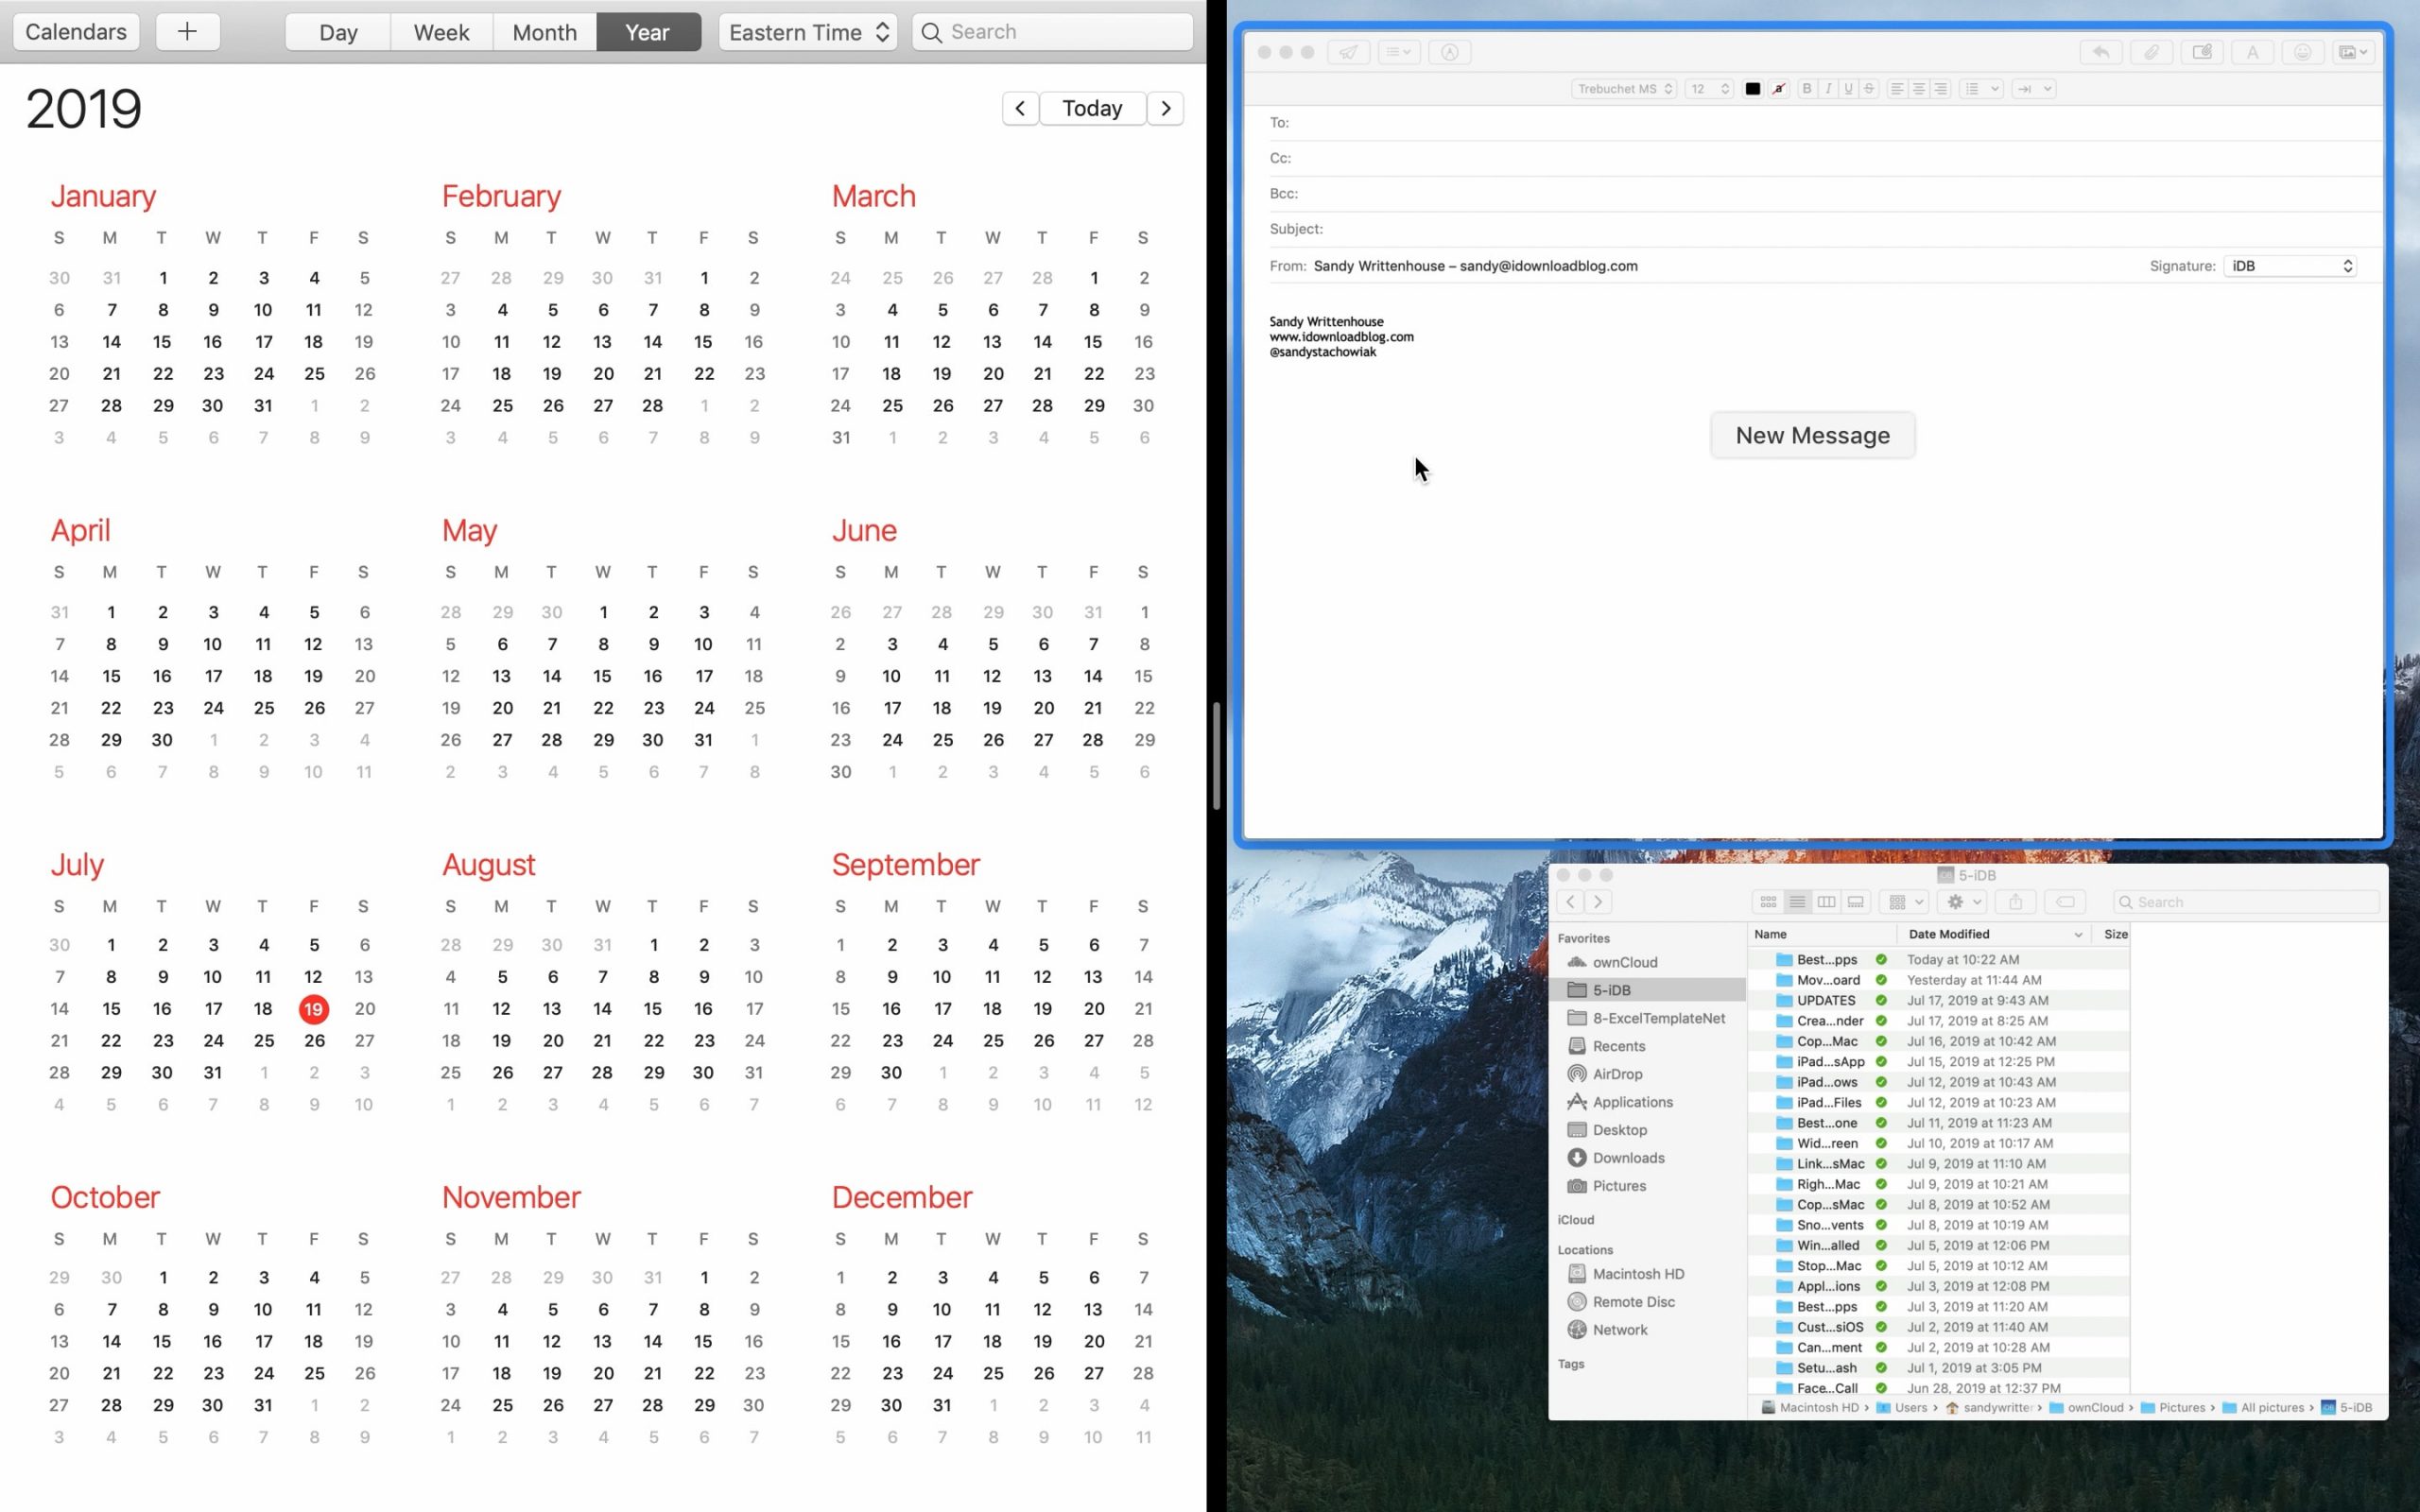
When you tile a window, all other open windows shift to the opposite side of your screen. Now, you need to choose other windows that you want to see in the split view. The windows will expand to fit the screen and your split-screen mode is on!
Easy, isn’t it? But before you get into the split-screen mode, here are other important things you need to know about it.
How Can You Adjust Your Split-Screen View
If you need to see only some part of one window and a larger part of the other one, you can adjust the view accordingly. All you have to do is hover on to the divider of any window, select, hold it, and drag it to the left or right. It will adjust your screen between two windows.
However, some apps have their minimum width specified. You cannot adjust their size. But, the adjustment in split-screen works in most of the apps that you need for work. So, you do not have to worry much about it.
You can also switch the sides of the windows. You only need to select the title bar of that window and drag it to the side you want.
How To Access Mission Control
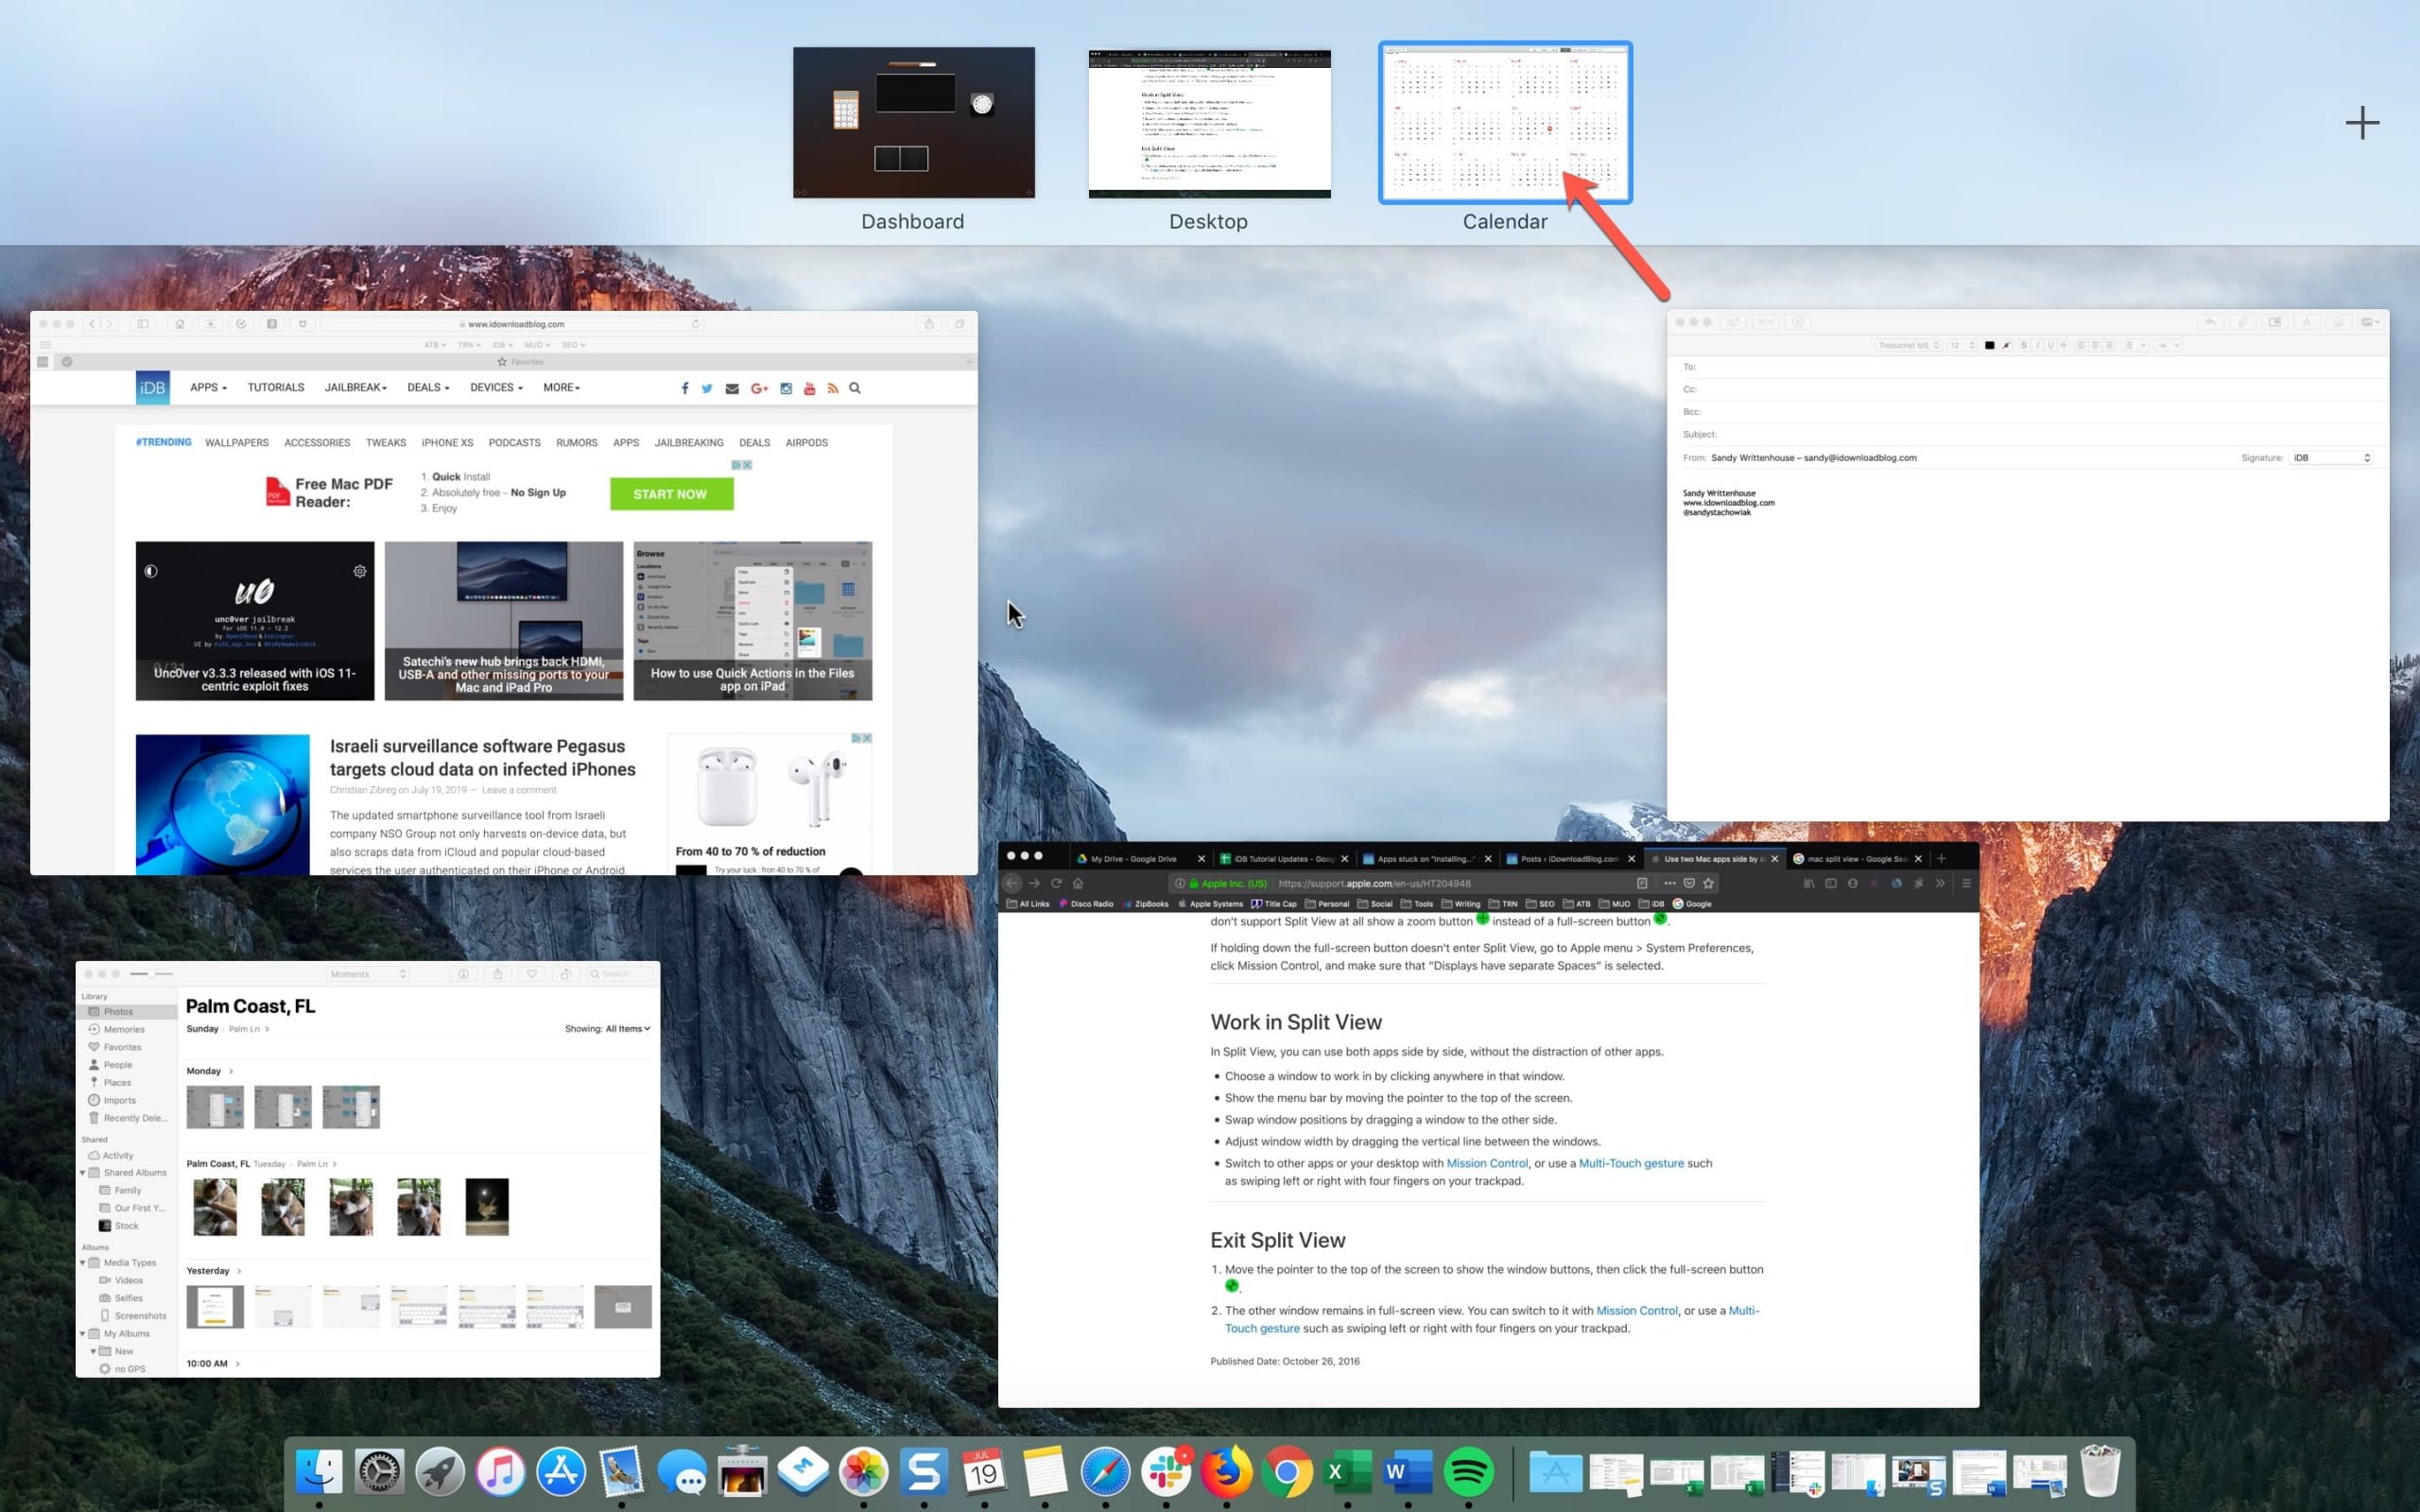
The Mission Control is the mode that helps in making the Split-Screen mode more efficient. Mission Control allows you to see all the open windows in a ribbon-like view. This view enables the switching from one window to another in no time.
You can also create multiple virtual desktops with different apps and windows remaining open.
To access the Mission control, you only need to drag one of your open windows to the top edge of the screen. After this, you will automatically enter the Mission Control Mode. There are also other ways of accessing Mission control.
If you have a trackpad for your mac, all you have to do is swipe up with three fingers or even four for some trackpads. It will depend upon the settings of your trackpad. Some keyboards also have a button, F3, to enable the Mission control mode.
Split-Screen View Options
The split-screen mode also gives you options like zoom, move windows to either side of the screen, and enter full screen. To view these options, you need to press Alt+Green Button.
Window Snapping
The window snapping option was previously available only on the windows. However, thankfully, it has finally been added to the macOS.
You need to drag a window to either corner of your screen, a box displaying the shape of the window will appear. When you release the cursor, the window snaps to the position shown in the box.

There are multiple ways of snapping your window. Which are these? Let’s see.
What Snapping Options Are Available On The Mac?
- You can drag a window to the corner of your screen to occupy 1/4th space of your screen.
- You can drag the window to the right or left side of your screen. This will divide your screen vertically into two parts.
- You can divide your screen into horizontal halves by dragging the window to the top or bottom.
- You can also view four screens at the same time. You need to drag a window to fill the top right and left side of the screen and do similar to fill the bottom screen.
- You can even drag the window to the bottom and fill the middle third.
Since the feature is new for all Mac users, it will take time to master it. After all, there is nothing that you cannot learn with practice.
How Can You Exit The Split Screen View
Now, since you have learned how to open and use the split-screen mode to work more efficiently, it’s time to learn to exit it.
Exiting from the split-screen is easy and there are simple ways to do it. First, you can go to any window open in split-screen and go to the top. Wait for the grey menu bar to reappear, since the split-screen mode hides it. Now, you will be able to see the green button again, click it and you will exit the split-screen mode. If it does not work, you can select and click on the “Exit Full-Screen” option.
Almost all these features are available on the latest versions of Mac. However, some options may not work for a few versions. If that’s the case for you, you can update your Mac to enjoy the split-screen mode and all its features.