Well, in this world all want their device match to their personality. This can be only done using customization. The customizing device as per your convenience has also limitations. The limitation depends on which device you have. If you have Windows 10 PC or Laptops then you have several customization settings. If you have a Chromebook then you have limited customization settings. On the internet, there are many articles showing how to customize Windows 10 but there are no blogs or article which gives tips and guide to customize Chromebook. In this article, you will see “How to change mouse cursor color and size?” on Chromebook. Apart from this, you will also see fixes to get rid of “Cursor disappeared on Chromebook”.
There are three reasons for reading this blog; the first if you are missing the track of your mouse cursor on Chromebook. This is because your mouse cursor is small and the color of your mouse cursor is light which is not visible properly, second if you want to make your mouse cursor unique from others, and third if your mouse cursor is disappeared.
Contents
How to change the mouse cursor on Chromebook?
In this guide, you will see steps for changing the size and color of a mouse cursor on a Chromebook. You will also see steps to add a red halo around the mouse cursor which will highlight the mouse cursor and you will not miss the track of your mouse cursor on your Chromebook. In this guide, I have also added a third-party extension for mouse cursor customization.
Steps to Change the Size of a Mouse Cursor
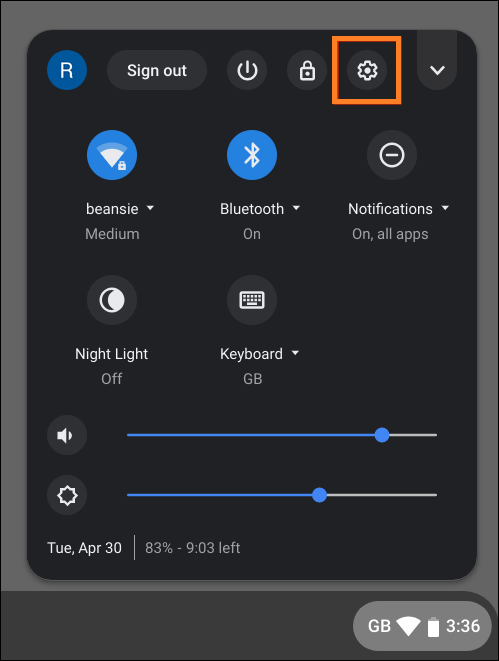
- For this, you will need the Accessibility features so go on the time which is on the bottom right corner.
- By doing this you will have a System menu. From it tap on the Setting button which is denoted by the gear icon on the top row.
- In the Settings window tap on the Accessibility option from the left side. If the Accessibility option is not available then tap on the Advanced option for the further option.
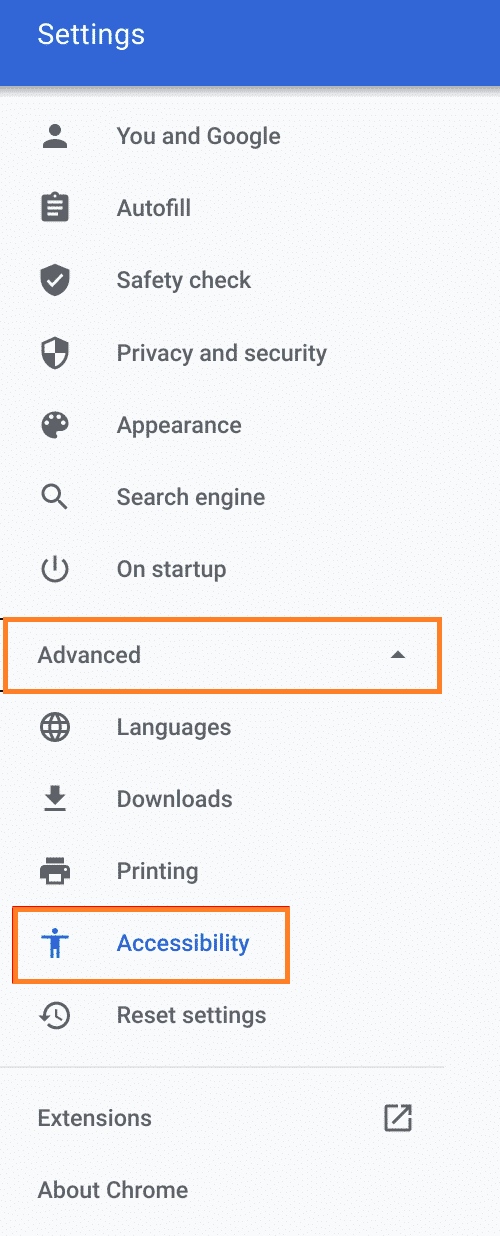
- Now from the Accessibility section tap on the Manage accessibility features.
- You will have an Accessibility settings screen. Go to the Mouse and touchpad section and do the toggle on of “Show large mouse cursor”.
- You can also use the slider to make the mouse cursor small or medium.
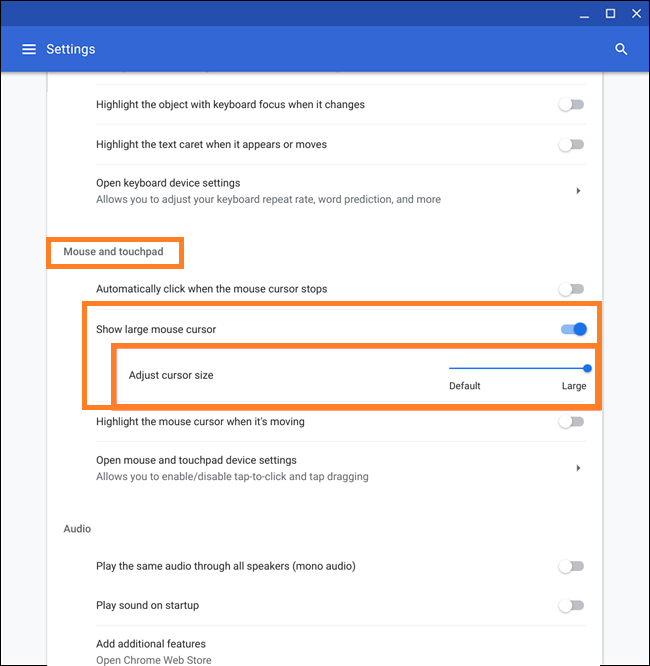
So, this is how you can change the size of a mouse cursor on the Chromebook.
Guide to change Mouse Cursor Color
Well, the steps for changing mouse cursor color are almost the same as changing the size of a mouse cursor. Follow the above steps till you won’t get Mouse and touchpad section. Once you get it then go on the Cursor color and tap on the drop-down icon. You will have a list of colors. You can choose as per your need and like. Make sure you select the dark color because the dark color is more visible than the light one. To make the mouse cursor more highlight apply the below guide properly.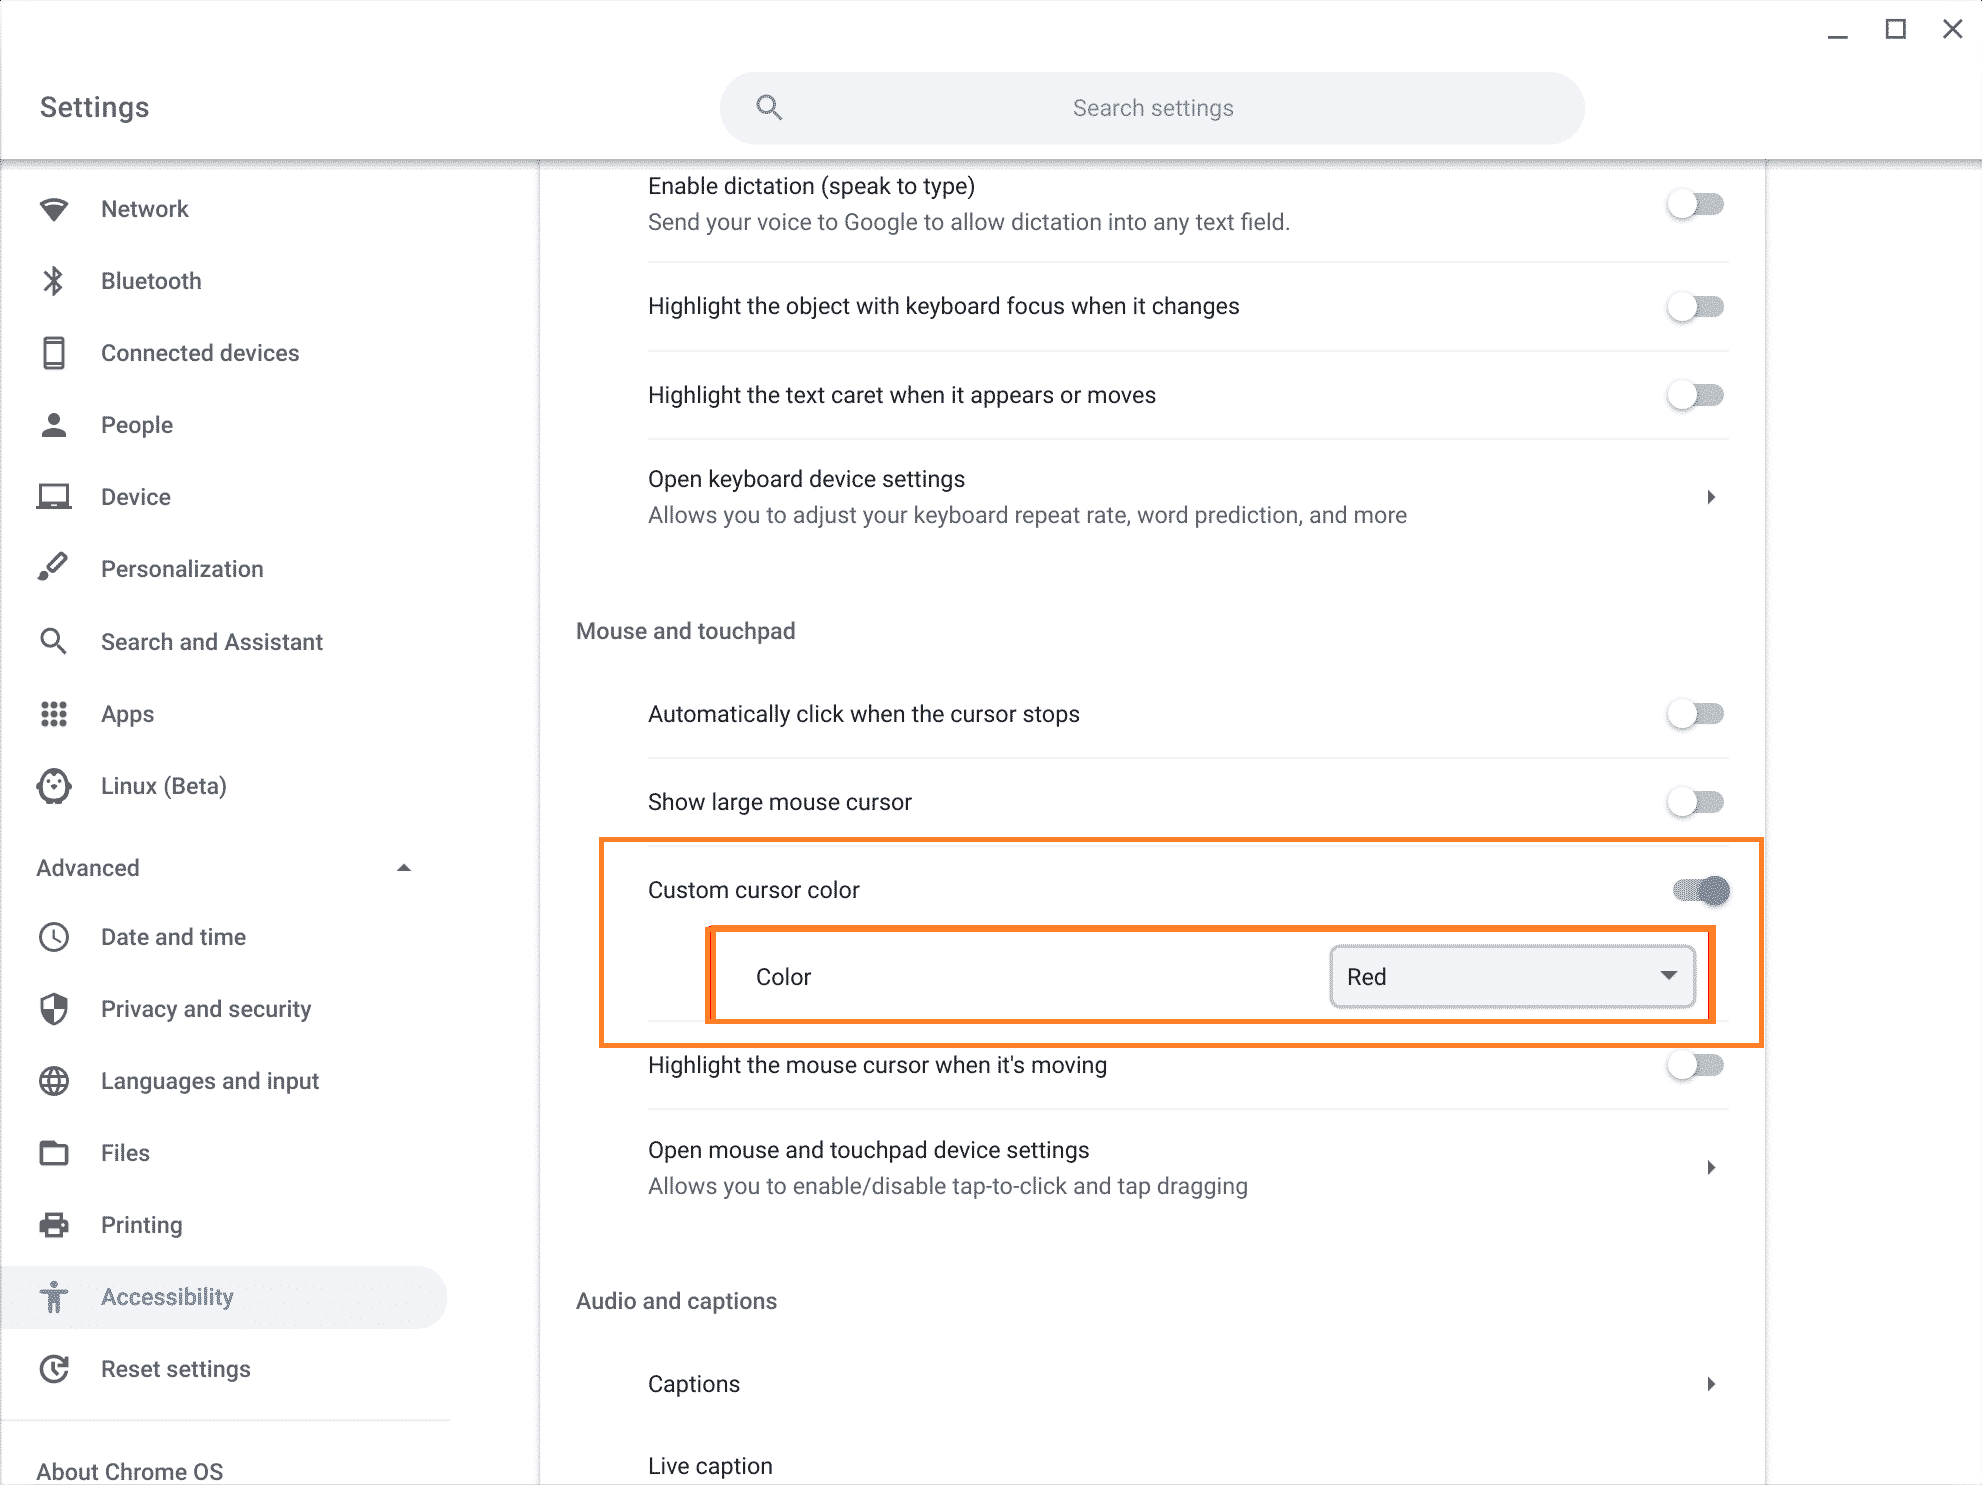
Guide to add a Red Halo around the Mouse Cursor
This setting will highlight the mouse cursor and it will take the mouse cursor to another level. By enabling this setting you will have a red small circle around the mouse cursor. The steps for adding a red halo around the mouse cursor are also the same as the above two settings. Go on the Mouse and touchpad section by applying the above steps. Once you are on it then do the toggle on of “Highlight the mouse cursor when it’s moving”. Now you can see a red halo around the mouse cursor on Chromebook.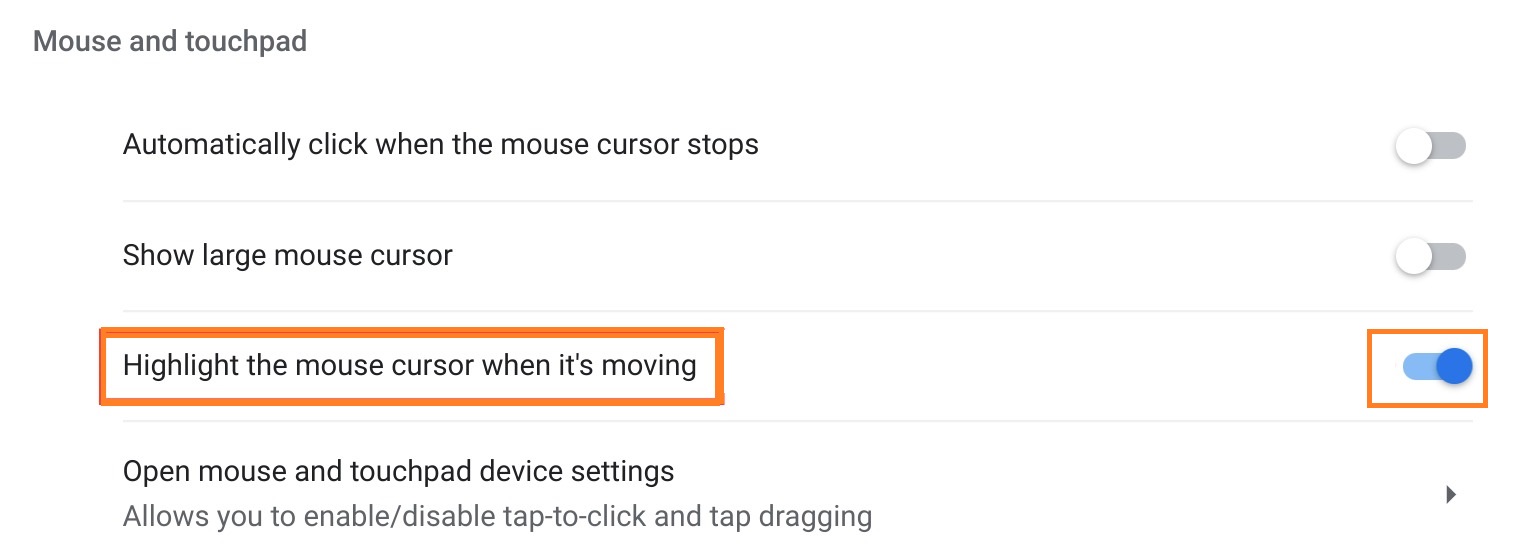
Well, you are all done with inbuilt settings for the mouse cursor. If you want to take your mouse cursor to another level you can make use of third-party extensions. Go through the below guide to have deep knowledge about it.
Change Mouse Cursor using the third-party Extensions
There are a number of Chrome extensions that take your mouse cursor to another level in the field of customization. There is one drawback of this customize cursor that it won’t work on Linux apps and Android apps. When you try to use it in Android and Linux apps the cursor becomes normal. There are two main chrome extensions for mouse cursor customization that are given below.
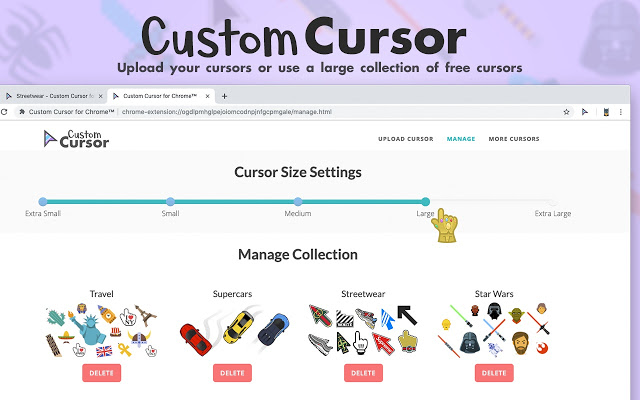
- Custom Cursor for Chrome: Well as compared to all Chrome extensions there is a number of preset for cursors on Custom cursor extensions. Each and every cursor come up with a two-pointer. The first pointer is a normal one and the second pointer comes when you hover the mouse on the link. On it, you can change the size of the cursor as per your need. The Custom cursor gives the cursor size big by default. It has approximately 2M users.
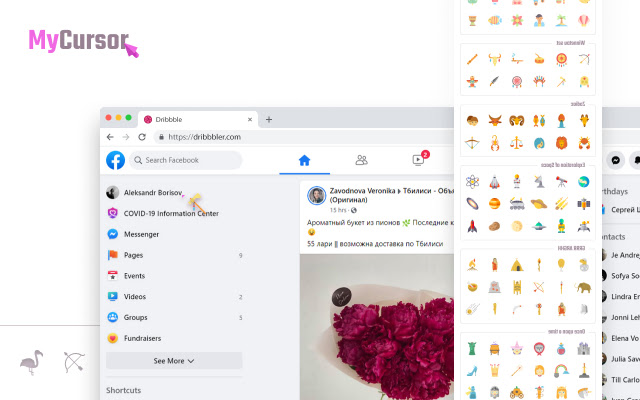
- My Cursor: The My Cursor is almost similar to Custom Cursor. The only difference is the library. The My Cursor has a number of cursors that look like emojis. You can also upload a cursor. It depends on you.
So, this was all about the third-party extension for the mouse cursor.
Guide to fix “Cursor disappeared on Chromebook” Error Message
Well, many users reported that when they are browsing the internet, suddenly the mouse cursor disappears from the screen. The mouse cursor shows on the boundaries of the chrome. When a user brings it to the screen it disappears again. If you are one of them then apply our tips to fix “Cursor disappeared on Chromebook”.
- Restart the Google Chrome. You can use the restart command for restart. Launch Google Chrome and go on the URL bar. Once you are on it then type chrome://restart and hit enter.
- Make use of Chrome Settings. Launch the Chrome settings and tap on the Advanced. After this scroll till you won’t get the System section. Once you get it then go on the “Use hardware acceleration when available”. From it tap on the Relaunch button. This will restart your browser.
- End the process using Task Manager.
I hope by applying the above tricks you get rid of the “Cursor disappeared on Chromebook” error message.
The blog is all about changing the mouse cursor on Chromebook and fixing the “Cursor disappeared on Chromebook” error message.