Contents
What is Trustedinstaller?
With updating Windows, Microsoft has given new features in Windows 10, 8 and 7. The new feature name as inbuilt user account which is known as a trustedinstaller. The trusted installer is one of the best-inbuilt user accounts which protects the different files. Have you ever deleted the file which is protected by the trustedinstaller? If yes then you have seen the folder access denied message saying ” You require permission from Trustedinstaller to make changes to this folder.”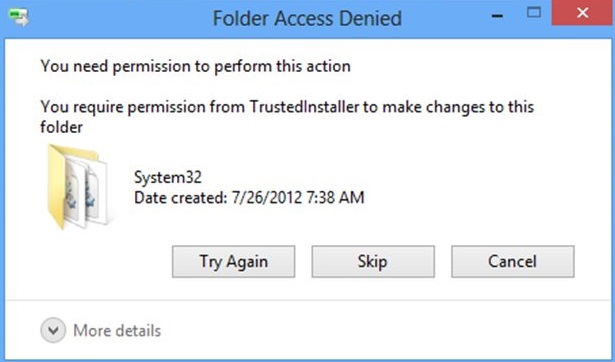
So now the question is how to overcome this issue or how to fix this error? The only solution to this problem or error is you just have to get permission from the trustedinstaller. Mainly this error occurs in Windows 10 and 7 so we have given the detailed steps for gaining permission from the trustedinstaller on both Windows 10 and 7. Don’t be frustrated because you are on the right platform which will provide you the full detail solution on it. Make sure you follow it properly without skipping a single step. At first, we will see the steps for Windows 10 then Windows 7.
How to get permission from the Trustedinstaller on Windows 10?
To avoid the access denied message on Windows 10 at first you should gain permission from Trustedinstaller. Once you get permission from it then you can delete the file, you can change it and you can also modify it as per your convenience. So, to gain permission from trusted installer follows the below steps in sequence:
- Step 1: First of all launch the file explorer on your Windows 10 and find out the file you want to modify or delete.
- Step 2: Once you have the file that you want now do right tap on it and select option name as Properties.
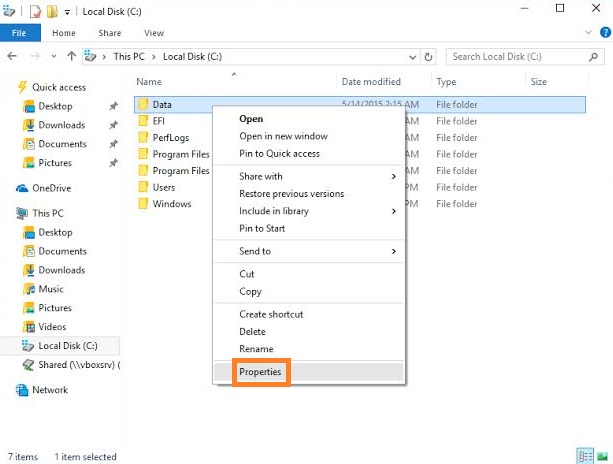
- Step 3: In properties screen, you will have multiple tabs but you have to go on the Security tab and it hit on the Advanced button.
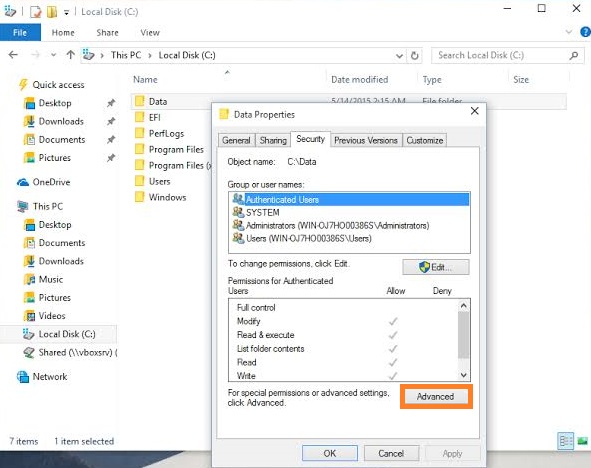
- Step 4: Once you hit on the Advanced button then you will have a new screen showing Advanced Security Settings for Data. So, in it, you just have to tap on the Change button which is near the Owner label.
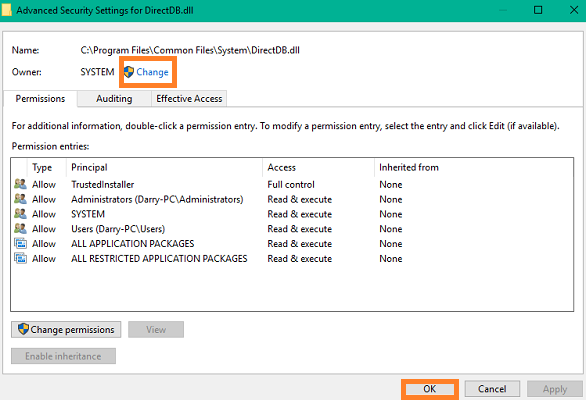
- Step 5: By taping on the Change button you will have once again a new screen name as Select User or Group. So, in its write the name as “NT Service\Trustedintsaller” So, this will be the new owner name by which you will get permission from the trustedinstaller.
- Step 6: At last you just have to hit on the OK button.
So, By applying the above steps you will get permission from the trustedinstaller on Windows 10. To eliminate the confusion I have given the separate steps for Windows 7 so follow as per your Windows system. If you are using Windows 10 then follow the above steps or if you are using Windows 7 then follow the below steps clearly.
How to get permission from the Trustedinstaller on Windows 7?
As I have told you that due to a change in the Windows system some steps will be changed in getting permission from Trustedinstaller. So follow the below steps properly without skipping a single step:
- Step 1: At first open the file explorer on your Windows 7 and then do right tap on the file you want to modify or delete and select the option name as Properties.
- Step 2: Now you will have many tabs on the screen so go on the Security tab and hit on the Advanced button.
- Step 3: Once you hit on the Advanced button then you will have a new screen showing multiple tabs on it so go on the Owner tab and tap on the Edit button.
- Step 4: Now its time to change the owner so change the ower. I must say that if your account is an administrator then you should select it.
- Step 5: On the same screen you will have a box name as Replace owner on subcontainers and objects so if you want to delete or modify the multiple files then you should uncheck this option.
- Step 6: At last hit on the OK button and you can see that now the owner will be the account you have chosen.
- Step 7: Once you are finished with the above steps then if you want to modify or delete a folder which contains subfolders then you should go on the Permission tab and tap on the Change Permission and select the account you want to make the owner and in below you will have a box name as “Replace all child object permission with inheritable permission from this object” so, do check on it.
- Step 8: Now to right tap on the file or a folder once again and select properties.

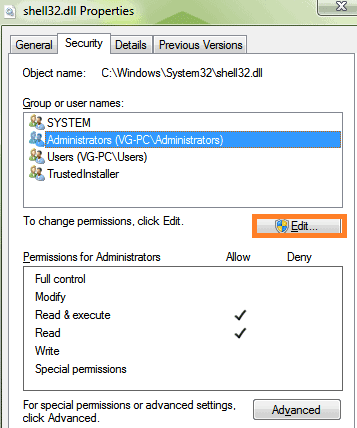
- Step 9: In the properties screen, you will have different tabs but go on the Security tab and instead of clicking on the Advanced button tap on the Edit button.
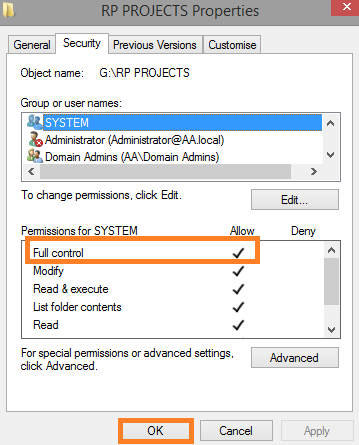
- Step 10: Now its time to tap on the name of the user of which you want to change the permission. If by chance the name of the user is not found then tap on the Add button and type the name and tick on the Full control.
- Step 11: Once you tick on the Full control then automatically other options will be ticked. Finally hit on the Apply button and then on the OK button.
So, these were the steps to gain permission from the trusted installer on Windows 7. I must say that some steps are complicated so read properly and follow it.
I hope that this blog will prove helpful for you have permission from the trustedinstaller on both Windows 10 and 7. Note that Windows 7 steps are applicable in Windows vista also. So, you should also follow the above steps in Windows Vista.