Well, the newest OS of Microsoft Windows is rolling out, and almost all Windows 10 users have upgraded to Windows 11. Windows 11 has come with multiple changes, improvements, and features. Adding to it, Windows 11 has strengthened its security.
If you are a fan of FPS then you must know about Valorant. It is a great Video Game at this time. It is a free and first-person shooter game. The video game is published and developed by Riot Games for only Microsoft Windows OS. In addition, it is popular and consists of anti-cheat measures which makes it unique from other games. However, if you are on Windows 11 and a fan of FPS then stick with this article till the end to play Volarant on Windows 11.

Before going on the actual guide here I want to clear one thing on Windows 11 you will not able to play Valorant without TPM 2.0 or Secure Boot. It is because Vanguard Valtorant is concerned about security and it ensures fair gameplay.
TPM (Trusted Platform Module) 2.0 is an essential requirement to install Windows 11. If you are on Windows 11 it means that TPM 2.0 is enabled on your system. The TPM 2.0 makes Windows 11 security stronger and making impossible for hackers to crack OS. However, Vanguard Valtorant needs TPM 2.0 and a Secure boot while installation just to ensure and verify that your Windows installation is a trusted platform.
Fix: Valorant VAN 1067 on Windows 11
Contents
System Requirements to Run Valorant on Windows 11
The basic system requirement to run Valorant on Windows 11 is enabled TPM 2.0 and enabled Secure Boot. In case, if you have skipped TPM 2.0 and Secure boot while installing Windows 11 then you will not able to run Valorant on Windows 11. Apart from this, the other minimum system requirement is listed below.
- If we talk about CPU and GPU then it should be Intel Core 2 Duo E8400 or AMD Equivalent and Intel HD 4000.
- The VRAM and RAM should be at least 1GB and 4GB.
In order to get and run Valorant on Windows 11, you have to upgrade the hardware including TPM 2.0, and Secure boot, or else you have to roll back to Windows 10.
Enable TPM 2.0 and Secure Boot on Windows 11
Some users are not sure about the TPM 2.0 and Secure Boot functionality on their Windows 11 devices. Maybe you just have to enable it from the BIOS to start playing Valorant on Windows 11.
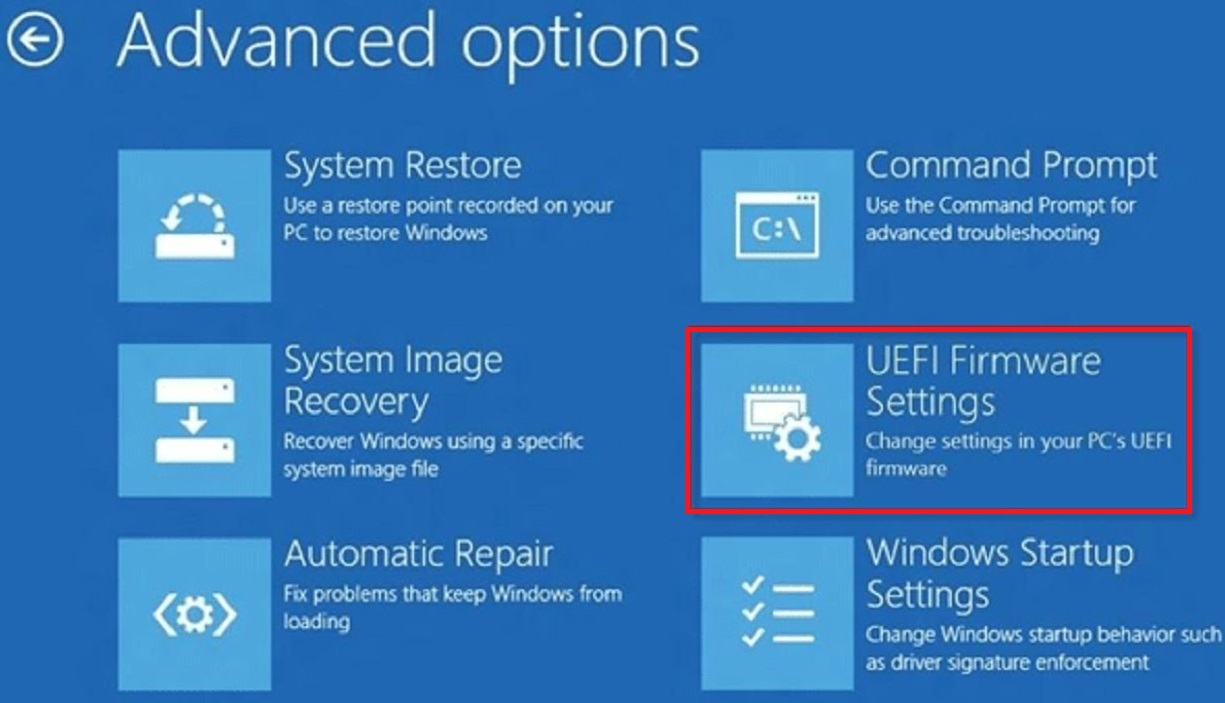
First, boot into the BIOS or UEFI firmware settings on your PC. The BIOS settings can be accessed by pressing F12, F10, F2, or the respective BIOS key for your device. The UEFI firmware can also be accessed from the Recovery Environment.
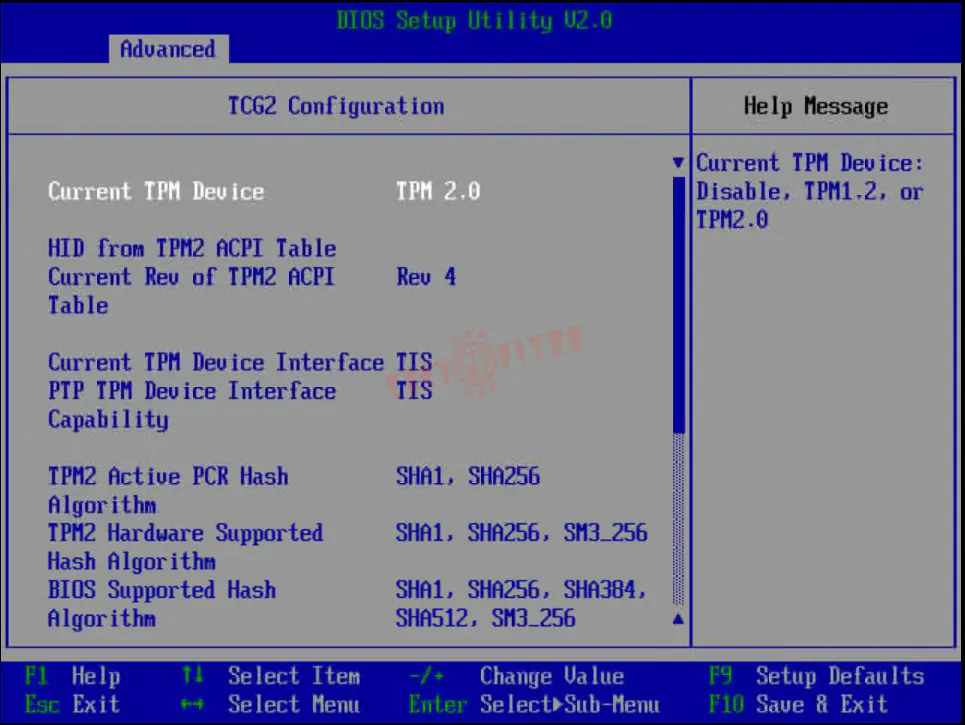
Once into the BIOS panel then go to the Advanced or Security Tab to find and enable the TPM 2.0 option. The TPM 2.0 option may be named AMD fTPM or Intel PTT (Intel Platform Trust Technology).
Similarly enable the Secure Boot option from the Boot, Security, or System Configuration tab.
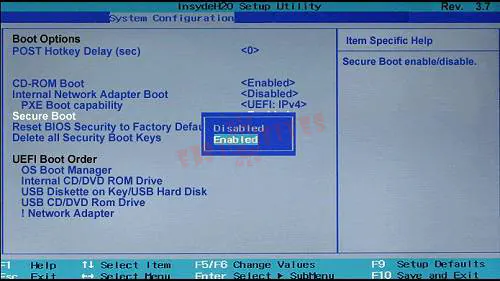
Then go to the last tab to Save and Exit the BIOS or UEFI firmware to boot normally.
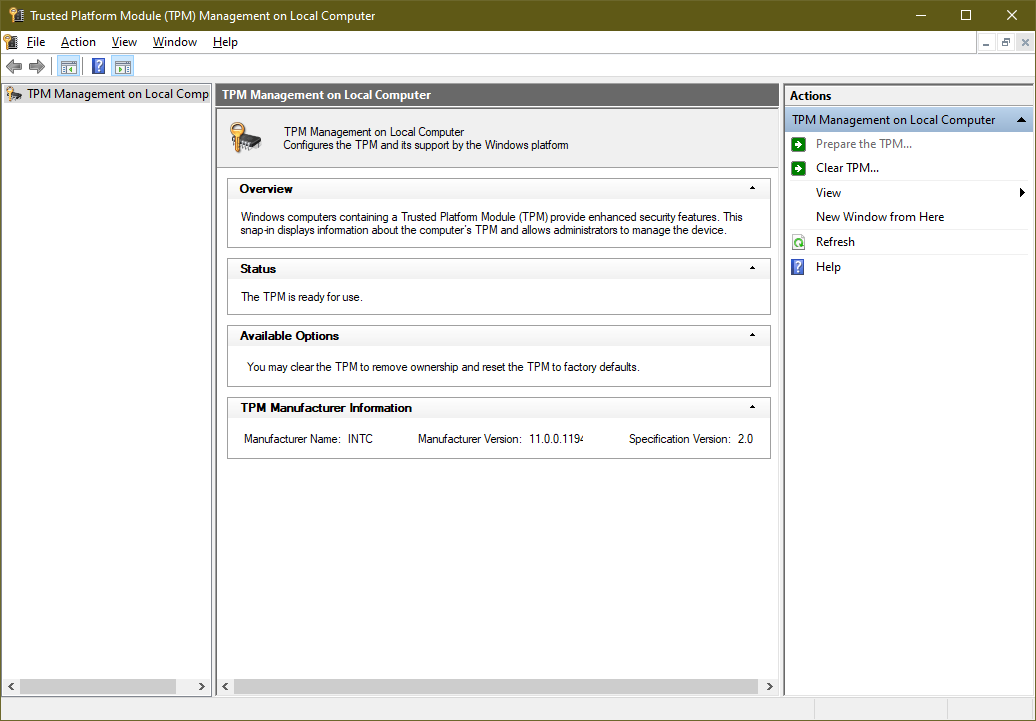
Once you have booted back to Windows 11 then you may verify the TPM 2.0 chip support from the Windows inbuilt program. Open the RUN dialog by pressing Windows + R keys to type tpm.msc command. The TPM version will be listed under the TPM Manufacturer Information box with the Specification Version.
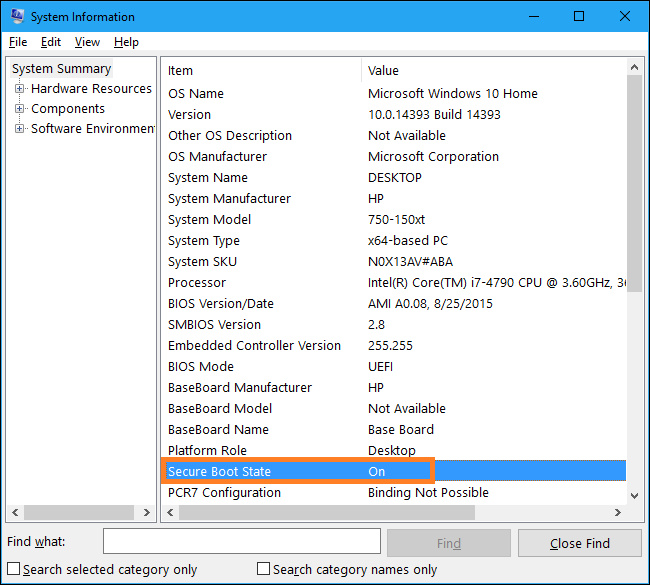
Launch the Start Menu to search and launch the System Information app. Then scroll down the items to find out the Secure Boot State.
Once you have verified both the TPM 2.0 and Secure Boot then you may start playing the Valorant game on Windows 11 without issues.
How to play Valorant on Windows 11?
As we know Riot Games is the developer and publisher of Valorant so, the best source of getting Valorant is Riot Games. In case, if you have Epic Games Store then you can also download and install Valorant from there. After all, the choice is yours. Steps for both sources are given below.
Download and Install from Riot Games
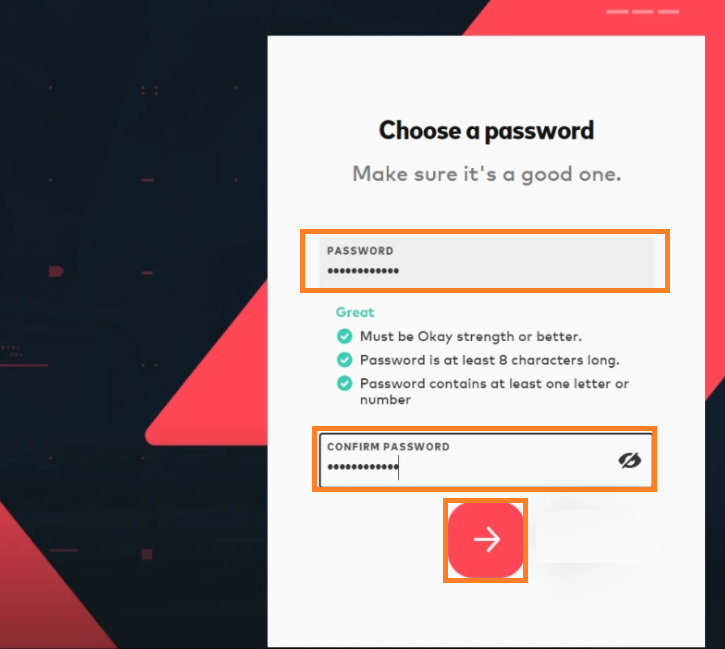
- At first, you have to create your account on Riot Games. For it launch any browser on your Windows 11 and search for playvalorant.com. After this, hit on the Play Now button and then tap on the Make One option. Already if you have Riot Games Account then hit on Sign in and then follow on-screen instructions. Now enter your Email Id, Age, Birthdate, Username, and Password. Make sure that after each information you hit on Arrow button. Once you are done with this then it means that you have created a Riot Games account.
- In the Riot Games search for Valorant. Once you have it then hit on Download button.

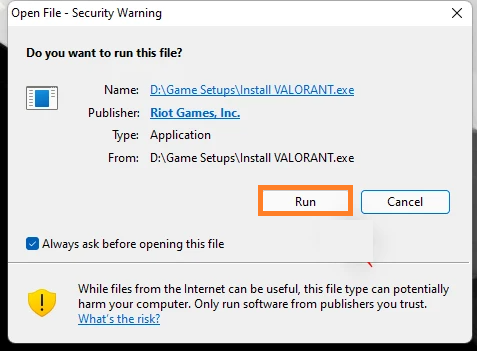
- When the file is fully downloaded then do a double tap on it and then hit on the Run option.
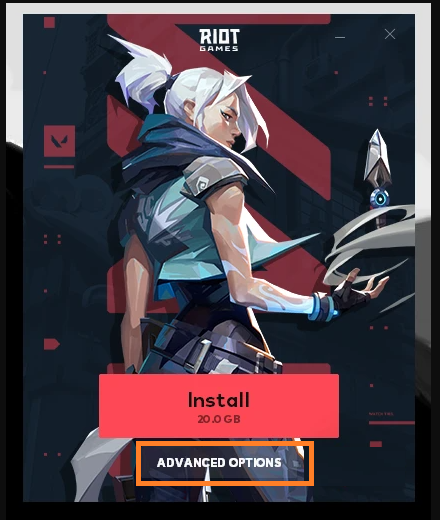
- From the prompted screen tap on Advanced Options for the further process.
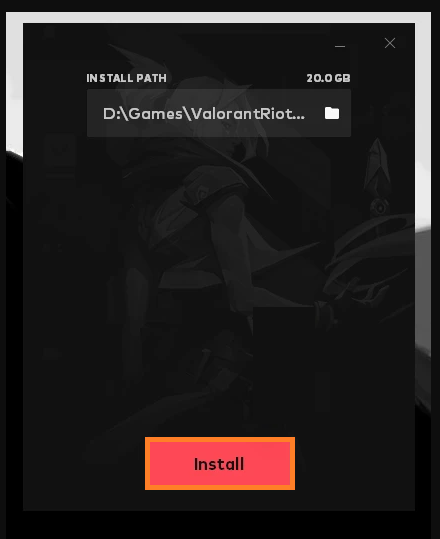
- Now you will have the path of the installation location. You can change it by clicking on the Folder icon. If you don’t want to change then directly hit on Install button.
- After this, the Riot Client will be installed. The installation depends on your internet connection.
- Now you have to sign in to your Riot Games account from the top left corner. You can also see the download progress in the bottom right corner. Once you have entered the sign-in information then hit on Arrow button.

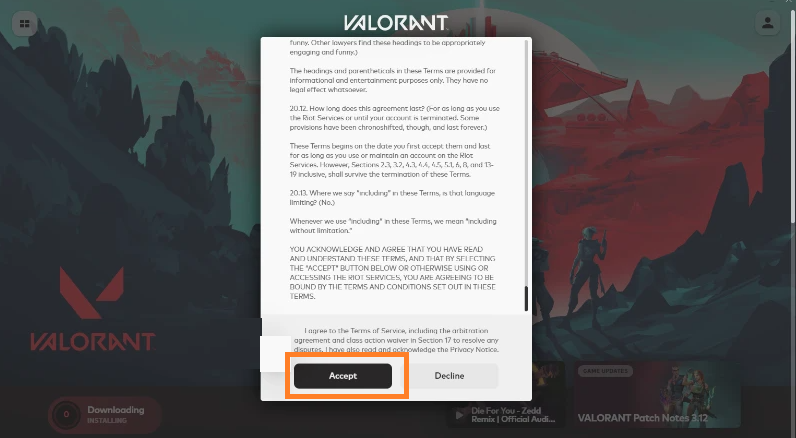
- On the screen, you will have a User Agreement. To accept it hit on Accept button.
- Now make sure you keep an open launcher as the game is downloading. Once downloaded fully then hit on the Play button.
- After this, you have to select Display Name. Once selected then hit on Confirm.
Finally, now you can run Valorant on your Windows 11.
Download and Install from Epic Games Store
- At first download the Epic Games Store on your Windows 11. Once downloaded then sign in using your Epic Games Store Account. If you have already Epic Games Store then just launch it to have a homepage.
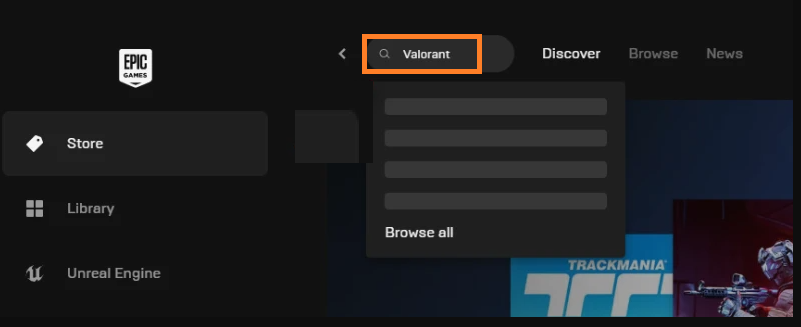
- On the home screen search for Valorant.
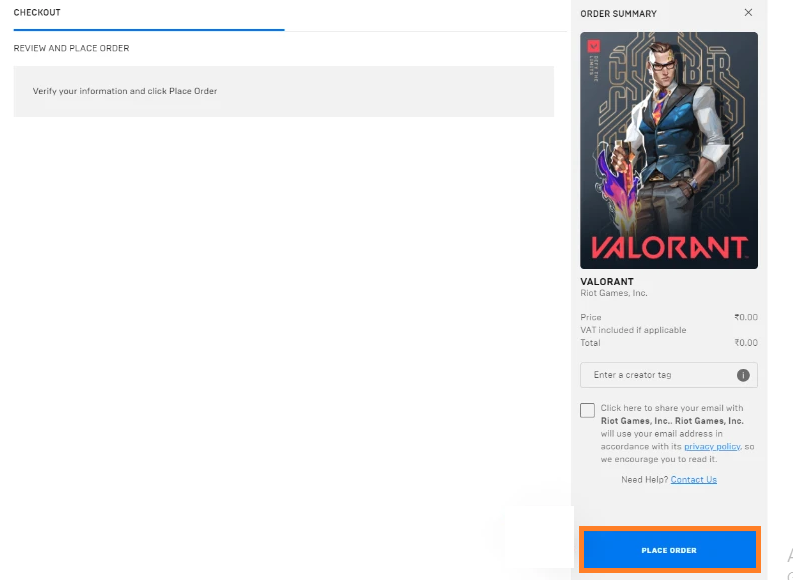
- Once you have it then hit on the blue GET button and then tap on the blue PLACE ORDER button from the right bottom corner.
- Now from the left pane tap on the Library tab and then look for Valorant in it.
- Once you have it then hit on its thumbnail to start the download process.
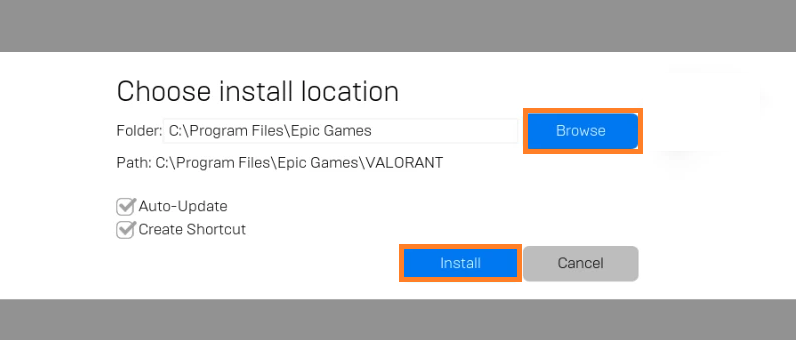
- After this, you will have an installation location screen. You can customize the location by clicking on the Browse button. If you don’t want to change the path then hit on Install button.
- Now the downloading process will be started. Once it is finished then choose the display name and hit on Confirm.
After all, you can launch the Valorant game from the Epic Games Store Library. Now you can enjoy the game on your Windows 11.
I hope that after reading this article you will be able to Run Valorant on Windows 11.